How to use magnets in 3D printed models

how to use magnets in 3d printed models

magnet inThere are also many applications in 3D printing projects. Not only can they be used in entertainment or decorative applications, but they can also be used in quick, swappable modular designs or even for wire bed detection. Of course, it is also important to find practical and safe ways to integrate magnets into printed […]

CNC Content Navigation

magnet inThere are also many applications in 3D printing projects. Not only can they be used in entertainment or decorative applications, but they can also be used in quick, swappable modular designs or even for wire bed detection. Of course, it is also important to find practical and safe ways to integrate magnets into printed parts.

In this article, Mohou.com will learn and discuss the role of magnets with everyone.Some possible uses for 3D printing parts and projects, then seamlessly inserting them into your prints in several effective ways.

1. Things to note

How to use magnets in 3D printed models

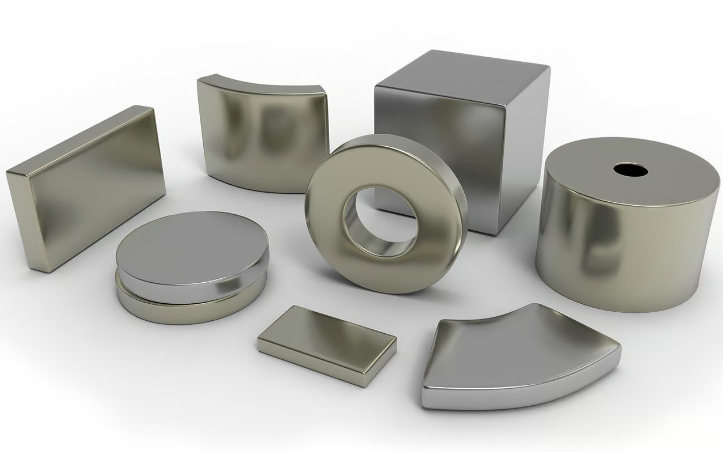
There are many types of magnets (source:Arnold Magnetic)

Before you start using magnets, here are a few things to consider:

shape: Magnets are generally cylindrical or rectangular. Barrel magnets are more popular because they are easy to install (as they allow easier insertion) and are unidirectional. They also come in ring or countersunk form for threaded fits, which we’ll discuss in detail below. Of course, there are many other shapes you can use depending on your application.

size: Choose the appropriate size based on the required strength of the magnet. Larger magnets will obviously be more powerful because they have stronger magnetic fields. Of course, you need to choose the right size and shape for your desired application. For example, if your part is thin but requires a strong magnet, choose a magnet with a large diameter but a small height (i.e. a thin, wide magnet).

Material: Neodymium magnets are very popular because they are very powerful (for their size and weight) and can withstand quite high temperatures depending on the specific type. Typically, you will want to keep a general purpose magnet in place for a long period of time.Below 70°C to maintain its magnetism.

Of course, make sure to insert the magnet with the correct polarity!

2. Adhesive fit

1734814793 676 How to use magnets in 3D printed models

Glue adjustment is the easiest way! (source:Mattia via printables)

Glue installation is the easiest and most convenient way to install magnets. You simply use super glue, epoxy or similar material to secure the magnet into the oversized hole. Although this is the least secure mounting method, it is still strong enough for most applications.

If you choose to glue the magnets into your project, you will need to design slightly larger holes. For example, if you use the diameterFor a 6.00mm circular magnet with a height of 3.00mm, consider modeling the diameter of the hole as 6.30mm and a height of 3.30mm.

Of course you shouldAdjust this value for 3D printer tolerances. If your printer has tight tolerances, consider reducing this value; for looser tolerances, increase this value. This ensures that the magnet can slide in and out of the hole easily.

After printing, add a drop of glue and press the magnet firmly. Then wait for the glue to dry and your piece is ready for use.

3. Respect the adjustment to the press

1734814794 279 How to use magnets in 3D printed models

Example of flexible pressure adjustment (source:Gédéon Ang via All3DP)

Flexible pressure fit takes advantage of plastic’s slight flexibility and flexible design features to“Tighten” the magnet. This is a safe and easy installation method that requires no glue. However, for added safety, it is recommended to also use a drop of glue.

In your design, based onDepending on the tolerances of the 3D printer, the hole is modeled to be exactly the same size as the magnet or slightly larger or smaller. However, you need to model the height of the hole to be slightly higher than the height of the magnet.

Next, add fins or other compatible parts so the hole can be enlarged slightly. For a stronger hold, use fewer, stronger fins. The hole will expand less and provide better grip on the magnet. However, this also depends on the tolerances of the printer. For example, if the hole is too small, you may not be able to insert the magnet at all.

1734814795 279 How to use magnets in 3D printed models

Example of flexible press-fit hole (source:Gédéon Ang via All3DP)

Alternatively, you can model the hole so that the magnet can fit easily. Just add more flexible fins, which will allow the hole to bend more. However, this means that the fixation will be less secure.

The image above is an example design. The design on the left shows a more secure, less conforming fit, while the design on the right shows a more flexible, conforming fit. Feel free to try other fin styles to get a consistent hole pattern and achieve the results you want.

After printing, press the magnet firmly into the appropriate hole.– Use a drop of glue if desired.

3. Tighten

1734814795 126 How to use magnets in 3D printed models

Screws are used to securely mount the magnets (Source:YGK3D via YouTube)

Screw fixing is a very secure installation method. Countersunk screws are used to mount the countersunk magnet very securely to the required component. This method is used when the magnet must be exposed outside the room (i.e. for conductive or other purposes).

For example,PCB Klicky Probe uses threaded magnets to ensure reliability, safety and conductivity. YouTuber YGK3D has a great video showing the entire build.

To design a threaded magnet, create holes or other features in the part for the screws. This can be accomplished by various methods, such as self-tapping holes for screws, holes for thermoset inserts, or slots for nuts.

Once printed, screw the magnet into the part. Then it is ready to use.

4. Integrated

1734814796 250 How to use magnets in 3D printed models

How to install recessed magnets (Source:Gédéon Ang via All3DP)

Here, the magnets are fully integrated into the printed part and cannot be removed or modified once inserted. This stops them from coming loose, but it also means the magnets will be weaker because the plastic will be between the magnets and the surface they are attracted to. Therefore, this method is particularly useful for components requiring magnetic isolation.

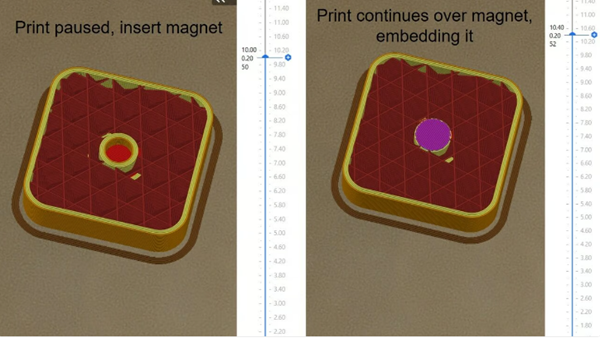
To embed magnets, you must hang the print at a specific height. We shared howThere is a guide to doing this in Cura, but all modern slicers allow this setting. You can also monitor the height of the print layer and manually pause the print at a specific height.

Here’s an overview of how to design and print embedded magnetic holes:

1. Model a hollow hole inside the part for the magnet. Similar to gluing, each hole size (e.g. the diameter and height of a cylindrical magnet) needs to be slightly larger in order to install easily.

2、Sets the height at which printing is stopped when trimming. This height is the layer where the hole is completely printed. For example, in the image above, all layers of the hole have beenPrinting is finished at Z=10.00 mm. At 10.20mm, a layer will be printed above the hole. Therefore, we will pause the printing after finishing the 10.00mm layer.

3. After printing stops, insert the magnet with the correct polarity into the hole.

4. After inserting the magnet, resume printing and printing will continue on the inserted magnet.

You now have a finished part with a built-in magnet hidden from the outside.


Daguang focuses on providing solutions such as precision CNC machining services (3-axis, 4-axis, 5-axis machining), CNC milling, 3D printing and rapid prototyping services.

CNC Experts

Picture of JinShui Chen

JinShui Chen

Rapid Prototyping & Rapid Manufacturing Expert

Specialize in CNC machining, 3D printing, urethane casting, rapid tooling, injection molding, metal casting, sheet metal and extrusion

CNC Recent Posts

CNC News

Common CNC Machining Products

Welcome to GreatLight Metal,Maximum Processing Size 4,000 mm

Precision Machining CNC Quote Online

Loading file

Upload Click here to upload or drag and drop your model to the canvas.

The model is too large and has been resized to fit in the printer's build tray. [Hide]

The model is too large to fit in the printer's build tray. [Hide]

The model is too large, a fitting printer is selected. [Hide]

The model is too small and has been upscaled. [Hide]

Warning: The selected printer can not print in full color [Hide]

Warning: obj models with multiple meshes are not yet supported [Hide]

Warning: Unsupported DXF entity  [Hide]

Warning: could not arrange models [Hide]


File Unit:      
Scale:
%
L × W × H:
X: × Y: × Z:  cm 
Rotation:
X: ° Y: °  

	
⚡ Instant Quote for Precision Manufacturing

Submit your design files (STEP/IGES/DWG) and receive a competitive quote within 1 hour, backed by ISO 9001-certified quality assurance.

📋 How It Works

  1. Upload & SpecifyShare your 3D model and select materials (Aluminum/Stainless Steel/Titanium/PEEK), tolerances (±0.002mm), and surface treatments.

  2. AI-Powered AnalysisOur system calculates optimal machining strategy and cost based on 10+ years of automotive/aerospace data.

  3. Review & ConfirmGet a detailed breakdown including:
    - Volume pricing tiers (1-10,000+ units)
    - Lead time (3-7 days standard)
    - DFM feedback for cost optimization

Unit Price: 

Loading price
5 Axis CNC Machining Equipment
4 Axis CNC Machining Equipment
3 Axis CNC Machining Equipment
CNC Milling & Turning Equipment
Prototype and Short-Run Injection Moldings Exact plastic material as final design
Volume Metal Die Casting Services - Precision Cast Parts
Bridge the Gap From Prototype to Production – Global delivery in 10 days or less
Custom high-precision sheet metal prototypes and parts, as fast as 5 days.
Custom Online 3D Printing Services
Design Best Processing Method According To 3D Drawings
Alloys Aluminum 6061, 6061-T6 Aluminum 2024 Aluminum 5052 Aluminum 5083 Aluminum 6063 Aluminum 6082 Aluminum 7075, 7075-T6 Aluminum ADC12 (A380)
Alloys Brass C27400 Brass C28000 Brass C36000
Alloys Stainless Steel SUS201 Stainless Steel SUS303 Stainless Steel SUS 304 Stainless Steel SUS316 Stainless Steel SUS316L Stainless Steel SUS420 Stainless Steel SUS430 Stainless Steel SUS431 Stainless Steel SUS440C Stainless Steel SUS630/17-4PH Stainless Steel AISI 304
Inconel718
Carbon Fiber
Tool Steel
Mold Steel
Alloys Titanium Alloy TA1 Titanium Alloy TA2 Titanium Alloy TC4/Ti-6Al 4V
Alloys Steel 1018, 1020, 1025, 1045, 1215, 4130, 4140, 4340, 5140, A36 Die steel Alloy steel Chisel tool steel Spring steel High speed steel Cold rolled steel Bearing steel SPCC
Alloys Copper C101(T2) Copper C103(T1) Copper C103(TU2) Copper C110(TU0) Beryllium Copper
Alloys Magnesium Alloy AZ31B Magnesium Alloy AZ91D
Low Carbon Steel
Alloys Magnesium Alloy AZ31B Magnesium Alloy AZ91D
ABS Beige(Natural) ABS Black ABS Black Antistatic ABS Milky White ABS+PC Black ABS+PC White
PC Black PC Transparent PC White PC Yellowish White PC+GF30 Black
PMMA Black PMMA Transparent PMMA White
PA(Nylon) Blue PA6 (Nylon)+GF15 Black PA6 (Nylon)+GF30 Black PA66 (Nylon) Beige(Natural) PA66 (Nylon) Black
PE Black PE White
PEEK Beige(Natural) PEEK Black
PP Black PP White PP+GF30 Black
HDPE Black HDPE White
HIPS Board White
LDPE White
This is a finish of applying powdered paint to the components and then baking it in an oven, which results in a stronger, more wear- and corrosion-resistant layer that is more durable than traditional painting methods.
No coating required, product’s natural color!
This is a finish of applying powdered paint to the components and then baking it in an oven, which results in a stronger, more wear- and corrosion-resistant layer that is more durable than traditional painting methods.
This finishing option with the shortest turnaround time. Parts have visible tool marks and potentially sharp edges and burrs, which can be removed upon request.
Sand blasting uses pressurized sand or other media to clean and texture the surface, creating a uniform, matte finish.
Polishing is the process of creating a smooth and shiny surface by rubbing it or by applying a chemical treatmen
A brushed finish creates a unidirectional satin texture, reducing the visibility of marks and scratches on the surface.
Anodizing increases corrosion resistance and wear properties, while allowing for color dyeing, ideal for aluminum parts.
Black oxide is a conversion coating that is used on steels to improve corrosion resistance and minimize light reflection.
Electroplating bonds a thin metal layer onto parts, improving wear resistance, corrosion resistance, and surface conductivity.
This is a finish of applying powdered paint to the components and then baking it in an oven, which results in a stronger, more wear- and corrosion-resistant layer that is more durable than traditional painting methods.
Please provide additional text description for other surface treatment requirements!
Material
Material
  • CNC Metals
    • Aluminum
    • Brass
    • Stainless steel
    • Inconel718
    • Carbon Fiber
    • Tool Steel
    • Mold Steel
    • Titanium
    • Alloy Steel
    • Copper
    • Bronze
    • Low Carbon Steel
    • Magnesium
  • CNC Plastics
    • ABS
    • PC
    • PMMA (Acrylic)
    • PA (Nylon)
    • PE
    • PEEK
    • PP
    • HDPE
    • HIPS
    • LDPE
Printer
Printer
  • CNC Metals
    • 5 Axis CNC Machining
    • 4 Axis CNC Machining
    • 3 Axis CNC Machining
    • CNC Milling & Turning
    • Rapid Tooling
    • Metal Die Casting
    • Vacuum Casting
    • Sheet Metal Fabrication
    • SLA 3D Printing
    • SLS 3D Printing
    • SLM 3D Printing
  • Rapid Prototyping
    • Design Best Processing Method According To 3D Drawings
Post-processing
Post-processing
Finalize
The world's first CNC machining center that dares to provide free samples!

Free for first product valued at less than $200. (Background check required)

precision machining cnc quote online

15 Years CNC Machining Services

When you’re ready to start your next project, simply upload your 3D CAD design files, and our engineers will get back to you with a quote as soon as possible.
Scroll to Top

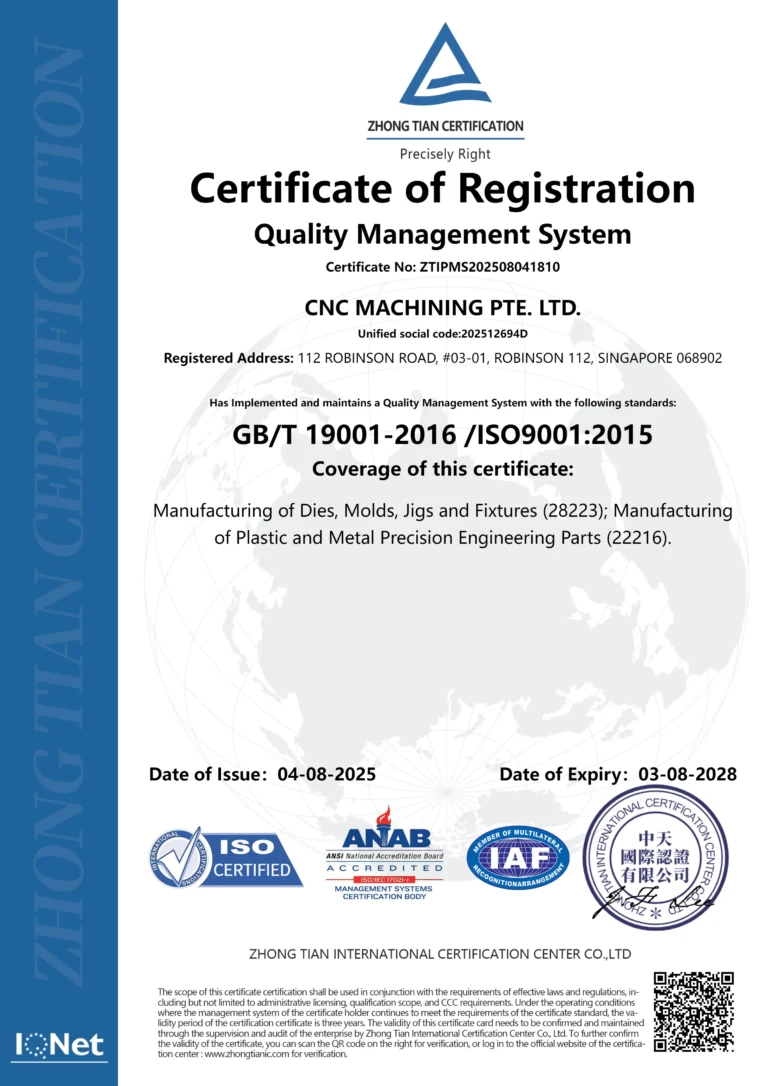
ISO 9001 Certificate

ISO 9001 is defined as the internationally recognized standard for Quality Management Systems (QMS). It is by far the most mature quality framework in the world. More than 1 million certificates were issued to organizations in 178 countries. ISO 9001 sets standards not only for the quality management system, but also for the overall management system. It helps organizations achieve success by improving customer satisfaction, employee motivation, and continuous improvement. * The ISO certificate is issued in the name of FS.com LIMITED and applied to all the products sold on FS website.

greatlight metal iso 9001 certification successfully renewed
GB T 19001-2016 IS09001-2015
✅ iso 9001:2015
greatlight metal iso 9001 certification successfully renewed zh

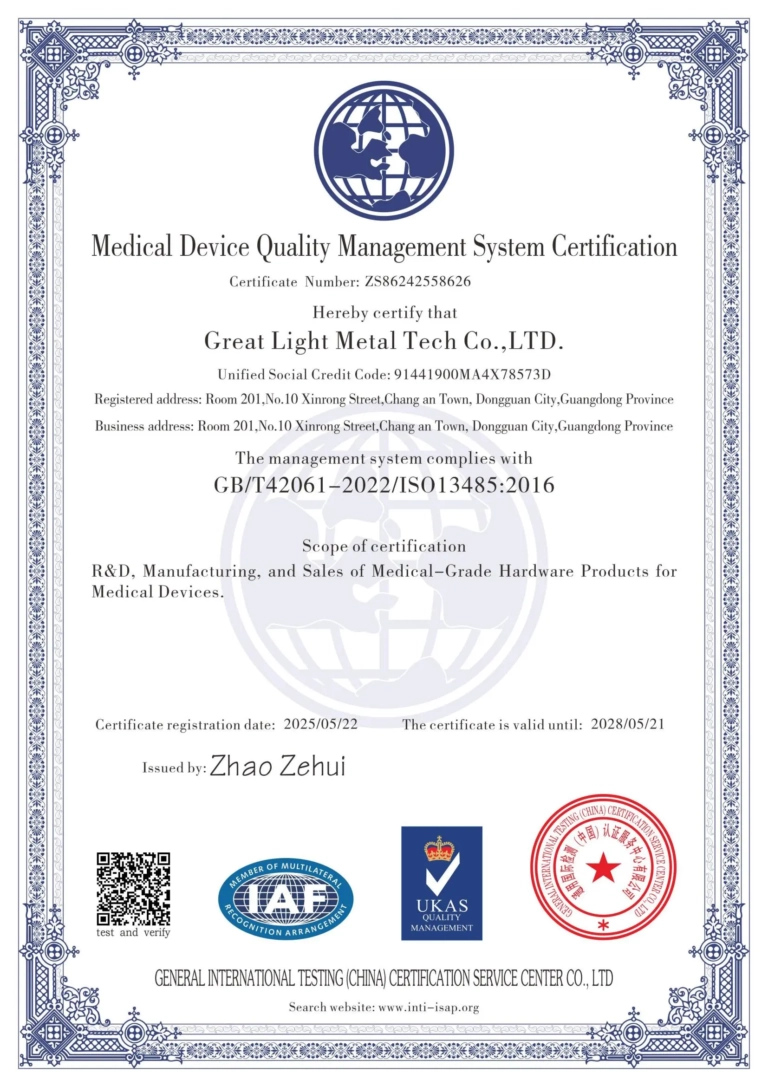
ISO 13485 certificate

ISO 13485 is an internationally recognized standard for Quality Management Systems (QMS) specifically tailored for the medical device industry. It outlines the requirements for organizations involved in the design, development, production, installation, and servicing of medical devices, ensuring they consistently meet regulatory requirements and customer needs. Essentially, it's a framework for medical device companies to build and maintain robust QMS processes, ultimately enhancing patient safety and device quality.

greatlight metal technology co., ltd has obtained multiple certifications (3)
greatlight metal technology co., ltd has obtained multiple certifications (4)

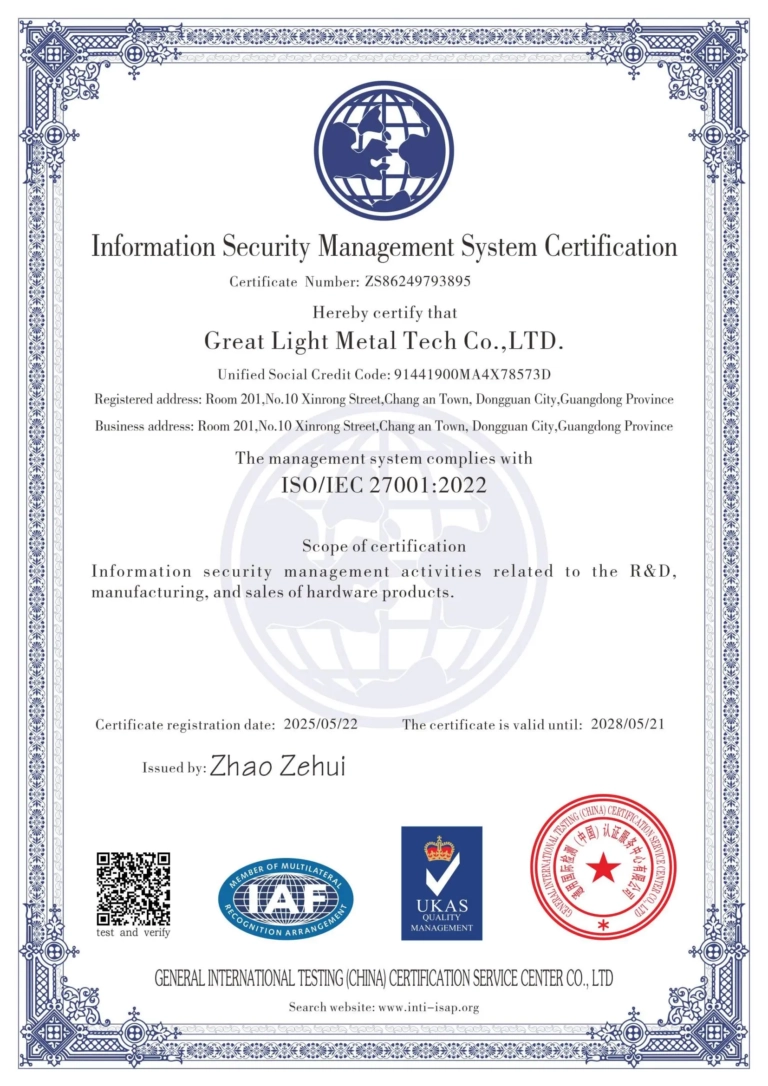
ISO 27001 certificate

ISO/IEC 27001 is an international standard for managing and processing information security. This standard is jointly developed by the International Organization for Standardization (ISO) and the International Electrotechnical Commission (IEC). It sets out requirements for establishing, implementing, maintaining, and continually improving an information security management system (ISMS). Ensuring the confidentiality, integrity, and availability of organizational information assets, obtaining an ISO 27001 certificate means that the enterprise has passed the audit conducted by a certification body, proving that its information security management system has met the requirements of the international standard.

greatlight metal technology co., ltd has obtained multiple certifications (1)
greatlight metal technology co., ltd has obtained multiple certifications (2)

IATF 16949 certificate

IATF 16949 is an internationally recognized Quality Management System (QMS) standard specifically for the automotive industry. It builds upon the foundation of ISO 9001 and adds specific requirements relevant to automotive production and service parts. The goal is to enhance quality, improve processes, and reduce variation and waste within the automotive supply chain.

automotive industry quality management system certification 01
automotive industry quality management system certification 00

Get The Best Price

Send drawings and detailed requirements via Email:info@glcncmachining.com
Or Fill Out The Contact Form Below:

All uploads are secure and confidential.