
What Does an Offset Page on CNC Machine Controls Actually Control?
The offset page on a CNC machine is where the control stores the numbers that shift program zero to the real setup. This page explains each offset type, how the control adds them up, and when a machinist should edit a value instead of the program.
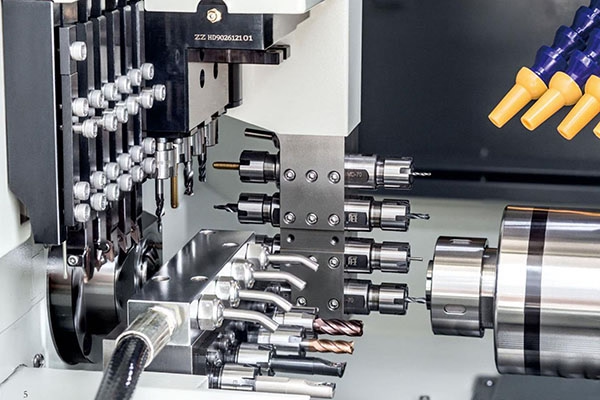
What the offset page on CNC machine controls stores
A CNC program is written against a coordinate system that does not exist yet. X0 Y0 Z0 is a point in software. The machine has to find that point on a vise, a fixture plate, or a tombstone, and it has to know how long each tool is. The offset page on a CNC machine is the register where those corrections live.
Every value on the page is a signed distance or a small compensation amount. The control adds the active work offset to the programmed coordinates, adds the tool length for the tool in the spindle, and then moves the axis. Nothing on the page changes the part geometry in the CAM file. It only tells the machine where that geometry sits in its own travel.
That separation matters on the shop floor. If a feature comes out 0.05 mm off after a setup change, the fix is usually one number on this page, not a re-post of the program. Editing the CAD model for a setup problem burns hours and adds a revision nobody needs.
The page also survives power cycles and tool changes, which is why it is the first place to look when a machine repeats a part position from yesterday. If the values are wrong, every part in the batch is wrong the same way.
Work offsets: G54 to G59 and extended sets
Work offsets are the largest numbers on the page. Each set holds an X, Y, and Z distance from machine home to the part zero you picked in setup. G54 is active by default on most controls. G55 through G59 let you park several zeros and switch between them with a single code.
This is how one program runs on four vise stations without touching the CAM file. You probe or touch off each station once, store the values under G54, G55, G56, and G57, and call them in the program. The same toolpath repeats at four locations.
Extended sets go further. Fanuc controls commonly expose G54.1 P1 through P48, and Haas uses G110 through G129. A tombstone with eight sides can hold eight work offsets, and a pallet pool can hold dozens. The mechanic is identical: the control reads the active set and shifts every programmed move by that amount.
Pick the offset set before you touch off. If you probe station three while G54 is active, you just overwrote station one. We see this most often on second shifts, when the same program runs on a fixture that was loaded by someone else.
Tool length offsets and how the control sums them
Tool length offset is the distance from the spindle gauge line to the cutting tip of each tool. A long 12 mm end mill and a short spot drill sit at very different Z heights in the spindle, but the program calls both with a single Z value. The length offset absorbs the difference.
On a vertical machining center this is the offset that keeps a drill from driving into the table. Set it wrong by 50 mm and the control believes the tip is 50 mm higher than it is. The first rapid move becomes a crash.
Most shops measure length offline on a presetter and type the number in, or touch each tool on a gauge block inside the machine. Both work. What matters is that the reference surface stays the same. If you measure on a presetter with a 50 mm gauge and touch off in the machine on the table, the numbers will not match.
Controls store these under H1 through H200 or more, and the program calls them with G43 H__. The offset is applied only while that tool is active. Cancel it with G49 before the next tool change or the next tool inherits the wrong length.
On mill-turn centers the same register often holds a second axis value for the B or C axis. Check the machine manual before you assume a single Z column.
Cutter radius and wear offsets
A CAM toolpath is usually written to the part contour, not to the center of the tool. The control needs to know the cutter radius so it can shift the path outward by that amount. That is cutter compensation, and it is stored as a radius or diameter value under D1, D2, and so on.
A 10 mm end mill has a 5 mm radius. If the offset says 4.9 mm, the control shifts the path 0.1 mm too little and the part comes out undersize on an outside profile. The error is one radius wide, not one diameter wide, which is the mistake that catches people on lathes set to diameter mode.
Wear offsets sit on top of that. They are small numbers, typically in the 0.005 mm to 0.05 mm range, used to nudge a feature after a first-article check. A bore that mics 0.02 mm small gets a wear value of -0.01 mm on the radius. Run the part again and it lands in tolerance.
Keep wear values small. Once a wear offset passes about 0.1 mm, the geometry problem is real and the tool or the program needs attention. Stacking wear on top of a worn cutter hides the root cause until the batch is scrap.
Offset types and what each one shifts
Values are typical for a 3-axis vertical machining center.
| Offset type | Stored as | Shifts | Edit when |
|---|---|---|---|
| Work offset | G54-G59, G54.1 P1-P48 | Part zero from machine home | Fixture moves or new setup |
| Tool length | H1-H200+ | Tool tip from spindle gauge line | Tool change or new tool |
| Cutter radius | D1-D99+ | Path outward by cutter radius | Cutter diameter changes |
| Wear | Same register, small value | Feature by a few microns | First-article check fails |
| Rotary / B-axis | Extra column on mill-turn | Angular zero of the table | Table re-clamped or re-indexed |
When to edit the page and when to fix the program
If the error repeats on every part and the setup has not moved, fix the program or the tool. If the error appeared after a setup change, a tool change, or a first-article check, edit the offset page.
Common questions about offset pages
Does the offset page change the part model?
No. Offsets only shift where the machine thinks the part is. The CAM file and the drawing stay the same.
If a feature is wrong on every part, the offset is probably not the right fix. Check the tool, the program, or the fixture first.
Why did my part move after a power cycle?
Absolute encoders hold position through a power cycle, but incremental encoders lose home. The machine must re-home before the stored work offsets mean anything.
On most controls the offset values themselves are kept in battery-backed memory. If the battery is low, values can drop to zero without a warning on screen.
Can I use one work offset for two vises?
Yes, if both vises sit at the same X, Y, and Z. Measure one and use it for both.
If the vises are offset from each other, use two sets. Running one program on two stations with a single offset means one station cuts air and the other cuts the vise.
How often should tool length offsets be re-checked?
After every tool change on a machine without a presetter, and at the start of each shift on a machine that has one.
Thermal growth moves the spindle 20-40 μm over a long run. On tight work, re-check the length after the machine has been running for an hour.
What is the difference between wear and geometry offsets?
Geometry holds the nominal tool size. Wear holds the small correction you add after measuring a part.
Some controls keep them in separate columns and add both. Others use one column. Read the control manual before you type a number in the wrong place.
Is the offset page the same on a lathe?
The idea is the same, but a lathe usually splits X into geometry and wear, and it works in diameter unless you change a parameter.
A 0.02 mm wear value on a lathe X offset removes 0.04 mm from the diameter. That is the single most common offset mistake on turning centers.
Send us the drawing and we will check the setup
Upload your model and tolerances. We reply with a quotation and a DFM note within 12 hours, and we machine from one prototype to 10,000+ parts with ±0.005 mm capability.
12-hour quote100% inspectionNo minimum order
More from the shop floor
We publish setup notes, tooling trials and inspection data from the factory floor.











