
Robot Rubber Bumpers Overmolding Service
This guide is for engineers and sourcing leads who need a machined substrate bonded to a rubber skin, not just a molded part. It covers the checks that separate suppliers who can hold substrate tolerance from those who only quote a mold.
In this article
- 1
- 2
- 3
- 4
- 5
- 6
- 7
- 8
What decides a robot rubber bumpers overmolding service
Five supplier profiles and what each one can actually deliver
Rates are typical of the market, not quotes. Use them to sort suppliers before you send drawings.
| Supplier type | Substrate capability | Rubber / tooling | Best fit | Main risk |
|---|---|---|---|---|
| Mold shop only | Outsources the metal | Own press, own tool | Simple flat plates | Tolerance drifts at the interface |
| Machine shop only | In-house, tight tolerance | No molding line | Metal cores and inserts | Bonding quality is unverified |
| Machine shop + molding cell | In-house, single setup | Tool and press on site | Cobot and AMR bumpers | Fewer rubber grades on hand |
| Full-service contract maker | In-house, multi-axis | Tool, press, finishing | AMR fleets, humanoid limbs | Longer quoting cycle |
| Overseas broker | No equipment | No equipment | Nothing critical | No process control at all |
Why the machined substrate sets the ceiling for robot rubber bumpers overmolding service
Overmolding puts a soft elastomer onto a rigid core. On a robot bumper the core is usually 6061-T6 or 304 stainless, sometimes 7075 where weight matters. That core has to bolt to a joint or a chassis leg, so its hole pattern and seating faces are the parts that decide whether the bumper fits at all. Once rubber covers the metal, you cannot re-machine it. Every tolerance decision is locked in before the press closes.
Rubber flows at low pressure but it flows everywhere. If a sealing face on the substrate sits 0.05 mm low, the elastomer pushes into that gap and forms flash along a visible edge. If a dowel pin hole drifts, the core sits off-center in the tool and the rubber wall goes thin on one side. Both defects come from the metal, not the molding.
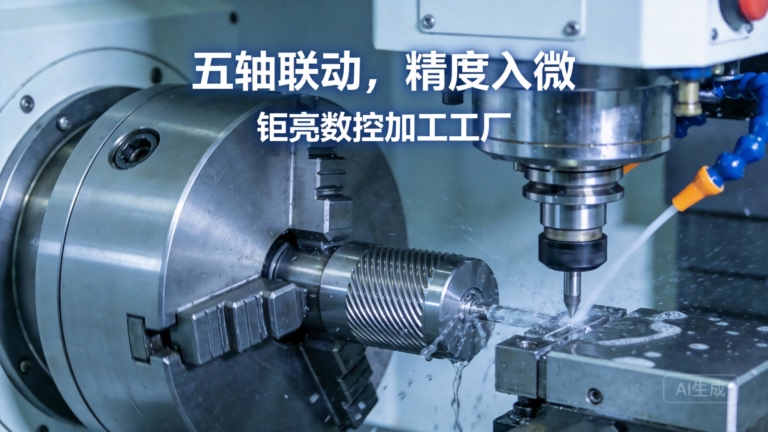
This is why the substrate is usually cut on a 4-axis or 5-axis machining center in one setup. Curved faces that follow a robot contour, undercuts that grip the rubber mechanically, and dowel holes all come off the same fixture. Splitting those features across three setups adds cumulative error, and cumulative error is what shows up as a rejected lot.
We hold ±0.005 mm on critical features and Ra 0.8–1.6 μm on bond surfaces. A rougher bond face is not always wrong, though. A light bead blast gives the elastomer more mechanical key than a mirror finish, and a mirror finish can actually hurt adhesion on some TPE grades.
- 1One setup for critical featuresCurved faces, undercuts and dowel holes cut together to avoid stacked error.
- 2Bond surface finish mattersRa 0.8–1.6 μm or a light blast beats a polished face on most TPE grades.
- 3Check the mounting pattern firstIf the bolt circle is wrong, nothing downstream can save the part.
Rubber grades and how they behave on a bumper
TPE and TPV bond to a primed or mechanically keyed metal core and run on a standard injection press. They are the default for cobot and AMR bumpers because cycle times are short and the tool cost is moderate. Shore hardness usually lands between 50 A and 80 A. Softer than that and the bumper deflects too far under a collision; harder and it stops absorbing energy.
LSR gives a wider temperature window and holds up better against UV and cleaning agents, which matters in food handling and medical cells. It needs a dedicated press and tighter process control, so the tooling bill is higher and the lead time is longer. Use it when the bumper sees washdown or steam, not just for a nicer feel.
EPDM is the choice for outdoor AMRs and anything that sits in sun and rain. It resists ozone and weathering well, but it does not bond to metal as readily as TPE, so the substrate needs a primer or a mechanical interlock. Bonding an EPDM skin without one of those two is a common cause of field delamination.
Foam-filled and microcellular grades cut weight and add damping. They compress further under the same load, so the bumper geometry has to grow to keep the same travel. If your robot has a tight envelope around the joint, foam may not fit the space you have.
- 1TPE / TPVDefault for cobots and AMRs. Shore 50 A–80 A, short cycle, moderate tool cost.
- 2LSRWashdown, UV and heat. Higher tool cost, dedicated press, longer lead time.
- 3EPDMOutdoor weathering. Needs a primer or mechanical interlock to bond.
- 4Foam gradesLighter and more damping, but they need more travel space.
Adhesion: the failure you cannot see until it is too late
Two mechanisms hold the rubber on. Chemical bonding comes from a primer or an adhesion promoter applied to the cleaned metal. Mechanical bonding comes from undercuts, knurling, holes or a blasted surface that the elastomer flows into and locks behind. Most reliable parts use both. A supplier who offers only one should be asked why.
Delamination rarely shows up on the first part. It shows up after thermal cycling, after a few thousand impact cycles, or after the robot sits in a cold warehouse for a season. If a supplier cannot show peel or pull data on your substrate and your rubber grade, you are buying an assumption.
Cleaning is the step that gets skipped. Machining coolant, fingerprints and oxide all sit between the metal and the primer. A part that was machined on Monday and molded on Friday needs a defined cleaning step in between, and that step belongs in the process sheet.
Design the interlock so it also works as a mechanical stop. If the rubber ever does start to release at one edge, a recessed groove or a through-hole keeps the skin from peeling back across the whole face. It is a cheap feature at the machining stage and very expensive to add later.
- 1Ask for peel dataOn your substrate and rubber grade, not on a generic test coupon.
- 2Cleaning belongs on the process sheetCoolant and oxide between metal and primer cause most early bond failures.
- 3Add a mechanical stopA groove or through-hole limits how far a peel can travel.
Cost, tooling and MOQ: where budgets actually break
The substrate is usually the larger line item on a low-volume bumper. A complex 5-axis core with undercuts can cost more per piece than the rubber over it, especially at 50 to 200 pieces. Buyers who compare only the molding rate often pick the wrong supplier and then pay twice for a re-cut core.
Tooling is a fixed cost. A simple two-plate tool for a flat bumper is a modest spend. A tool with slides for undercuts, or one built for LSR, costs several times more. That number does not fall when volume falls, which is why prototype quantities get quoted with a tooling line and a part line separately.
MOQ is the quiet killer. If a shop sets a 500-piece minimum to justify the tool, your first 20-piece build has nowhere to go. We run no minimum order quantity, from one prototype to 10,000+ part runs, so the same process sheet carries from the first sample to production.
Delivery time follows the same split. Quote and free DFM analysis come back within 12 hours, production can start within 24 hours, and parts ship in 3–5 days. Those numbers assume the substrate drawing is frozen. A change to the bolt pattern after tooling starts resets the clock.
- 1Quote metal and rubber separatelyIt shows which line item moves when volume or geometry changes.
- 2Tooling does not scale downA slide tool costs the same at 20 pieces as at 2,000.
- 3No MOQ keeps prototypes aliveOne piece through 10,000+ runs on the same process sheet.
Inspection and paperwork: what to ask for before you place the order
Ask how the substrate is verified before molding. A first-article report on the core, with the critical dimensions called out, tells you more than a certificate on the wall. At our plants that check is part of 100% inspection before shipment, alongside raw material check, in-process monitoring and final inspection, with reports on request.
Certifications matter by industry. ISO 9001:2015 covers the general quality system. IATF 16949:2016 matters if the bumper goes into an automotive or EV assembly line. ISO 13485:2016 applies when the robot works in a medical environment. ISO 27001:2022 covers how your drawings and CAD data are handled.
Confidentiality is a practical issue on robot programs. Bumper geometry often reveals the joint layout of an unreleased platform. Uploads are secure and confidential, and an NDA is available on request before you send files.
Finally, ask what happens to a rejected lot. A supplier who can re-cut a core in-house recovers in days. One who outsourced the metal waits on a third party and loses a week.
- 1First-article report on the coreCritical dimensions verified before rubber ever touches the part.
- 2Match certification to end useIATF 16949 for automotive, ISO 13485 for medical, ISO 27001 for data.
- 3NDA before filesBumper geometry can expose an unreleased joint layout.
Seven steps to qualify a robot rubber bumpers overmolding service
- 1Send the assembly drawing, not just the bumperInclude the joint or chassis leg it bolts to. Fit problems are usually interface problems, and the interface is what the supplier needs to see.
- 2State the impact load and cycle countGive the expected collision energy and how many cycles the bumper sees in service. That sets the rubber hardness and the wall thickness range.
- 3Fix the substrate material and finish6061-T6 for light weight, 304 or 316L for washdown, 7075 where mass is critical. Name the bond surface finish you want, typically Ra 0.8–1.6 μm.
- 4Ask for a DFM note with the quoteA useful quote flags thin rubber walls, undercut depth and any feature that needs a slide. If the quote has no engineering note, it is a price, not a plan.
- 5Request a bond test on your gradePeel or pull data on the actual substrate and elastomer. Test coupons from a catalog do not answer the question.
- 6Run one prototype and section itCut the part through a mounting boss and check the rubber wall thickness on both sides. That single cut exposes most process drift.
- 7Freeze the drawing before tooling startsAny change to the bolt pattern or seating face after the tool is cut adds cost and resets the lead time. Sign off the revision, then release.
Questions buyers ask before placing an order
Can you overmold onto a substrate we machine ourselves?
Yes, if the bond surfaces meet the drawing and arrive clean. Send the first-article report with the parts so we can confirm the critical dimensions before the run starts.
Parts that sat in a shop for weeks usually need a defined cleaning step before primer. Coolant residue and oxide are the two most common causes of a weak bond on customer-supplied cores.
What is the minimum order quantity for a bumper run?
There is no minimum order quantity. We run from one prototype to 10,000+ part runs, and the same process sheet carries from the first sample into production.
Prototype pricing is quoted with the tooling line and the part line separated, so you can see what changes when volume changes.
How tight can the rubber wall thickness be held?
The substrate positions the rubber, so wall thickness follows core tolerance. With cores held at ±0.005 mm, a nominal 2 mm rubber wall typically stays inside ±0.15 mm on a well-designed part.
Walls thinner than 1 mm get difficult. Flow front speed and pack pressure start to dominate, and short shots or knit lines appear at undercuts.
Which rubber holds up in a washdown or outdoor cell?
LSR for washdown, steam and repeated cleaning agents. EPDM for sun, rain and ozone exposure on outdoor AMRs.
EPDM needs a primer or a mechanical interlock to bond well to metal. Skipping that step is the most common reason an outdoor bumper delaminates in its first year.
How do you handle our CAD data and drawings?
Uploads are secure and confidential, and an NDA is available on request before you send files. Data handling follows ISO 27001:2022.
Bumper geometry often shows the joint layout of an unreleased platform. We treat those files the same way we treat our own customer programs.
What lead time should we plan for?
Quote and free DFM analysis come back within 12 hours. Production can start within 24 hours after the drawing is frozen, and parts ship in 3–5 days.
Historical late-delivery probability is below 2%. Tooling for a slide or an LSR part adds time before the first shot, so plan that separately from the machining schedule.
Send the assembly drawing and get a process plan, not just a price
Quote and free DFM analysis within 12 hours. No minimum order quantity, from one prototype to 10,000+ part runs.
12-hour quoteNo MOQ100% inspectionNDA on request
More from the shop floor
We publish setup notes, tooling trials and inspection data from the factory floor.











