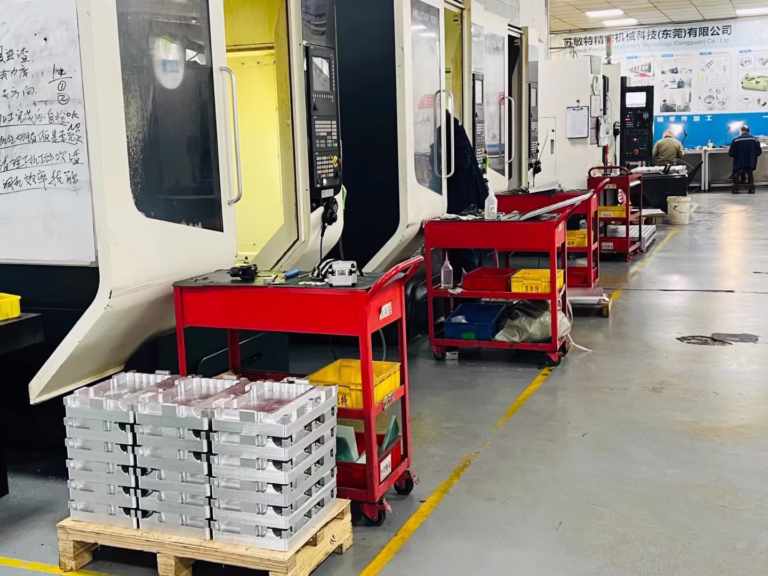
How To Zero Edges Of A Part On CNC Machine? is one of the most fundamental yet high-stakes skills in precision CNC machining. A single miscalculation in edge zeroing can lead to scrapped parts, delayed project timelines, and costly rework—pain points that many R&D teams, procurement engineers, and product designers know all too well. In the competitive landscape of high-end manufacturing, where parts for aerospace, medical devices, or automotive engines demand tolerances as tight as ±0.001mm, getting edge zeroing right is non-negotiable. At GreatLight CNC Machining Factory, our team of 150+ seasoned engineers has honed these techniques over 12+ years, leveraging our advanced 5-axis CNC machining centers and ISO 9001:2015 certified processes to deliver consistent, precise results for clients worldwide.
Why Edge Zeroing Is Non-Negotiable For Precision CNC Machining
Edge zeroing (also called workpiece edge offset) is the process of setting the CNC machine’s coordinate system to align with the physical edges of a workpiece. This tells the machine exactly where the part is located on the worktable, ensuring every cut, drill, or mill operation is performed in the correct position.
The consequences of incorrect edge zeroing are significant:
Scrap parts: Even a 0.01mm error can render a high-precision component unusable, especially in industries like medical or aerospace where parts must meet strict regulatory standards.
Increased costs: Reworking or replacing parts adds material and labor costs, while project delays can harm client relationships.
Quality inconsistencies: Without accurate zeroing, batches of parts may vary in dimensions, leading to fit issues in final assemblies.
Many manufacturers fall into the “precision black hole” promising tight tolerances but failing to execute on the basics like edge zeroing. At GreatLight, we recognize that precision starts with the first step: correctly setting the workpiece’s zero point. Our in-house quality control team verifies edge zeroing accuracy before every machining run using advanced coordinate measuring machines (CMMs), ensuring that every part meets or exceeds client specifications.
How To Zero Edges Of A Part On CNC Machine?
There are several reliable methods to zero the edges of a part on a CNC machine, each suited to different part types, precision requirements, and production volumes. Below is a detailed breakdown of the most common techniques, along with their pros, cons, and real-world applications from our team at GreatLight.
Method 1: Manual Edge Finder (Most Widely Used for 3/4-Axis Prototyping)
The manual edge finder is a low-cost, versatile tool that has been a staple in CNC shops for decades. It consists of a spring-loaded tip that wobbles when not in contact with the workpiece and runs true when it touches the edge.
Step-by-Step Process:

Install the edge finder: Mount the edge finder in the CNC spindle and set the spindle speed to 1000–1500 RPM (the wobbling motion works best at moderate speeds).
Position the edge finder: Move the spindle so the tip is roughly 1–2mm away from the workpiece edge you want to zero.
Feed the tool slowly: Use the machine’s manual feed controls to move the edge finder toward the workpiece. As soon as the tip stops wobbling and runs smoothly, stop the movement.
Record the coordinate: Note the machine’s X or Y coordinate at this point. Then, move the edge finder back by half the diameter of the edge finder tip (e.g., if the tip is 10mm, subtract 5mm from the recorded coordinate to get the true edge position).
Set the zero offset: Enter this adjusted coordinate into the CNC controller’s workpiece offset register (G54–G59 are common offsets).
Verify accuracy: Double-check the zero position by moving the spindle to the new zero point and confirming it aligns with the workpiece edge.
Pros:
Low cost (edge finders typically cost under $50)
No need for specialized software or equipment
Suitable for simple to moderately complex parts
Cons:
Manual process prone to human error (e.g., over-feeding the tool)
Slower than automated methods, not ideal for high-volume production
Limited precision (can achieve ±0.005mm to ±0.01mm accuracy with careful operation)
At GreatLight, we use this method for rapid prototype parts where speed and cost-effectiveness are priorities. For example, when a consumer electronics client needed 50 plastic prototype enclosures, our engineers used manual edge finders to zero the parts quickly, delivering the prototypes in 3 days as requested.
Method 2: Automated Touch Probe (High-Precision for 5-Axis and Volume Production)
For high-precision or high-volume projects, an automated touch probe is the gold standard. This electronic tool mounts to the CNC spindle and sends signals to the controller when it touches the workpiece edge, eliminating human error and speeding up the zeroing process.
Step-by-Step Process:
Calibrate the probe: First, calibrate the probe’s diameter in the CNC controller using a known reference block (this ensures accurate offset calculations).
Load the zeroing program: Upload a pre-written G-code program that instructs the probe to move to the workpiece edges.
Initiate the probe cycle: Start the program; the probe will automatically move to the X, Y, and Z edges of the workpiece, recording contact points.
Set the coordinate system: The controller will calculate the exact zero point based on the probe’s measurements and update the workpiece offset register automatically.
Confirm accuracy: The probe can also perform a quick verification by returning to the zero point and checking consistency.
Pros:
Ultra-high precision: Achieves ±0.001mm to ±0.002mm accuracy, ideal for parts requiring tight tolerances
Automated: Reduces labor time and eliminates human error
Consistent: Delivers the same results across batches, critical for volume production
Versatile: Can zero complex, multi-edge parts or 5-axis workpieces with ease
Cons:
Higher upfront cost (touch probes can cost $1,000–$5,000 depending on the model)
Requires specialized software and calibration
At GreatLight, we rely on touch probes for our 5-axis CNC machining services for clients in the automotive and aerospace industries. For instance, when a European automotive manufacturer needed 200 custom engine valve components with ±0.001mm tolerance, our team used automated touch probes on our 5-axis machining centers to zero each part, resulting in a 99.8% first-pass yield and meeting the client’s strict IATF 16949 quality standards.
Method 3: Manual Offset Calculation (For Non-Standard or Odd-Shaped Parts)
For parts with non-linear edges (e.g., curved surfaces, angled edges) or when specialized tools are unavailable, manual offset calculation is a viable alternative. This method requires measuring the workpiece’s dimensions manually and entering the offsets into the CNC controller.
Step-by-Step Process:
Measure the workpiece: Use a micrometer or caliper to measure the part’s key dimensions (e.g., length, width, distance from a reference edge to a feature).
Determine the zero point: Calculate the offset between the machine’s default coordinate system and the workpiece’s edge. For example, if the workpiece is 100mm long and positioned 20mm from the machine’s X=0 point, the zero offset for the right edge would be X=120.
Enter the offset: Input the calculated coordinates into the workpiece offset register in the CNC controller.
Test a small cut: Run a test cut on a scrap area of the workpiece to verify the offset is correct before proceeding with full machining.
Pros:
Flexible for odd-shaped parts that can’t be zeroed with standard tools
No need for specialized equipment beyond measuring tools
Cons:
High risk of human error (measurement mistakes or calculation errors)
Low precision (limited by the accuracy of your measuring tools)
Time-consuming, not ideal for complex parts
GreatLight’s engineers use this method sparingly, typically for one-off custom parts where standard edge finders or probes can’t reach the edge (e.g., deeply recessed parts). We always follow up with CMM measurements to ensure the offset is correct before full production.
Method 4: Laser Edge Detection (Delicate Parts and Ultra-High Precision)
Laser edge detection is a non-contact method that uses a laser beam to detect the workpiece’s edge. This is ideal for delicate parts that could be damaged by physical contact (e.g., thin plastic sheets, soft metals like aluminum foil) or for parts requiring ultra-tight tolerances.
Step-by-Step Process:
Calibrate the laser: Set up the laser sensor on the CNC machine and calibrate it to the worktable surface.
Scan the workpiece edge: The laser beam moves across the workpiece edge; the controller detects the point where the laser reflects back differently (indicating the edge of the part).
Set the zero point: The controller automatically calculates the edge position and updates the coordinate system.
Verify accuracy: Use a CMM to confirm the zero point is correct, especially for ultra-high-precision parts.
Pros:
Non-contact, no risk of damaging delicate parts
Ultra-high precision (can achieve ±0.0005mm accuracy)
Fast scanning for complex parts
Cons:
Very high cost (laser systems can cost tens of thousands of dollars)
Requires a dust-free, temperature-controlled environment to avoid laser interference
At GreatLight, we use laser edge detection for medical device parts, such as thin titanium surgical tools that could be damaged by physical touch. Our ISO 13485 certified processes ensure that every step, including laser zeroing, meets strict medical regulatory standards.
Comparison of Edge Zeroing Methods
To help you choose the best method for your project, here’s a side-by-side comparison of the four techniques:
| Method | Precision Range | Speed | Cost | Ideal Applications |
|---|---|---|---|---|
| Manual Edge Finder | ±0.005mm to ±0.01mm | Slow (manual) | Low (<$50 tool) | 3/4-axis prototypes, low-volume simple parts |
| Automated Touch Probe | ±0.001mm to ±0.002mm | Fast (automated) | Medium ($1k–$5k tool) | 5-axis machining, high-volume production, tight tolerances |
| Manual Offset Calculation | ±0.01mm to ±0.02mm | Very slow | Low (measuring tools) | Odd-shaped parts, one-off custom components |
| Laser Edge Detection | ±0.0005mm to ±0.001mm | Medium (automated scan) | High (tens of $k system) | Delicate parts, ultra-high-precision medical/aerospace components |
Common Mistakes To Avoid In Edge Zeroing
Even with the right method, edge zeroing can fail if you overlook these critical details. Our team at GreatLight has learned to avoid these pitfalls through years of experience and our ISO 9001:2015 certified quality processes:
Neglecting Tool Wear or Calibration
Edge finders and touch probes wear out over time, leading to inaccurate measurements. At GreatLight, we calibrate our tools daily and replace edge finders after 500 uses to ensure consistency.
Ignoring Thermal Expansion
CNC machines and workpieces expand with heat, which can shift the edge position by up to 0.005mm per 10°C temperature change. Our workshops are temperature-controlled to 20±1°C, minimizing thermal drift during machining.
Using Damaged or Dull Tools
A bent edge finder tip or a scratched touch probe can give false readings. We inspect all tools before use and discard any that show signs of damage.
Failing To Verify Zeroing Accuracy
Never assume the zero point is correct after setting it. Our team always runs a test cut or uses a CMM to verify the zero position before starting full production.
Forgetting To Account For Tool Diameter
When using edge finders or touch probes, you must subtract half the tool’s diameter from the contact coordinate to get the true edge position. Our CNC programs are pre-written to automatically adjust for tool diameter, eliminating this error.
Advanced Edge Zeroing For Complex 5-Axis CNC Parts
5-axis CNC machining allows for complex, multi-angle cuts, but it also adds complexity to edge zeroing. Unlike traditional 3-axis machines, 5-axis machines can rotate the workpiece or spindle, meaning the edge zero point must be accurate across multiple axes.
At GreatLight, our 5-axis machining experts use two key techniques to handle this:
3D Probe Mapping
We use automated touch probes to scan the entire surface of the workpiece, creating a 3D map of its edges. This allows the CNC controller to adjust the coordinate system dynamically as the spindle or workpiece rotates, ensuring accurate cuts at every angle.
Coordinate System Rotation
For parts with angled edges, we rotate the machine’s coordinate system to align with the edge, rather than moving the workpiece. This reduces setup time and ensures consistent accuracy across all machining operations.
One of our recent projects involved machining humanoid robot joint parts, which required complex 5-axis cuts and ±0.001mm precision. Our team used 3D probe mapping to zero the parts, resulting in joints that fit perfectly and met the client’s strict performance requirements.
Conclusion
How To Zero Edges Of A Part On CNC Machine? is a fundamental skill that separates average manufacturers from precision experts. By choosing the right method, avoiding common mistakes, and leveraging advanced tools and processes, you can ensure consistent, accurate results for every part.
At GreatLight CNC Machining Factory, we’ve built our reputation on mastering these basics and delivering on our promise of precision. With over 12 years of experience, 127+ advanced machining tools (including 5-axis CNC centers, 3D printers, and CMMs), and ISO 9001:2015, IATF 16949, and ISO 13485 certifications, we’re equipped to handle any CNC machining project—from rapid prototypes to high-volume production runs. Our one-stop services include post-processing (e.g., anodizing, powder coating) and a comprehensive after-sales guarantee: free rework for quality problems, and a full refund if rework is still unsatisfactory.
Whether you’re manufacturing automotive engine parts, medical devices, or humanoid robot components, we’re here to be your trusted precision CNC machining partner.
Frequently Asked Questions (FAQ)
1. What is the difference between edge zeroing and workpiece zeroing?
Edge zeroing specifically refers to setting the zero point to align with the physical edges of a workpiece. Workpiece zeroing is a broader term that can include setting the zero point to a specific feature on the part (e.g., a hole or a notch) rather than just the edge. Both processes aim to align the CNC machine’s coordinate system with the workpiece for accurate machining.

2. How often should I re-zero edges during a machining job?
It depends on the project:
Short runs (1–10 parts): Re-zero once at the start of the run.
Long runs (100+ parts): Re-zero every 20–30 parts to account for tool wear and thermal drift.
High-precision parts: Re-zero every 10 parts and verify with a CMM at mid-run.
At GreatLight, our quality control team sets re-zero intervals based on the part’s tolerance requirements and production volume.
3. Can edge zeroing be fully automated?
Yes, with automated touch probes or laser detection systems, edge zeroing can be fully integrated into the CNC machining program. The machine will automatically zero the part, verify the accuracy, and start machining without human intervention. This is ideal for high-volume production runs where consistency and speed are critical.
4. What factors affect the accuracy of edge zeroing?
Key factors include:

Tool calibration and condition (e.g., dull edge finders)
Thermal expansion of the machine or workpiece
Worktable stability (loose clamps can shift the workpiece)
Operator skill (for manual methods)
Environmental conditions (dust, vibration, temperature changes)
GreatLight minimizes these factors with temperature-controlled workshops, regular tool maintenance, and automated systems.
5. How does GreatLight ensure precise edge zeroing for custom parts?
At GreatLight, we follow a strict, ISO 9001:2015 certified process for edge zeroing:
Tool calibration: All edge finders, touch probes, and lasers are calibrated daily.
Method selection: Our engineers choose the best zeroing method based on the part’s precision requirements and design.
Accuracy verification: We use CMMs to verify the zero point before every machining run.
Process documentation: Every zeroing step is documented to ensure consistency across all projects.
For more insights into our precision machining capabilities and to connect with our team, visit our official page GreatLight Metal.


