How To Work A CNC Machine?
As a senior manufacturing engineer with years of hands-on experience in precision machining, I’m often asked by clients and newcomers alike: “How do you actually work a CNC machine?” It’s a fundamental question that bridges the gap between design and physical reality. Operating a Computer Numerical Control (CNC) machine is a sophisticated blend of technical knowledge, practical skill, and meticulous attention to detail. It’s far more than just pressing a start button; it’s about understanding a complete digital-to-physical workflow. This guide will walk you through the essential steps and considerations, providing a clear picture of what it takes to transform a digital blueprint into a precision-crafted part.
The Foundation: Understanding the CNC Workflow
Before touching the machine, it’s crucial to grasp the overarching process. Working a CNC machine is a cyclical workflow, not a linear task. It involves preparation, execution, and verification. Here’s a high-level view:
Design & Programming: Creating the part’s digital model (CAD) and translating it into machine instructions (CAM/G-Code).
Setup & Preparation: Physically preparing the machine, workpiece, and tools.
Execution & Monitoring: Running the machine program while ensuring safety and process stability.
Verification & Finishing: Inspecting the part and performing any necessary post-processing.
Each stage is interdependent, and mastery comes from understanding how decisions in one phase affect all others.
Step-by-Step: The Operator’s Journey
Phase 1: Pre-Production – The Digital Blueprint
A. CAD Model Analysis
The process begins long before the machine is powered on. A machinist or programmer must thoroughly analyze the 3D CAD model (typically in formats like STEP, IGES, or SLDPRT). This involves:
Design for Manufacturability (DFM) Check: Identifying potential machining challenges—undercuts, thin walls, deep cavities, tight tolerances—and possibly consulting with the design engineer.
Material Selection: Understanding the specified material (e.g., aluminum 6061, stainless steel 316, PEEK) dictates everything from cutting tools to machining strategies.
Tolerance Review: Highlighting critical dimensions and surface finish requirements.
B. CAM Programming – The “Brains” of the Operation
This is where the virtual model becomes machine instructions. Using Computer-Aided Manufacturing (CAM) software (e.g., Mastercam, Fusion 360, Siemens NX), the programmer:
Selects Tools: Chooses appropriate end mills, drills, and taps from a digital library, considering diameter, flute count, coating, and length.
Defines Toolpaths: Creates a sequence of operations (e.g., facing, roughing, semi-finishing, finishing, drilling). This involves setting:
Feeds and Speeds (SFM, RPM, IPT): The most critical parameters. Correct settings ensure efficiency, tool life, and surface quality. Incorrect settings can break tools or ruin the part.
Cut Depth and Stepover: Determines how much material is removed per pass.
Coolant Strategy: Decides between flood coolant, mist, or air blast.
Generates G-Code: The CAM software post-processes the toolpaths into G-Code—a low-level language (a series of G and M commands like G01 X10.5 Y20.0 F100) specific to the machine’s controller (e.g., Fanuc, Heidenhain, Siemens).
C. Simulation and Verification
A responsible operator never runs untested code. The CAM software’s simulation module visually runs the entire program, checking for:
Collisions: Between the tool, holder, workpiece, and machine components.
Air Cutting: Inefficient movements where the tool isn’t cutting.
Gouging: The tool accidentally cutting into unwanted areas.
Cycle Time Estimation.
Phase 2: Machine Setup – The Physical Foundation
A. Workspace Preparation & Safety
Safety First: Don appropriate PPE (safety glasses, hearing protection, no loose clothing). Ensure the machine safety interlocks are functional.
Machine Warm-up: Running a warm-up cycle is essential for high-precision machines to stabilize the thermal state of spindles and ball screws.
Cleanliness: A clean machine is a accurate machine. Remove chips and debris from the worktable and vise.
B. Workholding
Securing the raw material (the “workpiece”) is paramount. The choice depends on the part geometry and batch size:
Vises: Standard for blocks of material.
Fixture Plates: For complex or multiple parts.
Custom Jigs & Fixtures: For high-volume production.
Vacuum Chucks: Ideal for thin, flat parts.
The goal is maximum rigidity and precise, repeatable location.
C. Tool Setup
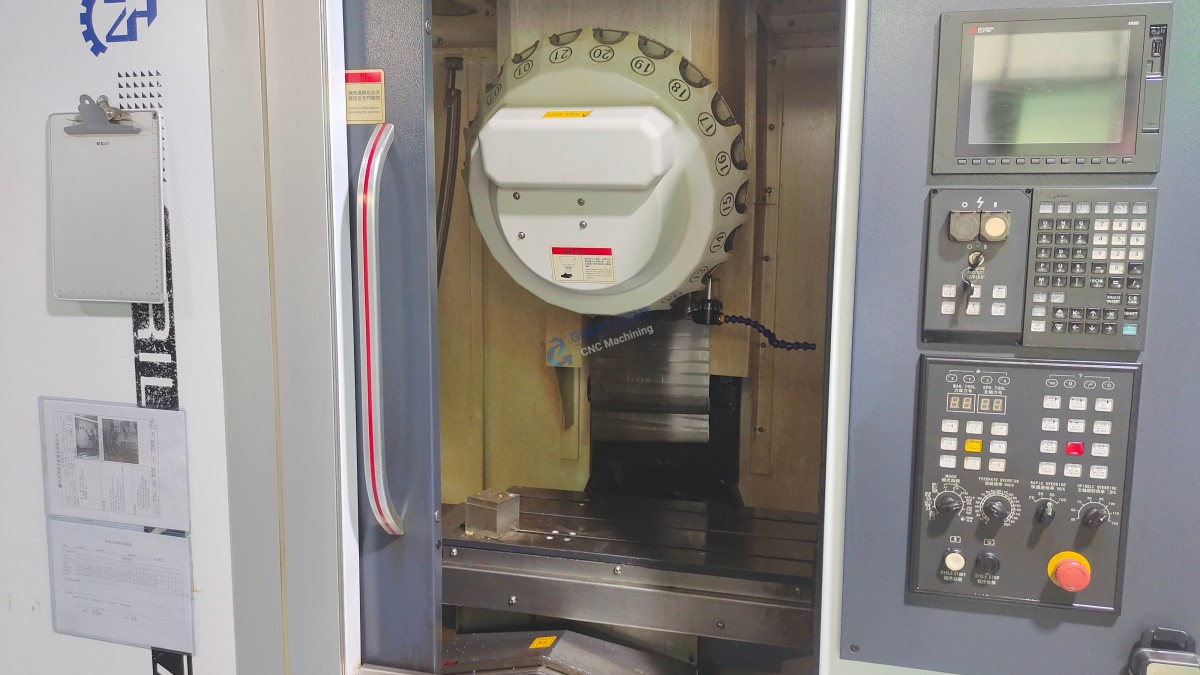
Tool Presetting: Using a tool pre-setter (or manually on the machine), each tool’s length and diameter are measured. This data is entered into the machine’s Tool Length Offset (H-code) and Tool Diameter Compensation (D-code) registers.
Tool Loading: Tools are loaded into the machine’s automatic tool changer (ATC) carousel in the order specified by the program.
D. Workpiece Zero (“Work Offset”) Setting
This is a critical skill. The operator uses a probe (touch-trigger or manual edge finder) to locate a known point on the workpiece (often a corner or the center of a bore). This point in the machine’s coordinate system is defined as the program’s zero point (e.g., G54, G55) and entered into the control. All tool movements will be relative to this point.
Phase 3: Execution – Running the Job
A. Program Loading and Dry Run
The G-Code program is transferred to the machine control (via network, USB, or DNC).
A dry run is performed with the spindle off and often with the Z-axis height raised. The operator watches the machine’s path and the control’s graphical display to verify movement logic.
B. First Article Run
For the first part, the operator typically runs the program in single-block mode, executing one line of code at a time, ready to press the emergency stop.
Feedrate Override is often reduced to 50% or less for initial cuts.
The operator closely monitors sound, vibration, and chip formation (color, size, shape)—key indicators of correct cutting conditions.
C. Production Run
Once the first part is verified, the machine can run automatically.
The operator’s role shifts to process monitoring: checking tool wear, ensuring coolant flow, clearing chips, and performing in-process quality checks with micrometers or calipers.
Phase 4: Post-Processing & Inspection
Deburring: Removing sharp edges created during machining.
Cleaning: Parts are cleaned of coolant and chips.
Final Inspection: Using precision instruments like Coordinate Measuring Machines (CMMs), optical comparators, or surface profilometers to verify all dimensions and tolerances against the original drawing.
Documentation: Recording inspection results and any deviations.
The Evolution: From 3-Axis to Advanced Machining
While the core principles remain, working a 5-axis CNC machine adds layers of complexity and capability. Instead of just moving in X, Y, and Z, the tool or workpiece can also rotate on two additional axes (e.g., A and B). This allows for:
Single-Setup Machining: Completing complex geometries without repositioning the part, drastically improving accuracy.
Access to Complex Angles: Machining undercuts and contoured surfaces impossible with 3-axis.
Use of Shorter Tools: By tilting the tool head, a stiffer, shorter tool can be used, allowing for higher feed rates and better surface finishes.
Operating a 5-axis machine requires advanced CAM programming to manage simultaneous movements and sophisticated setup skills to establish complex work coordinate systems. This is where partnering with a specialist like GreatLight CNC Machining Factory provides immense value. Their expertise in precision 5-axis CNC machining services ensures that the full potential of this advanced technology is harnessed correctly and efficiently for your most challenging components.
Conclusion
So, how do you work a CNC machine? It is a disciplined synthesis of digital mastery and hands-on craftsmanship. It begins with a deep understanding of CAD/CAM and the science of cutting metals, transitions to the meticulous art of physical setup and workholding, and culminates in the vigilant supervision of a automated process that demands human judgment at every turn. For businesses seeking precision parts, understanding this process underscores the value of choosing a capable partner. It’s not just about owning the machine; it’s about possessing the accumulated engineering knowledge, rigorous process control, and skilled personnel to operate it effectively. Whether you are looking to produce a simple bracket or a complex aerospace component with intricate geometries, the principles of careful planning, precise execution, and thorough verification remain the universal keys to success in the world of CNC machining.
Frequently Asked Questions (FAQ)
Q1: What is the most important skill for a CNC machinist or operator?
A: While technical knowledge is vital, attention to detail and procedural discipline are arguably the most critical. A single missed decimal point in an offset, a slightly loose vise, or a failure to simulate a program can lead to costly crashes or scrap parts. The ability to methodically follow checklists and maintain intense focus is paramount.
Q2: How long does it take to learn to operate a CNC machine competently?
A: The learning curve is steep. Basic setup and operation for simple parts on a 3-axis mill might be learned in a few months of intensive training. However, achieving proficiency in programming, advanced setup (especially for 5-axis), troubleshooting, and optimizing processes for different materials typically requires 2 to 5 years of hands-on experience under skilled mentorship.
Q3: Can I run a CNC machine directly from a CAD file?
A: No, you cannot. A CAD file (e.g., .STEP, .SLDPRT) is a geometric model. It must be translated into G-Code through the CAM programming process. Some modern, user-friendly machines have conversational programming that simplifies this for basic shapes, but for any complex part, dedicated CAM software is essential.
Q4: What’s the difference between a CNC “Operator” and a CNC “Programmer”?
A: The roles often overlap, especially in job shops. Typically, an Operator focuses on the physical machine: setup, loading programs, running jobs, and in-process inspection. A Programmer focuses on the digital side: creating efficient, error-free toolpaths and G-Code from CAD models. Many skilled professionals are both.
Q5: Why is the first part inspection so critical?
A: The First Article Inspection (FAI) is a formal verification that the entire process—from the CAD model to the CAM program to the machine setup—has produced a part that meets all design specifications. It’s the final checkpoint before committing to a full production run, preventing the mass production of defective parts.
Q6: My part design is very complex. What type of CNC machining service should I look for?
A: For highly complex parts with organic shapes, undercuts, or features requiring machining from multiple angles, you should seek out a provider with expertise in multi-axis machining, particularly 5-axis CNC machining. This technology minimizes setups, improves accuracy on complex features, and is often the only way to machine certain geometries. Providers like GreatLight CNC Machining Factory specialize in these advanced capabilities, turning complex designs into manufacturable realities. For insights into their approach and industry applications, you can explore their professional network on LinkedIn.
