Building your own CNC machine is a fascinating endeavor that blends mechanical engineering, electronics, and software into a powerful tool for creation. Whether driven by cost-saving goals, a passion for DIY, or the need for a highly customized machine, understanding how to make a CNC machine provides deep insight into the world of subtractive manufacturing. This comprehensive guide will walk through the fundamental steps, critical considerations, and practical challenges, offering a clear perspective for hobbyists and professionals alike.

Understanding the Core Philosophy: It’s a System Integration Project
Before purchasing a single component, it’s crucial to frame the project correctly. How to make a CNC machine is not about inventing new principles but about the precise integration of established subsystems:
The Mechanical Structure: The frame, linear motion systems, and spindle that provide rigidity and accuracy.
The Motion Control System: Motors, drives, and the controller that translate digital commands into physical movement.
The Software Ecosystem: The CAD/CAM software for design and toolpath generation, and the control software (like Mach3, GRBL, or LinuxCNC) that runs the machine.
Success hinges on the harmonious interaction of all three. A weak link in any subsystem will define the machine’s overall capability and precision.
Step 1: Defining Purpose and Specifications
Your design is entirely dictated by your intended use. Ask these questions:
Work Envelope: What maximum part size (X, Y, Z) do you need?
Materials: Will you cut softwoods, hardwoods, plastics, aluminum, or even steel? This dramatically affects required rigidity and power.
Precision & Tolerance: What level of accuracy is acceptable? ±0.1mm is achievable for hobbyists; ±0.01mm or better requires industrial-grade components and design.
Budget: Costs can range from a few hundred dollars for a small 3D-printed router to tens of thousands for a robust metal-cutting mill.
This clarity prevents over-engineering for simple tasks or, more commonly, under-engineering for demanding ones.
Step 2: Designing and Sourcing the Mechanical Structure
This is the “bones” of your machine. The primary goal is stiffness; any flex or vibration during cutting will destroy precision and finish quality.
Common Frame Materials:
Extruded Aluminum (e.g., 80/20 or Bosch Rexroth profiles): Excellent for prototyping and medium-duty machines. They are modular, easy to assemble, and reasonably stiff. Damping characteristics are moderate.
Steel Welded Frame: Offers superior rigidity and vibration damping for heavy-duty cutting. Requires significant welding and machining skill to ensure squareness and flatness.
Cast Iron or Polymer Concrete: The gold standard for industrial machines due to exceptional mass and damping properties, but impractical for most DIY builds.
MDF or Plywood: A low-cost entry point for very light-duty (foam, softwood) machines. Susceptible to moisture changes and lacks long-term rigidity.
Critical Linear Motion Components:
Rails & Carriages: Linear guide rails (supported round rails or profile rails) are essential. Profile rails (like HIWIN type) offer the highest stiffness and load capacity. Avoid unsupported smooth rods for anything beyond the lightest duty.
Drive Mechanism:
Lead Screws: Affordable but can have issues with backlash and lower speed.
Ball Screws: The preferred choice for precision. They convert rotary motion to linear motion with high efficiency and minimal backlash. Pre-tensioned ball screws are key for high-performance machines.
Belt Drives: Used primarily in high-speed, low-force applications like 3D printers or CNC routers for non-ferrous materials.
Step 3: Selecting the Motion Control System
This is the “nervous system” that brings the machine to life.
Motors:

Stepper Motors: Common in DIY builds. They move in discrete steps, are simple to control, and hold position when stopped. They can lose steps (and thus position) if under-powered or overloaded.
Servo Motors: Used in industrial machines. They use feedback (encoders) to actively monitor and correct position, providing higher torque at speed and never losing steps. More complex and expensive.
Motor Drivers/Amps: These electronics take low-power step/direction signals from the controller and amplify them to drive the motors. Choose drivers matched to your motor’s current and voltage ratings.
Motion Controller: The “brain.” It can be:
A dedicated breakout board paired with software like Mach3/4 on a PC.
An all-in-one microcontroller board (like an Arduino running GRBL or a Teensy running FluidNC).
A standalone industrial controller (like from Mesa Electronics with LinuxCNC).
Step 4: Integrating Spindle and Tooling
The spindle is the “heart” of the cutting action.
Router Spindles: (e.g., from DeWalt or Makita) are cost-effective for wood and plastics. They are air-cooled and often lack speed control via software.
VFD Spindles: (Variable Frequency Drive) are liquid-cooled, quieter, and offer precise software-controlled speed. They are mandatory for serious work in metals and composites. Power ratings from 800W to 3kW+ are common.
Tooling: Collets (ER11, ER20, ER32) hold the cutters. Invest in good quality tool holders and a variety of end mills suited to your materials.
Step 5: Assembly, Calibration, and Software Setup
Assembly: This stage requires patience and precision. Use dial indicators, precision squares, and levels. The goal is a square, trammed, and rigid structure. Every micron of error in assembly will be multiplied in the final part.
Wiring & Electronics: Neatly organize wiring in cable carriers. Pay strict attention to grounding and shielding to prevent electrical noise from causing erratic motor behavior.
Software Configuration: This is often the most time-consuming step for beginners.
CAD Software: (Fusion 360, SolidWorks, etc.) for designing parts.
CAM Software: (often integrated with CAD) to generate the G-code toolpaths from your design.
Control Software: Configure it with your machine’s exact parameters: steps per millimeter for each axis, acceleration, jerk settings, and soft limits.
Calibration: Use a dial indicator to measure actual movement versus commanded movement. Perform backlash compensation in software if measurable play exists in your drive system.
The Inevitable Challenges and Why Many Choose Professional Partners
The journey of how to make a CNC machine is incredibly educational but fraught with hurdles:

The Rigidity-Accuracy Paradox: Achieving industrial-grade stiffness and geometric accuracy (±0.02mm or better over a large volume) is extraordinarily difficult without professional machining equipment to make the parts for your new machine.
Hidden Costs: The bill of materials for a robust machine often exceeds the cost of a ready-made benchtop CNC.
Time Investment: Hundreds of hours can go into design, sourcing, assembly, and debugging.
Safety: A high-speed spindle spinning a metal cutter is inherently dangerous. DIY machines may lack proper enclosures, emergency stops, and fail-safes.
This is where the value proposition of an established expert like GreatLight Metal Tech Co., LTD. becomes unmistakably clear. While building a machine teaches you about mechanics, partnering with GreatLight gives you access to the result: high-precision parts, on demand, without the capital investment, risk, or time delay.
Conclusion: Build for Knowledge, Partner for Results
Understanding how to make a CNC machine is a profound exercise in systems engineering that we deeply respect. It cultivates a unique appreciation for the challenges of precision manufacturing. For prototyping a single machine or for pure learning, it’s a worthy project.
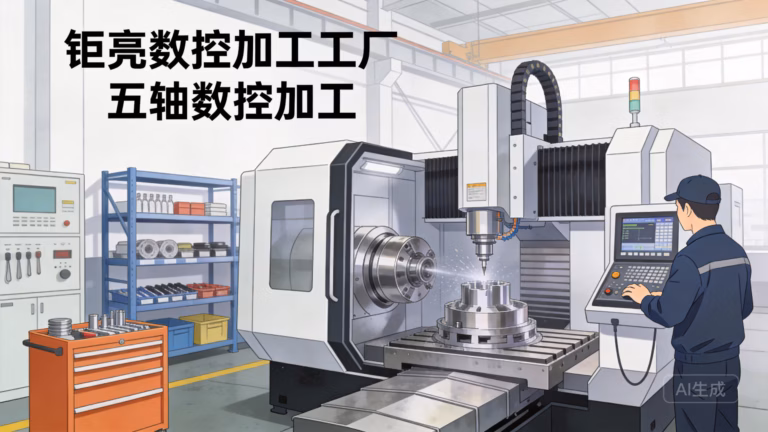
However, for businesses and innovators whose primary goal is not machine-building but part-making—to develop a new product, validate a design, or produce small batches—the efficient, reliable, and safe path is to leverage existing expertise. GreatLight CNC Machining Factory embodies this principle. With a foundation built on advanced 5-axis CNC centers, a full spectrum of post-processing capabilities, and a rigorous quality management system certified under ISO 9001:2015, GreatLight transforms complex designs into tangible, high-accuracy components. They have already solved the rigidity, accuracy, and reliability challenges internally, allowing you to focus your resources on design and innovation, not machine maintenance and process debugging. Whether your need is for a one-off prototype or a production run, the precision CNC machining services offered by a partner like GreatLight provide a scalable, professional bridge from digital model to perfected physical part.
Frequently Asked Questions (FAQ)
Q1: What is the most expensive part of building a CNC machine?
A: For a precision-oriented build, the cost drivers are typically the linear motion components (high-quality ball screws and profile linear guides) and the spindle system. These define the machine’s fundamental accuracy and capability. The frame material (thick steel or aluminum) also represents a significant portion of the budget.
Q2: Can I build a CNC machine capable of machining steel?
A: Yes, but it is the highest tier of DIY challenge. It requires an exceptionally rigid, heavy frame (often welded steel), a powerful VFD spindle (2.2kW minimum), premium linear guides, and robust ball screws. Even then, material removal rates will be conservative compared to an industrial CNC machining center.
Q3: How do I control backlash in my DIY CNC machine?
A: Backlash is minimized at the design and component stage: use pre-loaded ball screws and dual pre-loaded nut arrangements, ensure all motor couplings are tight, and use high-quality linear guides. Remaining backlash can be compensated for in the control software, but this is a correction, not a cure, and can affect contouring accuracy.
Q4: Is software the hardest part for a beginner?
A: Often, yes. The mechanical assembly is tangible. The software setup—configuring the controller, tuning motor currents and step signals, and integrating CAD/CAM workflows—involves abstract concepts and troubleshooting that can be daunting. A strong community (forums for GRBL, Mach3, etc.) is an invaluable resource.
Q5: When does it make more financial sense to outsource rather than build?
A: Consider outsourcing if: 1) Your goal is parts, not the machine itself. 2) You need precision and repeatability beyond ±0.05mm. 3) Your project timeline cannot absorb months of build and调试 time. 4) The total cost of quality DIY components approaches or exceeds the cost of a commercial solution or the cost of outsourced parts for your project. Companies like GreatLight offer economies of scale and expertise that are hard to match for one-off projects.
Q6: What safety precautions are absolutely essential?
A: Never compromise on safety. Essential precautions include: a fully enclosed cutting area, polycarbonate viewing windows, emergency stop buttons within easy reach, proper grounding of all electrical components, a spindle that only starts via software command, and always wearing safety glasses. Assume the machine can fail in unexpected ways.
For more insights into the professional capabilities that support global innovation, you can follow the industry developments on platforms like LinkedIn.


