
Drone Data Link Antenna Mounts CNC
An antenna mount is the mechanical half of your radio link. This page explains what CNC machining can and cannot control in a drone data link antenna mount, which tolerances actually matter, and when a machined part is the wrong answer. Written for RF, airframe and manufacturing engineers who have to sign off on the drawing.
In this article
- 1
- 2
- 3
- 4
- 5
- 6
- 7
- 8
What a Machined Antenna Mount Actually Controls
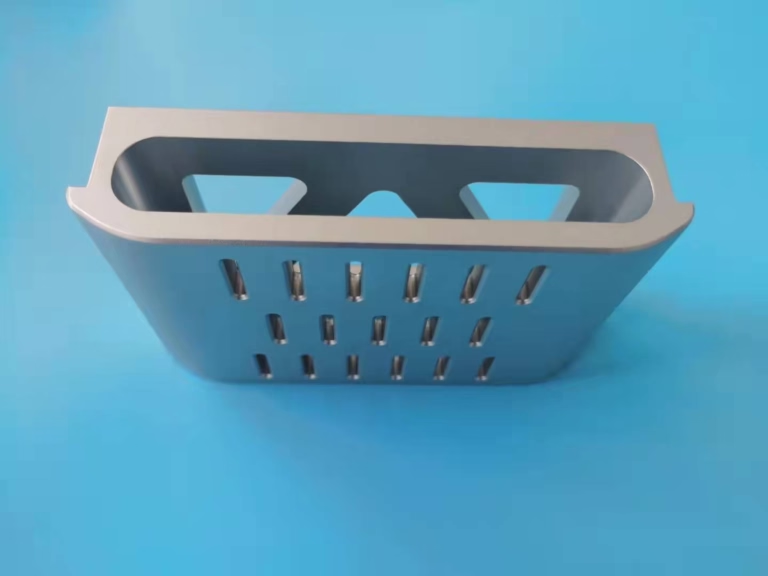
A data link antenna mount holds an RF component at a fixed angle and a fixed distance from the airframe. That is the whole job. Everything else follows from it: the antenna keeps the gain and pattern the link budget assumed, the connector stays mated, and the ground plane does not change shape in flight.
Machining enters the picture because those three conditions are geometric. A pattern shift of a few degrees at 2.4 GHz or 5.8 GHz costs more link margin than most people expect, and the mount is what sets the angle. If the flange face is not square to the reference bore, the antenna points off axis no matter how well the airframe was built.
The mount also sets the electrical return path. A connector flange bolted to an anodized plate is not grounded. Anodizing is a dielectric, and a hardcoat layer can sit in the range of 20–50 μm. That is enough to break the shield connection at these frequencies. Machining the mounting face bare, or masking it before coating, is a drawing decision that has nothing to do with strength and everything to do with whether the link radiates or radiates badly.
So the part is doing two jobs at once. It is a structural bracket carrying vibration and landing loads, and it is a reference surface that defines RF geometry. Most failures we see on drone data link antenna mounts CNC programs come from treating it as only the first.
Which Tolerances Move the Link Budget
Not every dimension on the print deserves the same tolerance. On an antenna mount, four features carry most of the RF risk: the connector flange face, the bore that locates the antenna axis, the bolt pattern that ties the mount to the airframe, and the ground contact face.
Angular alignment between the flange face and the airframe datum is usually the tightest callout. A beamwidth of 60° loses real gain at 3° of tilt. On a long boom mount the error compounds, so the per-face tolerance has to shrink as the arm gets longer. That is a trigonometry problem, not a machining problem, and it belongs in the DFM conversation.
Positional tolerance between the connector flange and the mounting interface is the second lever. On a typical RF antenna mount, ±0.025 mm between those two features is where the useful range starts. GreatLight machines to ±0.005 mm when the geometry supports it, which leaves margin for coating build-up and for the tolerance stack on the airframe side.
Flatness on the ground contact face matters more than finish. A face that is flat but has a Ra 1.6–3.2 μm as-machined texture still makes broad contact. A face that is mirror-polished but dished by 0.05 mm does not. We check flatness on the granite before we check surface finish, every time.
Why Five-Axis Setup Changes the Result
An antenna mount usually has features on four or five sides: a flange face, a locating bore, a mounting pad, a cable relief slot, and often a shallow pocket to save mass. On a three-axis machine that becomes three or four setups, and every re-clamp adds a position error.
Simultaneous five-axis work keeps those features in one coordinate system. The practical benefit is not exotic geometry. It is that the flange face, the bore and the mounting pad all come off the same setup, so the angular relationship between them is set by the machine rather than by the fixture.
Tool access is the second gain. Angled connector bosses and undercut fillets are reachable with a short, stiff tool instead of a long one that deflects. Short tools hold tolerance and leave a better floor finish in the pocket.
Where five-axis does not help: thin plate brackets that are essentially 2.5D. Those parts are cheaper and faster on a three-axis mill with a good fixture, and pushing them to five-axis just adds setup time. We say so when the geometry says so.
Material Choice and the Galvanic Question
Aluminum 6061-T6 is the default for airframe-side mounts. It machines clean, anodizes predictably, and has enough stiffness per gram for most brackets. Where stiffness is the limit rather than strength, 7075-T6 buys roughly a third more modulus-relevant section for the same mass, at higher cost and worse corrosion behavior.
Stainless 304 or 17-4PH shows up when the mount has to survive repeated clamping or sits near a heat source. It is heavier and slower to machine. Titanium TC4 (Ti-6Al-4V) is the answer for high-temperature or high-vibration installations, but it is not a weight-saving move over aluminum; the density is higher.
The material question engineers skip is galvanic coupling. Aluminum mount, stainless fasteners, carbon fiber airframe, and a copper ground strap can put four dissimilar metals in one wet joint. Insulating washers and a defined ground path fix it. Without them, the corrosion product forms exactly on the face that carries your RF return.
For radomes and covers, PC, POM and PEEK are common. PEEK holds up near hot electronics but costs a lot more than POM. If the cover is not structural, POM is usually the right call.
When CNC Is the Wrong Process
CNC is the right answer for prototypes, low and mid volume, and any part where the RF geometry has to be tight. It is the wrong answer in three situations.
First, high volume with a simple shape. At 10,000+ parts a year, a die-cast or molded body with a machined interface face costs less per unit. We run die casting as well, so this is not a sales argument, it is arithmetic.
Second, parts dominated by a single flat profile in thin sheet. Laser cut and formed sheet metal gets there faster and cheaper. Machining a 1.5 mm bracket out of solid stock wastes most of the material.
Third, geometries that need internal channels you cannot reach with a tool. Those go to additive, sometimes with a machined interface brazed or bolted on. The hybrid route is common in antenna work and it is not a compromise if the interface face is still machined flat.
The honest test: if the drawing has more than one tight angular relationship, and the part is not a flat plate, CNC is almost always correct.
How to Verify a Mount Before It Flies
Inspection on a mount like this is not just dimensional. We run raw material check, in-process monitoring and final inspection, with reports on request, and 100% inspection before shipment. For RF hardware, three checks matter most.
CMM verification of the flange face to datum angle, reported as a number rather than a pass or fail, so the engineer can see the margin. Position of the connector bore is measured in the same setup as the flange, otherwise the report measures the fixture.
Ground continuity across the mounting face, checked with a milliohm meter on a coated and a bare sample. This catches masking errors before the parts ship. A coating that creeps into the ground face will not show up in any dimensional report.
Fit check with a real connector and a torque wrench. Thread depth, counterbore clearance and wrench swing are the three things that pass inspection and fail on the bench. Machined threads in aluminum 6061 gall; stainless inserts or a Helicoil callout solves it. We flag this in DFM if the drawing does not.
Where the Money Actually Goes
Two mounts with the same envelope can differ 3× in price. The driver is rarely material. It is setup count and tolerance density.
A part with five tight callouts on four faces needs five-axis work and a CMM program. A part with two tight callouts on one face can run on a three-axis mill with a soft jaw fixture. Both are correct designs; they just cost different amounts.
Coating is the second cost lever. Masking a ground face adds handling. So does selective anodizing on a connector boss. If the RF design allows a plated finish instead of anodize, the masking step disappears.
At GreatLight, quotation and free DFM analysis come back within 12 hours, and production can start within 24 hours. Parts ship in 3–5 days. There is no minimum order quantity, so a single prototype and a 10,000-part run go through the same quoting path. The plants run 127 high-precision CNC machines, including 16 simultaneous 5-axis centers, with a 4,000 mm maximum processing size.
Which Feature Drives Which Requirement
Use this to decide where to spend tolerance and where to loosen it.
| Feature | What it controls | Practical target | Typical failure if missed |
|---|---|---|---|
| Flange face to datum | Antenna boresight angle | 0.02 mm per 100 mm arm | Pattern tilt, lost gain at range |
| Bore to flange position | Connector pin alignment | ±0.025 mm or tighter | Mating stress, intermittent RF |
| Ground contact face | Shield return path | Flat, bare, Ra ≤ 3.2 μm | Common-mode noise, detuning |
| Bolt pattern | Repeatable re-install | ±0.05 mm hole position | Shift after field service |
| Wall thickness | Vibration fatigue life | Per FEA, ≥ 1.5 mm typical | Cracking at fillet roots |
| Mount mass | Endurance and payload | Cut where stiffness allows | Shorter flight time, more inertia |
The Verdict
If the mount has more than one tight angular relationship and carries the RF reference surface, machine it on five-axis and keep the ground face bare. If it is a flat plate bracket with a single locating hole, cut it on three-axis or form it from sheet, and spend the saved money on the connector interface instead.
Questions Engineers Ask
Does surface finish on the mount affect RF performance?
Only on the faces that carry current or set contact. A rough as-machined face at Ra 1.6–3.2 μm still makes good broad contact if it is flat.
On the antenna-side faces, a finer finish at Ra 0.8–1.6 μm helps when you are sliding a connector into a bore and do not want to gall the aluminum.
Can an anodized mount be used as an RF ground?
Not through the coating. Anodizing is a dielectric and hardcoat can reach tens of micrometers, which is electrical open at these frequencies.
Mask the ground face, or machine it after coating, or switch to a conductive finish such as electroless nickel or chromate conversion where the spec allows it.
What tolerance should I put on the flange face angle?
Start from the beamwidth. If the antenna has a 60° beam, keeping boresight error under 1° leaves the pattern essentially unchanged.
On a 100 mm arm, 1° is roughly 1.7 mm of tilt at the tip, so the per-face flatness and angle callouts get tight fast. Work backward from the beamwidth, not from a habit number.
Is titanium worth it for a drone antenna mount?
Only when temperature or vibration drives the design. TC4 (Ti-6Al-4V) has higher density than aluminum, so it is not a weight play.
For a normal airframe mount at ambient temperature, 6061-T6 or 7075-T6 does the job at lower cost and with easier finishing.
How do I keep the mount from loosening in vibration?
Use a defined preload and a positive locking feature. Thread locker alone is not enough on a part that sees continuous airframe vibration.
Mechanical options that work: safety wire, a Nord-Lock style washer, or a machined tab that keys the connector body against rotation.
Can you work from a STEP file plus an RF requirement note?
Yes. Send the model, the datum scheme, and the faces that carry RF ground. Uploads stay confidential and an NDA is available on request.
DFM feedback and a quotation come back within 12 hours, including any callouts we think are tighter than the design needs.
Send Us the Mount Drawing
Upload a STEP file and the RF faces you care about. We return DFM feedback and a quotation within 12 hours, with 100% inspection before shipment.
12-hour quote100% inspectionNo minimum order quantity
GreatLight Elsewhere
We publish setup notes, tooling trials and inspection data from the factory floor.











