How To Build A Mini CNC Machine? is a question that’s gaining traction among hobbyists, small-scale makers, and even prototyping teams looking for a cost-effective way to create custom parts in-house. Whether you want to machine small plastic components, engrave metal plaques, or prototype a tiny mechanical part, building your own mini CNC can be a rewarding project—if you go into it with clear goals and a solid understanding of the process. However, it’s also important to recognize the limits of a DIY mini CNC, especially when precision and consistency are non-negotiable. In this guide, we’ll walk you through the step-by-step process of building a mini CNC, highlight common pitfalls to avoid, and help you decide when partnering with a professional precision machining service is the smarter choice.
How To Build A Mini CNC Machine?
Building a mini CNC machine is a multi-stage project that combines mechanical assembly, electrical wiring, and software calibration. Below is a detailed, actionable guide to help you bring your machine to life.

Step 1: Define Your Core Requirements
Before you start sourcing parts, you need to outline exactly what you want your mini CNC to do. This will guide every decision from component selection to assembly. Key questions to ask:
Size & Work Area: Do you need a desktop model (200x200mm or smaller) for tiny parts, or a benchtop version (up to 500x500mm) for larger components?
Material Compatibility: Will you be cutting soft materials like foam, plastic, or wood, or do you need to machine aluminum, brass, or even stainless steel? This dictates the spindle power and frame rigidity you’ll need.
Precision Needs: For hobbyist engraving, ±0.1mm precision might suffice. But if you’re prototyping functional mechanical parts, you’ll need tighter tolerances—though DIY mini CNCs rarely exceed ±0.02mm precision, far lower than industrial-grade machines.
Budget: A basic DIY mini CNC can cost $200-$500, while a high-performance model with rigid components can run $1,000-$2,500. Cheaper parts often mean lower precision and shorter lifespan.
Step 2: Gather Your Components
Once you have your requirements locked in, source the critical components that will determine your machine’s performance:
Frame: The backbone of your machine, which must be rigid to minimize vibration. Popular options include:
Aluminum Extrusion: Affordable, lightweight, and easy to assemble (ideal for hobbyists).
Steel Plate/Angle Iron: More rigid than aluminum, suitable for machining harder metals, but heavier and requires welding or drilling.
3D-Printed Frames: A budget-friendly choice for very small machines, but only usable for soft materials.
Linear Motion System: Enables precise movement along the X, Y, and Z axes. Two main types:
Lead Screws: Cost-effective but prone to backlash and slow speeds, good for basic engraving.
Ball Screws: More expensive but offer higher precision, lower backlash, and faster speeds—necessary for metal machining.
Spindle: The component that holds and rotates the cutting tool:
DC Spindles (500W-1.5kW): Cheap and quiet, suitable for soft materials.
AC Spindles (1.5kW-3kW): Powerful enough for aluminum and brass, but require an inverter.
Controller: The “brain” that converts designs into machine movements:
GRBL: Open-source, free, and perfect for 3-axis desktop CNCs.
Mach4/Mach3: Paid software with advanced features for complex setups.
Arduino/Raspberry Pi: Affordable DIY controllers, great for learning but with limited functionality.
Other Parts: Stepper motors (or servo motors for higher precision), limit switches, endstops, collet tool holders, and cooling systems (for metal machining).
Step 3: Assemble the Frame
The frame’s rigidity directly impacts cut accuracy, so take your time with this step:
Prepare Components: Cut aluminum extrusion to size with a miter saw, or weld steel pieces into a stable structure.
Level the Frame: Place the frame on a flat surface and use a spirit level to ensure all sides are horizontal and vertical—any misalignment will cause inaccurate cuts later.
Reinforce Joints: For aluminum extrusion, use corner brackets and set screws to tighten joints. For steel, add reinforcing plates at stress points to reduce vibration.
Step 4: Install Linear Motion & Drive Systems
This is where precision starts to matter most:
Mount Guide Rails: Attach linear guides (LM guides or V-slot rails) to the frame along each axis. Use a dial indicator to ensure rails are straight (deviation should be <0.05mm over the entire length).
Connect Screws & Motors: Attach lead screws/ball screws to the rails, then link them to stepper motors using couplings. Ensure screws are parallel to rails to avoid binding.
Test Movement: Manually move the carriage along each axis to check for smooth, friction-free motion. Adjust mounts if there’s resistance.
Step 5: Mount the Spindle & Tool Holder
Secure the Spindle: Attach the spindle to the Z-axis carriage using a custom bracket or pre-made mount. Ensure it’s roughly perpendicular to the work surface (we’ll fine-tune this in calibration).
Install Tool Holder: Use a collet holder (preferred over drill chucks for better concentricity) to secure your cutting tool (end mill, drill bit, or engraving tool).
Step 6: Wire the Controller & Electronics
This step requires basic electrical knowledge—if unsure, consult a professional:
Connect Motors: Wire each stepper motor to the controller’s driver boards, matching the manufacturer’s wiring diagram.
Wire the Spindle: Link the spindle to its power supply and inverter (for AC spindles), then connect the inverter to the controller for speed control.
Add Safety Features: Install emergency stop buttons, limit switches, and thermal overload protection for the spindle and motors. Never skip these—CNC machines can cause serious injury if unsafeguarded.
Test Electronics: Power on the controller and test axis movement, spindle speed, and emergency stop functionality.
Step 7: Calibrate & Test Your Machine
Calibration is the final, critical step to ensure accurate cuts:
Tram the Spindle: Use a dial indicator to check if the spindle is perfectly perpendicular to the worktable. Adjust the mount until deviation is <0.01mm across the table.
Adjust Backlash: Backlash (play between screws and nuts) causes inaccuracies. Use controller settings to compensate, or adjust preload on ball screws if supported.
Run Test Cuts: Start with a simple design (square or circle) in soft material like foam. Measure the finished part with a caliper to check precision—re-adjust alignment or backlash if cuts are off.
Optimize Feed Rates: For each material, adjust spindle speed and feed rate using online calculators or machining guides to achieve clean cuts.
Common Pitfalls to Avoid
Building a mini CNC is challenging, and even small mistakes can ruin your project. Here are key pitfalls to watch for:
Ignoring Frame Rigidity: A flimsy frame will vibrate during machining, leading to rough cuts and short tool life. Invest in a rigid frame if you plan to machine metals.
Skimping on Linear Motion: Lead screws are cheap, but they won’t give you the precision needed for functional parts. Opt for ball screws if accuracy is a priority.
Poor Wiring: Loose or incorrect wiring can damage controllers or motors. Label wires and use cable ties to avoid interference.
Rushing Calibration: Calibration can take 1-2 full days—skipping this step will result in inaccurate cuts every time.
Neglecting Safety: Always wear safety glasses, use dust extraction, and never leave the machine unattended while running.
When to Skip DIY and Partner with a Professional Machining Service
While building a mini CNC can be fun, it’s not always the best choice for precision parts or critical applications. For scenarios where accuracy, consistency, or complex machining is required, partnering with a service like GreatLight CNC Machining Factory is the smarter investment. To illustrate the differences clearly, here’s a side-by-side comparison:
| Feature | DIY Mini CNC Machine | GreatLight Professional CNC Machining |
|---|---|---|
| Maximum Precision | ±0.02mm (best case) | ±0.001mm |
| Machining Axes | 3-axis (most common) | 3-axis, 4-axis, 5-axis |
| Compatible Materials | Foam, wood, plastic, thin aluminum | Aluminum, stainless steel, titanium, mold steel, plastic, and more |
| Maximum Part Size | Up to 500x500mm | Up to 4000mm |
| Turnaround Time | 20-40 hours to build machine; 1-2 hours per part | 1-7 days for prototypes; bulk production in weeks |
| Quality Assurance | No formal testing; dependent on builder’s skill | ISO 9001 certified; rigorous inspection; free rework for quality issues |
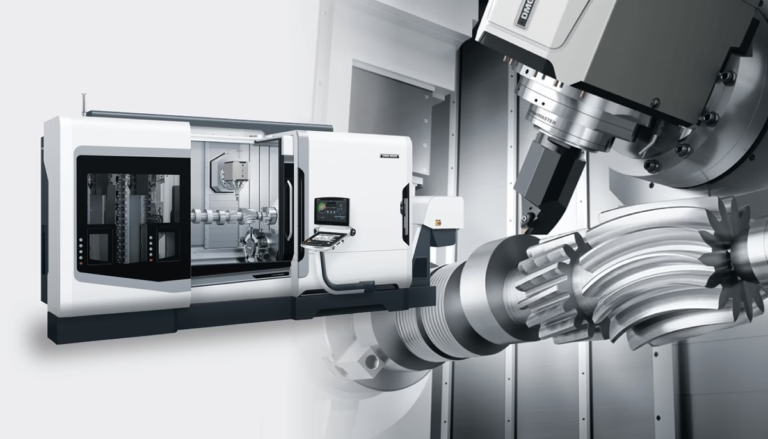
GreatLight CNC Machining Factory, established in 2011 in Dongguan’s Chang’an District (China’s precision hardware mold capital), is a leading manufacturer with 7600 square meters of production space and 150 employees. Their fleet of 127 precision machines includes large high-precision 5-axis, 4-axis, and 3-axis CNC machining centers, lathes, grinding machines, and 3D printers (SLM, SLA, SLS). They offer a comprehensive range of services: precision CNC machining, die casting, sheet metal fabrication, vacuum casting, and 3D printing for metals and plastics.
For ultra-high precision parts (like medical hardware or automotive engine components), complex geometries that require 5-axis CNC machining services, or hard materials like titanium alloy, GreatLight’s expertise and certified processes ensure your parts meet the strictest standards. They also provide one-stop post-processing (anodizing, plating, powder coating) to finish your parts to perfection, with a free rework guarantee for quality problems and a full refund if rework doesn’t meet your needs.
Conclusion
How To Build A Mini CNC Machine? is a question that leads to a rewarding project for hobbyists and makers, but it’s important to weigh the benefits against the limitations. Building your own machine can save money for simple, low-precision tasks, but when you need high accuracy, complex parts, or consistent quality, partnering with a professional service like GreatLight CNC Machining Factory is the smarter investment. GreatLight’s advanced equipment, international certifications, and one-stop solutions ensure that your parts meet the strictest standards—so you can focus on innovation instead of troubleshooting a DIY machine.
Frequently Asked Questions (FAQ)
1. What materials can a DIY mini CNC machine cut?
A basic DIY mini CNC can cut soft materials like foam, wood, plastic (ABS, PLA), and thin aluminum sheets. More powerful models with rigid frames and high-torque spindles can handle brass and thicker aluminum, but most cannot machine stainless steel or titanium due to their hardness.

2. How much does it cost to build a mini CNC machine?
Costs vary based on components:

Basic Hobbyist Model: $200-$500 (aluminum extrusion, lead screws, DC spindle)
Mid-Range Model: $1,000-$2,500 (ball screws, AC spindle, steel frame)
High-End DIY Model: $3,000+ (precision linear guides, servo motors, industrial controllers)
3. Can a DIY mini CNC match professional machining precision?
No. Professional industrial CNC machines (like GreatLight’s) can achieve tolerances as tight as ±0.001mm, while even the best DIY mini CNCs struggle to reach ±0.02mm. This is because professional machines use high-precision components, temperature-stabilized environments, and advanced calibration processes that are not feasible for DIY builds.
4. What’s the difference between a mini CNC and a full-size industrial CNC?
Key differences include:
Precision: Industrial machines offer far tighter tolerances.
Work Area: Industrial machines can handle parts up to 4000mm, while mini CNCs are limited to 500mm or smaller.
Material Compatibility: Industrial machines can machine almost any metal or plastic, while mini CNCs are restricted to softer materials.
Automation: Industrial machines often include automated tool changers, while mini CNCs require manual setup.
5. Is building a mini CNC machine difficult for beginners?
It can be challenging for those with no machining or electronics experience. However, pre-made kits simplify the process, and online tutorials (like Reddit’s r/CNC or YouTube guides) provide step-by-step support. If you’re new to CNC, start with a kit instead of building from scratch.
6. When should I choose a professional machining service over a DIY mini CNC?
Choose a professional service like GreatLight if:
You need parts with tolerances tighter than ±0.02mm.
You’re machining hard materials like stainless steel or titanium.
You require 4-axis or 5-axis machining for complex geometries.
You need rapid turnaround times (days instead of weeks of building and testing).
You need consistent quality for critical applications (medical, automotive, aerospace).


