
Why Build a CNC Machine? 6 Reasons and the Failures to Expect
This page is for engineers, makers and shop owners who are deciding whether to build a CNC machine or buy one. It covers the real reasons to build, the fault patterns that show up in almost every self-built machine, and the point where buying a used VMC becomes the cheaper answer.
In this article
- 1
- 2
- 3
- 4
- 5
- 6
Why Build a CNC Machine: Symptom, Cause, Fix
Use this as a starting checklist when your build cuts badly.
| Symptom | Likely cause | How to handle it |
|---|---|---|
| Ripples on the wall, regular pitch | Z axis or spindle not square to the table | Tram the spindle, sweep the table with a dial indicator |
| Taper on a deep pocket wall | Tool deflection from long gauge length | Shorten the holder, take 0.2 mm stepovers, reduce feed |
| Pocket corners overshoot by 0.05 mm | Backlash in the ballscrew or loose coupler | Re-tension the nut, check coupler runout under 0.02 mm |
| Dimensions drift over a long run | Thermal growth in the frame and spindle | Warm up 20–30 min, cut a test part, re-zero before the run |
| Stepper stalls at 3,000 mm/min | Torque drops with speed, driver under-volted | Lower rapid to 2,000 mm/min, raise drive voltage, check current |
| Chatter that changes with rpm | Frame resonance, thin-wall fixture | Add mass or damping, change spindle speed by 10 percent |
| Surface finish worse at one end of travel | Ballscrew misalignment along the axis | Shim the bearing blocks, re-check straightness over full travel |
| Steps lost only on fast Z retracts | Acceleration set past what the motor can push | Cut Z acceleration by 30 percent, add a counterbalance |
Build it to learn, buy it to produce
Build a machine when the goal is control, learning and one part family. Buy or outsource when the goal is tolerance, volume and traceable inspection. If your part needs ±0.005 mm or a certified report, send it to a shop that already has the frame, the metrology and the paperwork.
Why build a cnc machine instead of buying a used VMC
The honest answer starts with cost. A used 3-axis vertical mill with a working controller and a spindle that still holds tolerance usually runs several times the price of a bench build, and it arrives with unknown history. A self-built machine lets you spread the spend over months, buy the frame and rails first, and add the spindle when the budget allows.
The second reason is fit. A commercial machine is a generalist. It is designed to cut a wide range of parts for a wide range of customers. When you build, you can size the frame, rails and spindle for one material family and one part envelope. If you cut 6061 aluminum plates all day, you do not need a heavy cast iron base. You need stiffness where the cut pushes back.
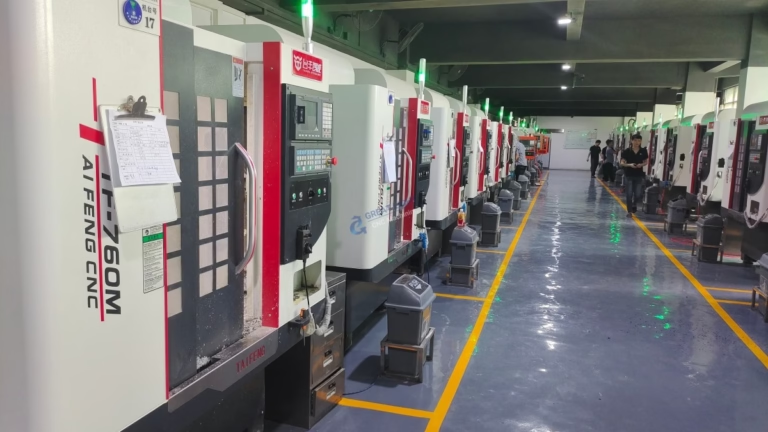
The third reason is learning. When you assemble the axis, set preload, tune the driver and measure the result, you learn what backlash, compliance and thermal growth actually feel like. That knowledge carries over to any machine you later run, including a 16-station 5-axis cell in a job shop.
There is also a maintenance argument. On a machine you built, you know where every fastener is and why it is there. When a bearing starts to howl, you already know the disassembly order. That shortens downtime in a way a service contract rarely matches.
None of these reasons require you to build a machine that competes with a production VMC. That is not the goal. The goal is a tool that matches your parts, your budget and your curiosity.
Where a self-built machine stops being the right answer
There is a hard boundary at tolerance. A well-built hobby-class machine with profile rails and a quality ballscrew can hold ±0.02 mm on a good day. Holding ±0.005 mm across a batch, in a warm shop, after eight hours of cutting, is a different problem. That number comes from a rigid frame, a temperature-stable spindle and a metrology loop, not from better software.
The second boundary is volume. If you need 500 parts a month, a self-built machine becomes a bottleneck and a maintenance project at the same time. Spindle hours, chip evacuation and tool changes all scale badly on a bench build. At that point the economics flip toward a used production machine or an outside shop.
The third boundary is certification. Aerospace, medical and automotive work often requires traceable inspection, calibrated equipment and a documented quality system. A self-built machine can make the part, but it cannot produce the paperwork. If your customer needs an inspection report with the shipment, build the machine for learning and send the production parts out.
A useful test: write down the tightest tolerance, the tightest surface finish and the monthly quantity before you buy the first rail. If any of the three lands outside what a bench build can do, the build is a project, not a production plan.
What the build actually costs in money and time
Budget builds usually undercount three things: the spindle, the enclosure and the time. A trim router spindle is cheap and loud. A proper 2.2 kW water-cooled spindle with a VFD, ER20 collets and a pump costs several times more, and it is the part that decides your surface finish and your cut depth.
The enclosure is not optional. Aluminum chips and coolant go everywhere. A simple frame with polycarbonate panels, a chip tray and a drain keeps the shop usable and keeps the rails clean. Rails that run dry or packed with chips lose preload and start to rumble within weeks.
Time is the largest line item. Expect a first build to take far longer than the parts list suggests, mostly in alignment, wiring and tuning. The people who finish are the ones who treat it as a series of small measurements rather than one big assembly.
You can reduce the risk by buying the motion parts as a matched set. A frame kit with pre-machined mounting faces, ground ballscrews and matched rails removes the hardest alignment work. It costs more up front and saves weeks of scraping and shimming.
Frame, drive and spindle choices that decide the outcome
Frame material sets the ceiling. Welded steel is stiff and cheap but needs stress relief and machining after welding, or it will move for months. Aluminum extrusion is easy to assemble and easy to get wrong, because bolted joints slip under cutting load. Epoxy granite fills the gap between them: heavy, well damped, but a project in itself.
On drives, ballscrews beat leadscrews on backlash and efficiency. A C7 rolled screw is fine for a router, a C5 ground screw is what you want if you care about ±0.02 mm or better. Rack and pinion suits long travel but needs a preloaded reducer to avoid reversing error. Belt drive is quiet and fast, and it is also the first thing to show compliance under load.
Motors come down to steppers versus servos. Steppers are cheap, hold position when idle and lose steps when pushed past their torque curve. Servos close the loop, cost more and need tuning. For a first build, size the stepper with at least 30 percent torque margin at your target rapid speed, then verify with a dial indicator on a loaded move.
The spindle is where money buys finish. Runout under 0.01 mm at the taper, a rigid holder and the right collet matter more than raw power. A 2.2 kW spindle will cut 6061 aluminum at 6 mm depth with a 6 mm three-flute cutter if the frame is stiff enough to take the reaction.
Step by step: the first cuts on a build a cnc machine project
Do these in order. Each one catches a fault before it hides in the next step.
- 1Level and anchor the framePut the frame on a flat surface, shim until a machinist level reads under 0.02 mm per 300 mm in both directions, then anchor it. An unlevel frame twists the rails and shows up later as taper.
- 2Tram the spindle to the tableSweep a dial indicator on a 100 mm arm around the table. Aim for under 0.02 mm over the full circle. Shimming the spindle mount is normal. Do not bend the plate.
- 3Set rail parallelismMeasure the two rails of each axis with a dial indicator riding the carriage. Keep them within 0.01 mm along the full travel. Tighten from the center outward so the rail does not bow.
- 4Check backlash on every axisCommand 0.05 mm moves in both directions and read the indicator. Anything above 0.02 mm needs attention: re-tension the nut, check the coupler, check the bearing preload.
- 5Tune acceleration and rapid speedStart at 1,000 mm/min and 200 mm/s². Raise in steps of 20 percent until the motor stalls or the surface shows ripple, then back off 30 percent. Write the numbers down on the machine.
- 6Warm up before measuringRun the spindle and all axes for 20–30 minutes, then cut a test part in the same material as production. Re-zero after warm-up. Cold measurements on a warm machine are the most common source of drift.
- 7Cut an accuracy test partMachine a square pocket with a circular boss and measure it. Look for roundness, squareness and depth error. Record the numbers. That record is your baseline for every future check.
Questions engineers ask before they build
How accurate can a self-built machine realistically be?
A rigid build with ground ballscrews, profile rails and a well-trammed spindle can hold around ±0.02 mm on a good day in a temperature-stable shop. Tighter than that needs a heavier frame, a temperature-controlled spindle and a real metrology loop.
Measure before you promise. Cut a test part, measure it, and use those numbers for quoting. Do not use the resolution of the controller as an accuracy claim.
Steppers or servos for a first build?
Steppers are the lower-risk choice for a first machine. They are cheap, simple to wire and hold position when idle. Size them with at least 30 percent torque margin at your target rapid speed.
Servos make sense when you need high rapids, closed-loop position or high duty cycles. They cost more and need tuning, so save them for a second build once you know the machine geometry is sound.
How do I stop chatter on a light frame?
Chatter is a stiffness problem, not a feed problem. First shorten the tool gauge length and reduce the stepover. Then add mass or damping to the frame and the fixture.
If it persists, change spindle speed by about 10 percent and see whether the noise moves. If it does, you are near a structural resonance. If it does not, check the tool holder and the workholding.
Do I need coolant on a small machine?
For aluminum, a mist or a small flood system helps a lot. It clears chips from the flute and keeps the cutter from welding to the work. Dry cutting with a three-flute cutter works for shallow passes if you use air blast.
For steel and stainless, cooling matters more. Heat goes into the tool edge and shortens life fast. If you cut steel often, plan for flood coolant and a chip tray from the start.
When should I send parts out instead of building?
Send them out when the tolerance goes below what your machine can hold, when the monthly volume exceeds a few hundred parts, or when the customer needs certified inspection paperwork.
Those three conditions are not about skill. They are about equipment, hours and a documented quality system. A shop that runs 127 machines and holds ±0.005 mm is set up for exactly that.
What is the first upgrade that pays off?
The spindle and the tool holder. Runout at the taper shows up directly in finish, tool life and dimensional scatter. A good spindle with an ER20 or ER25 holder will improve results more than any software change.
The second is a rigid workholding plate. Most chatter blamed on the machine actually comes from a part that is not held firmly enough.
Send the drawing, get a straight answer
Upload your part and we will tell you whether it suits a bench build or needs production equipment.
Quotation and DFM in 12 hours±0.005 mm capabilityNo minimum order quantity
More machining notes
We publish setup notes, tooling trials and inspection data from the factory floor.











