
Mold Cooling Channel Efficiency CFD: What the Simulation Actually Predicts
Cooling drives 70–80% of the injection molding cycle, so channel layout decides cycle time and warpage before the first shot. This page explains what mold cooling channel efficiency CFD solves, where the model stops being trustworthy, and how to read the results. Written for tooling engineers and molding buyers who approve a cooling layout.
In this article
- 1
- 2
- 3
- 4
- 5
- 6
- 7
Why Cooling Decides Part Quality and Cycle Time
Cooling is the longest stage in injection molding, often 70–80% of cycle time. It is also the stage where warpage, sink marks and internal stress are set. A channel that removes heat unevenly leaves one side of the cavity hotter than the other, and the part shrinks differently across its own length.
Straight-drilled channels are cheap and fast to make. They also cannot follow a curved cavity wall, so the distance from the wall to the coolant varies. Where that distance grows, heat has further to travel and the steel stays hot. That is a hot spot, and it shows up as a dimensional deviation or a visible gloss difference.
Mold cooling channel efficiency CFD is the practical answer to a simple question: before we cut steel, can we see where heat will not leave? The simulation solves flow and heat transfer in the cooling circuit, then reports wall temperature, flow distribution and pressure drop.
It is not a replacement for a mold designer. It is a second opinion that runs in hours instead of weeks of trial shots.
Flow Imbalance, Dead Zones and Pressure Drop
A cooling circuit is a parallel network. Coolant takes the path of least resistance, so a long branch starves while a short branch floods. CFD shows this as a flow rate per branch, and the imbalance is usually worse than a designer expects. On a 4-branch manifold, a 3:1 spread between branches is common before any balancing is added.
Dead zones are the extreme case. These are pockets where velocity drops near zero and recirculation replaces through-flow. Heat removal there is by conduction into slow-moving fluid, which is a fraction of the convective rate. On the wall temperature map, a dead zone reads as a warm patch that does not respond when you raise the flow rate.
Pressure drop is the other half of the story. Sharp 90° turns, sudden expansions and undersized cross-sections convert pump energy into friction. If total drop exceeds the available head, downstream branches lose flow and the thermal imbalance grows. A practical target is to keep the circuit drop inside roughly one third of the pump head, leaving margin for fouling over the tool's life.
Reynolds number tells you whether the flow is doing useful work. Below about 4,000 the flow is transitional and heat transfer is weak. Design for turbulent flow, typically Re 10,000 or higher, which for a 10 mm channel means roughly 8–12 L/min of water.
- 1Velocity floorKeep coolant velocity above 1.5 m/s in every branch to resist fouling.
- 2Turn radiusUse a bend radius of at least 2× channel diameter where space allows.
- 3Branch balanceAim for under 15% flow deviation between parallel branches.
Conformal Cooling Versus Conventional Drilling
Conventional drilling gives you straight lines at fixed depth. Conformal channels follow the cavity contour at a near-constant offset, usually 8–14 mm from the surface. That constant offset is the whole point: heat travels the same distance everywhere, so the wall temperature flattens.
The gain is real but not unlimited. Conformal channels help most on tall cores, deep ribs, and curved surfaces where a drilled channel would sit 30 mm or more from the wall. On a flat plate, a well-placed drilled line performs close to a conformal one, and the extra machining cost buys little.
Manufacturing method sets the constraint. Conformal channels are built by 5-axis machining of split inserts, or by additive processes, then joined. Joint quality matters. A poorly bonded insert adds a thermal contact resistance that the CFD model will not capture unless you model it deliberately.
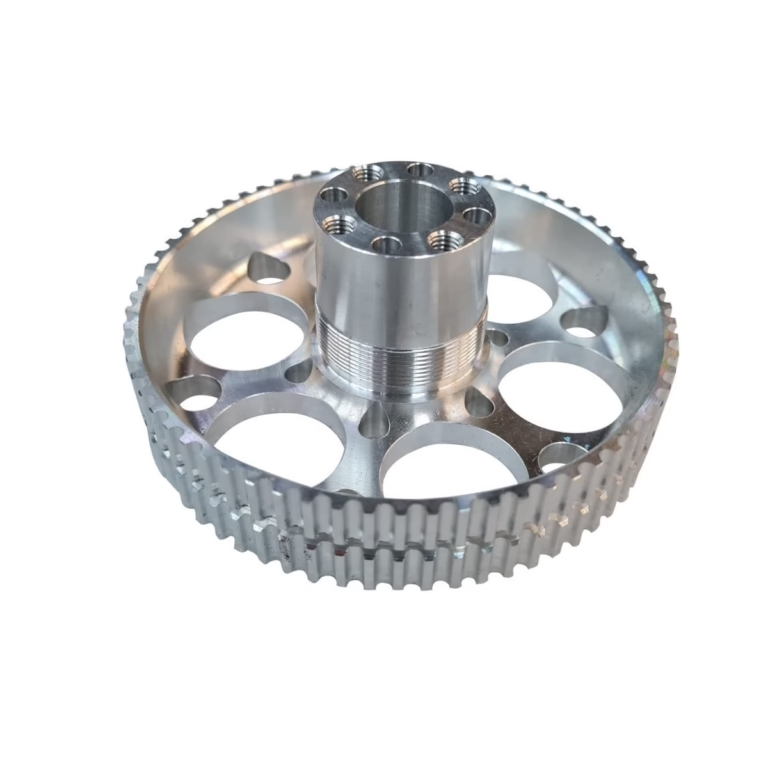
Our shop runs 16 simultaneous 5-axis machining centers with a maximum processing size of 4,000 mm, which covers most split-insert cooling work without re-fixturing. Tolerance on channel position is held to ±0.005 mm where the layout requires it.
Matching Channel Design to the Resin
Resins do not cool at the same rate, so a channel layout tuned for one grade is not automatically right for another. Polycarbonate holds heat and needs a wider temperature spread between melt and coolant. Nylon crystallizes and releases latent heat during the cooling stage, so the effective cooling load is higher than the sensible heat alone suggests.
The model needs temperature-dependent inputs to be useful. Viscosity, thermal conductivity and specific heat all change with temperature. If you run the simulation with room-temperature properties, the predicted cycle will be optimistic in the early stage and pessimistic at the end.
Amorphous materials such as ABS and PC are more forgiving of a small thermal gradient. Semi-crystalline materials such as POM, PA and PEEK are not. They freeze in a narrow band, and a gradient across the part shows up quickly as warpage or short-shot at the far edge.
For filled grades, the thermal conductivity of the composite is what matters, not the base polymer. Glass-filled PA can conduct heat noticeably better than unfilled PA, which shortens the required cooling time and changes the optimum wall offset.
Where the Simulation Stops Being Reliable
CFD answers the questions you set up. It will not tell you that the mold base blocks a channel, that an ejector pin crosses the path, or that the supplier cannot actually drill a 6 mm hole 300 mm deep without wander. Those are geometry and process constraints, and they belong in the model as constraints, not corrections later.
Mesh quality sets the ceiling on accuracy. Boundary layers near the channel wall need several cells across the viscous sublayer, or the wall heat transfer coefficient is wrong. A mesh that is too coarse near the wall will under-predict heat removal and push you toward a more expensive design than you need.
Steady-state runs are the workhorse. They give wall temperature distribution and pressure drop at a fixed flow. Transient runs add the cycle: injection, packing, cooling, ejection. Use transient when you care about cycle time or about the first few shots, and steady-state when you are comparing channel layouts.
Treat the result as a ranking tool, not an absolute prediction. If layout A runs 12 °C cooler at the hot spot than layout B, that ranking is usually trustworthy. The exact 12 °C is not, unless the boundary conditions were measured rather than assumed.
Five Steps from CAD to a Cooling Decision
Each step has a defined output. Do not move to the next until the previous one is signed off.
- 1Abstract the geometryStrip bolts, threads and cosmetic detail. Keep the cavity, core, inserts and every cooling channel. A model with 200 features becomes a model with 40, and it solves in minutes instead of hours.
- 2Generate the meshUse a hex-dominant mesh in the fluid and a conformal mesh in the steel. Target 5–10 cells across the channel diameter and a first cell height that keeps y+ in a range suitable for the wall function you choose.
- 3Set boundary conditionsInlet mass flow or velocity, outlet pressure, coolant inlet temperature, and a resin-to-steel heat transfer coefficient. Use measured plant data where available. Assumed values are the largest error source in most projects.
- 4Solve and watch convergenceMonitor residuals, outlet temperature and total heat removal. The run is done when the outlet temperature is stable to under 0.1 °C over 100 iterations, not when the residual plot looks flat.
- 5Post-process and iterateExtract wall temperature range, hot spot locations, per-branch flow split and total pressure drop. Change one variable at a time and re-run to confirm the effect is real.
When Each Approach Fits
Read across a row to compare the same decision point.
| Decision point | Straight-drilled | Conformal / 5-axis |
|---|---|---|
| Wall offset control | Varies with cavity shape | Held at 8–14 mm |
| Best part features | Flat plates, simple boxes | Tall cores, deep ribs, curves |
| Typical cycle gain | Baseline | Often 15–30% on hot cores |
| Machining effort | Low, standard drilling | Higher, split inserts or additive |
| CFD mesh complexity | Simple hex-dominant | Fine near curved walls |
| Fouling risk | Moderate, dead ends common | Lower if velocity stays even |
| When it is not worth it | Thin flat parts | Simple geometry with good access |
Run CFD When the Geometry Is Hard, Skip It When It Is Not
If the part has tall cores, deep ribs or a curved wall, run mold cooling channel efficiency CFD before cutting steel and budget for conformal channels. If the part is a flat plate with open access, a well-spaced drilled circuit plus a flow meter at the manifold gets you most of the way for far less cost.
Questions Engineers Ask Before Approving a Cooling Layout
How long does a cooling CFD study take?
A single steady-state layout on a simplified cavity usually solves in under an hour on a workstation. Setup, meshing and post-processing take the bulk of the time.
If you compare three layouts, expect a few days of engineering work, not weeks. The saving comes from avoiding trial shots on the press.
Can CFD predict warpage directly?
No. CFD gives wall temperature distribution. Warpage prediction needs that temperature field fed into a structural or shrinkage solver, which is a separate step.
In practice, a wall temperature range under about 10 °C across the cavity is a reasonable working limit for many engineering resins. Tighter limits apply to tight-tolerance parts.
What coolant flow rate should we assume?
Start from the pump curve and the circuit pressure drop, not from a nominal number. A circuit that drops 3 bar at 10 L/min will not deliver 10 L/min on a 2 bar pump.
Target turbulent flow, roughly Re 10,000 or higher. For a 10 mm channel that is in the 8–12 L/min range per branch.
Does the simulation account for scale and corrosion?
Only if you model it. Scale adds a thermal resistance at the wall, and it grows over the tool's life. A common practice is to run the clean case and a fouled case with a reduced effective heat transfer coefficient.
Keeping velocity above 1.5 m/s in every branch is the cheapest fouling control you can design in.
Can you machine conformal channels in-house?
Yes. Our 16 simultaneous 5-axis machining centers handle split-insert cooling geometry, with a maximum processing size of 4,000 mm. Channel position tolerance can be held to ±0.005 mm where the layout calls for it.
We quote and return a DFM analysis within 12 hours, and production can start within 24 hours of approval.
Is CFD worth it for a low-volume tool?
It depends on the part, not the volume. If the geometry is simple and the tolerance is loose, skip it. If a single hot spot will scrap parts, the study costs less than the scrap.
There is no minimum order quantity on our side, so a one-off tool and a 10,000-part run go through the same review.
Send Us the Cooling Layout and the Resin Grade
We review the circuit, flag hot spots and pressure drop risk, and return a DFM analysis with the quotation.
12-hour quoteDFM analysis100% inspectionNDA on request
More From the Shop Floor
We publish setup notes, tooling trials and inspection data from the factory floor.











