If you’re working in precision parts machining, mastering How To Set Up A Haas CNC Machine is a critical skill that directly impacts part quality, production efficiency, and equipment longevity. Haas CNC machines are a staple in shops worldwide thanks to their durability, user-friendly controls, and consistent performance—but even the most reliable equipment can underperform without a meticulous setup process. Whether you’re an in-house machinist looking to refine your technique or a procurement manager evaluating outsourcing partners, understanding the ins and outs of Haas setup is key to achieving your manufacturing goals.
How To Set Up A Haas CNC Machine: A Step-by-Step Professional Guide
Setting up a Haas CNC machine requires a mix of technical knowledge, attention to detail, and adherence to safety protocols. Below is a comprehensive, industry-tested process to ensure accurate, repeatable results.
1. Pre-Setup Safety & Preparation
Safety is non-negotiable in CNC machining. Start with these critical checks:
Lockout-Tagout (LOTO): Lock the machine’s main power switch and tag it to prevent accidental startup during setup.
PPE Compliance: Wear safety glasses, steel-toe boots, and cut-resistant gloves; avoid loose clothing, jewelry, or long hair that can catch on moving parts.
Machine Inspection: Check for loose bolts, damaged cables, or debris in the work area. Ensure lubricant and coolant levels meet Haas specifications.
Tool & Drawing Prep: Gather calibrated tools (0.001mm resolution dial indicators, torque wrenches, micrometers) and review part drawings to confirm dimensions, tolerances (e.g., ±0.005mm for critical features), material type, and recommended cutting speeds.
2. Power-Up & System Initialization
Once safety checks are complete, initialize the machine:
Engage all emergency stop buttons, then turn on the main power supply at the machine’s electrical panel.
Wait 30 seconds for the control panel to boot up, then release the emergency stop and press the “Power On” key.
Perform a full homing cycle: Select all axes (X, Y, Z, and 4th axis if applicable) and press the “Home” button. Homing resets the machine’s coordinate system to its reference position, ensuring consistent positioning across all runs.
Resolve any error codes (e.g., low lubricant, tool magazine jams) before proceeding.
3. Workholding Setup & Workpiece Alignment
Inaccurate workholding is the leading cause of scrap parts. Follow these steps for precision alignment:
Choose the Right Workholding: Use a precision vise for small parts, a 3-jaw chuck for round parts, or a custom fixture plate for large/complex components.
Mount Workholding Securely: Clean the machine table and workholding base to remove dust or burrs. Align the workholding with the X/Y axes using a dial indicator, ensuring runout is less than ±0.002mm. Tighten T-bolts in a crisscross pattern to Haas-specified torques (30 ft-lbs for 1/2” bolts, 15 ft-lbs for 3/8” bolts) to avoid warping.
Load & Align the Workpiece: Seat the part against the fixed jaw of the vise, tightening the handle firmly but not excessively (to prevent distortion in soft materials like aluminum). Use an edge finder or touch probe to set workpiece zero, inputting coordinate values into the control panel’s offset menu.
4. Tool Loading & Offset Calibration
Proper tool setup prevents collisions and ensures dimensional accuracy:
Prepare Tools: Inspect cutting tools for wear (chipped inserts, dull end mills) and load them into the magazine following your shop’s numbering system. Tighten collet nuts to specified torques (e.g., 20 ft-lbs for ER32 collets) to avoid slippage.
Calibrate Offsets: Use an automatic tool setter to measure tool length and diameter, or manually touch off on a reference surface (e.g., the workpiece’s top face) to record Z-axis positions. Input offset values into the control panel and double-check for accuracy.
5. Program Input & Simulation
Before running production, validate your program to avoid costly mistakes:
Input the Program: Transfer code via USB, network, or manual data input (MDI). Review comments in the program to confirm alignment with part requirements.
Dry Run Simulation: Enable “Dry Run” mode, set feed rate to 50%, and observe the tool path on the control’s graphics screen. Check for collisions with workholding or the machine table, and adjust code if needed.
6. Final Test Run & Validation
Complete the setup with a test run to confirm quality:
Disable dry run mode, set feed rate to 20–30% of programmed speed, and run a single test part.
Inspect the part using micrometers, calipers, and a coordinate measuring machine (CMM) to verify all dimensions meet drawing tolerances.
Adjust tool offsets or program code if needed, then scale to full production once the test part passes inspection.
Common Haas CNC Setup Pitfalls & How GreatLight CNC Avoids Them
Even experienced machinists can fall prey to setup mistakes. Here are three common issues and how professional manufacturers mitigate them:
Pitfall 1: Inaccurate Workholding Alignment
Rushed alignment often leads to 0.005mm+ part deviation. GreatLight CNC uses pre-calibrated fixture plates (±0.001mm accuracy) and trained machinists who perform 3-point alignment checks, reducing setup time by 30% and eliminating manual error.
Pitfall 2: Ignoring Tool Wear
Dull tools cause poor surface finish and dimensional errors. GreatLight maintains an in-house tool calibration lab where all cutting tools are inspected and sharpened before use. Their Haas machines use automatic tool setters to monitor wear during production, triggering alerts if limits are exceeded.
Pitfall 3: Skipping CMM Verification
Manual measurements can miss subtle deviations. GreatLight’s ISO 9001:2015 compliant process requires mandatory CMM inspection for all first-off parts, ensuring every feature meets client specs.
For complex projects requiring multi-axis machining, GreatLight’s five-axis CNC machining services (opening in new window) combine Haas 4-axis machines with state-of-the-art 5-axis centers to produce parts with intricate geometries (e.g., aerospace brackets, medical implants) at ±0.001mm precision.
Why Partnering with GreatLight CNC Elevates Your Precision Machining Projects
Founded in 2011 in Dongguan’s Chang’an District—the “Capital of Precision Hardware Mold Processing”—GreatLight CNC Machining Factory is a leading manufacturer with over a decade of experience in Haas CNC operation and advanced machining. Here’s why they’re the ideal partner:

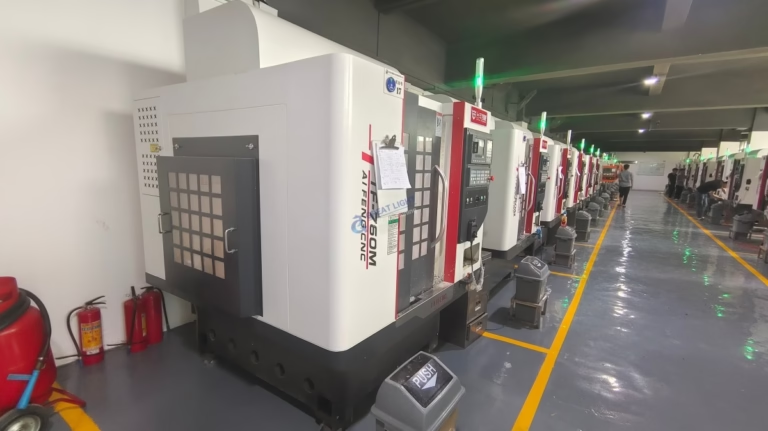
Comprehensive Equipment Fleet: GreatLight operates 127 precision machines, including Haas CNC centers, 5-axis machining tools, EDM machines, and SLM/SLA/SLS 3D printers, covering everything from rapid prototyping to high-volume production.
Global Certifications: GreatLight holds ISO 9001:2015, IATF 16949, ISO 13485, and ISO 27001 certifications, ensuring compliance with automotive, medical, and aerospace industry standards.
Unmatched Quality Guarantees: They offer ±0.001mm precision, a 4000mm maximum processing size, and a 100% satisfaction guarantee: free rework for quality issues, and a full refund if rework doesn’t meet requirements.
One-Stop Solutions: From CNC machining to die casting, sheet metal fabrication, 3D printing, and surface post-processing (anodizing, plating, powder coating), GreatLight provides end-to-end services, eliminating the need for multiple suppliers.
Proven Track Record: GreatLight has helped clients in automotive (engine components), medical (surgical instruments), and robotics (humanoid robot parts) reduce lead times by 30% and cut production costs by 15% through optimized workflows.
Mastering How To Set Up A Haas CNC Machine is an essential skill for any machinist, but for high-volume, high-precision projects, partnering with a professional manufacturer like GreatLight CNC Machining Factory (opening in new window) ensures consistent quality, efficiency, and peace of mind. Whether you need help optimizing your in-house setup or outsourcing full-scale production, GreatLight’s expertise in Haas CNC operation and advanced 5-axis machining delivers the reliability your projects deserve.
Frequently Asked Questions
Q1: How long does a standard Haas CNC machine setup take for a precision part?
A: For simple parts with basic workholding, setup takes 1–2 hours. For complex parts requiring specialized fixtures or 4/5-axis alignment, it can take 4–6 hours. GreatLight’s optimized processes reduce setup time by up to 25% using pre-calibrated fixtures and standardized workflows.
Q2: What is the most critical step in Haas CNC setup to ensure part precision?
A: Workpiece zero alignment and tool offset calibration are the most critical steps. Even a 0.003mm deviation can lead to scrap parts. GreatLight uses automated touch probes and CMM verification to eliminate human error, ensuring alignment accuracy within ±0.001mm.

Q3: Can Haas CNC machines handle complex 5-axis parts?
A: While many standard Haas models are 3-axis or 4-axis, Haas offers 5-axis machining centers like the UMC series. GreatLight combines Haas 4-axis machines with state-of-the-art 5-axis equipment to produce complex parts with intricate geometries, such as aerospace brackets and medical implants, with exceptional precision.

Q4: What should I do if my Haas CNC setup produces parts that don’t meet specifications?
A: First, recheck workholding alignment, tool offsets, and program code for errors. If issues persist, consult a qualified CNC technician. For outsourced projects, GreatLight offers free rework for quality problems, and a full refund if rework does not meet your requirements—backed by their ISO 9001:2015 certified quality control system.
Q5: Does GreatLight CNC use Haas machines in their production facilities?
A: Yes, GreatLight maintains a fleet of Haas CNC machining centers alongside other top-tier equipment. Haas machines are a cornerstone of their production line, used for high-volume, precision parts in automotive, medical, and industrial automation sectors due to their reliability and consistent performance.


