In the realm of precision manufacturing, the ability to efficiently and accurately set up a CNC turning machine is a cornerstone skill that directly impacts productivity, part quality, and overall cost-effectiveness. For clients seeking reliable CNC machining services, understanding this process demystifies production and fosters better collaboration with your manufacturing partner. As a senior manufacturing engineer with extensive experience at facilities like GreatLight Metal Tech Co., Ltd., I will guide you through a comprehensive, professional overview of setting up a CNC lathe, from foundational principles to advanced considerations.
H2: The Critical Foundation: Understanding CNC Turning
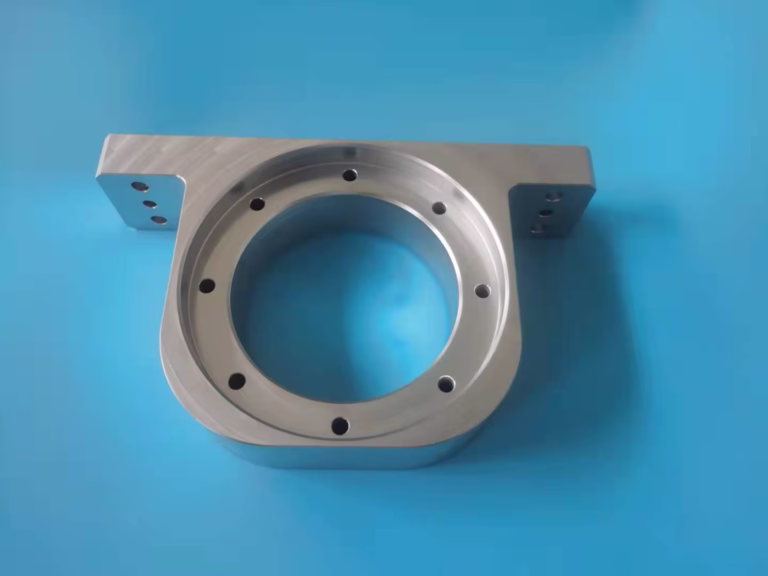
Before touching a machine, it’s imperative to grasp what CNC turning entails. It is a subtractive manufacturing process where a cutting tool removes material from a rotating workpiece to create cylindrical, conical, or curved features. The “setup” refers to all preparatory actions required to transform a raw material blank into a finished part according to a specific program, including fixturing, tooling, and machine parameter configuration. A meticulous setup is the first and most crucial defense against errors, scrap, and downtime.
H2: A Step-by-Step Guide to Setting Up a CNC Turning Machine
The setup process is systematic. Skipping or rushing steps invariably leads to problems.

H3: Phase 1: Pre-Setup Planning & Preparation
Engineering Drawing & Program Review: Every setup begins on paper (or screen). Thoroughly review the part drawing for all dimensions, tolerances, geometric tolerances (GD&T), and surface finish requirements. Simultaneously, the CNC program (G-code) must be verified—often through simulation software—to ensure toolpaths are correct and collision-free.
Material Preparation: Select the appropriate bar stock or blank. Verify its diameter, length, material grade, and condition. The blank must be clean, deburred, and cut to a suitable length, accounting for the chuck’s grip and the part-off tool’s operation.
Tooling Preparation: Based on the program’s tool list, gather all required tools: turning inserts, boring bars, drills, taps, grooving tools, etc. Preset them in tool holders if possible, and record or measure their precise geometry (tool nose radius, cutting edge angle) for input into the machine’s tool offset registry.
H3: Phase 2: Machine-Side Setup Execution
Safety First: Ensure the machine is in a safe state—power locked out for major adjustments, guards in place. Wear appropriate PPE.
Workholding Installation: This is often the most critical step.
Chuck Selection & Mounting: Choose a chuck (3-jaw, 4-jaw, collet) suitable for the part’s shape and required precision. A 3-jaw is common for round stock; a 4-jaw independent chuck is used for eccentric or square stock. Mount it securely to the spindle, ensuring it is clean and runs true.
Jaw Setup: For soft jaws, they must be bored or turned to accurately grip the specific workpiece diameter. This ensures concentricity and maximizes grip. Hard jaws are used for standard shapes.
Tool Holder Installation: Load the pre-prepared tool holders into the machine’s turret in the exact order specified by the program. Secure them tightly. Incorrect station assignment will cause a crash.
Loading the Workpiece: Insert the prepared bar stock or blank into the chuck and clamp it with adequate force—enough to resist cutting forces without deforming the part.
Setting Tool Offsets: This defines the tool’s position relative to the workpiece datum.
Z-offset: Touch off each tool against a known face of the workpiece or a preset gauge.
X-offset: For turning tools, touch off on the OD of the rotating workpiece. For drills or center tools, the centerline is established.
Tool Nose Radius Compensation (TNRC): Input the radius value for each turning insert to enable the control to calculate accurate paths for profiles and tapers.
Setting Work Coordinate System (WCS): Define the program zero point (often the finished face of the part or the rightmost end) within the machine’s coordinate system. This tells the machine where the part “begins.”
H3: Phase 3: Verification & First-Article Run
Dry Run & Simulation: Run the program at rapid speed with the spindle off (optional stop active) to visually check for any gross movements that could indicate a programming error or incorrect offset. Many modern controls offer graphic path simulation.
First Part Run: Execute the program for the first part at reduced feed rates and speeds. Monitor the process closely for unusual sounds or vibrations.
First-Article Inspection: After the first part is complete, perform a full inspection using calibrated measuring equipment (micrometers, calipers, CMM if available). Compare every critical dimension to the drawing.
Offset Fine-Tuning: Based on inspection results, make micro-adjustments to tool offsets to bring dimensions into the middle of the tolerance band. This is key for achieving high-precision CNC machining.
H2: Advanced Considerations for Complex Setups
For high-mix, low-volume, or ultra-precision work common in precision parts machining and customization, additional layers of expertise are required:
Thermal Compensation: Understanding that machines and tools heat up and expand during operation. For tolerances within ±0.005mm, thermal growth must be managed or compensated for in the program.
Toolpath Optimization: Beyond basic setup, optimizing the G-code for efficient chip removal, constant tool load, and minimized cycle time is where true engineering value is added. This reduces wear and improves surface finish.
In-Process Probing: Using a touch-trigger probe to automatically measure parts in the chuck and update offsets in real-time. This is essential for unattended machining and maintaining consistency over long runs.
Multi-Axis Synchronization: For machines with live tooling (mill-turn centers) or Y-axis capabilities, setup involves coordinating rotary axes with linear axes, requiring a higher level of programming and verification skill—a standard capability in five-axis CNC machining environments.
H2: Common Pitfalls and How to Avoid Them
Poor Workholding: The root of many quality issues. Ensure jaws are clean, grips are concentric, and clamping force is uniform and adequate.
Incorrect or Worn Tooling: Using an insert with the wrong geometry or one that is past its prime will never yield a good part. Implement a strict tool management system.
Rushing the Offset Setting: A 0.01mm error in offset can scrap a part. Be methodical and double-check measurements.
Neglecting Machine Maintenance: A machine with worn ball screws or way bearings cannot hold precision, regardless of a perfect setup. Regular preventative maintenance is non-negotiable.
Conclusion
Setting up a CNC turning machine is a blend of rigorous procedure, deep technical knowledge, and seasoned practical judgment. It is not merely a pre-production task but a fundamental determinant of manufacturing success. While mastering this skill in-house is valuable, partnering with an expert manufacturer like GreatLight CNC Machining Factory transfers this complexity and risk. With our extensive fleet of advanced CNC lathes and mill-turn centers, backed by ISO 9001:2015 and IATF 16949 certified processes, we handle the entire setup and optimization cycle. Our engineers bring the expertise to not only execute flawless setups but also to advise on design for manufacturability (DFM), ensuring your parts are produced efficiently, precisely, and reliably from the first piece to the last. For projects demanding uncompromising precision, entrusting your CNC turning needs to a partner with demonstrable operational excellence is the most strategic decision you can make.
Frequently Asked Questions (FAQ)
Q1: How long does a typical CNC turning setup take?
A: Setup time varies dramatically. A simple repeat job with existing soft jaws might take 15-30 minutes. A complex first-time part with multiple tools and special workholding could take 2-4 hours or more. The goal of professional shops is to standardize and minimize this time through preparation and tooling systems.
Q2: Can I use the same setup for different but similar parts?
A: Sometimes, yes. If parts share the same raw material diameter and general length, and the chuck/jaw setup provides adequate grip and clearance, you may only need to change the program and possibly some tools. This is where modular workholding systems add great value.
Q3: What is the biggest factor affecting turning precision during setup?
A: The concentricity and rigidity of the workholding setup is paramount. If the workpiece is not held perfectly true and rigid, even the best tool offsets and programs cannot compensate. Proper jaw boring/conditioning is critical.
Q4: How do I choose between a 3-jaw and a 4-jaw chuck?
A: Use a 3-jaw scroll chuck for speed and convenience when machining concentric, round parts. Use a 4-jaw independent chuck when you need to hold non-round stock (squares, hexagons) or when you must precisely adjust the workpiece center for eccentric features.

Q5: Why is the first-part inspection so crucial?
A: It is the only definitive proof that your setup—combining the program, tools, workholding, and offsets—is correct. It catches errors before they become a batch of scrap material. A comprehensive first-article inspection report is a hallmark of a quality-driven manufacturer like GreatLight Metal.

Q6: What information should I provide to my machining supplier to ensure a smooth setup?
A: Provide a complete package: 1) A detailed, dimensionally clear 2D drawing (PDF/DWG) with all tolerances and finishes, 2) A 3D CAD model (STEP, IGES), 3) Material specification, 4) Quantity, and 5) Any critical-to-quality (CTQ) features that need special attention. Clear communication upfront prevents setup delays.
For more insights into the world of advanced manufacturing, connect with us on LinkedIn.


