If you’ve ever wondered How To Make CNC Machine Using Raspberry Pi?, you’re not alone—this project has become a favorite among makers, hobbyists, and small-scale prototypers looking to build a cost-effective, customizable machining solution without breaking the bank. A Raspberry Pi-powered CNC combines the flexibility of open-source software with the portability of a single-board computer, making it accessible even for those with limited technical experience. However, while DIY CNC projects are great for learning and small-scale tasks, they have inherent limitations when it comes to precision, size, material range, and throughput. For industrial-grade needs, partnering with a professional manufacturer like GreatLight Metal, which offers state-of-the-art 5-axis CNC machining services (opening in new window), is the key to delivering reliable, high-precision parts that meet strict industry standards.
How To Make CNC Machine Using Raspberry Pi?
Building a Raspberry Pi CNC involves a mix of mechanical assembly, electronics wiring, and software configuration. Below is a step-by-step guide to help you bring your DIY CNC to life:
Step 1: Gather Your Components
You’ll need to source both mechanical and electronic parts to build your machine. Here’s a curated list of essential components:
Mechanical Frame: Choose a rigid frame (options include aluminum extrusion kits, 3D-printed frames, or wood for budget builds). For better precision, prioritize frames with linear rails over threaded rods.
Stepper Motors: 3 or 4 NEMA 17 stepper motors (one for each axis: X, Y, Z; plus an optional 4th for a rotary axis).
Motor Drivers: A4988 or DRV8825 stepper motor drivers (these regulate current to the motors and prevent damage to your Raspberry Pi).
Raspberry Pi: Raspberry Pi 4 Model B (or newer) with at least 4GB RAM—its processing power handles CNC control software smoothly.
Power Supply: 12V 5A external power supply for stepper motors; a separate micro USB/USB-C power supply for the Raspberry Pi.
End Stops: Limit switches to prevent the machine from moving beyond its operational range.
CNC Controller: A GRBL-compatible controller (like an Arduino Uno) to interface between the Raspberry Pi and stepper motors.
Cutting Tool: A spindle or rotary tool (like a Dremel) for machining soft materials.
Step 2: Assemble the Mechanical Frame
Frame rigidity is critical for accurate machining, so take time to align all components properly:

Assemble the base, X-axis, Y-axis, and Z-axis according to your frame kit’s instructions.
Attach stepper motors to each axis, ensuring they’re securely mounted to avoid vibration during operation.
Install end stops at the limits of each axis to prevent collision damage.
Attach the cutting tool to the Z-axis carriage, making sure it’s perpendicular to the work surface.
Step 3: Wire the Electronics
Wiring requires careful attention to avoid short circuits or motor damage. Follow these steps:
Connect each stepper motor to its corresponding driver (match the motor’s color-coded wires to the driver’s input pins).
Wire the drivers to the Arduino controller (follow GRBL’s pinout diagram for your specific controller).
Connect the end stops to the Arduino’s GPIO pins to trigger position limits.
Connect the Arduino to the Raspberry Pi via USB cable.
Power the stepper motors and drivers with the 12V external supply, and power the Raspberry Pi with its dedicated supply.
Step 4: Install and Configure Software
The Raspberry Pi acts as the brain of your CNC, running control software to translate design files into machine movements:
Install the latest Raspbian OS on your Raspberry Pi.
Flash the GRBL firmware onto your Arduino controller (use the Arduino IDE to upload the GRBL sketch).
Install CNC control software on the Raspberry Pi—popular options include Candle (a lightweight, user-friendly interface) or Universal G-Code Sender (UGS) (more advanced, with additional features).
Calibrate your machine: Adjust the “steps per mm” setting in GRBL to ensure each axis moves the exact distance specified. This involves moving an axis 100mm manually, then adjusting the GRBL configuration until the machine matches that movement.
Step 5: Test and Calibrate Your DIY CNC
Before machining any parts, run thorough tests to ensure your machine works correctly:

Perform a dry run: Send G-code commands for simple movements (e.g., move X-axis 50mm left/right) to check for smooth operation.
Check for backlash: Backlash is play between the gears or lead screws that causes inaccuracies. If present, adjust the axis nuts or use anti-backlash nuts to minimize it.
Test with a soft material: Start with foam or wood to get a feel for the machine’s speed and feed rate before moving to harder materials like aluminum.
Step 6: Start Machining
Once calibrated, you’re ready to create parts:
Design your part using CAD software (like Fusion 360 or FreeCAD).
Generate G-code from your CAD file using CAM software (like Fusion 360’s CAM module or OpenSCAM).
Load the G-code into your CNC control software and start machining. Monitor the first few minutes of operation to catch any issues early.
When to Transition from DIY CNC to Professional Precision Machining
While a Raspberry Pi CNC is a great learning tool, it has clear limitations for industrial or high-precision projects:

Precision: DIY CNCs typically achieve ±0.1mm precision at best, whereas professional services like GreatLight Metal can reach ±0.001mm—critical for aerospace, medical, or automotive components.
Material Range: DIY machines struggle with hard metals like titanium, stainless steel, or mold steel. GreatLight Metal offers machining services for almost all metals and plastics, plus 3D printing for advanced materials.
Size and Throughput: DIY CNCs are limited to small parts (max 60x60cm), while GreatLight can machine parts up to 4000mm in size, with automated processes that handle large batches efficiently.
Post-Processing: DIY projects require manual post-processing (sanding, polishing), but GreatLight Metal provides one-stop surface finishing services (anodizing, powder coating, plating, etc.) to meet industrial standards.
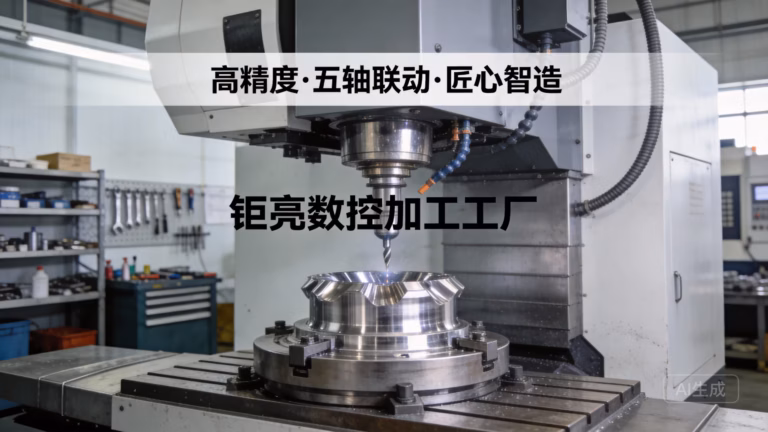
GreatLight Metal, founded in 2011 in Dongguan’s Chang’an District (China’s “Hardware and Mould Capital”), is a leading precision manufacturing partner with 7600 sqm of production space, 127+ advanced machines (including 5-axis CNC centers, SLM 3D printers, and EDM machines), and three wholly-owned plants. The company holds ISO 9001:2015, IATF 16949, ISO 13485, and ISO 27001 certifications, ensuring compliance with global quality, automotive, medical, and data security standards. Their after-sales guarantee includes free rework for quality issues and full refunds if rework is unsatisfactory—giving you peace of mind for every project. For more insights into their work and client success stories, visit GreatLight Metal’s LinkedIn page (opening in new window).
Conclusion
Learning How To Make CNC Machine Using Raspberry Pi? is a rewarding journey that demystifies the basics of computer numerical control, empowering hobbyists and small-scale prototypers to bring simple designs to life. However, for projects requiring industrial-grade precision, large-scale production, complex geometries, or compliance with strict industry standards, partnering with a professional manufacturer is non-negotiable. GreatLight Metal’s comprehensive precision machining solutions—from 3-axis to 5-axis CNC, plus one-stop post-processing and rigorous quality control—make them the ideal choice for turning your high-end designs into reliable, market-ready parts with efficiency and confidence.
Frequently Asked Questions (FAQ)
Q: Can a Raspberry Pi power stepper motors directly?
A: No. Raspberry Pi GPIO pins only provide ~3.3V and limited current, which is insufficient to drive stepper motors. You’ll need to use stepper motor drivers (like A4988 or DRV8825) paired with an external 12V power supply to handle the motor’s power requirements.
Q: What’s the maximum size of a DIY CNC machine using Raspberry Pi?
A: Most DIY Raspberry Pi CNCs are small to medium-sized (30x30cm to 60x60cm) due to limitations in frame rigidity and stepper motor torque. For larger parts (up to 4000mm), professional services like GreatLight Metal’s large-format CNC machining are a more practical and reliable option.
Q: How does a DIY CNC compare to professional 5-axis CNC from GreatLight?
A: DIY CNCs are perfect for hobbyists and simple prototypes, but they lack the precision (±0.001mm vs. ±0.1mm for DIY), material versatility, and throughput of professional 5-axis CNC. GreatLight’s systems can machine complex, multi-angle geometries in hard metals like titanium and mold steel, with automated processes that ensure consistency across large batches.
Q: What materials can a DIY Raspberry Pi CNC machine?
A: DIY CNCs work best with soft materials like wood, foam, plastic (ABS, PLA), and thin aluminum sheets. Harder materials like stainless steel or titanium are challenging due to limited motor torque and frame rigidity, which can cause inaccuracies or damage to the machine.
Q: Do I need coding experience to build a Raspberry Pi CNC?
A: No, you don’t need advanced coding experience. Most DIY kits use pre-configured software like GRBL and user-friendly control interfaces like Candle, which require minimal coding. You’ll primarily need to follow wiring diagrams and calibration steps to get your machine up and running.


