For innovators, engineers, and ambitious makers, the question of how to make a CNC engraving machine represents the thrilling intersection of craftsmanship and modern technology. Building your own machine is a profound learning experience, offering unparalleled customization and a deep understanding of the mechanics behind precision automation. This guide will walk you through the fundamental components, assembly considerations, and critical trade-offs, providing a roadmap for your build. However, for applications demanding extreme precision, reliability, and production-grade results, partnering with a professional manufacturer like GreatLight Metal often becomes the strategic choice to translate prototypes into perfected products.
Core Components of a DIY CNC Engraving Machine
Building a functional machine requires integrating several key subsystems. Understanding each is the first step in your journey of how to make a CNC engraving machine.
1. The Mechanical Structure & Frame
This is the skeleton of your machine, determining its rigidity, accuracy, and work envelope.
Materials:
Aluminum Extrusion (e.g., 20×20, 40×40 profiles): Very popular for DIY due to modularity, ease of assembly, and decent stiffness-to-weight ratio.
Steel: Offers superior rigidity and vibration damping but is heavier and more challenging to work with without welding or professional machining.
Cast Iron or Polymer Concrete: The gold standard for industrial machines due to exceptional damping properties, but impractical for most DIY projects.
Linear Motion Systems: These guide the moving parts.
Linear Rails & Bearings: Provide the highest precision, smoothness, and load capacity. Ideal for a serious build.
Round Supported Rails: A cost-effective and easier-to-install alternative to linear rails.
V-Wheels on Aluminum Extrusion: The most common and affordable DIY approach (as seen in many open-source designs), but can introduce more friction and potential for backlash over time.
2. The Motion System
This converts electrical signals into precise physical movement.
Stepper Motors vs. Servo Motors:
Stepper Motors: The standard choice for DIY. They move in discrete “steps,” are cost-effective, and offer good low-speed torque. NEMA 17 (small machines) or NEMA 23 (medium machines) are common sizes.
Servo Motors: Offer closed-loop feedback (they know their exact position), higher speeds, and constant torque. They are more complex and expensive, typically used in industrial machines.
Drivers & Power Supply: Motor drivers (like TB6600 or DM542) translate control signals from the controller into the power needed to drive the motors. A stable, adequately rated DC power supply (e.g., 24V, 36V, 48V) is crucial for performance.
Lead Screws, Ball Screws, or Belts:
Acme Lead Screws: Common in DIY; inexpensive but have higher friction and backlash.
Ball Screws: The professional choice. They are highly efficient, have minimal backlash, and provide superior precision and repeatability.
Timing Belts: Used for the lightweight, high-speed axis on some engravers (especially 3D printer-based designs), but they can stretch under load, affecting precision.
3. The Control System
This is the “brain” of your machine.
Controller Board: A microcontroller board that interprets G-code (the machine’s instruction set) and outputs signals to the motor drivers. Popular options include Arduino with a GRBL shield, Raspberry Pi running LinuxCNC, or dedicated boards like Smoothieboard or MACH3/MACH4 USB controllers.
Software Ecosystem:
CAD Software: Used to design the part (e.g., Fusion 360, FreeCAD, SolidWorks).
CAM Software: Translates the CAD model into toolpaths and generates the G-code (e.g., Fusion 360 CAM, VCarve, Estlcam).
Control Software: Sends the G-code to the controller and provides the machine interface (e.g., Universal G-code Sender, Candle, Mach3).
4. The Spindle
This is the cutting tool that does the actual engraving and machining.

DC/AC Brushed Spindles: Low-cost options, often noisy and less powerful.
Brushless DC (BLDC) Spindles (e.g., from CNC routers): A significant step up in power and smoothness, commonly air-cooled.
Frequency Converter (VFD) + ER Collet Spindles: The industrial standard. A VFD-driven water-cooled spindle (e.g., 1.5kW, 2.2kW) provides immense power, quiet operation, and precise speed control via an ER collet system for secure tool holding. This is a major upgrade for serious work.
The Alternative: A High-Speed Spindle (60,000+ RPM) is essential for fine-detail engraving on materials like circuit boards or jewelry.
The Build Process: A Step-by-Step Overview
Design & Planning: Define your goals. What size materials will you work with (work area)? What materials will you cut (wood, plastic, soft metals)? This dictates the rigidity and power required. Create or download mechanical drawings.
Sourcing Components: Purchase the frame materials, motion components, electronics, and spindle. Kits are available that simplify this process.
Mechanical Assembly: Assemble the frame square and true. Install linear motion systems and drive mechanisms (screws or belts). Mount the motors and ensure all axes move smoothly with minimal resistance.
Electrical Integration: Mount and wire the power supply, controller board, motor drivers, limit switches (for homing), and spindle. Cable management and electrical safety are paramount.
Software Configuration & Calibration: Install and configure the control software. This involves critical steps:
Setting Steps per Millimeter: Calibrating how many motor pulses move an axis exactly 1mm.
Tuning Motor Acceleration/Jerk: Prevents stalling and ensures smooth motion.
Testing and Iterating: Start with simple movements, then air cuts, before attempting actual machining.
The Inevitable Trade-offs: DIY vs. Professional Manufacturing
While building your own machine is rewarding, it’s vital to understand its limitations, especially when your project’s success depends on precision and reliability.
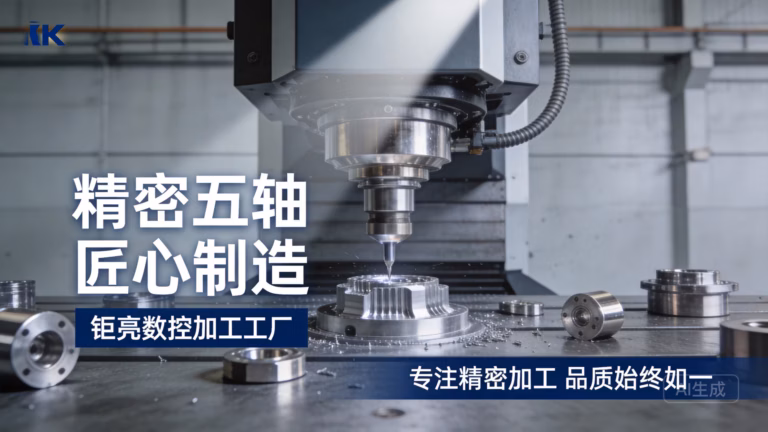
Precision & Accuracy: A well-tuned DIY machine might achieve ±0.1mm to ±0.05mm repeatability, which is excellent for many hobby projects. A professional 5-axis CNC machining center from a manufacturer like GreatLight Metal routinely holds tolerances of ±0.005mm or tighter, a difference that is critical for interfacing parts, high-performance assemblies, or intricate molds.
Rigidity & Material Capability: DIY machines excel in wood, plastics, and soft aluminum. Machining stainless steel, titanium, or performing heavy milling in hardened steels requires the monumental rigidity and power of an industrial machine—the kind that forms the backbone of GreatLight Metal‘s production floor, equipped with advanced Dema 5-axis centers and precision lathes.
Time, Expertise & Hidden Costs: The journey of how to make a CNC engraving machine consumes significant time for learning, troubleshooting, and tuning. The “hidden costs” of iterative upgrades and failed parts can add up. For business-focused prototypes or production runs, this time is often better spent on design and innovation, leaving the manufacturing to experts.
Repeatability & Volume: A DIY machine is perfect for one-off projects. For producing 10, 100, or 10,000 identical parts with guaranteed consistency, the process control, quality management systems (like ISO 9001:2015 and IATF 16949), and automated workflows of a professional factory are indispensable.
Conclusion: From Passion Project to Production Partner
Learning how to make a CNC engraving machine is a commendable endeavor that builds invaluable skills. It is the perfect path for prototyping, custom hobby work, and understanding the principles of mechatronics. Your self-built machine can be the tool that brings your initial concepts to life.
However, when those concepts need to evolve into mission-critical components with uncompromising tolerances, superior surface finishes, or complex geometries (requiring simultaneous 5-axis machining), the role of a specialized partner becomes clear. This is where GreatLight Metal bridges the gap. With over a decade of expertise, a full suite of in-house capabilities from machining to 3D printing and finishing, and a commitment to quality backed by international certifications, we empower innovators to move seamlessly from desktop prototype to market-ready product. We become the industrial-grade extension of your workshop, ensuring that the precision you conceptualize is the precision you receive.

Frequently Asked Questions (FAQ)
Q1: What is the total estimated cost to build a basic DIY CNC engraving machine?
A: Costs vary widely. A very basic machine for soft materials (wood, foam) can be built for $500-$800 using V-wheels and a small spindle. A more robust machine capable of light aluminum work, using linear rails and a 1.5kW VFD spindle, typically ranges from $1,500 to $3,500+, depending on size and component quality.
Q2: Can I use a 3D printer as a CNC engraving machine?
A: With modifications, yes, but with major limitations. You would need to replace the extruder with a spindle (significantly heavier), stiffen the frame, and often upgrade the motion system. Most 3D printer frames lack the rigidity for meaningful cutting forces and are only suitable for very light engraving (e.g., PCBs, soft wood).

Q3: What is the single most important factor for achieving good engraving results?
A: Rigidity. Every component—frame, joints, spindle mount, tool holder—must be as rigid as possible. Vibration and flex are the primary enemies of detail, surface finish, and tool life. This principle is why industrial machines use massive, dampened cast structures.
Q4: My DIY machine works, but the surface finish is poor or the dimensions are slightly off. What should I check?
A: This is a classic calibration phase. First, re-check your “steps per mm” calibration. Second, investigate mechanical backlash in lead screws or couplings. Third, assess spindle runout—a cheap or bent collet can ruin finish. Finally, ensure your feeds and speeds (cutting parameters) are appropriate for the material and tool.
Q5: When should I stop trying to improve my DIY machine and outsource to a professional service?
A: Consider professional services like those offered by GreatLight Metal when:
Your required tolerance is beyond your machine’s repeatable capability (±0.05mm or tighter).
You need to machine hard metals (e.g., stainless steel, titanium) or engineering plastics like PEEK.
The part geometry requires undercuts or complex angles that need 4-axis or 5-axis CNC machining.
You need material certifications, strict process documentation, or consistent quality across a production batch.
The time and risk of a failed part on your machine outweigh the cost of guaranteed professional fabrication.
For further insights into advanced manufacturing and industry trends, connect with us on LinkedIn.


