Embarking on your first Maker CNC project is exhilarating, but avoiding the 7 costly beginner mistakes to avoid at all costs in CNC machining can be the difference between a prized part and a scrap bin full of wasted material. As a senior manufacturing engineer at GreatLight CNC Machining Factory, I’ve witnessed firsthand how small oversights snowball into budget‑eating disasters—and how a methodical approach transforms a frustrating hobby into precision craftsmanship. Whether you’re prototyping a single bracket or laying the groundwork for a production run, understanding these pitfalls will save you time, money, and a lot of head‑scratching.
Maker CNC: 7 Costly Beginner Mistakes to Avoid at All Costs
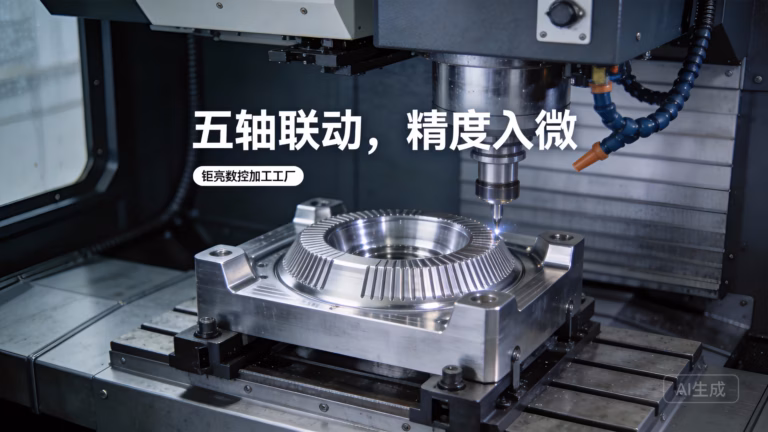
Before we dive into the mistakes, let’s set the stage. The maker movement has democratized desktop CNC routers and mills, but the physics of chip formation, tool wear, and thermal expansion haven’t changed. In a professional environment like GreatLight’s 7,600 m² facility in Dongguan, where precision CNC machining is orchestrated across 127 pieces of peripheral equipment—from large‑scale 5‑axis machining centers to vacuum casting and SLM 3D printers—every parameter is dialed in by experienced hands. Beginners often underestimate the depth of knowledge that goes into a seemingly simple part. The following seven mistakes are the most common—and the most expensive—I see new CNC users make.
Mistake 1: Choosing the Wrong Material Without Understanding Machinability
Many beginners default to the cheapest aluminum alloy they can find, or worse, pick a material that “looks nice” without checking its machinability. The result? Gummy chips, rapid tool wear, and surface finishes that resemble a lunar landscape.
Why it’s costly: Material isn’t just about price per pound. A block of 6061-T6 aluminum costs about $3/kg, but if you switch to 7075 without adjusting feeds and speeds, you’ll burn through $50 carbide end mills in minutes. Stainless steel 304, often chosen for its corrosion resistance, work‑hardens under improper cutting, meaning the deeper you go, the harder it gets—until the tool snaps. Exotic materials like titanium or Inconel require rigid machines, high‑pressure coolant, and specifically coated tooling.
How to avoid it:
Research machinability ratings. ASTM and ISO provide standardized ratings; 6061-T6 is 90%, 304 stainless is around 40%, Inconel 718 is a mere 13%. Start with high‑machinability materials like 6061, brass (C360), or Delrin (POM).
Design for the material. Thin walls, deep pockets, and sharp internal corners that are trivial in plastic become nightmarish in hardened tool steel. Adjust your design based on material properties.
Consult data sheets. Reputable metal suppliers provide cutting speeds, chip load recommendations, and annealing states. At GreatLight, we maintain a proprietary library of over 300 material grades and their optimized parameters—something a beginner can approximate with online calculators but is refined over thousands of jobs.
Pro tip: If you’re prototyping a part that will eventually be die‑cast or injection‑molded, prototype in a material that mimics the final one’s mechanical properties. Our rapid prototyping service often uses 3D‑printed stainless steel (via SLM) to validate form and fit before committing to expensive molds.
Mistake 2: Incorrect Tool Selection and Feeds/Speeds
Walk into any makerspace and you’ll hear chatter—literally and figuratively—about “what speed for a ¼” end mill in aluminum?”. Beginners often copy numbers from forums without considering tool material, coating, stick‑out, or machine rigidity. Over‑revving a HSS tool dry in steel equals a glowing orange cutting edge and a ruined part.
Why it’s costly: Feeds and speeds are a delicate balance of surface speed (SFM) and chip load (inch per tooth). Too slow, and you rub instead of cut, generating heat and work‑hardening the material. Too fast, and you exceed the tool’s thermal limit. A single oversized cut can snap a $60 carbide drill, damage a spindle, and scrap a near‑finished part. The real cost, however, is the compounding inaccuracy: a dulled tool deflects more, producing tapered walls and out‑of‑tolerance features.
How to avoid it:
Use manufacturer’s recommendations. Tooling suppliers like Sandvik, Kennametal, and Harvey Tool provide exact starting parameters for every tool and material. Follow them religiously before making incremental adjustments.
Perform a tap test. Even on a benchtop machine, you can tap the tool lightly with a hammer and listen; a clean “ping” indicates rigidity, a “thud” suggests looseness or excessive overhang.
Apply chip thinning. When your step‑over is less than 50% of the tool diameter, the actual chip thickness drops. Many CAM packages can automatically compensate, but manual programmers must calculate the new feed rate to maintain chip load and avoid rubbing.
Invest in good simulation software. Modern CAM can visualize material removal, detect collisions, and predict tool load. At GreatLight, we simulate every 5‑axis toolpath to prevent any unexpected plowing into the fixture.
How professionals handle it: In our 5‑axis machining cells, adaptive clearing strategies maintain constant tool engagement, allowing feeds up to 500 IPM in aluminum while automatically reducing in corners. This technology is increasingly accessible to hobbyists through entry‑level CAM like Fusion 360, so there’s no excuse not to use it.
Mistake 3: Inadequate Workholding – The Part Moves, the Tolerance Shifts
I’ve seen beginners clamp a complex part in a bench vise with a single bolt, expecting it to stay put under cutting forces of 50 kg. It won’t. A part that shifts by 0.1 mm during a finishing pass might as well be a doorstop. Workholding is the silent killer of precision.
Why it’s costly: Not only does the part become scrap, but the misalignment can cause tool collision, breaking cutters and even bending the spindle. Re‑machining from a new piece of stock wastes material and hours. Moreover, poor workholding introduces vibration that degrades surface finish and reduces tool life.
How to avoid it:
6‑point location. At minimum, a part should be constrained in all six degrees of freedom (the 3‑2‑1 principle). Use parallels, stop pins, and toe clamps to create a fixed reference.
Design your own fixture. For odd‑shaped parts, mill a custom soft jaw from aluminum. Match the jaw’s cavity to the part’s contour. This is standard practice at GreatLight when we run batches of a few dozen parts; it ensures repeatability within 0.01 mm.
Vacuum and magnetic tables. Thin, flat parts often warp when clamped mechanically. Vacuum chucks (for non‑ferrous) and magnetic chucks (for steel) hold uniformly without deformation. We use them extensively for sheet metal and thin‑wall aerospace components.
Superglue and tape? For very delicate work, some makers use cyanoacrylate adhesive on a sacrificial plate. It works, but only for light cuts and specific materials. I’d recommend it for last‑resort situations in a hobby context, never in production.
A note on pallet systems: Once your fixture is dialed in, record its offset. Machines with repeatable pallet systems (like our 5‑axis trunnion tables) let you swap parts without re‑indicating the work, saving enormous setup time. Even a basic tool‑maker’s vise with a fixed jaw can be your “fixed point” if you always load against it.

Mistake 4: Skipping Rigorous Machine Calibration and Maintenance
Your CNC machine, no matter how “smart,” relies on physical components: ballscrews, linear rails, spindle bearings. Dust, coolant mist, and thermal growth shift its accuracy over time. Beginners often run a machine out of the box and never check its squareness until parts start coming out skewed.
Why it’s costly: A tram error of just 0.05 mm over a 100 mm part translates to a 0.05 mm taper per 100 mm of depth—completely unacceptable for precision fits. Spindle runout that exceeds 0.01 mm will snap micro‑tools and create oval holes. Over weeks, these errors compound, leading to inconsistent batches where no two parts are alike.
How to avoid it:
Weekly tram checks. Using a dial indicator on an arm, sweep the table or a precision square to verify perpendicularity. Most desktop machines allow you to shim the column or adjust gibs.
Backlash measurement. Move the axis a set distance, then move it back and measure the actual return with an indicator. If the value exceeds 0.02 mm, recalibrate or replace worn nuts. Modern controllers have backlash compensation, but it’s a band‑aid, not a cure.
Spindle run‑out test. Insert a precision ground test bar (or a known‑good carbide rod) and measure TIR (total indicated runout) at the nose and at 300 mm out. Acceptable values: <0.005 mm at the nose for a high‑speed spindle, <0.01 mm for a general‑purpose mill.
Lubrication and cleanliness. Way oil must flow. Grease fittings need love. Coolant that smells like a swamp has gone acidic and will corrode your machine. Our maintenance crew at GreatLight spends the first 30 minutes every morning on preventive checks—a habit that has kept our 5‑axis machines running at ±0.001 mm for years.
Data speaks: According to a 2023 survey by a machine tool builder, 73% of warranty repairs on hobbyist CNCs stemmed from poor maintenance, not manufacturing defects. Treat your machine like a precision instrument, not a workbench.
Mistake 5: Overlooking the Power (and Pitfalls) of CAM Programming
It’s tempting to trust that the CAM software will output perfect G‑code. But default settings often generate inefficient, tool‑hammering toolpaths. Lead‑ins that plunge directly into stock, retracts at rapid through the part, and a complete ignorance of chip evacuation can turn a 30‑minute job into a three‑hour ordeal.
Why it’s costly: Inefficient toolpaths waste machine time, which on a professional machine is billed at $100+/hour. For a hobbyist, it’s personal time. More critically, a poorly programmed linking move can gouge a previously finished surface, forcing a redo. Advanced mistakes like forgetting to leave stock for finishing (or leaving too much) and selecting the wrong tolerance for arcs create visible faceting.
How to avoid it:
Use 3D simulation religiously. Enable collision detection with the vice, clamps, and tool holders. I’ve seen tools try to rapid through steel hold‑downs because the CAM didn’t know they were there. Our simulation, coupled with machine kinematics on 5‑axis setups, is non‑negotiable.
Optimize cut direction. Conventional cutting (up‑milling) on a final pass often leaves a better surface than climb milling, but climb milling usually tool life on rigid machines. Understand when to use each, especially on thin walls.
Employ dynamic/adaptive clearing. This high‑speed machining technique maintains constant tool engagement, allowing deeper axial cuts with a small step‑over. It’s lighter on the spindle and can double metal removal rates. Free CAM packages now offer this.
Post‑processor verification. The post that translates CAM to your machine’s language must be correct. A missing M‑code for coolant or an incorrect arc format (IJK vs R) can cause major issues. At GreatLight, we’ve built custom posts for every machine, rigorously tested with dry‑runs.
A lesson from the shop floor: I once watched a beginner mill a beautiful pocket geometry, only to find the bottom was 0.5 mm too shallow because he forgot to account for the corner radius of the end mill and the CAM calculated depth from the theoretical tip. Always check tool definition: flat, bull‑nose, or ball. A ball‑nosed tool’s effective cutting diameter at certain depths is not its shank diameter.
Mistake 6: Ignoring Post‑Processing and Surface Finishing Until It’s Too Late
A CNC machined part straight off the machine often has visible tool marks, sharp edges, and residual stress. Beginners frequently declare victory when the part matches the 3D model, only to realize later that anodizing, powder coating, or even a simple press‑fit assembly requires a specific surface finish that wasn’t designed in.
Why it’s costly: If you machine a bearing bore to exact size and then anodize it, the oxide layer grows inward and outward, undersizing the bore by up to 0.025 mm. Now your precision fit is a press‑fit or worse. Electroplating adds thickness unevenly. Welding a machined part can distort it beyond salvage. Re‑machining after coating is often impossible without damaging the finish.
How to avoid it:
Plan the entire finishing process up front. If the part will be anodized, leave 0.025–0.05 mm allowance on critical bores. If it will be powder coated, mask threads or holes. Specify surface roughness (Ra) requirements and choose tools and step‑overs accordingly. A 0.1 mm step‑over with a ball‑nosed cutter can achieve Ra 0.8 µm, often acceptable without polishing.
Deburr immediately. Burrs are stress risers, cut fingers, and interfere with assembly. Use a deburring knife, vibratory tumbler, or even manual brushing. At GreatLight, we run an automated deburring unit that also radiuses edges to a precise chamfer.
Outsource specialty finishes to those who know the tolerances. Experience with anodizing chemistry, electroless nickel plating, and passivation avoids dimensional surprises. Our one‑stop service means the same technical team manages the entire chain, from CNC to finishing, so no tolerance is lost in hand‑off.
Consider stress relief. Rough machining can introduce internal stresses, causing warping afterward. For critical parts in aluminum, a T6 temper followed by vibration stress relief can lock in geometry. For steel, a proper heat‑treating cycle before finish machining is essential.
Pro tip for makers: If you’re going to anodize at home or through a local shop, order a test coupon of the exact alloy, machine it to a specific dimension, and measure it post‑treatment. Document the growth/loss factor and apply it to your part’s design.
Mistake 7: Underestimating Total Cost and Time – And Failing to Outsource Wisely
The most heartbreaking mistake? Spending $2,000 on a desktop CNC and months learning, only to realize that the production intent part requires 5‑axis simultaneous machining you can’t achieve, or that your profit margin evaporates because you factor only material and not consumables, tooling, or your own labor. Many makers burn far more cash self‑machining complex components than outsourcing from the start.
Why it’s costly: A hobbyist might price a simple aluminum bracket at $5 in material, ignoring that it took four $15 end mills to get the finish right, plus 8 hours of personal time. If a professional shop like GreatLight can deliver the same part, with certification and 0.001 mm accuracy, for $50 in a few days, the “saving” is an illusion. Worse, a flawed part that fails in use can lead to liability, recall, or reputational damage.
How to avoid it:
Honestly assess your machine’s capabilities. If your part requires tight‑tolerance bores, undercuts that need a 4th axis, or exotic materials, your 3‑axis machine may be the wrong tool. Know when to pivot.
Calculate Total Machined Cost (TMC) accurately. Include: material waste, tool wear (amortize cutter cost over number of parts you can achieve), coolant, electricity, machine depreciation, and your hourly rate. Many beginners find outsourcing the roughing to a waterjet service and doing only finishing makes sense.
Build a relationship with a factory that welcomes small runs. Professional services like GreatLight’s have the overhead of ISO 9001, ISO 13485, and IATF 16949 certified processes, but they also have the efficiency to keep per‑part cost reasonable even for low volumes. We regularly handle one‑off prototypes and small batches of 5–50 pieces, treating them with the same rigor as production runs of thousands.
Use outsourcing strategically. For example, you might CNC the main body on your machine, but send out for wire EDM of an internal sharp corner, or for surface grinding of critical datums. By combining your own machine with professional services, you gain the best of both worlds.
Case in point: An automotive startup came to us with a piston crown design that required intricate cooling galleries and a polished combustion face. They had attempted to machine it on a 3‑axis mill and spent $800 in tools and 40 hours, achieving a poor finish because they couldn’t tilt the part. GreatLight programmed it for a 5‑axis trunnion, completed the job in 4 hours with a mirror‑like finish, and total cost was $600—including material and tooling. The lesson: complexity that’s a hobbyist nightmare is a professional’s daily bread.
How GreatLight CNC Machining Factory Turns Pitfalls into Precision
Having diagnosed the seven most expensive beginner blunders, it’s worth noting that each one is mitigated by the systemic approach at GreatLight. Established in 2011 and operating from a 7,600 m² facility with 150 skilled professionals, GreatLight combines decades of accumulation in tool libraries, fixture designs, and process refinement to eliminate guesswork. Our 127 precision peripherals—including large 5‑axis, 4‑axis, and 3‑axis CNC machining centers, EDM, vacuum forming, and metal/plastic 3D printers—are orchestrated under one roof, so the “material to finished part” chain never suffers from contractor miscommunication.
Why a one‑stop solution matters for beginners and pros alike:
Material intelligence: Over 300 grades in our database, with proven machining recipes.
Tool management: Automated tool‑life monitoring and sister‑tooling prevent in‑process breakage.
Fixturing library: Reusable quick‑change pallets and soft‑jaw CAD models accelerate setup.
Certified quality: ISO 9001, ISO 13485, and IATF 16949 mean your part is inspected with CMMs, laser scanners, and hardness testers—not just a pair of calipers.
Post‑processing mastery: In‑house anodizing, plating, painting, and polishing with known dimensional compensation.
If you’re a maker feeling the sting of these mistakes, consider a hybrid model: leverage your CNC for rapid prototyping of simple geometries, and call on a factory like GreatLight for the critical finishing, complex 5‑axis contours, or certified production parts. This approach keeps your projects moving without the steep and costly learning curve.
Conclusion: Maker CNC: 7 Costly Beginner Mistakes to Avoid at All Costs and a Smarter Path Forward
No article can replace hours of hands‑on chip‑making, but internalizing these seven mistakes will flatten your learning curve dramatically. Remember: the true cost of a part isn’t just the material; it’s the tooling, time, scrap, and missed opportunities. A disciplined engineer plans for the entire process—from machinability to post‑finishing—before the first jog command. And when a design exceeds your machine’s reach, collaborating with a partner that has the technology, certifications, and experience transforms an obstacle into a competitive advantage.
At GreatLight CNC Machining Factory, we thrive on solving the challenges that send hobbyist machines back to the garage. So as you advance on your Maker CNC journey, keep these costly mistakes at a safe distance, and never hesitate to seek professional support when precision and reliability are on the line. After all, the best mistake is the one someone else already made—and shared with you.


