For engineers, makers, and prototyping enthusiasts, the idea of controlling a CNC machine using an Arduino Uno represents a fascinating intersection of accessible microcontroller technology and precision manufacturing. It embodies the DIY spirit of taking control of the fabrication process. While professional-grade industrial CNCs rely on dedicated, powerful controllers, an Arduino-based setup opens doors to custom automation, educational projects, and low-volume prototype machining. This exploration delves into the how, the why, and the critical considerations of such an undertaking.
Understanding the Core Concept: Arduino as the Brain, Not the Muscle
At its heart, a CNC machine is a computer-controlled system that moves a tool along programmed paths. An Arduino Uno, with its versatile I/O pins and programming environment, can serve as the system’s “brain” to interpret commands and send step/direction signals. However, it’s crucial to understand the Arduino’s role:
It is a motion controller and signal generator. It reads G-code (or simpler commands), calculates trajectories, and outputs precise digital pulses to stepper motor drivers.
It is NOT a motor driver or power supply. The Arduino’s pins cannot provide the high current needed to drive stepper motors directly. It acts as the command center for external drivers (like TB6600 or DRV8825 modules).
It is best suited for lightweight applications. Think small desktop CNC routers for wood/acrylic, engravers, PCB mills, or simple 3-axis manipulators, not for machining steel or aluminum with industrial rigidity.
The Essential System Architecture
Building a system to control a CNC machine using an Arduino Uno involves several key components working in concert:

The Arduino Uno: The main microcontroller.
CNC Shield (Highly Recommended): A specialized add-on board that mounts directly onto the Arduino. It provides organized connections for up to 4 stepper motor drivers, spindle control, limit switches, and coolant control. Popular versions are compatible with Pololu-style drivers.
Stepper Motor Drivers: Modules like A4988 (for smaller motors) or TB6600 (for NEMA 17, 23, 34). These interpret the Arduino’s step/direction signals and deliver the appropriate power to the motors.
Stepper Motors: NEMA 17 or NEMA 23 are common choices for desktop machines.
Power Supply: A separate, robust DC power supply (e.g., 24V/36V, 10A+) to power the motors via the drivers. The Arduino is powered separately via USB or its DC jack.
The CNC Machine Mechanics: The actual frame, linear guides, lead screws, and spindle/router.
Step-by-Step Guide to Setup and Control
Step 1: Hardware Assembly
Mount the CNC Shield onto the Arduino Uno.
Insert the stepper motor drivers into the designated slots on the shield (X, Y, Z, and sometimes A for a 4th axis).
Connect the stepper motors to the driver terminals, ensuring correct coil pairing (use a multimeter to find coil pairs if undocumented).
Connect the high-power DC supply to the shield’s power terminal block.
Connect limit switches (highly advised for safety and homing) to their dedicated pins on the shield.
Connect the spindle control (often a PWM signal to a relay or a VFD) if applicable.
Step 2: Software and Firmware Installation
Install the Arduino IDE on your computer.
You will need specialized firmware to run on the Arduino to make it understand G-code. GRBL is the undisputed, open-source champion for this purpose.
GRBL is a high-performance G-code parser and motion controller firmware written in optimized C for the Arduino. It translates standard G-code commands into smooth, accelerated stepper motor movements.
Upload the GRBL firmware to your Arduino Uno via the IDE. This transforms the Arduino into a dedicated G-code interpreter.
Step 3: Configuration and Tuning
Once GRBL is uploaded, you communicate with it via a serial terminal (like the Arduino Serial Monitor, or better, dedicated software).
You must set critical GRBL parameters ($-settings) to match your machine’s physics:
$100, $101, $102: Steps per millimeter for X, Y, Z axes. This is calculated from your motor steps/rev, driver microstepping setting, and lead screw pitch.
$110, $111, $112: Maximum travel speed (mm/min).
$120, $121, $122: Acceleration (mm/sec²).
$130, $131, $132: Maximum travel limits (mm).
Proper tuning of speed and acceleration is vital to prevent lost steps (where the motor doesn’t move as far as commanded), which ruin machining accuracy.
Step 4: Sending G-code to Your Machine
You need a sender software on your PC to stream G-code files to the Arduino/GRBL. Universal G-code Sender (UGS), Candle, and bCNC are excellent free options.
This software opens a serial connection, allows for manual machine control (jogging), and feeds the G-code line by line to the controller.
You create G-code using CAD/CAM software (e.g., Fusion 360, EstlCAM, VCarve). You design a part, define toolpaths (contours, pockets, drilling), and the CAM software posts the toolpaths as a G-code file tailored for GRBL.
Critical Considerations and Limitations
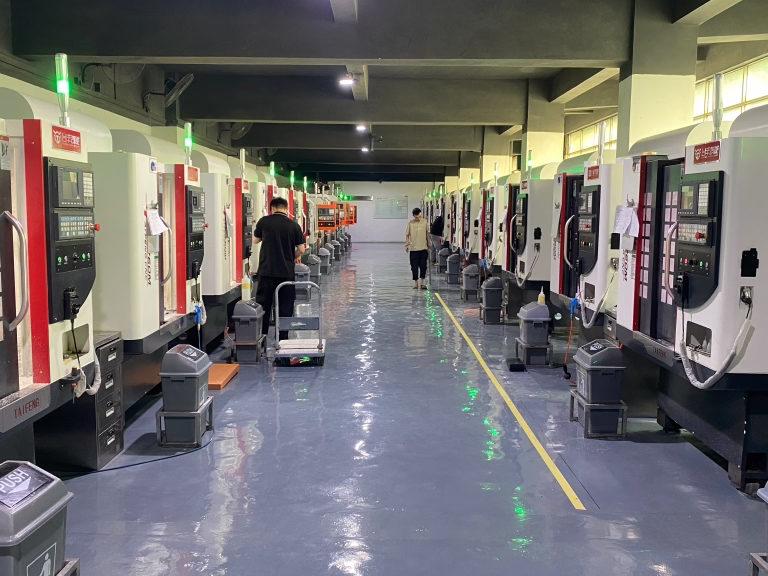
While empowering, this approach has boundaries that a professional manufacturer like GreatLight CNC Machining Factory is structured to transcend:
Performance Cap: The Arduino Uno’s 8-bit ATmega328P processor and GRBL’s architecture have finite processing speed. This can limit the complexity of G-code (lots of short line segments) and the overall feed rates achievable compared to a dedicated motion controller.
Real-World Precision & Rigidity: The ultimate precision of a machined part depends more on the mechanical rigidity of the machine frame, bearing quality, and thermal stability than the controller’s step resolution. A DIY machine often lacks the cast iron construction and pre-tensioned ball screws of an industrial VMC.
Material Limitations: Desktop machines driven by this setup typically lack the torque, rigidity, and cooling to effectively and safely machine hard metals like stainless steel or titanium with any meaningful precision or surface finish.
Lack of Advanced Features: Industrial controllers offer advanced look-ahead, adaptive feed control, torque management, and seamless integration with probes and tool changers—features beyond GRBL’s scope.
Conclusion: A Powerful Learning Tool, a Bridge to Professional Needs
Learning how to control a CNC machine using an Arduino Uno is an invaluable educational journey. It demystifies CNC operation, teaches the fundamentals of G-code, motion control, and system integration. It’s perfect for prototyping ideas in softer materials, creating custom fixtures, or educational workshops.
However, when your project demands true high precision, complex 5-axis geometries, material integrity in aerospace alloys, or consistent production quality, the limitations of a DIY system become apparent. This is where the expertise and industrial-grade infrastructure of a partner like GreatLight CNC Machining Factory become essential. We leverage advanced, multi-axis CNC machining centers governed by proprietary, high-speed controllers to deliver tolerances within ±0.001mm, handle exotic materials, and ensure repeatability across production runs. The Arduino project ignites the spark of creation; professional CNC services like ours provide the reliable, precise furnace to turn that spark into a finished, high-performance component.

Frequently Asked Questions (FAQ)
Q1: Can I control a 5-axis CNC machine with an Arduino Uno and GRBL?
A: Standard GRBL is designed for 3 axes (X, Y, Z). While there are forks and modifications (like GRBL-ESP32) that support more axes, controlling a true, coordinated 5-axis machine for complex simultaneous machining is exceedingly challenging. The kinematics (mathematical transformations for tool center point control) are non-trivial and require much more computational power than an Uno provides. Professional 5-axis work is firmly in the domain of industrial controllers.
Q2: What is the most common problem when setting this up, and how do I fix it?
A: Lost steps is the most frequent issue. It manifests as the machine ending up in a different position than commanded, ruining the part. Causes and fixes:
Acceleration/Speed too high: Reduce $120/$121/$122 (acceleration) and $110/$111/$112 (max speed) in GRBL.
Insufficient motor current: Adjust the current limit potentiometer on your stepper driver (consult its datasheet).
Mechanical binding: Ensure all axes move freely by hand when disengaged.
Weak power supply: Use a power supply with sufficient voltage and current (amperage) rating.
Q3: Is it safe to machine metals with an Arduino-controlled desktop CNC?
A: It requires extreme caution. Machining metals generates significant force, heat, and sharp chips. A desktop machine must be very robustly built. Always start with soft metals like aluminum at low depths of cut and feed rates. Essential safety: Wear safety glasses, secure your workpiece firmly, and understand emergency stop procedures. Never leave the machine unattended.
Q4: My company needs functional prototypes in PEEK or Titanium. Can this method work?
A: For demanding engineering polymers like PEEK or metals like titanium, a DIY Arduino-based system is not recommended. These materials require specific cutting speeds, feeds, rigidity, and cooling to be machined properly without damaging the material or the tool. For such high-performance prototypes, partnering with a professional service equipped for precision CNC machining is the only reliable path to achieving usable, dimensionally accurate parts.
Q5: How does the cost of building this compare to using a professional service?
A: The DIY route has a lower upfront cash cost for hardware (a few hundred dollars) but a very high time cost for learning, building, and debugging. The professional service has a higher per-part cost but provides guaranteed precision, material certification, time savings, and zero capital investment in equipment. The choice depends entirely on your priority: learning and low-cost experimentation (DIY) vs. obtaining a guaranteed, precision result for product development (professional service). For insights into how leading manufacturers operate, you can follow industry advancements on platforms like LinkedIn{:target=”_blank”}.


