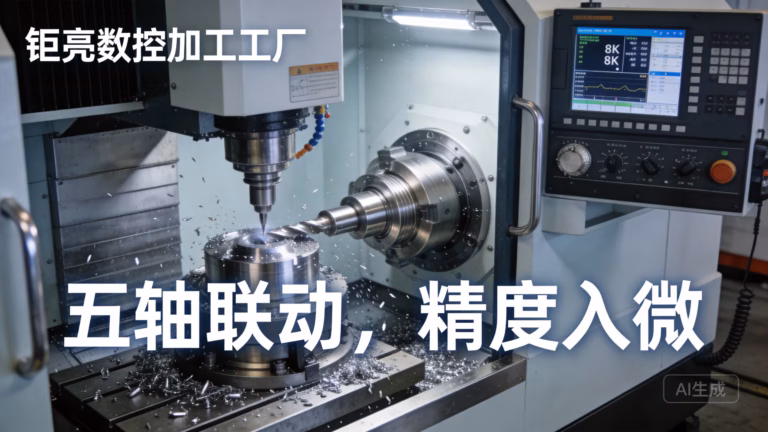
How To Make G Code For CNC Machine?

If you’ve ever wondered how a CNC machine transforms a digital design into a physical precision part, the answer lies in G-code: the standardized programming language that dictates every movement, speed, and operation of the machine. For engineers, machinists, and procurement professionals tasked with creating high-quality parts—whether for automotive engines, aerospace components, or humanoid robot hardware—mastering the basics of G-code generation is critical to ensuring accuracy, efficiency, and cost-effectiveness. Even if you rely on professional machining services like those offered by GreatLight CNC Machining Factory, understanding how G-code works helps you communicate more effectively with your partner and validate that your parts will meet strict tolerances, such as the ±0.001mm precision GreatLight regularly delivers.
What Is G-Code and Why Does It Matter?
G-code, short for “Geometric Code,” is the universal language of CNC machining. Each line of code contains commands that tell the machine’s axes (X, Y, Z for three-axis; plus A, B, C for five-axis) where to move, how fast to move, what tool to use, and when to perform auxiliary actions like turning on coolant or changing tools.
For precision parts manufacturing, well-written G-code is non-negotiable. A single error in a coordinate or feed rate can lead to scrap material, machine damage, or parts that fail tolerance checks. This is especially true for complex components—like the new energy vehicle e-housings GreatLight produces—where five-axis machining requires synchronized movements of rotary and linear axes, and even minor G-code inaccuracies can compromise fit and function. GreatLight’s ISO 9001:2015 certified processes include rigorous G-code validation to ensure every part meets client specifications, a key reason they offer free rework for quality issues and full refunds if rework doesn’t resolve problems.
Core Steps to Create G-Code for CNC Machines
Creating functional, efficient G-code involves a structured workflow that balances design intent, machine capabilities, and material properties. Below is a step-by-step breakdown, tailored to both in-house machinists and those working with external partners like GreatLight:
Step 1: Define Your Part Design & Machining Requirements
Before writing any code, you need a clear understanding of your part’s design and how it will be manufactured. This includes:
CAD File: A detailed 3D model (in formats like STEP, IGES, or STL) that outlines the part’s geometry. GreatLight accepts all major CAD formats and offers design-for-manufacturability (DFM) feedback to optimize parts for CNC machining, reducing G-code complexity and production time.
Material Selection: Different materials (aluminum alloy, titanium, stainless steel, mold steel) require different cutting speeds, feed rates, and tooling. For example, titanium alloy parts (common in aerospace and medical fields) need slower feed rates to prevent tool wear, which must be reflected in G-code commands. GreatLight supports over 50 materials and can advise on the best choices for your application.
Tolerances & Quality Standards: If your part requires ±0.001mm precision (like many of GreatLight’s medical hardware components), your G-code must account for tool deflection, thermal expansion, and machine repeatability.
Machining Operations: Will you need three-axis milling, four-axis turning, or five-axis simultaneous machining? GreatLight’s fleet of 127 precision machines—including large five-axis centers—can handle all these operations, and their G-code is optimized for each machine’s unique capabilities.
| Material | Recommended Spindle Speed (RPM) | Typical Feed Rate (mm/min) | G-Code Considerations |
|---|---|---|---|
| 6061 Aluminum Alloy | 3000–8000 | 100–300 | High feed rates to reduce cycle time |
| Titanium Grade 5 | 500–1500 | 20–50 | Slow feeds, frequent coolant commands |
| 304 Stainless Steel | 1000–3000 | 50–100 | Rigid tool paths to minimize chatter |
| PEEK Plastic | 2000–5000 | 80–200 | Sharp tools, low heat generation |
Step 2: Choose the Right CAM Software (Or Manual Programming for Simple Parts)
G-code can be created manually or with Computer-Aided Manufacturing (CAM) software. For most modern applications—especially complex parts—CAM software is the go-to choice:
Manual Programming: Best for simple parts (e.g., a flat plate with drilled holes) using basic G-code commands (G00 for rapid move, G01 for linear cut, G81 for drilling). This requires deep knowledge of G-code syntax but is fast for small tasks.
CAM Software: For complex geometries (like five-axis aerospace components or humanoid robot joints), CAM software (e.g., Mastercam, SolidWorks CAM, Siemens NX) automatically generates toolpaths and G-code from your CAD model. GreatLight uses industry-leading CAM tools integrated with their five-axis machines to optimize tool paths for minimal waste and maximum accuracy.
Step 3: Import CAD Model & Set Up Machining Parameters
Once you have your CAM software ready, the next steps are to:
Import the CAD Model: Ensure the model is clean (no overlapping surfaces or missing edges) to avoid toolpath errors.
Set Up the Work Coordinate System (WCS): Define the origin point (X0, Y0, Z0) where the machine will start. Common WCS commands include G54-G59, which are stored in the machine’s memory for repeatability. GreatLight’s machinists use standardized WCS setups to ensure consistency across all their three manufacturing plants.
Select Tooling: Choose the right end mills, drills, or turning tools for your material and operations. CAM software will calculate tool length compensation (G43) to account for tool size, ensuring accurate cuts.
Define Feed Rates & Spindle Speeds: Refer to material guidelines (like the table above) and adjust for tool size and depth of cut. GreatLight’s team uses their decade of experience to fine-tune these parameters for each part, reducing cycle time while maintaining precision.
Step 4: Generate Toolpaths & Simulate the Program
CAM software converts your parameters into toolpaths—the path the tool will follow to machine the part. Before generating G-code, always simulate the toolpath to:

Detect Collisions: Ensure the tool, spindle, or machine table doesn’t hit the fixture or part. GreatLight’s simulation tools catch 99% of collision risks before the first cut, saving material and machine downtime.
Validate Cut Quality: Check for overcuts, undercuts, or missed features that could compromise the part’s function.
Optimize Cycle Time: Identify redundant movements that can be removed to speed up production.
Step 5: Post-Process the Toolpaths to Machine-Specific G-Code
Toolpaths from CAM software are not directly usable by CNC machines—they need to be translated into machine-specific G-code via a post-processor. Post-processors account for:
Machine axis configuration (three-axis vs five-axis)
Controller type (Fanuc, Siemens, Haas)
Machine limits (e.g., GreatLight’s maximum machining size of 4000mm)
Auxiliary functions (coolant, tool changes)
GreatLight has customized post-processors for every machine in their fleet, ensuring that the G-code is optimized for each machine’s capabilities. This is especially critical for five-axis machining, where synchronized rotary and linear movements require precise command sequencing.
Step 6: Test & Validate the G-Code
Before running a full production batch, test your G-code with:
Dry Runs: Run the program without material to check for movement errors.
Single-Step Execution: Run the program one line at a time to verify each operation.
First-Part Inspection: Measure the first part with precision tools (e.g., coordinate measuring machines, or CMMs) to ensure it meets tolerances. GreatLight has in-house CMMs and adheres to ISO 9001 standards to inspect every critical feature of parts, including those used in medical hardware (compliant with ISO 13485) and automotive components (compliant with IATF 16949).
Advanced Tips for Optimizing G-Code Performance
For those looking to take their G-code to the next level, consider these advanced strategies:
Use Canned Cycles: For repetitive operations like drilling, tapping, or boring, use canned cycles (e.g., G83 for deep-hole drilling, G84 for tapping) to reduce code length and minimize errors.
Minimize Tool Changes: Group operations by tool to reduce downtime. GreatLight’s CAM software automatically optimizes tool change sequences for their multi-axis machines, cutting cycle times by up to 20% for complex parts.
Incorporate Coolant Commands: Use M08 to turn on coolant and M09 to turn it off, adjusting based on material (e.g., constant coolant for titanium to prevent overheating).
Add Error Handling: Include M00 (program stop) or M01 (optional stop) commands at critical stages for manual quality checks.
Optimize Five-Axis Movements: For parts requiring simultaneous five-axis machining, use smooth rotary axis transitions (avoid abrupt changes in A/B/C axes) to reduce tool wear and improve surface finish. GreatLight’s expertise in five-axis CNC machining services ensures that G-code for these complex operations is both efficient and accurate.
Common Pitfalls to Avoid When Writing G-Code
Even experienced machinists make mistakes. Here are the most common pitfalls to watch out for:
Incorrect Work Offsets: Forgetting to set the WCS (G54) can lead to parts being machined in the wrong location.
Ignoring Tool Length Compensation: Failing to use G43 can result in undercuts or damaged tools.
Overlooking Machine Limits: Programming movements beyond the machine’s travel range (e.g., Z-axis depth) can cause collisions. GreatLight’s post-processors automatically check for machine limits to prevent this.
Inadequate Feed Rates for Hard Materials: Using too high a feed rate for titanium or stainless steel can break tools or produce poor surface finishes.
Not Accounting for Thermal Expansion: For parts machined at high temperatures, adjust coordinates to compensate for material expansion. GreatLight’s climate-controlled facilities minimize thermal variations, reducing the need for manual adjustments.
When to Partner with a Professional CNC Machining Service
While learning to create G-code is valuable, there are times when partnering with an expert is the best choice:
Complex Parts: Five-axis machining, high-precision tolerances, or intricate geometries require specialized G-code knowledge and equipment that GreatLight has mastered.
Volume Production: For large batches, professional services like GreatLight can optimize G-code for repeatability and efficiency, reducing per-unit costs.
Lack of In-House Expertise: If your team doesn’t have dedicated machinists or CAM software, outsourcing to a trusted partner saves time and reduces risk.
GreatLight CNC Machining Factory offers end-to-end services, from design validation to G-code generation, machining, and post-processing (e.g., anodizing, powder coating). Their ISO 9001:2015 certification, ISO 27001 data security compliance, and industry-specific certifications (IATF 16949 for automotive, ISO 13485 for medical) ensure that every part meets global quality standards. Plus, their after-sales guarantee—free rework for quality issues, full refund if rework is unsatisfactory—gives you peace of mind.
Conclusion
How To Make G Code For CNC Machine? is a question that combines technical knowledge, practical experience, and attention to detail. Whether you’re programming manually for simple parts or using advanced CAM software for complex five-axis components, mastering G-code is essential to producing high-quality precision parts. For projects that demand the highest levels of accuracy, efficiency, or scalability, partnering with a trusted expert like GreatLight CNC Machining Factory can streamline your production process and ensure success. To learn more about their precision machining capabilities and see real-world case studies, visit GreatLight Metal on LinkedIn.
Frequently Asked Questions (FAQ)
1. Can I write G-code manually without CAM software?
Yes, manual programming is possible for simple parts (e.g., flat milling, basic drilling) using standard G-code commands. However, for complex geometries or five-axis machining, CAM software is necessary to generate accurate toolpaths and avoid errors.
2. How long does it take to learn G-code?
The basics of G-code can be learned in a few weeks, but mastering advanced concepts (like five-axis programming or optimizing for precision) takes months of hands-on practice. GreatLight’s machinists have over a decade of experience writing G-code for high-precision parts, so you can rely on their expertise if you’re short on time.
3. What’s the difference between G-code and M-code?
G-code controls geometric movements (e.g., G01 for linear cutting, G02 for circular arcs), while M-code controls auxiliary functions (e.g., M03 for spindle on clockwise, M08 for coolant on). Both are essential for complete CNC machine operation.
4. How does G-code affect part precision?
Well-written G-code accounts for tool deflection, thermal expansion, and machine repeatability, ensuring that cuts are accurate to within specified tolerances. GreatLight’s G-code is fine-tuned to achieve ±0.001mm precision for critical parts, which is essential for medical and aerospace applications.

5. Do CNC machining services like GreatLight handle G-code generation for clients?
Yes. GreatLight offers end-to-end services, including G-code generation, for clients who provide CAD models. Their team uses advanced CAM software and customized post-processors to optimize G-code for their machines, ensuring the highest quality and efficiency.
6. What should I do if my G-code produces a defective part?
First, check for errors in work offsets, tool length compensation, or feed rates. If you’re working with a service like GreatLight, they offer free rework for quality issues and a full refund if rework doesn’t resolve the problem, so you don’t have to bear the cost of defective parts.


