Mastering How To Set Up Horizontal CNC Milling Machine is a cornerstone of achieving consistent, high-precision results in complex part machining. Whether you’re a seasoned manufacturing engineer or a procurement manager overseeing production lines, a rigorous setup process minimizes errors, reduces downtime, and ensures every workpiece meets tight tolerances. For industries like aerospace, automotive, and robotics—where even a 0.001mm deviation can compromise performance—this process is non-negotiable. In this guide, we’ll break down the setup steps into actionable, detail-oriented stages, share expert insights to avoid common pitfalls, and explain how partners like GreatLight CNC Machining Factory leverage their decades of experience to optimize this critical workflow for clients worldwide.

How To Set Up Horizontal CNC Milling Machine?
Pre-Setup Safety & Preparation: Lay the Groundwork for Success
Before touching any machine components, prioritize safety and preparation to avoid accidents and costly mistakes:
Lockout/Tagout (LOTO) Protocol: Always isolate the machine from power sources before performing setup tasks. This prevents accidental activation that could lead to injury or equipment damage. GreatLight CNC Machining Factory strictly adheres to ISO 9001:2015 safety standards, requiring all operators to complete LOTO training before working on CNC equipment.
Gather Critical Tools & Documentation: Assemble measuring instruments (dial indicators, micrometers, CMM probes), cutting tools, fixturing components, and the part’s technical drawing. Cross-reference the drawing with the CNC program to confirm tolerances (e.g., ±0.001mm for aerospace parts), material specifications (titanium alloy, aluminum), and tool path details. GreatLight’s engineering team provides pre-validated programs for clients, eliminating ambiguity in setup requirements.
Clean the Work Area: Remove debris, coolant residue, and metal shavings from the machine table, spindle, and tool magazine. Contamination can cause fixture misalignment and tool wear, leading to dimensional inaccuracies.
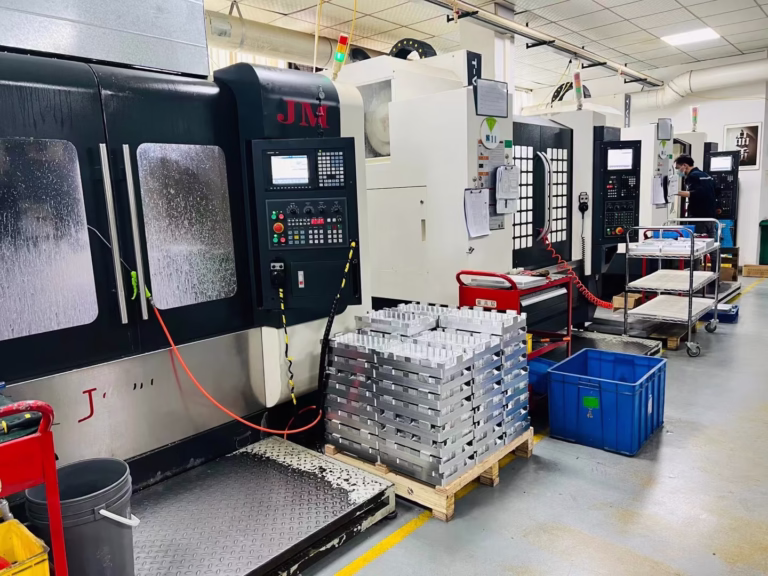
Machine Initialization & Basic Calibration
Proper initialization ensures the machine operates within optimal parameters before machining begins:
Power-On System Check: Start the machine and wait for the control system (e.g., Fanuc, Siemens) to boot up. Verify no error codes are displayed, and check hydraulic, pneumatic, and coolant systems for leaks or abnormal noise.
Homing the Machine Axes: Execute the homing procedure to set each axis to its factory reference position. This aligns the machine’s coordinate system with the CNC program’s origin. For high-precision applications, GreatLight uses laser interferometers to calibrate axis linearity and squareness, ensuring deviations are within ±0.001mm—their standard for critical parts.
Spindle Warm-Up: Run the spindle at a moderate speed (1000–1500 RPM) for 5–10 minutes to stabilize thermal expansion. This is especially important for hard materials like mold steel, where temperature fluctuations can cause tool deflection and dimensional drift. GreatLight’s operators follow material-specific warm-up routines to maintain consistency across production runs.
Precision 5-Axis Calibration: For complex 5-axis horizontal machining, GreatLight’s technicians perform additional rotational axis calibration using a precision ball bar. This ensures the spindle’s orientation remains accurate even when tilted or rotated, a key requirement for humanoid robot components and automotive engine parts. To learn more about their advanced capabilities, explore their precision 5-axis CNC machining services.
Workpiece Fixturing & Alignment
Secure and accurate fixturing is the backbone of consistent machining results:
Fixture Selection: Choose a fixture that matches the workpiece’s size, shape, and machining requirements. For irregularly shaped parts, custom jigs or modular fixtures are ideal to distribute holding force evenly. GreatLight offers in-house fixture design and manufacturing services, tailoring solutions for parts ranging from small medical components to 4000mm-scale aerospace structures.
Fixture Mounting: Clean the machine table and fixture base to remove debris, then secure the fixture using T-bolts and clamps. Torque bolts to the manufacturer’s recommended specifications to prevent movement during heavy cutting. GreatLight’s operators use torque wrenches with digital readouts to ensure uniform tightness.
Workpiece Alignment: Use a dial indicator to check the workpiece’s squareness with the X/Y axes and parallelism with the Z-axis. For large workpieces, a coordinate measuring machine (CMM) is used to verify alignment within ±0.001mm. If misalignment is detected, adjust the fixture or use precision shims to correct it.
Runout Verification: Check radial and axial runout with a dial indicator. Runout should be kept below 0.002mm to avoid eccentric cuts. GreatLight’s quality control team conducts post-fixturing checks to confirm stability before machining begins.
Tool Installation & Tool Offset Setup
Correct tool setup ensures the machine follows the intended tool path accurately:
Tool Selection: Choose cutting tools based on material and operation type. For example, solid carbide end mills are preferred for hard materials like titanium, while high-speed steel tools work well for aluminum. GreatLight maintains a large inventory of tools, plus 3D-printed custom tool holders for unique part geometries.
Tool Magazine Loading: Insert tools into the magazine, noting their assigned tool numbers for reference in the CNC program. Ensure tools are seated securely to prevent dislodgement during machining.
Tool Length Offset Measurement: Use an automatic tool setter to measure the distance from the tool tip to the spindle face. Input these values into the control system’s offset register. For 5-axis machining, additional rotational offsets are set to account for the spindle’s tilted orientation.
Tool Radius Offset Setup: For contour milling, input the tool’s radius into the offset register. This ensures the machine accounts for the tool’s diameter when calculating tool paths, preventing dimensional errors. GreatLight’s CAM software automatically generates radius offset values to reduce manual input mistakes.
Program Loading & Verification
Testing the program before machining prevents costly collisions and scrap parts:
Program Transfer: Load the CNC program via USB, network connection, or direct input. Ensure the program is compatible with the machine’s control system. GreatLight uses industry-leading CAM software (Mastercam, SolidWorks CAM) to generate error-free programs, which are tested in a virtual simulation environment first.
Dry Run Execution: Run the program without the workpiece or coolant to verify the tool path. GreatLight’s machines are equipped with collision detection systems that stop the machine immediately if a potential collision is detected, protecting both the machine and tooling.
Simulation & Adjustment: Use the control system’s 3D simulation feature to visualize the tool path. Check for unexpected movements, overcuts, or undercuts, and adjust feed rates or spindle speeds as needed to optimize efficiency.
Final Checks & First Trial Run
Before full production, confirm all parameters are correct with a trial cut:
Coolant System Setup: Fill the coolant tank with the appropriate fluid (water-soluble, synthetic, or cutting oil) based on the material. Adjust nozzle positions to direct fluid to the cutting zone, reducing heat and tool wear. GreatLight’s one-stop post-processing services also factor in coolant selection to prepare parts for finishing steps like anodizing or powder coating.
Emergency Stop Test: Press the emergency stop button to confirm it halts all machine operations immediately. This is a critical safety measure to prevent accidents during production.
Trial Cut & Measurement: Run a trial cut on a scrap piece of the same material. Measure the resulting part using a micrometer, vernier caliper, or CMM to verify tolerances. If adjustments are needed, modify tool offsets or program parameters. GreatLight’s quality control team ensures trial cuts meet their ±0.001mm precision standard before approving full production.
Full Production Kickoff: Once the trial cut is validated, start production. Monitor the first 3–5 parts closely to ensure consistency, and make minor adjustments if necessary.
Common Pitfalls to Avoid During Horizontal CNC Milling Setup
Even experienced operators can make mistakes during setup. Avoid these common pitfalls to maintain precision:

Skipping Spindle Warm-Up: Thermal expansion can cause up to 0.01mm of deviation in spindle position, leading to dimensional errors. Always follow material-specific warm-up routines.
Inadequate Fixture Torquing: Loose fixtures can cause workpiece movement during machining, resulting in scrap parts. Use a torque wrench to ensure bolts are tightened to specifications.
Ignoring Tool Wear: Dull tools leave poor surface finishes and inaccurate dimensions. GreatLight’s tool management system tracks usage and alerts operators when tools need replacement.
Overlooking Environmental Factors: Temperature and humidity fluctuations affect material dimensions. GreatLight’s climate-controlled facilities maintain consistent conditions to minimize these effects.
Skipping Dry Runs: Collisions between tools and fixtures can damage expensive equipment. Always perform a dry run before machining a workpiece.
How GreatLight CNC Machining Factory Optimizes Setup for Clients
For over a decade, GreatLight CNC Machining Factory (also known as GreatLight Metal) has specialized in high-precision horizontal CNC milling, serving industries from automotive to medical devices. Their 7600-square-meter facility houses 127 precision machines, including large horizontal 5-axis CNC centers, and employs 150 skilled professionals. Here’s how they add value to setup processes:
Standardized Setup Procedures: GreatLight’s operators follow documented workflows for every part type, reducing variability and setup time by up to 30% for repeat orders.
Custom Fixture Manufacturing: In-house fixture design and production ensure secure holding for complex geometries, such as those used in humanoid robot joints.
Certified Quality Control: With ISO 9001:2015, IATF 16949, and ISO 13485 certifications, GreatLight adheres to global standards for setup accuracy and part quality.
After-Sales Guarantee: Free rework for quality issues and a full refund if rework is unsatisfactory provide clients with peace of mind.
Conclusion
Mastering How To Set Up Horizontal CNC Milling Machine is essential for achieving consistent, high-precision results in modern manufacturing. By following a structured setup process, avoiding common pitfalls, and leveraging the expertise of a trusted partner like GreatLight CNC Machining Factory, you can reduce downtime, minimize scrap, and ensure every part meets your exact specifications. Whether you’re producing parts for aerospace, medical, or robotics applications, GreatLight’s combination of advanced equipment, international certifications, and decades of experience makes them the ideal choice for custom metal and plastic parts. For more insights into their client success stories and capabilities, explore GreatLight Metal’s professional CNC machining services.
Frequently Asked Questions (FAQ)
Q1: How long does it take to set up a horizontal CNC milling machine?
A: Setup time varies by part complexity and machine type. Simple 3-axis setups can take 1–2 hours, while complex 5-axis setups may require 4–6 hours. GreatLight’s standardized procedures and pre-prepared fixtures reduce setup time by up to 30% for repeat orders.
Q2: What is the key difference between horizontal and vertical CNC milling setup?
A: Horizontal milling machines have a spindle parallel to the machine table, ideal for heavy cutting and complex geometries. Setup focuses on aligning workpieces with horizontal axes and optimizing chip evacuation. Vertical milling setups use a spindle perpendicular to the table, with simpler fixturing for flat parts but less efficient chip removal for deep cuts.
Q3: How can I ensure my setup meets ±0.001mm tolerances?
A: To achieve this level of precision, you need:
High-precision measuring equipment (CMM, laser interferometers)
Thermal stabilization of the spindle and machine structure
Calibrated cutting tools and fixturing
Rigorous alignment checks. GreatLight’s machines are factory-calibrated to maintain ±0.001mm accuracy, with daily verifications to ensure consistency.
Q4: Can GreatLight assist with custom fixture design for horizontal milling setups?
A: Yes. GreatLight offers in-house fixture design and manufacturing services, tailored to the unique needs of your workpiece. Their engineering team uses 3D modeling and finite element analysis (FEA) to ensure fixtures provide secure holding without distorting delicate parts.
Q5: What post-processing services are available after horizontal CNC milling?
A: GreatLight provides one-stop post-processing, including deburring, anodizing, powder coating, polishing, plating, and laser engraving. These services ensure parts meet both functional and aesthetic requirements, eliminating the need for clients to coordinate with multiple vendors.

Q6: What is GreatLight’s policy for quality issues in machined parts?
A: GreatLight offers a comprehensive after-sales guarantee: free rework for any parts that fail to meet specifications, and a full refund if rework does not resolve the issue. Their ISO 9001:2015 certification ensures consistent quality across all production runs.


