If you’re working with a Lagun CNC machine, mastering How To Load Lagun CNC Machine is critical to unlocking its full precision potential, reducing downtime, and ensuring consistent quality across every workpiece. Whether you’re a small shop operator or a procurement manager overseeing high-volume production, the loading process sets the foundation for successful machining—cut corners here, and you risk costly errors, rework, or even machine damage.
How To Load Lagun CNC Machine?
Loading a Lagun CNC machine requires a systematic, detail-oriented approach that combines safety, precision, and adherence to the machine’s specifications. Below is a step-by-step guide tailored to both vertical (VMC) and horizontal (HMC) Lagun machining centers:
1. Pre-Load Preparation: Lay the Groundwork for Safe, Accurate Machining
Before touching any workpiece or tool, prioritize safety and system checks to avoid preventable issues:
Safety First: Test the emergency stop button, verify all machine guards are securely in place, and clear the work area of debris, loose tools, or unused materials. Lagun CNC machines are built for heavy-duty operations, so neglecting safety can lead to serious accidents.
Machine System Checks: Confirm the machine’s axes are homed to their zero positions, lubrication reservoirs (spindle, ways, tool changers) are full, and the control panel displays no active error codes. For older Lagun models, manually move each axis a short distance to ensure smooth, unobstructed operation.
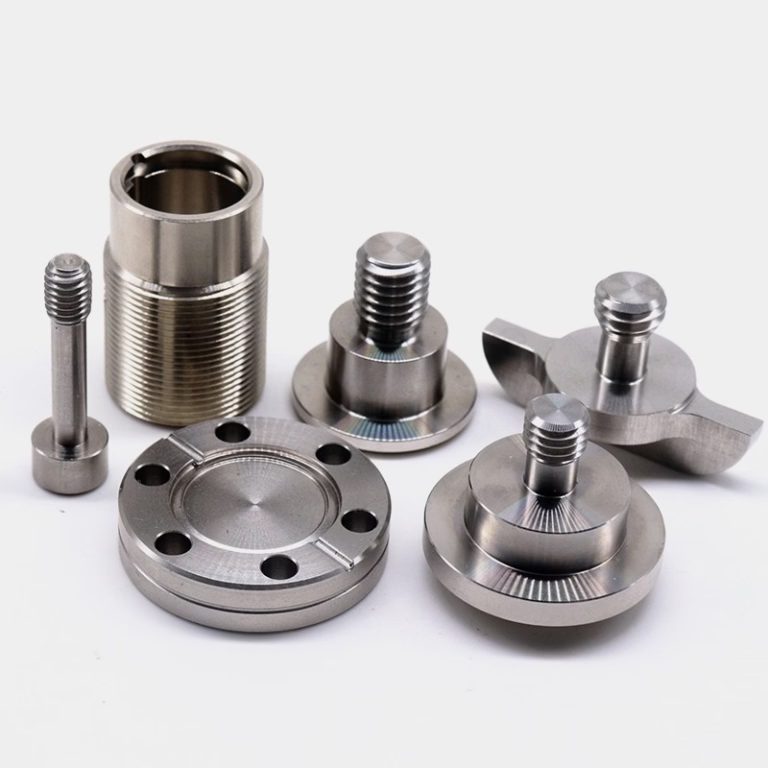
Workpiece & Tooling Prep: Inspect the workpiece for defects like warping, burrs, or surface damage that could disrupt alignment. Clean all fixture and workpiece contact surfaces to remove dust, grease, or residual coolant—even tiny particles can compromise grip and precision. Prepare all required tools, holders, and fixtures (e.g., vises, vacuum chucks, modular clamps) for quick access.
2. Workpiece Fixturing: Align and Secure for Repeatable Precision
Proper fixturing ensures the workpiece stays stable and aligned throughout the machining cycle:
Choose the Right Fixture: Match the fixture to the workpiece’s material and geometry. For small, flat parts, use a precision vise with hardened jaws; for large or irregularly shaped components, opt for custom jigs or pallet systems (compatible with most Lagun HMCs) for fast changeovers.
Precision Alignment: Use a dial indicator or edge finder to align the workpiece with the machine’s X, Y, and Z axes. For Lagun HMCs, center the workpiece on the pallet to avoid imbalance during rotation. Tighten fixture bolts gradually and evenly—over-tightening can warp thin-walled parts or damage the fixture.
Verify Position Accuracy: After securing, use the machine’s built-in probe (if equipped) or a micrometer to double-check the workpiece’s position. Record the workpiece offset values in the control panel to ensure the G-code program references the correct origin point.
3. Tool Loading: Install and Calibrate Cutting Tools for Optimal Performance
Lagun CNC machines use either automatic tool changers (ATCs) or manual tool loading for smaller models—follow these steps for both:

Tool Selection & Inspection: Choose tools matched to the machining operation (end mills for milling, drills for holes, taps for threading). Inspect cutting edges for wear; damaged tools leave poor surface finishes or break mid-cycle, causing costly delays.
Tool Changer Operation: For ATC-equipped Lagun models, insert tools into holders with clean, dry shanks, ensuring they seat fully. Use a torque wrench to tighten set screws to the manufacturer’s specified torque (20–30 Nm for ER collets). For manual loading, carefully insert tools into the spindle and secure them per the machine’s instructions.
Set Tool Offsets: Use a tool length setter to measure each tool’s projection length, then input these values into the machine’s offset register. For radius offsets, measure the tool’s diameter with a micrometer and enter the correct value to avoid dimensional errors.
4. Program Verification: Catch Errors Before Machining Begins
Even the most well-written G-code can have errors—verify the program to prevent collisions or mismachining:
Load & Review the Program: Transfer the G-code to the Lagun control panel (via USB, Ethernet, or direct input) and review all commands (G00 for rapid movement, G01 for linear interpolation, M codes for auxiliary functions) to ensure they match the workpiece and tooling setup.
Dry Run Simulation: Run the program in dry mode (no coolant, no cutting) to visualize the tool path. Lagun’s control systems (often Fanuc 0i-MF or Siemens 828D) include 3D simulation tools that highlight potential collisions with fixtures or the workpiece frame.
Adjust as Needed: If the simulation reveals issues (e.g., tool path interference, incorrect spindle speed), modify the program or adjust workpiece/tool positions. For example, add a 0.5mm clearance distance to avoid fixture contact.
5. Initiating the Machining Process: Final Checks and Monitoring
Once all pre-loading steps are complete, start the cycle with vigilance:
Final Safety & Quality Checks: Confirm coolant lines are positioned to reach the cutting zone, spindle speed and feed rates match material recommendations (e.g., 10,000 RPM for aluminum, 3,000 RPM for steel), and all guards are closed.
Start & Monitor the Cycle: Press the cycle start button and stay within reach of the emergency stop for the first 5–10 minutes. Monitor spindle load, tool vibration, and coolant flow to ensure everything operates as expected.
Post-Machining Inspection: After the cycle finishes, remove the workpiece and inspect critical dimensions with precision tools (coordinate measuring machine, CMM, or dial gauge) to confirm alignment and tool offsets were set correctly.
Common Pitfalls to Avoid When Loading a Lagun CNC Machine
Even experienced operators can make mistakes—avoid these common pitfalls to maintain quality and efficiency:
Relying on Visual Alignment: Never skip precision measurements with dial indicators or machine probes; a 0.01mm misalignment can lead to parts that are out of tolerance.
Over-Tightening Fixture Clamps: This distorts thin-walled parts or damages fixture jaws. Use torque-limiting wrenches to apply consistent, safe clamping force.
Skipping Dry Runs: A single programming error can cause tool-to-workpiece collisions, resulting in thousands of dollars in repairs. Dry runs are a low-cost way to mitigate this risk.
Forgetting to Update Offsets: Always re-calibrate tool offsets when changing a tool, holder, or fixture. Outdated offsets lead to dimensional errors and rework.
How Professional Machining Shops Like GreatLight Optimize Lagun CNC Loading for Precision
Mastering Lagun CNC loading takes years of hands-on experience, but professional shops like GreatLight Metal Tech Co., LTD. (GreatLight) have standardized this process to deliver consistent, sub-micron precision for every client. Here’s how they stand out:
Certified, Experienced Technicians: GreatLight’s team includes CNC specialists trained in Lagun machine operations, with strict adherence to ISO 9001:2015 quality protocols. Every technician follows a documented loading workflow to eliminate human error.
Advanced Alignment & Measurement Tools: Instead of manual checks, GreatLight uses laser alignment systems and CMMs to verify workpiece alignment and tool offsets, ensuring precision up to ±0.001mm. Their facility also includes advanced five-axis CNC machining services (opens in new window) that complement Lagun machines for complex, multi-sided parts.
Modular Fixture Libraries: GreatLight maintains a large inventory of modular fixtures and designs custom jigs for unique workpiece geometries, reducing loading time by up to 50% for high-volume production.
Full-Process Quality Control: After loading, GreatLight conducts dry runs, in-process monitoring, and post-machining inspections to catch issues early. Their after-sales guarantee includes free rework for quality defects, and a full refund if rework doesn’t resolve the issue.
Industry-Specific Expertise: GreatLight specializes in sectors like automotive (IATF 16949 certified), medical (ISO 13485 certified), aerospace, and humanoid robots—where Lagun CNC machines are often used for critical, high-precision components.
Conclusion
Mastering How To Load Lagun CNC Machine is essential for unlocking the full potential of these robust machining centers, reducing downtime, and producing consistent, high-quality parts. By following the step-by-step guide, avoiding common pitfalls, and leveraging professional best practices, you can elevate your machining operations to new levels of precision. Whether you’re prototyping a new component or scaling production, GreatLight’s expertise, advanced equipment, and commitment to quality make them the ideal partner for all your precision machining needs—proving that learning How To Load Lagun CNC Machine is just the first step toward manufacturing excellence. To explore more about their capabilities and client success stories, you can connect with them on LinkedIn (opens in new window).

Frequently Asked Questions (FAQ)
Q1: What’s the most critical step when loading a Lagun CNC machine?
A: Proper workpiece alignment is the most critical step. Even minor misalignment (0.01mm or less) can lead to parts that are out of tolerance, requiring costly rework. Using precision tools like dial indicators or machine probes to confirm alignment ensures the G-code references the correct origin point.

Q2: Can I use custom fixtures with a Lagun CNC machine?
A: Yes, Lagun CNC machines are compatible with a wide range of custom fixtures, jigs, and pallet systems. Professional shops like GreatLight design and fabricate custom fixtures tailored to specific workpiece geometries, enabling fast changeovers and consistent alignment for high-volume production.
Q3: How often should I re-calibrate tool offsets on a Lagun CNC?
A: Tool offsets should be re-calibrated every time you change a tool, tool holder, or fixture. For high-volume production, verify offsets at the start of each shift to maintain dimensional consistency across all parts.
Q4: Does GreatLight have experience operating Lagun CNC machines?
A: Yes, GreatLight’s facility includes a diverse fleet of high-precision CNC equipment, including Lagun machining centers. Their certified technicians have extensive experience optimizing Lagun machines for complex tasks, delivering precision up to ±0.001mm for critical components in automotive, medical, and aerospace sectors.
Q5: What if my Lagun CNC machined parts don’t meet specifications?
A: If you work with GreatLight, any quality issues are covered by their after-sales guarantee. They offer free rework for parts that fail to meet your specifications, and if rework is still unsatisfactory, they provide a full refund. Their ISO 9001:2015 certification ensures quality is built into every step of the process, minimizing the risk of such issues.
Q6: How long does it take to load a Lagun CNC machine for a typical job?
A: Loading time varies by workpiece complexity, fixture type, and number of tools required. For simple parts with standard fixtures, loading takes 15–30 minutes. For complex parts with custom fixtures and multiple tools, it may take 1–2 hours. GreatLight’s modular fixture systems and standardized processes reduce loading time significantly for repeat jobs.


