Unlocking the World of Precision: A Pragmatic Guide to Beginning CNC Machining Under $200
The dream of transforming digital designs into precise, tangible metal or plastic parts is powerful, driving innovation across industries. For students, hobbyists, engineers on a shoestring budget, or startups validating a concept, the prospect of “CNC machining” often conjures images of six-figure industrial machines. However, the entry barrier is not as insurmountable as it seems. The question of how to start CNC machining for under $200 is not only valid but opens a practical gateway into the world of subtractive manufacturing. This guide will demystify the process, offering realistic pathways and setting clear expectations for what is achievable at this budget level.
Deconstructing the $200 Starting Point: What Does It Really Buy?
First, it’s crucial to align expectations. A budget of $200 will not purchase a functional, professional-grade CNC machine capable of machining steel or aluminum with high precision. Instead, this budget is your key to accessing capability, not owning hardware. The modern manufacturing ecosystem, fueled by digitalization and distributed production models, allows you to leverage industrial-grade equipment without the capital investment. Your $200 is primarily allocated to procuring a physical part or a service, not the machinery itself.
Your journey begins not with a purchase order for a machine, but with a clear definition of your goal:
Goal A: To Obtain a Simple, Precision-Machined Part. You have a specific component in mind for a project, prototype, or repair.
Goal B: To Learn and Experience the CNC Process Hands-On. You wish to understand CAD/CAM, toolpaths, and material behavior through physical creation.
The pathway differs significantly for each goal.
Pathway 1: The Service Route – Accessing Professional Capability for a Single Part
This is the most direct and effective method to start CNC machining and receive a high-quality part for under $200. You are essentially outsourcing the machining to a professional shop, paying only for the service and material for your specific job.
Step-by-Step Process:
Master the Digital Blueprint (CAD): Your journey starts on your computer. You need a precise 3D model (CAD file) of the part you want. For simple geometries, free software like Fusion 360 (for personal use), Tinkercad, or Onshape is sufficient. The model must be “watertight” and dimensionally accurate.
Choose the Right Partner (The “Under $200” Secret): This is critical. Large, traditional machine shops often have high minimum order values or setup fees that eclipse a $200 budget. The solution lies in leveraging online manufacturing platforms or specialized rapid prototyping services. These platforms aggregate orders, automate quoting, and connect you with workshops optimized for low-volume, quick-turnaround jobs. They make micro-orders economically viable.
Select Material and Process Wisely: On these platforms, you’ll upload your CAD file and configure your order.
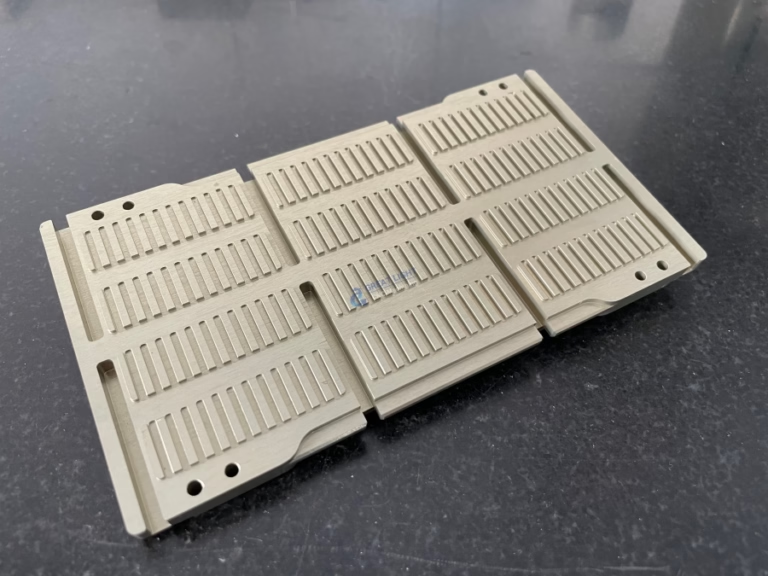
Material: For your budget, choose standard, readily available materials. 6061 Aluminum is the quintessential choice for prototypes—it’s affordable, machines beautifully, and is strong enough for most non-structural proofs-of-concept. Delrin (POM) or Nylon are excellent, low-cost choices for plastic parts. Exotic alloys like titanium or hardened tool steel will immediately exceed your budget.
Process: Choose 3-axis CNC milling. This is the most common and cost-effective CNC process. If your part can be designed to be manufactured in a single setup (without requiring complex undercuts), 3-axis is perfect. Avoid specifying 4-axis or 5-axis unless absolutely necessary, as complexity increases cost.
Quantity: Stick to 1-2 pieces. The unit cost for a single prototype is manageable; the cost savings from volume won’t materialize significantly within a $200 total.
Tolerances and Finishes: Specify standard tolerances (e.g., ±0.1mm or ±0.005″). Requesting aerospace-level tolerances (±0.025mm or ±0.001″) will drastically increase cost due to required inspection time and specialized processes. Choose a basic “as-machined” finish. Secondary finishes like anodizing or powder coating are add-ons for future, larger budgets.
Review the Instant Quote and Order: The platform’s algorithm will generate a price based on material volume, machining time, and setup. A simple aluminum bracket or enclosure part can easily come in under $100, including material. More complex parts may approach the $200 ceiling. Place your order, and the platform will handle the rest—sending the job to a vetted machine shop.
What You Get: Within days, you receive a professionally machined part, giving you firsthand experience with the quality, precision, and potential of CNC technology. You’ve successfully started CNC machining without touching a machine.
Pathway 2: The DIY & Learning Route – Building Foundational Knowledge
If your goal is experiential learning, your $200 can be invested in tools that build the foundational skills that precede physical machining.

Invest in Software & Simulation (~$0-$100): The heart of CNC is software. Deeply learn a CAD/CAM package. Fusion 360 offers a powerful free license for hobbyists and startups. Use this budget to perhaps purchase an advanced online course on Udemy or Coursera focused on CNC programming (CAM) within Fusion 360. Learning to create error-free toolpaths, select correct feeds/speeds, and simulate machining virtually is invaluable.
Start with Alternative “Desktop” Fabrication (~$100-$200): To bridge the gap between digital and physical, consider:
PCB Milling: Small, affordable desktop CNC routers (like the popular Genmitsu 3018 series) can be found for around $200. While they cannot machine metals effectively (beyond very soft aluminum with great difficulty), they are excellent for machining PCBs, wax, wood, and plastics. They teach you the core concepts of G-code, workholding, and tool management.
Handheld Power Carving: Tools like rotary tools (Dremel) with router attachments can be used for very basic, manual “machining” of soft materials, helping you develop an intuition for material removal.
The Reality Check: A true CNC machine capable of safely and accurately machining metals like aluminum requires rigidity, precision spindles, and robust electronics, which cost far more than $200 to build or buy. The DIY route at this budget is about skill acquisition, not industrial production.
The GreatLight Perspective: From First Prototype to Production
As a professional manufacturer like GreatLight Metal, we see countless projects begin exactly as described above—a designer or engineer testing a concept with a single, low-cost machined part. This first prototype is the crucial first step in the innovation chain.
When that prototype proves its function and the project scales, the limitations of the “under $200” approach become apparent. Issues of material certification, production repeatability, advanced tolerances, and secondary processing become critical. This is where partnering with a full-service manufacturer provides immense value.
For instance, a client may come to us with a prototype part they had made online. They love the design but now need 500 units with a hard-anodized finish, certified 6061-T6 material, and a critical bore diameter held to ±0.01mm. Our role is to engineer the process for manufacturability, select the optimal machine (perhaps utilizing our 5-axis capabilities for efficiency), and implement rigorous in-process quality checks—all under the umbrella of our ISO 9001:2015 and IATF 16949 certified quality management systems. The initial $200 investment validated the idea; the subsequent partnership ensures its reliable, high-quality realization.

Conclusion
So, how to start CNC machining for under $200? The answer is elegantly simple: Leverage the distributed manufacturing ecosystem to become a client of CNC machining, not an owner of the machine. By intelligently using online manufacturing platforms to produce a simple, well-designed part in a standard material, you can hold a precision-manufactured component in your hands for a very accessible cost. This hands-on experience is invaluable. It either gives you the functional part you need or fuels the learning that will inform your future designs and manufacturing decisions. Whether you remain an informed buyer of machining services or use this as a springboard into deeper technical exploration, that first sub-$200 part is the most important step in your precision manufacturing journey. As your needs evolve from prototype to production, the landscape of partners, like those offering integrated solutions from rapid prototyping to full-scale manufacturing, will be ready to support your next leap forward.
Frequently Asked Questions (FAQ)
Q1: Can I really get a metal part made for under $200?
A1: Absolutely. By designing a relatively simple part (avoiding complex internal cavities or ultra-thin walls), choosing a cost-effective material like 6061 aluminum or Delrin plastic, and ordering a single piece through an online manufacturing service, costs can often range from $50 to $150, well within the $200 budget.
Q2: What is the biggest mistake beginners make when trying to start CNC machining on a budget?
A2: The most common mistake is underestimating the importance of a good, manufacturable design. Designs with sharp internal corners (which require tiny, expensive tools), unnecessarily tight tolerances, or features that require multiple complex setups will skyrocket costs. Designing for manufacturability (DFM) is the most important cost-control skill.

Q3: Is the quality from these online platforms good enough for a functional prototype?
A3: Yes, in most cases. Reputable platforms partner with vetted machine shops. The quality for a 3-axis machined prototype in a common material is typically very high and perfectly suited for form, fit, and functional testing. However, for parts requiring certified materials or mission-critical aerospace/medical tolerances, you would eventually engage a specialized manufacturer with the relevant quality certifications (e.g., ISO 13485 for medical).
Q4: I have $200 to spend on a machine. What should I buy?
A4: With a $200 machine budget, temper your expectations. You can purchase a very basic desktop CNC router for engraving wood, plastics, or PCBs. It will not be a capable metal machining tool. Consider this a learning platform for understanding G-code and basic machine operation, not a production tool. A better investment might be in high-quality CAD/CAM software training and using the remaining funds for a service-made part.
Q5: How does this “start small” approach connect to larger-scale production?
A5: It’s the ideal pipeline. The initial low-cost prototype de-risks your design. Once validated, you can approach a manufacturer like GreatLight Metal for a formal quotation on a pilot run or production volume. You can share your initial prototype and CAD files, and the manufacturer will apply their deep engineering support to optimize the design for cost-effective production, suggest alternative processes (like die casting for high volumes), and ensure quality consistency at scale, seamlessly transitioning your project from a $200 concept to a successful product. Connect with industry leaders on platforms like LinkedIn to explore these advanced manufacturing networks.


