
How To Use A Desktop CNC Machine? Whether you’re a hobbyist prototyping a small gadget, a startup testing a new product design, or a small business producing low-volume custom parts, desktop CNC machines have become accessible tools for turning digital designs into physical components. But mastering their use requires following a structured process to ensure precision, safety, and consistent results. Below, we break down the step-by-step workflow, highlight key best practices, and help you understand when it’s time to scale up to professional precision machining services for more demanding projects.
How To Use A Desktop CNC Machine?
Pre-Use Preparation: Safety and Foundation Setup
Before powering on your desktop CNC machine, prioritizing safety and proper setup is non-negotiable—this directly impacts both your well-being and the quality of your parts.
Safety First:
Wear impact-resistant safety goggles to protect against flying chips; avoid loose gloves, jewelry, or baggy clothing that could get caught in moving parts.
Ensure your workspace has adequate ventilation (especially for machining plastic or metal) to reduce dust and fume exposure.
Never leave the machine unattended during operation, and keep emergency stop buttons within easy reach.
Machine Leveling and Securing:
If your machine is a kit, assemble it per the manufacturer’s manual, paying close attention to aligning linear guides and lead screws.
Level the machine using a spirit level; even minor misalignment can cause vibration that degrades precision over time. Secure it to a heavy, stable workbench to minimize movement during cuts.
Tool and Material Prep:
Select the right end mill for your material: upcut mills for clean top surfaces on wood/plastic, downcut mills for preventing fraying, and flat end mills for general metal machining. For hard materials like aluminum, use carbide tools instead of high-speed steel (HSS) to extend tool life.
Secure your material using appropriate workholding: a precision vise for rigid metal parts, double-sided adhesive tape for thin plastic sheets, or clamps for irregularly shaped pieces. Ensure the material is firmly fixed to avoid shifting during cuts.
Software Setup and G-Code Generation
A desktop CNC machine relies on digital instructions to execute cuts—this phase bridges your design and physical part.
CAD Design Creation:
Start with a 3D or 2D CAD (Computer-Aided Design) file. For beginners, user-friendly tools like Tinkercad or SketchUp work well for simple shapes; for complex parts, professional software like SolidWorks or AutoCAD is ideal. Import existing designs in STL, STEP, or DXF formats if you don’t want to build from scratch.
CAM Software for Toolpath and G-Code:
Convert your CAD file to G-code using CAM (Computer-Aided Manufacturing) software. Popular options for desktop CNCs include Fusion 360 (free for hobbyists), Easel (browser-based, beginner-friendly), and VCarve Desktop.
Key settings to configure:
Spindle Speed: Match to your material (e.g., 10,000–15,000 RPM for aluminum, 15,000–20,000 RPM for plastic).
Feed Rate: Controls how fast the tool moves across the material; slower rates for hard metals to prevent tool breakage.
Depth of Cut: Start with shallow passes (0.1–0.2mm for metals) to reduce tool stress, especially for initial cuts.
Preview the toolpath in the CAM software to check for collisions with the vise or machine limits—adjust accordingly before generating the final G-code.
Transfer G-Code to the Machine:
Send the G-code to your CNC machine via USB drive, SD card, or Wi-Fi (depending on your machine’s capabilities). Most desktop controllers allow you to preview the toolpath on-screen; run a quick visual check to ensure no steps were missed.
Step-by-Step Machine Operation
Once setup is complete, follow these steps to execute your cut:
Homing the Machine: Power on the machine and initiate the homing process. This moves the tool to the machine’s default zero position, establishing a reference point for all axis movements.
Set Workpiece Origin: Manually move the tool to your desired starting point on the material (e.g., the bottom-left corner of your part). Use the machine’s controller to set this as the X, Y, and Z zero positions. For greater accuracy, use a touch probe to automatically detect the material’s surface.
Dry Run: Perform a dry run by raising the tool 5–10mm above the material and running the G-code. This lets you verify the toolpath doesn’t collide with the workholding or machine frame without risking damage to your part or tool.
Start Machining: Lower the tool to the correct Z position, start the spindle, and initiate the cut. Monitor the process closely for the first few minutes—listen for unusual noises (which may indicate tool deflection or material shifting) and check for consistent chip formation.
Post-Machining Shutdown: Once the cut is complete, stop the spindle first, then power off the machine. Allow all moving parts to come to a complete stop before approaching the workspace.
Post-Processing and Machine Maintenance
Part Finishing: Remove the part and use sandpaper, deburring tools, or a file to smooth sharp edges and tool marks. For metal parts, you may also apply a protective coating (e.g., clear anodizing for aluminum) to prevent corrosion.
Machine Care:
Clean chips and dust from the worktable, linear guides, and lead screws after each use using a brush or compressed air.
Lubricate linear guides and lead screws per the manufacturer’s schedule to prevent wear and ensure smooth movement.
Inspect tools for dullness or damage; replace worn end mills promptly to maintain precision.
When To Move Beyond Desktop CNC to Professional Precision Machining
Desktop CNC machines are perfect for small-scale, low-precision projects, but they have clear limitations. For critical applications, partnering with a professional manufacturer like GreatLight CNC Machining Factory is essential. Here are key scenarios where professional services add irreplaceable value:
Complex Geometries: Parts with undercuts, curved surfaces, or multi-axis features require the precision of five-axis CNC machining services (link opens in new window)—a capability desktop machines lack. GreatLight’s advanced five-axis centers can produce intricate parts in a single setup, reducing error and lead times.
Ultra-High Precision Requirements: If your parts demand tolerances of ±0.001mm or tighter (e.g., medical implants, aerospace components), desktop machines can’t deliver consistent results. GreatLight’s ISO 9001:2015-certified processes and in-house inspection equipment ensure every part meets strict precision standards.
Specialized Materials: Machining hard metals (titanium, mold steel), heat-resistant alloys, or engineering plastics requires heavy-duty equipment and expertise. GreatLight’s 127+ pieces of precision equipment, including SLM 3D printers for metal prototypes, can handle nearly any material with ease.
Large Batch Production: Desktop CNCs are slow for mass production, with limited automation. GreatLight’s three wholly-owned manufacturing plants and streamlined workflows can scale to produce hundreds or thousands of parts without sacrificing quality.
One-Stop Solutions: Professional manufacturers like GreatLight offer end-to-end services, including post-processing (anodizing, powder coating, polishing), quality testing, and design optimization. This eliminates the need to coordinate with multiple vendors, saving time and reducing risk.
GreatLight CNC Machining Factory, founded in 2011 in Dongguan’s Chang’an District (China’s “Hardware and Mould Capital”), has 150 employees and a 7600-square-meter facility. It holds certifications like ISO 13485 (medical) and IATF 16949 (automotive), ensuring compliance with industry-specific standards. With a maximum processing size of 4000mm and after-sales guarantees (free rework for quality issues, full refund if unsatisfied), it’s a trusted partner for custom metal and plastic parts across automotive, medical, aerospace, and robotics industries.
Conclusion
How To Use A Desktop CNC Machine? By following the structured steps of preparation, software setup, operation, and maintenance, you can successfully produce small-scale parts with consistent results. While desktop CNC machines offer accessibility and flexibility for hobbyists and small projects, they can’t match the precision, scalability, and expertise of professional manufacturers for high-stakes applications. For complex, high-precision parts or large production runs, partnering with a leader like GreatLight Metal Tech Co., LTD. (link opens in new window) ensures your project meets the highest standards of quality and reliability. In the end, knowing How To Use A Desktop CNC Machine? is a valuable skill, but knowing when to leverage professional services is the key to turning your design into a successful, market-ready product.
Frequently Asked Questions (FAQ)
Q1: Can desktop CNC machines handle metal parts?
A: Yes, most desktop CNC machines can machine soft metals like aluminum, brass, and copper. However, hard metals like steel or titanium will cause rapid tool wear and may not achieve tight tolerances. For hard metals or high-precision metal parts, professional machines like those at GreatLight CNC Machining Factory are far more reliable.
Q2: What’s the difference between G-code and M-code?
A: G-code is the primary language for controlling axis movements and toolpaths (e.g., G00 for rapid movement, G01 for linear cutting). M-code controls auxiliary machine functions (e.g., M03 to start the spindle clockwise, M08 to turn on coolant). Both work together to execute a complete machining cycle.
Q3: How do I improve the precision of my desktop CNC parts?
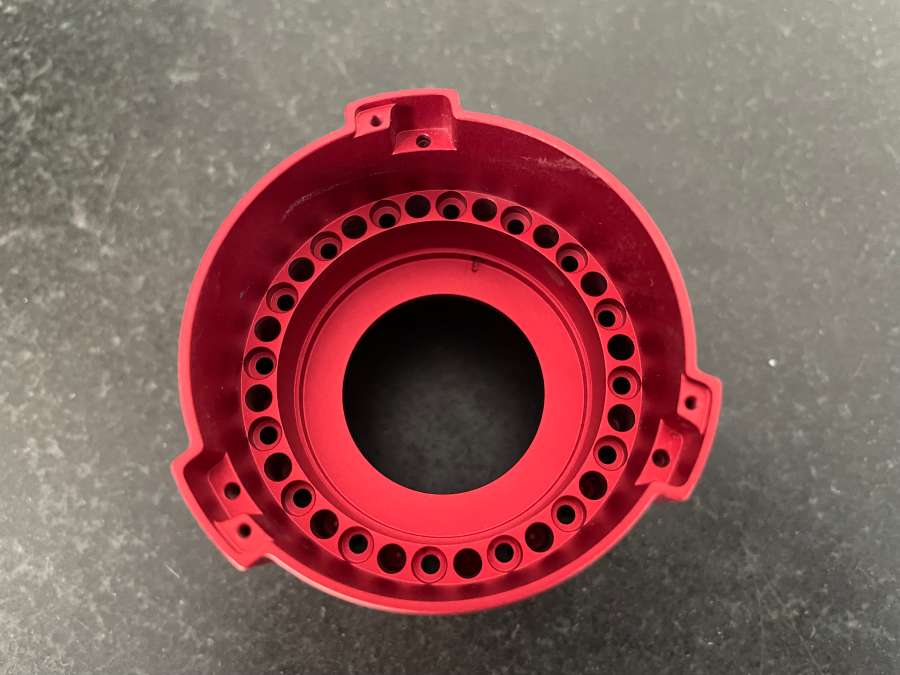
A: To boost precision: level the machine regularly, use high-quality carbide tools, optimize CAM settings for your material, set the workpiece origin accurately with a touch probe, and perform dry runs to catch errors early. For ultra-high precision, consider outsourcing to a professional service like GreatLight, which can achieve ±0.001mm tolerances.
Q4: Does GreatLight CNC Machining Factory accept small prototype orders?
A: Yes, GreatLight specializes in both rapid prototyping and mass production. Whether you need a single prototype or thousands of parts, their team can adapt their processes to meet your volume needs, with the same strict quality standards applied across all orders.
Q5: What post-processing services does GreatLight offer?
A: GreatLight provides a full range of one-stop post-processing services, including anodizing, powder coating, sandblasting, polishing, laser engraving, and electroplating. This eliminates the need to coordinate with multiple vendors, streamlining your production workflow and ensuring consistent quality.



















