In the realm of digital fabrication, the lines between additive and subtractive manufacturing are increasingly blurring. A fascinating project that captures this convergence is the endeavor to turn a 3D printer into a CNC machine. This concept speaks to the maker’s spirit of maximizing existing tools and exploring the full spectrum of material processing. While a converted machine can open new doors for hobbyists and prototyping, understanding its capabilities, limitations, and the context of professional manufacturing is crucial.
This article, from the perspective of a precision engineering workshop, will delve into the principles, methods, and practical considerations of this conversion. We’ll explore when such a hybrid tool is a brilliant innovation and when partnering with a professional service like GreatLight CNC Machining Factory becomes the unequivocally superior choice for achieving reliable, high-tolerance results.
H2: Understanding the Core Principle: From Deposition to Subtraction
At their most fundamental level, both 3D printers (FDM type) and CNC milling machines are computer-controlled Cartesian robots. They share several core components:
A Frame and Motion System: Typically using stepper motors and lead screws or belts to move along the X, Y, and Z axes.
A Controller Board: Often running firmware like Marlin, GRBL, or Klipper to interpret G-code commands.
A Toolhead: This is the critical difference.
The Conversion Essence: To turn a 3D printer into a CNC machine, you are fundamentally replacing the additive toolhead (hot end extruder) with a subtractive toolhead (a rotating spindle or router). This transforms the machine from a device that melts and deposits plastic layer by layer into one that cuts, carves, and engraves materials like wood, plastic, PCB, and soft metals.
H2: A Step-by-Step Guide to Conversion
Converting a 3D printer requires mechanical, electrical, and software modifications. Here’s a structured approach:

H3: 1. Assessment and Selection of the Base Printer
Not all 3D printers are suitable candidates. The ideal base is:

Rigid Frame: A sturdy frame (e.g., cube-style CoreXY or a robust i3 variant) is essential to handle cutting forces without flexing, which destroys precision.
Sufficient Build Volume: Determines the maximum size of your workpiece.
Controller Compatibility: The board must support the spindle control and potentially higher-current stepper drivers.
H3: 2. Mechanical Modifications
Spindle Mounting: Design and print or fabricate a secure mount to attach the new spindle to the printer’s X-carriage. This mount must be extremely rigid.
Spindle Selection: Common choices include:
DC Brushless Spindles (500W-800W): Common for engravers, good for wood/plastic.
Trim Routers (e.g., Dremel): Accessible but often underpowered and loud.
VFD Spindles (1.5KW+): The professional choice for serious cutting, requiring a Variable Frequency Drive for speed control.
Workholding: This is one of the biggest challenges. You need a solid, flat bed (often replacing the heated bed with an MDF or aluminum spoilboard) and a method to clamp workpieces (T-slot nuts, clamps, vacuum table).
H3: 3. Electrical and Control Upgrades
Spindle Power & Control: The spindle needs its own power supply. For speed control, you must connect it to a PWM-capable output on your controller board.
Stepper Motor Considerations: Cutting forces are higher than printing. You may need to upgrade to more powerful stepper motors or adjust current settings to prevent skipped steps.
Wiring and Safety: Ensure all wiring is secure. Adding an emergency stop switch is highly recommended. Always wear appropriate PPE (safety glasses, hearing protection).
H4: 4. Software and Workflow Shift
CAD/CAM is King: You no longer use slicers. The workflow becomes:
Design your part in CAD software.
Generate toolpaths (G-code) in CAM software (e.g., Fusion 360, Estlcam, Carbide Create). This step is critical—you must define feed rates, spindle speeds, depth of cut, and tool selection.
Firmware Tweaks: You may need to update the printer’s firmware (e.g., enable spindle control features in Marlin or switch to GRBL-based firmware designed for CNC).
H3: 5. Material and Tooling Considerations
Start Soft: Begin with machinable wax, foam, or softwoods to learn and calibrate without breaking tools or the machine.
Endmills vs. Filament: You’ll need a collection of end mills (flat, ball-nose, V-bits). Collets must match your spindle’s shaft size (e.g., ER11).
Dust and Chip Management: This is a major issue. A proper dust shoe connected to a vacuum is essential for visibility, machine health, and air quality.
H2: The Inherent Limitations and Practical Realities
While the project is educative and rewarding, a converted machine faces inherent constraints that separate it from industrial equipment:
Rigidity and Precision: 3D printer frames and linear motion systems (often using V-slot wheels) are not designed for the lateral forces of milling. This leads to chatter, tool deflection, and poor surface finishes. Achieving true precision CNC machining tolerances (±0.1mm is often a struggle, let alone ±0.025mm or tighter) is nearly impossible.
Speed and Power: The spindles used are generally low-power, limiting material removal rates and the ability to cut hard materials like metals efficiently.
Work Envelope and Clamping: The original build volume is reduced by the need for workholding, and securing material robustly is a persistent challenge.
Reliability and Repeatability: For one-off prototypes, it might work. For any form of batch production or consistent part quality, reliability is low.
H2: When to Convert, and When to Partner with a Professional
This is the critical decision point for any designer, engineer, or maker.
Consider the DIY conversion if:
Your primary goal is education and experimentation.
You work almost exclusively with soft materials (balsa, pine, acrylic, PCB).
Your precision requirements are very low (> ±0.5mm).
You need to make simple fixtures, signs, or decorative items.
Immediately choose a professional service like GreatLight CNC Machining Factory if:
You require high dimensional accuracy and tight tolerances (from ±0.1mm down to ±0.001mm).
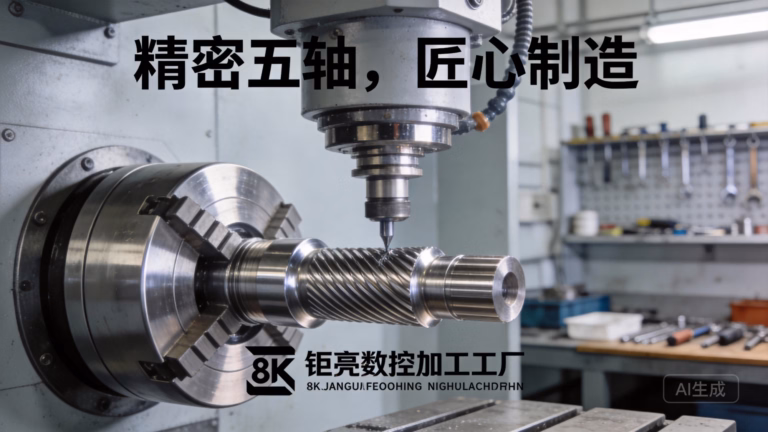
Your designs involve complex 3D geometries, deep cavities, or undercuts that benefit from 5-axis CNC machining.
You are machining engineering-grade metals (aluminum, stainless steel, titanium), hard plastics (PEEK, Delrin), or advanced composites.
Surface finish and part integrity are critical to your product’s function.
You need material certification, process validation, and full quality management (ISO 9001:2015, IATF 16949).
Your project scales beyond a single prototype to small-batch or production runs.
A professional manufacturer brings not just massively superior precision CNC machining equipment, but also decades of process knowledge, metrology for verification, and a full suite of post-processing (anodizing, painting, heat treatment) capabilities. They transform your digital model into a certified, reliable component.

Conclusion
The project to turn a 3D printer into a CNC machine is a fantastic deep dive into mechatronics and digital manufacturing principles. It empowers makers to expand their workshop’s capabilities on a budget. However, it is fundamentally a compromise. The precision, rigidity, speed, and material range of a converted machine are orders of magnitude below that of a dedicated, industrial CNC system.
For clients and innovators whose projects demand reliability, precision, and professional-grade results, partnering with an expert manufacturer is not just an option—it is a strategic necessity. The journey from a creative concept to a market-ready product often requires the kind of uncompromising capability that only comes with professional equipment and expertise. It is in this space that dedicated partners prove their indispensable value.
FAQ: Turning a 3D Printer into a CNC Machine
Q1: What is the best type of 3D printer to convert into a CNC machine?
A1: Printers with a very rigid, enclosed frame (like a CubeX, Creality CR-10 Max with heavy reinforcement, or a Voron design) are best. Avoid printers with a cantilevered design or excessive frame flex. CoreXY printers often provide a good balance of rigidity and platform stability.
Q2: Can a converted 3D printer cut aluminum?
A2: It is possible but extremely challenging and limited. You would need a very rigid machine, a high-power spindle (1KW+), single-flute end mills, very slow feed rates, and minimal depth of cut. Even then, surface finish and accuracy will be poor compared to a professional mill. It’s not recommended for any part requiring precision.
Q3: What is the single biggest challenge in this conversion?
A3: Rigidity. Every part of the system—frame, linear motion, spindle mount, and workholding—must be rock-solid. Flex in any of these areas will cause chatter, broken tools, inaccurate parts, and potential damage to the machine.
Q4: Is it more cost-effective to convert a printer or buy a desktop CNC?
A4: For light-duty work (wood, plastic engraving), a conversion of a printer you already own can be cheaper. However, for more serious milling, a purpose-built desktop CNC router (like those from Shapeoko or Onefinity) will deliver far better performance, rigidity, and safety for a similar total investment. They are designed from the ground up for subtractive forces.
Q5: When should I stop using a converted machine and seek professional CNC services?
A5: You should seek professional precision CNC machining services when:
Your part’s functional success depends on hitting specific, tight tolerances.
You are working with metals harder than 6061 aluminum or engineering plastics.
You need a fine surface finish straight off the machine.
You require more than 1-2 identical parts with consistency.
Your design complexity exceeds 2.5D or simple 3D carving.
For projects where the cost of failure is high, the expertise of a seasoned manufacturing partner is your most valuable asset. Learn more about our capabilities on our professional network at GreatLight on LinkedIn.


