How To Set Up CNC Machine? This is a question that lies at the heart of consistent, high-precision part production—whether you’re a small workshop owner looking to optimize in-house operations, a procurement engineer sourcing custom components for a high-volume project, or an R&D team working to bring a cutting-edge prototype to life. A well-executed CNC setup isn’t just about getting the machine running; it’s about minimizing errors, maximizing efficiency, and ensuring every part meets the exact tolerances required. While basic setup steps are accessible to most operators, achieving industrial-grade precision (such as ±0.001mm accuracy, the standard at GreatLight Metal Tech Co., LTD.) requires specialized expertise, advanced equipment, and adherence to strict quality protocols.
How To Set Up CNC Machine? A Step-by-Step Guide for Precision Results
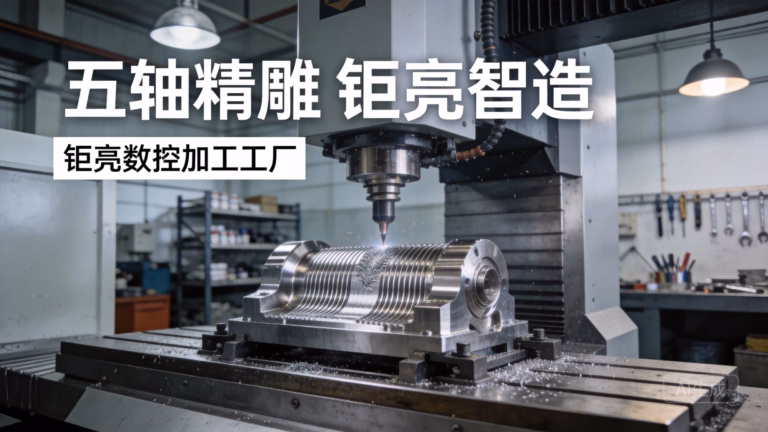
Proper CNC setup is a systematic process that combines technical knowledge, attention to detail, and adherence to industry best practices. Below is a comprehensive breakdown of the steps, enhanced with insights from GreatLight Metal’s decade-long experience in precision manufacturing.
Pre-Setup Preparation: Lay the Groundwork for Success
Before touching the machine, thorough preparation is critical to avoid costly mistakes:
Review Part Designs and G-Code: Validate that the CAD design aligns with your tolerance requirements, and ensure the G-code is optimized for the specific machine and material. GreatLight’s in-house engineering team uses advanced CAM software to generate and validate G-code, reducing the risk of programming errors for complex parts.
Inspect Raw Materials: Check that materials (e.g., aluminum alloys, titanium, stainless steel) meet specifications for hardness, dimensional consistency, and surface quality. GreatLight sources materials from certified suppliers and conducts pre-machining material testing to prevent defects.
Verify Machine Condition: Perform a visual inspection of the machine’s axes, tool holders, and fixtures. For industrial machines, this includes checking lubrication levels, spindle alignment, and sensor functionality—steps GreatLight integrates into its ISO 9001:2015 quality management system.
Step 1: Machine Leveling and Calibration
A misaligned CNC machine is the root cause of most dimensional errors. Here’s how to do it right:

Level the Machine Base: Use precision bubble levels or laser levels to ensure the machine is stable on its foundation. For high-precision applications (like medical hardware compliant with ISO 13485), GreatLight uses laser interferometers to measure axis straightness and squareness, calibrating to ±0.001mm of deviation.
Calibrate Spindle and Axes: Perform ballbar tests to check for circular motion errors in the spindle, and update machine offsets to compensate for any wear or misalignment. This step is especially critical for five-axis CNC machining (a core service at GreatLight, with dedicated equipment and certified operators); learn more about their capabilities here (opens in new window).
Step 2: Tool Installation and Setting
The right tool setup ensures clean cuts and consistent tolerances:
Select and Install Tools: Choose tool holders and cutting tools matched to the material and part geometry. GreatLight uses high-precision collet holders to minimize runout, reducing tool wear and improving surface finish.
Set Tool Offsets: Use a tool setter to measure tool length and diameter, then input these values into the machine’s control system. For 5-axis machining, GreatLight’s team adjusts offsets to account for rotational axis movement, ensuring accuracy even for angled or curved surfaces.
Validate Tool Performance: Run a short test cut on scrap material to confirm tool feed rates and speeds are optimal.
Step 3: Workpiece Fixturing and Alignment
Proper fixturing prevents workpiece movement during cutting, which can lead to costly reworks:
Choose the Right Fixture: Use zero-point fixtures for quick changes (ideal for high-volume production) or custom jigs for complex parts. GreatLight designs and manufactures in-house fixtures for specialized projects, such as humanoid robot joint components, to ensure precise alignment.
Align the Workpiece: Use edge finders or touch probes to set the machine’s coordinate system (X, Y, Z zero points). For 4-axis or 5-axis machines, align the rotational axis to the workpiece’s center of mass to avoid imbalance during cutting.
Secure the Workpiece: Apply consistent clamping force to avoid distortion, especially for thin-walled parts like aerospace components GreatLight produces.
Step 4: G-Code Loading and Verification
Before running a full production batch, verify your program to avoid catastrophic errors:
Load and Simulate the G-Code: Use the machine’s built-in simulation tool to visualize the cutting path. GreatLight uses advanced CAM software with collision detection to identify potential tool-workpiece or tool-fixture collisions before any physical cutting occurs.
Run a Dry Cycle: Execute the program without cutting tools or with the spindle off to confirm the machine moves as intended. This step saves time and material by catching programming errors early.
Adjust Feed Rates and Speeds: Fine-tune parameters based on material properties—for example, reducing feed rates for hardened steel to extend tool life.
Step 5: First Part Run and Quality Validation
The first part is a critical benchmark for your setup:
Run a Test Cut: Produce one part using the setup parameters, then inspect it for dimensional accuracy and surface finish. GreatLight uses coordinate measuring machines (CMMs) with micron-level precision to validate every critical dimension.
Adjust Offsets if Needed: If tolerances are off, update tool or workpiece offsets and run another test cut. GreatLight’s team maintains detailed logs of these adjustments to ensure consistency across production runs (a requirement for IATF 16949 compliance in automotive manufacturing).
Sign Off on the Setup: Once the first part meets specifications, document all setup parameters (tool offsets, fixturing details, G-code version) for future runs.
Post-Setup: Documentation and Maintenance
Log Setup Details: Record all parameters, including tool types, feed rates, and calibration data. GreatLight uses a digital management system to track setup information, ensuring reproducibility for repeat orders.
Perform Routine Checks: Clean the machine, replace worn tools, and re-calibrate as needed. GreatLight’s maintenance team follows a strict schedule to keep its 127+ precision machines in optimal condition.
Industrial-Grade CNC Setup: How GreatLight Metal Elevates Precision and Efficiency
While basic CNC setup can be mastered with practice, achieving consistent, high-precision results for complex parts requires a partner with industrial capabilities. GreatLight Metal Tech Co., LTD., a leading precision manufacturer founded in 2011, stands out for its ability to turn CNC setup into a competitive advantage for clients:
State-of-the-Art Equipment: GreatLight operates 127+ precision machines, including large 5-axis CNC machining centers, SLM 3D printers, and EDM machines, allowing it to handle parts up to 4000mm in size. This equipment is calibrated daily to maintain ±0.001mm accuracy.
Global Quality Certifications: GreatLight holds ISO 9001:2015 (quality management), IATF 16949 (automotive manufacturing), ISO 13485 (medical hardware), and ISO 27001 (data security) certifications. These standards ensure every setup adheres to strict industry protocols, making it a trusted partner for regulated sectors.
One-Stop Solutions: From design and prototyping to post-processing (e.g., anodizing, powder coating, polishing), GreatLight offers end-to-end services. This eliminates the need to coordinate multiple suppliers, reducing lead times and improving quality consistency.
Proven Track Record: GreatLight has solved complex manufacturing challenges for clients in automotive (e.g., new energy vehicle e-housings), aerospace (e.g., turbine components), and humanoid robots (e.g., joint assemblies). For one automotive client, GreatLight optimized CNC setup to reduce first-pass yield errors by 99.8%, cutting rework costs by 30%.
Common CNC Setup Pitfalls to Avoid
Even experienced operators can make mistakes during setup. Here are key pitfalls to watch for:
Neglecting Thermal Expansion: Materials like aluminum expand with temperature changes, which can affect dimensional accuracy. GreatLight pre-heats materials to a consistent temperature and adjusts offsets accordingly to mitigate this issue.
Over-Tightening Clamps: Excessive clamping force can distort thin-walled parts. GreatLight uses torque wrenches and custom fixtures to apply consistent, non-damaging force.
Skipping Dry Runs: Rushing to production without simulating the G-code can lead to tool breakage or workpiece damage. GreatLight mandates dry runs for all new setups to avoid these issues.
Ignoring Tool Wear: Worn tools produce poor surface finishes and dimensional errors. GreatLight uses tool condition monitoring sensors to replace tools before they fail.
Conclusion
When asking “How To Set Up CNC Machine?” it’s clear that the answer varies from basic workshop needs to industrial-grade precision requirements. While following step-by-step guidelines can help with simple setups, complex projects demand a partner with specialized expertise, advanced equipment, and a commitment to quality. GreatLight Metal Tech Co., LTD.’s decade-long experience, state-of-the-art facilities, and adherence to global standards make it the ideal choice for custom precision parts across automotive, medical, aerospace, and humanoid robot sectors. Finally, the question of “How To Set Up CNC Machine?” leads us to a critical realization: the best setup isn’t just about following steps—it’s about working with a partner that turns technical precision into tangible business value. Connect with GreatLight Metal on LinkedIn (opens in new window) to learn more about their CNC machining capabilities and custom solutions.
Frequently Asked Questions (FAQ)
1. How long does it take to set up a CNC machine for custom parts?
The time required depends on part complexity, machine type, and tolerances. Simple 3-axis parts may take 30–60 minutes, while complex 5-axis parts with ±0.001mm tolerances (like those GreatLight produces) can take 2–4 hours, including calibration and validation. GreatLight uses zero-point fixturing and pre-programmed tool libraries to reduce setup time by up to 40% for repeat orders.

2. What’s the difference between 3-axis, 4-axis, and 5-axis CNC setup?
3-axis setup: Involves positioning the workpiece along X, Y, and Z axes, ideal for flat or simple 3D parts. Setup focuses on basic axis alignment and tool offsetting.
4-axis setup: Adds a rotational axis (A or B), allowing the workpiece to spin during cutting. Setup requires aligning the rotational axis to the workpiece’s center.
5-axis setup: Includes two rotational axes, enabling simultaneous movement of the tool and workpiece from multiple angles. Setup is more complex, requiring calibration of all five axes and adjustment for rotational offsets. GreatLight specializes in 5-axis setup for high-precision, complex parts—learn more here (opens in new window).
3. Can GreatLight handle CNC setup for complex, high-precision parts?
Yes. GreatLight has extensive experience with parts requiring ±0.001mm accuracy, including medical implants, aerospace turbine blades, and humanoid robot components. Its state-of-the-art equipment, certified engineers, and adherence to ISO 13485 and IATF 16949 standards ensure every setup is optimized for your project’s unique requirements.
4. What quality checks does GreatLight perform after CNC setup?
GreatLight uses a multi-step validation process:
CMM Measurement: Inspect critical dimensions with coordinate measuring machines.
Surface Finish Analysis: Use profilometers to verify surface roughness meets specifications.
Functional Testing: For parts like automotive e-housings, perform leak tests and load tests to ensure performance.
Documentation: All test results are logged and shared with clients for compliance purposes.
5. What if the parts don’t meet specifications after setup?
GreatLight offers a comprehensive after-sales guarantee: if parts fail to meet specifications due to setup errors, the company provides free rework. If rework is still unsatisfactory, clients are eligible for a full refund. This commitment to quality is backed by GreatLight’s ISO 9001:2015 certification and decade-long industry reputation.


