If you’ve ever wanted to bring digital designs to life on paper, cardboard, or even thin wood, learning How To Make CNC Drawing Machine Using Arduino? is an engaging, hands-on project that blends electronics, mechanics, and programming. Whether you’re a hobbyist exploring CNC technology for the first time or a small business testing prototype drawing mechanisms, an Arduino-based CNC drawing machine offers an affordable, customizable entry point into computer-controlled manufacturing. While building your own machine is a rewarding learning experience, for precision components or industrial-scale applications, partnering with a professional manufacturer like GreatLight CNC Machining Factory can take your projects to the next level—combining uncompromising precision, efficiency, and reliability.
How To Make CNC Drawing Machine Using Arduino?
Understanding the Basics of an Arduino CNC Drawing Machine
At its core, an Arduino CNC drawing machine is a computer-controlled 2D (or 3D) plotter that uses an Arduino microcontroller to interpret G-code—a numerical control programming language that defines the machine’s movement path. The system relies on three key components:
Motion Control: Stepper motors drive the pen along horizontal (X) and vertical (Y) axes, while an optional servo or solenoid handles the Z-axis (pen lift/lower) to start and stop drawing.
Firmware: GRBL, an open-source lightweight firmware, turns your Arduino into a dedicated CNC controller, handling motion planning, motor acceleration, and G-code parsing.
User Interface: A computer running a G-code sender (like Universal Gcode Sender) translates digital designs into commands the Arduino can execute.
This setup is ideal for beginners because it’s low-cost, modular, and uses readily available parts—while still offering a glimpse into the precision engineering that powers industrial CNC systems.
Materials and Tools You’ll Need
To build a functional Arduino CNC drawing machine, gather the following components (we’ll focus on a 2-axis design with an optional Z-axis pen lift):

Electronic Components
Arduino Board: Arduino Uno (best for beginners due to accessible pins) or Nano (compact for smaller machines).
Stepper Motors: 2 (or 3 for Z-axis) NEMA 17 motors (1.8° step angle, 1.5A current rating works well for most DIY setups).
Stepper Motor Drivers: DRV8825 (preferred over A4988 for 32x microstepping, which delivers smoother motion and higher precision) or A4988.
Power Supply: 12V/5A DC power supply (USB alone doesn’t provide enough current to drive stepper motors reliably).
Pen Lift Mechanism: SG90 servo motor (easiest for beginners to control) or a solenoid for faster actuation.
Jumper Wires: Male-to-male, male-to-female for wiring components.
Optional: Limit switches (for homing the machine to a known starting position) or a laser module (to convert the machine into an engraver).
Mechanical Components
Frame: Aluminum extrusion (2020 series is popular for its rigidity and ease of assembly) or MDF/plywood (cheaper but less durable).
Linear Motion System: Lead screws with T-nuts (for high precision) or timing belts and pulleys (for faster movement). Alternatively, smooth rods with linear bearings (affordable but slightly less precise).
Pen Holder: 3D-printed (quick and customizable) or custom machined (GreatLight’s precision machining services can produce holders with tighter tolerances and longer durability than 3D-printed versions).
Mounting Brackets: For stepper motors, drivers, and pen holders (3D-printed or pre-made).
Tools
Soldering iron and solder (for connecting wires to drivers or motors).
Screwdriver set (Phillips and flathead).
Wire cutters/strippers.
Multimeter (for testing connections and current levels).
Computer (to flash firmware and send G-code to the Arduino).
Step-by-Step Construction Guide
1. Assemble the Machine Frame
Start by building a rigid base frame to ensure drawing accuracy—any wobble will lead to distorted designs.
For aluminum extrusion: Use corner brackets to connect rails into a rectangular shape (e.g., 400x300mm working area). Use a square to verify the frame is perfectly aligned.
For MDF/plywood: Cut panels to size and reinforce joints with wood glue or metal brackets to prevent flexing.
2. Install Linear Motion Components
For lead screw systems: Attach the lead screw to the stepper motor shaft using a coupling, then secure the T-nut to the moving carriage. Ensure the lead screw rotates smoothly without binding.
For timing belt systems: Mount pulleys on the stepper motor and end brackets, thread the timing belt around them, and tighten it to remove slack (avoid over-tightening, which can cause friction).
Test the carriage movement: Slide it along the axis to ensure it moves freely without resistance.
3. Wire the Electronic Components
Follow these wiring steps carefully to avoid damaging components:
Connect stepper motor drivers to the Arduino: Each driver uses 4 pins (Step, Direction, Enable, Ground) and draws 5V power from the Arduino.
Wire stepper motors to drivers: Match the motor’s color-coded coils to the driver’s A+, A-, B+, B- terminals (check the motor datasheet for correct wiring).
Connect the 12V power supply to the drivers (ensure the ground is common with the Arduino to avoid voltage differences).
For the servo pen lift: Connect the signal pin to an Arduino PWM pin (e.g., D9), VCC to 5V, and GND to the Arduino’s ground.
Optional: Wire limit switches to Arduino digital pins for homing functionality (use pull-up resistors or enable internal pull-ups in the firmware).
4. Flash GRBL Firmware to Arduino
GRBL is the industry-standard firmware for Arduino CNC setups. Here’s how to install it:
Download the latest GRBL sketch from the official repository and open it in the Arduino IDE.
Disconnect external power from the Arduino, select your board and port, then click “Upload.”
Once uploaded, open the Serial Monitor (set baud rate to 115200) and type $# to view default settings. Calibrate steps per mm ($100 for X-axis, $101 for Y-axis) based on your machine’s specs:
Example: For a lead screw with 2mm pitch and 16x microstepping:
Steps per mm = (200 steps/rev * 16 microsteps) / 2mm = 1600 steps/mm
Save changes by typing $ and pressing enter.
5. Install the Pen Holder and Calibrate Position
Attach the pen holder to the X-axis carriage. If using a servo, mount it so it can lift the pen 2-3mm off the surface when activated.
Load a pen and adjust its height so it touches the paper firmly but doesn’t drag. Test the servo by sending a command like M3 S90 (lifts pen) or M3 S0 (lowers pen) via the Serial Monitor.
6. Test Motion and Draw Your First Design
Use a G-code sender (e.g., Universal Gcode Sender) to send basic commands: G0 X10 Y10 moves the pen 10mm right and 10mm up.
For your first drawing, convert a simple SVG design to G-code using Inkscape’s free G-code plugin. Load the G-code into the sender, place paper under the pen, and start the drawing process.
Troubleshooting Common Issues
Stepper Motors Not Moving: Check power supply connections, ensure the driver’s Enable pin is not activated (GRBL disables motors by default until a command is sent), and verify wiring between the Arduino and drivers.
Inaccurate Drawing: Calibrate steps per mm, tighten loose belts or lead screws, increase microstepping on drivers, or reinforce a wobbly frame.
Pen Not Lifting/Lowering: Adjust the servo angle in G-code, check wiring connections, or replace a faulty servo.
Skipping Steps: Increase motor current (use a multimeter to set the driver’s current limit to match the motor’s rating), reduce drawing speed, or upgrade to higher-torque stepper motors.
Enhancing Your DIY CNC Drawing Machine
Once you have a basic working machine, consider these upgrades to boost performance:
Add Limit Switches: Homing functionality ensures consistent starting positions for every drawing.
Upgrade to Linear Rails: Custom machined linear rails from GreatLight offer superior rigidity and smoother motion than smooth rods, reducing drawing errors.
Integrate a Laser Module: Swap the pen holder for a laser module to convert the machine into an engraver capable of marking wood, plastic, or metal.
Closed-Loop Stepper Motors: These motors use encoders to detect and correct skipped steps, ideal for heavy-duty drawing tasks.
When to Upgrade to Professional CNC Machining
While building a DIY Arduino CNC drawing machine is a fantastic learning tool, there are scenarios where professional precision machining is non-negotiable:
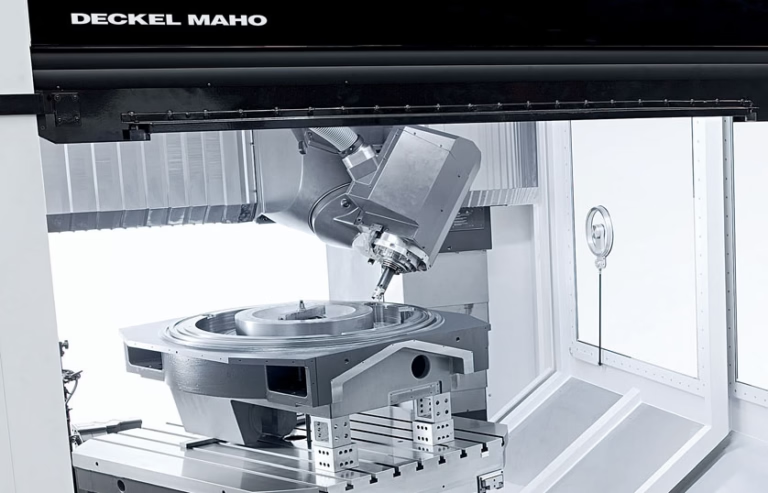
Custom Precision Components: If you need parts like custom linear rails, pen holders, or frame components with tight tolerances (±0.001mm) that can’t be 3D-printed, GreatLight CNC Machining Factory offers 5-axis CNC machining services capable of achieving these standards—far beyond what most DIY setups can produce.
Industrial Scalability: For businesses mass-producing CNC drawing machines, GreatLight provides one-stop manufacturing solutions, including CNC milling, sheet metal fabrication, and post-processing (anodizing, painting, etc.) to meet volume demands.
Compliance and Quality: GreatLight holds ISO 9001:2015, IATF 16949, and ISO 13485 certifications, ensuring parts meet strict industry standards for automotive, medical, and aerospace applications. They also offer free rework for quality issues and a full refund if rework is unsatisfactory.
Conclusion
Learning How To Make CNC Drawing Machine Using Arduino? is a rewarding journey that bridges digital design and physical creation, offering a hands-on introduction to CNC technology. Whether you’re a hobbyist exploring new skills or a small business testing a prototype, this project provides a low-cost, flexible entry point. However, when precision, durability, or scalability is critical, partnering with a professional manufacturer like GreatLight CNC Machining Factory is the ideal choice. Their decades of experience, state-of-the-art equipment, and comprehensive one-stop services ensure your custom parts are produced to the highest standards, every time. Remember, How To Make CNC Drawing Machine Using Arduino? is a great starting point, but for industrial-grade results, trust the experts at GreatLight CNC Machining Factory.
Frequently Asked Questions (FAQ)
Q1: Can I use any Arduino board for this project?
A: Most Arduino boards work, but Arduino Uno is best for beginners due to its accessible pins and larger form factor. Arduino Nano is a good choice for compact machines. Avoid using boards with limited I/O pins (like Arduino Micro) for setups with limit switches or additional sensors.
Q2: What’s the best stepper motor driver for a DIY CNC drawing machine?
A: The DRV8825 driver is superior to the A4988 for most setups. It supports microstepping up to 32 steps, resulting in smoother motion and higher precision. It also includes overcurrent protection to prevent damage to motors and drivers.

Q3: How do I generate G-code for my drawings?
A: For simple 2D designs, use Inkscape with its free G-code plugin (ideal for SVG files). For complex CAD designs, use Fusion 360 or SolidWorks, which can export G-code directly. Online tools like GCodeGenerator.com also convert PNG files to G-code for basic drawings.
Q4: What materials can I use to build the frame of my CNC drawing machine?
A: Aluminum extrusion (2020 series) is the top choice for its rigidity, durability, and ease of assembly. MDF or plywood is cheaper but less rigid, which can lead to drawing inaccuracies. For high-precision DIY machines, consider custom machined aluminum frames from GreatLight for unmatched stability.

Q5: When should I consider professional CNC machining services instead of a DIY solution?
A: Opt for professional services if you need:
Parts with tolerances tighter than ±0.01mm.
Custom components that can’t be 3D-printed or made with hobbyist tools.
Mass production of parts for commercial CNC drawing machines.
Compliance with industry standards (e.g., ISO 9001, IATF 16949) for industrial applications.
GreatLight CNC Machining Factory offers all these benefits, plus one-stop post-processing and dedicated after-sales support.


