How To Make A Cheap CNC Machine? is a question that’s top-of-mind for hobbyists, maker-space enthusiasts, and small business owners looking to add machining capabilities without breaking the bank. Building a budget CNC can be a fulfilling project that teaches you the fundamentals of motion control, mechanical design, and machining. However, it’s important to set realistic expectations: a cheap DIY CNC will never match the precision, speed, or versatility of a professional machine. Before you grab your tools, let’s break down what you need to know—from the planning phase to when it makes more sense to outsource to a trusted partner like GreatLight CNC Machining Factory.
Key Considerations Before Building a Cheap CNC Machine
Before you start sourcing parts, take time to answer three critical questions to ensure your project aligns with your needs:
Define Your Machining Goals
Ask yourself: What materials will I be cutting? (Wood, plastic, soft metals like aluminum, or hard metals like steel?) What size parts do I need to make? What level of precision do I require? A cheap DIY CNC is best suited for simple tasks like engraving wood, cutting plastic sheets, or milling basic aluminum parts with tolerances no tighter than ±0.1mm. If you need parts for automotive prototypes, medical devices, or aerospace components—where tolerances can be as tight as ±0.001mm—building a budget machine won’t cut it.

Budget vs. Precision Trade-Offs
The word “cheap” is relative here. A functional DIY CNC can be built for as little as $200-$500 using repurposed parts and open-source software, but these machines will have significant limitations. Expect to sacrifice precision, durability, and speed for cost. For example, a $300 DIY router might vibrate excessively when cutting hard metals, leading to rough finishes or inaccurate parts. If you need consistent, high-quality results, you’ll either have to invest more in better components or consider outsourcing.
Time and Skill Investment
Building a CNC machine isn’t a weekend project for beginners. You’ll need basic mechanical skills (drilling, tapping, assembling frames), electrical wiring knowledge, and familiarity with CAD/CAM software to design parts and generate toolpaths. Even with open-source guides, troubleshooting issues like backlash (play in the mechanical components) or misaligned axes can take hours or days. If you’re short on time or lack these skills, outsourcing your machining needs is often more cost-effective in the long run.
How To Make A Cheap CNC Machine?: A Step-by-Step Guide
If you’ve decided to move forward with your DIY CNC build, follow these steps to maximize your chances of success:
1. Select the Right CNC Machine Type
For a budget build, start with a CNC router—it’s the easiest and cheapest to construct, ideal for cutting wood, plastic, and soft metals. Avoid CNC mills or lathes, which require more robust frames and higher-powered components that drive up costs. Alternatively, you can repurpose an old 3D printer or laser cutter to convert into a basic CNC, which saves on parts like stepper motors and linear rails.
2. Source Affordable Components
You can cut costs by using repurposed materials and open-source tools:
Frame: Use aluminum extrusion (from old industrial equipment or budget online suppliers), MDF, or even PVC pipes for a basic frame. Aluminum is more durable than MDF but slightly more expensive.
Motors: Repurpose stepper motors from old printers, scanners, or CNC kits. Look for NEMA 17 motors—they’re common, cheap, and suitable for light-duty tasks.
Controller: Use an Arduino-based GRBL controller (costing $20-$50) or a Raspberry Pi with CNC-focused software like CNCjs. These open-source options are well-supported by online communities.
Spindle: For a cheap spindle, repurpose a cordless drill or use a low-power electric motor with a collet to hold bits. Note that these spindles aren’t ideal for hard metals, as they lack the torque and speed needed for clean cuts.
Linear Motion: Use threaded rods (cheaper but less precise) or repurposed linear rails from old printers. Threaded rods are prone to backlash, so you’ll need to add anti-backlash nuts to improve accuracy.
3. Assemble the Mechanical Frame
Start by building the base frame according to your design (you can find free plans online for budget CNC routers). Ensure the frame is square and rigid—any flex will cause vibration and inaccurate cuts.
Attach the linear motion components (threaded rods or rails) to the frame. Make sure they’re perfectly parallel to avoid binding during movement.
Mount the stepper motors to the frame and connect them to the linear motion components using timing belts or lead screws. Timing belts are quieter and more efficient than lead screws for horizontal axes, while lead screws are better for vertical axes (Z-axis) where weight is a factor.
4. Install the Motion Control System
Wire the stepper motors to the GRBL controller, following the manufacturer’s instructions. Make sure to double-check the wiring to avoid damaging the motors or controller.
Connect the controller to your computer via USB. Install GRBL software to send toolpaths to the machine.
Test the motion of each axis manually to ensure they move smoothly without binding. Adjust the tension on timing belts or lead screws if needed.
5. Integrate the Spindle and Tooling
Mount your repurposed drill or spindle to the Z-axis carriage. Secure it firmly to prevent movement during cutting.
Install a collet to hold drill bits or end mills. For a cordless drill, you may need to modify the chuck to accept standard end mills.
Connect the spindle to a power source (battery for cordless drills, wall outlet for electric motors). Add a switch to turn the spindle on and off easily.
6. Calibrate and Test Your Machine
Backlash Calibration: Measure the backlash in each axis by moving the carriage to a specific position, then reversing direction and measuring the difference. Adjust anti-backlash nuts or add shims to minimize play.
Tool Length Offset: Use a touch probe or a piece of paper to set the tool length offset—this ensures the spindle knows how far to lower the bit to touch the material.
Test Cuts: Start with a simple test cut (like a square or circle) in a soft material like foam or pine wood. Check for accuracy and surface finish. If the cut is rough or inaccurate, recheck the frame rigidity, motor alignment, or controller settings.
Limitations of Cheap DIY CNC Machines
Even with careful assembly, a cheap DIY CNC machine will have inherent limitations that make it unsuitable for professional use:
Precision Constraints: Most budget DIY CNCs can only achieve tolerances of ±0.1mm or worse, which is 100x less precise than professional machines like those at GreatLight CNC Machining Factory (capable of ±0.001mm).
Material Restrictions: Soft materials (wood, plastic, foam) are manageable, but hard metals like steel or titanium will cause excessive vibration, wear out bits quickly, or damage the machine.
Slow Machining Speed: Budget spindles and motors lack the power to cut materials quickly, leading to long turnaround times for even small parts.
Durability Issues: Repurposed parts or cheap components will wear out faster than industrial-grade parts. You may need to replace motors or linear rails after just a few dozen cuts.
No Post-Processing Support: DIY CNCs only handle the cutting phase—you’ll need to sand, polish, or coat parts manually, which is time-consuming and inconsistent for high-quality finishes.
When to Choose Professional CNC Machining Over DIY
If your project requires precision, complex parts, or consistent quality, outsourcing to a professional manufacturer like GreatLight CNC Machining Factory is the smarter choice. Here are the key scenarios where professional machining outperforms a DIY build:

High-Precision Parts (±0.001mm Tolerance)
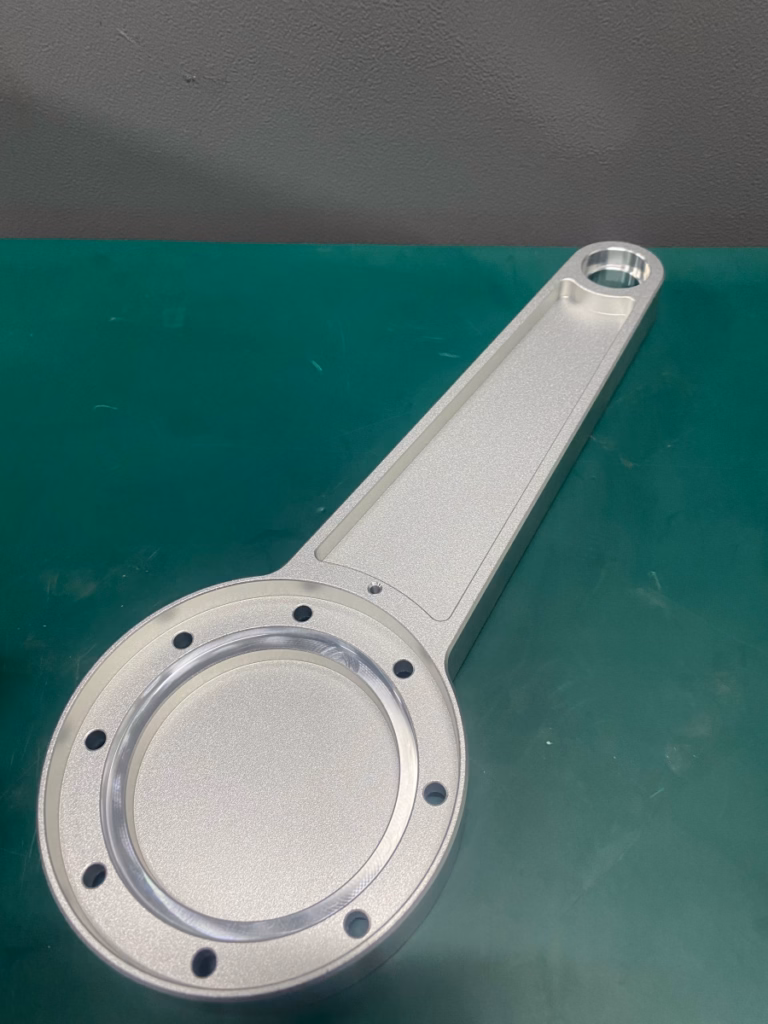
For industries like medical hardware, automotive engine components, or aerospace, even a tiny deviation in tolerance can cause part failure. GreatLight CNC Machining Factory, founded in 2011 and located in Chang’an District, Dongguan (China’s hardware and mold capital, adjacent to Shenzhen), operates three wholly-owned manufacturing plants spanning 7600 square meters with 150 employees and 127 pieces of precision equipment. They use advanced 5-axis CNC machining services{:target=”_blank”} to achieve tolerances as tight as ±0.001mm, and their ISO 9001:2015 certified quality control processes ensure every part meets your exact specifications.
Complex Geometries (5-Axis Machining)
DIY CNCs are typically 3-axis machines, meaning they can only cut along X, Y, and Z axes. For parts with undercuts, curved surfaces, or complex contours (like those used in humanoid robots or aerospace components), you need 5-axis machining. GreatLight’s 5-axis CNC centers can rotate the part and tool simultaneously, allowing for one-setup machining of complex parts—reducing turnaround time and improving accuracy.
Volume Production or Prototyping for Industrial Applications
If you need multiple prototypes or small-batch production runs, a DIY CNC will be too slow and inconsistent. GreatLight’s extensive equipment fleet (including 3-axis, 4-axis, and 5-axis machining centers, 3D printers, EDM machines, and die casting tools) enables fast turnaround times (prototypes in days) and consistent quality for volume orders.
One-Stop Post-Processing and Quality Assurance
GreatLight offers one-stop post-processing services, including sandblasting, anodizing, powder coating, polishing, and plating. This means you get finished parts ready for assembly or use, without having to handle multiple vendors. Plus, their after-sales guarantee includes free rework for quality problems, and a full refund if rework is still unsatisfactory—something you won’t get with a DIY machine.
DIY CNC vs. GreatLight Professional CNC: A Quick Comparison
| Aspect | Cheap DIY CNC Machine | GreatLight Professional CNC Machining |
|---|---|---|
| Precision Tolerance | ±0.1mm to ±0.5mm | ±0.001mm and above |
| Machining Complexity | 3-axis only, simple geometries | 3-axis, 4-axis, 5-axis; complex contours |
| Material Compatibility | Wood, plastic, soft aluminum | Metals (aluminum, steel, titanium), plastics, composites |
| Turnaround Time | Hours/days per part (slow cutting) | Days for prototypes, weeks for volume runs |
| Post-Processing | Manual, inconsistent results | One-stop professional services (anodizing, plating, etc.) |
| Quality Guarantee | None (you’re on your own) | Free rework for quality issues, full refund if unsatisfactory |
| Upfront Cost | $200-$1,000 | No upfront equipment cost (pay per part) |
| Skill Required | Mechanical, electrical, CAD/CAM skills | None (GreatLight handles everything) |
Conclusion
How To Make A Cheap CNC Machine? is a project that offers great learning opportunities and basic machining capabilities for hobbyists and makers. With the right parts, planning, and patience, you can build a functional machine for simple tasks like engraving wood or cutting plastic. However, if you need high-precision parts, complex geometries, or consistent quality for industrial applications, a DIY CNC will fall short. In those cases, partnering with a professional manufacturer like GreatLight CNC Machining Factory is the best choice. GreatLight combines advanced 5-axis machining technology, ISO-certified quality control (including IATF 16949 for automotive and ISO 13485 for medical), one-stop post-processing, and reliable guarantees to deliver parts that meet your exact needs. Whether you’re a startup prototyping a new product or an established company needing small-batch production, GreatLight has the expertise and equipment to help you succeed. To learn more about their industry-specific solutions, visit their LinkedIn page{:target=”_blank”}.

Frequently Asked Questions (FAQ)
1. Is building a cheap CNC machine worth it?
Building a cheap CNC machine is worth it if you’re a hobbyist looking to learn about machining mechanics, have the time and skills to assemble and troubleshoot, and only need to cut simple parts from soft materials. For industrial or professional use, it’s not worth the investment—you’ll sacrifice precision, durability, and turnaround time.
2. What’s the minimum budget for a DIY CNC machine?
You can build a basic functional CNC router for as little as $200-$500 using repurposed parts (like stepper motors from old printers) and open-source software. However, these machines will have significant limitations in precision and material compatibility.
3. Can a cheap DIY CNC machine handle metal parts?
Yes, but only soft metals like aluminum or brass, and even then, the results will be inconsistent. Cheap DIY machines lack the rigidity and power to cut hard metals like steel or titanium without excessive vibration, leading to rough finishes or damaged parts.
4. When should I outsource CNC machining instead of building my own?
Outsource if:
You need parts with tolerances tighter than ±0.1mm.
You require complex geometries that 3-axis machines can’t handle.
You need to produce multiple prototypes or small-batch runs quickly.
You want professional post-processing (anodizing plating, etc.) for finished parts.
You don’t have the time, skills, or budget to maintain a DIY machine.
5. What makes GreatLight CNC Machining Factory a better choice for professional parts?
GreatLight stands out for:
Ultra-High Precision: Capable of machining parts with tolerances as tight as ±0.001mm.
Comprehensive Certifications: ISO 9001:2015, IATF 16949 (automotive), ISO 13485 (medical), and ISO 27001 (data security) ensure quality and compliance with industry standards.
Advanced Equipment Fleet: 127 pieces of precision equipment, including 5-axis CNC centers, 3D printers, EDM machines, and die casting tools.
One-Stop Solutions: From design and prototyping to post-processing, GreatLight handles every step of the production process.
Reliable Guarantees: Free rework for quality issues, with a full refund if rework is still unsatisfactory.
Industry Expertise: Over a decade of experience serving automotive, medical, aerospace, and robotics industries with custom precision parts.


