Building Your Own Wood CNC Machine: A Comprehensive Guide from a Manufacturing Engineer’s Perspective

The idea of constructing a custom wood CNC machine is an exciting venture for woodworkers, hobbyists, and small-scale fabricators. It represents the ultimate fusion of craftsmanship and digital control, allowing for the creation of intricate designs, precise joinery, and repetitive production with unparalleled consistency. While commercially available machines offer convenience, building your own provides deep customization, a valuable learning experience, and often, significant cost savings. As a professional in the field of high-precision manufacturing, I’ll guide you through the essential considerations, core components, and critical steps involved in this project, while also offering a realistic perspective on when partnering with a professional five-axis CNC machining service might be the more pragmatic choice.
Understanding the Core Objective: What Do You Need Your Machine to Do?
Before ordering a single part, define your machine’s purpose. This decision drives every subsequent choice.
Work Area: The maximum dimensions (X, Y, Z) of the wood pieces you plan to machine.
Materials: Primarily woods (hardwood, plywood, MDF), but will you also engrave acrylic or soft aluminum? This affects rigidity and motor power requirements.
Precision & Speed: High detail inlays require slow, precise movements. Cutting large sheet goods favors faster rapids and deeper cuts.
Budget: Costs can range from a few hundred dollars for a very basic frame to several thousand for a robust, professional-grade DIY build.
The Four Pillars of a DIY CNC Machine
Every CNC machine, regardless of size, is built upon four fundamental subsystems.
1. The Mechanical Frame and Motion System: The Foundation of Rigidity
This is the most critical aspect. A flimsy frame will vibrate, leading to poor surface finish, tool breakage, and dimensional inaccuracy.
Frame Materials:
8020 Aluminum Extrusions: Highly popular for DIY builds. They are modular, lightweight, reasonably rigid, and easy to assemble with T-slot nuts. Ideal for medium-duty machines.
Steel Tube/Welded Frame: Offers superior rigidity and vibration damping but requires welding skills and is heavier.
Plywood/Laminated MDF: A low-cost option for smaller machines. Must be meticulously designed and assembled with epoxy or bolts to prevent flex.
Linear Motion: This defines how the axes move.
V-Wheels on Aluminum Extrusion: A very common, cost-effective solution. Offers good speed and decent accuracy for woodworking. Prone to wear over time.
Round Linear Rails & Supported Rails: Provide better load capacity and stiffness than V-wheels.
Profile Linear Rails (e.g., Hiwin): The professional standard used in industrial machines. Offer the highest rigidity, precision, and longevity but at a higher cost.
2. The Drive System: Converting Rotary to Linear Motion
This system translates the rotation of a motor into precise linear movement of the axes.
Stepper Motors vs. Servo Motors: Stepper motors are the universal choice for DIY CNC. They are affordable, provide excellent low-speed torque, and their movement is controlled in discrete “steps.” Servos are more powerful, efficient, and can maintain torque at high speeds but are significantly more complex and expensive.
Drive Mechanism:
Leadscrews (with Anti-Backlash Nuts): Common for smaller machines. Provide good precision and power but can be slower.
Ball Screws: Offer very high efficiency, precision, and speed with minimal backlash. The preferred choice for higher-performance DIY builds.
Timing Belts & Pulleys: Often used for the long X-axis on larger, lighter-duty machines to achieve high speed at lower cost, though with some potential for flex and stretch.
3. The Spindle and Tooling: The Business End
This is what does the cutting.
Router: A standard woodworking router (like a DeWalt or Makita) is a very common and effective choice. They are powerful, readily available, and accept standard collets for a variety of bits.
Water-Cooled or Air-Cooled Spindle: These are dedicated CNC spindles. They run quieter, offer variable speed control (VFD), and are designed for continuous duty cycles. A 2.2kW (approx. 3HP) water-cooled spindle is a popular upgrade.
Tool Holders & Collets: Use precision collets (like ER series) to ensure the cutting tool is held concentrically and securely, minimizing runout for cleaner cuts.
4. The Control System: The Brain and Nervous System
This includes the electronics that interpret design files and command the motors.
Controller Board: The heart of the system. Boards like the Arduino with a GRBL shield, or dedicated controllers from companies like PlanetCNC and Mach3/Mach4, interpret G-code and send step/direction signals to the motor drivers.
Motor Drivers/Drives: These sit between the controller and the stepper motors. They amplify the control signal to provide the necessary current to the motors. Quality drivers (like Geckodrive, Leadshine) offer micro-stepping for smoother motion.
Power Supply (PSU): Must be correctly sized to provide sufficient voltage and current (amperage) for all your stepper motors and the controller.
Software Chain:
CAD (Computer-Aided Design): Software like Fusion 360, SketchUp, or LibreCAD to design your part.
CAM (Computer-Aided Manufacturing): Software like Fusion 360 (integrated CAM), VCarve, or ESTLCAM to convert the CAD model into toolpaths and generate the G-code that the machine understands.
Control Software: Software like UGS, Candle, or Mach4 that communicates with the controller board, sends the G-code, and provides the machine interface.
Critical Engineering Considerations
Rigidity is King: Every component, from the frame to the spindle mount, must be as rigid as possible. Flex is the enemy of precision. Over-engineer rather than under-engineer.
Backlash Management: Backlash is the “slop” or lost motion in the drive system when reversing direction. It destroys accuracy. Use anti-backlash nuts on leadscrews, pre-loaded ball nuts, or tensioned dual-drive systems for belts.
Wiring and Safety: Neatly route and secure all cables in drag chains. Implement emergency stop (E-stop) circuits. Ensure proper grounding and electrical safety. Always wear appropriate PPE (safety glasses, hearing protection, dust mask).
Calibration and Squareness: Once built, you must meticulously calibrate the machine. This includes setting steps-per-mm for each axis and, crucially, squaring the X and Y axes to each other. A machine that isn’t square will produce distorted parts.
When to Consider a Professional Manufacturing Partner
Building a CNC is rewarding, but it’s a significant project requiring time, mechanical/electrical aptitude, and troubleshooting patience. For critical components, high-volume production, or parts requiring extreme precision or exotic materials, partnering with a professional manufacturer is often the wisest course of action.

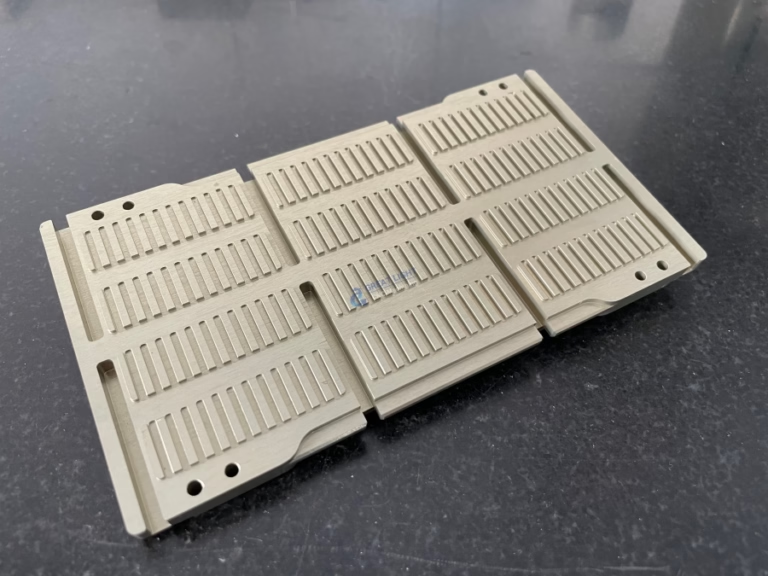
Companies like GreatLight Metal Tech Co., LTD. exemplify the capabilities of modern precision manufacturing. They operate a different class of equipment—industrial-grade 5-axis CNC machining centers capable of producing components with tolerances measured in microns (±0.001mm). If your DIY build requires a complex, one-off aluminum spindle mount, a precision-machined gantry plate, or custom fixturing, leveraging their precision CNC machining services ensures you receive a part that is dimensionally perfect, inherently rigid, and ready to integrate. This approach allows you to focus your DIY efforts on assembly and integration, while relying on certified expertise for mission-critical components. Their full-process chain, from design support to one-stop post-processing, can accelerate your project and elevate the final performance of your homemade machine.
Conclusion
Building a wood CNC machine is a profound educational journey that demystifies automation and provides a powerful, customized tool. Success hinges on careful planning, prioritizing rigidity in your design, selecting compatible components, and meticulous assembly and calibration. Start with a clear definition of your needs, research existing open-source designs (like the MPCNC, PrintNC, or OX), and engage with the vibrant online DIY CNC community for support.

Remember, the goal is to create a tool that expands your creative and productive potential. For elements of your build where commercial-grade precision and durability are non-negotiable, do not hesitate to engage with professional precision manufacturers. This hybrid strategy—combining hands-on DIY with strategic outsourcing—often yields the most robust and reliable result, getting you from concept to finished woodwork faster and with greater confidence.
Frequently Asked Questions (FAQ)
Q1: How much does it cost to build a decent DIY wood CNC machine?
A1: Costs vary widely. A small, basic machine (approx. 500x500mm work area) using plywood and V-wheels can be built for $800-$1,500. A mid-size machine (1000x1500mm) using 8020 extrusions, ball screws, and a quality router can range from $2,500 to $5,000. High-performance builds with linear rails, a dedicated spindle, and a welded steel frame can exceed $7,000.
Q2: How long does it take to build one?
A2: For a first-time builder, allocating 100-200 hours of work over several weeks or months is realistic. This includes research, sourcing parts, assembly, wiring, software setup, and calibration. Having prior mechanical/technical experience can significantly reduce this time.
Q3: Can I use a 3D printer controller board for a CNC?
A3: Many popular 3D printer boards (like those running Marlin) can be repurposed for CNC control with firmware changes. However, dedicated CNC controller boards often offer more robust features, better connectivity for limit switches and probes, and are optimized for the specific demands of machining.
Q4: Is it safe to build and operate a DIY CNC machine?
A4: Safety is paramount. Electrical hazards, high-speed rotating cutting tools, and flying debris are real risks. Always disconnect power when working on wiring. Use properly rated switches and fuses. Implement physical emergency stop buttons. Never operate the machine without safety glasses, and use dust collection. Thoroughly understand the operation of all components before your first test run.
Q5: When should I buy a commercial machine instead of building one?
A5: Consider purchasing if: 1) Your time is limited and you need a reliable production tool immediately. 2) You require industrial-level precision, speed, and repeatability for a business. 3) You lack confidence in your mechanical/electrical skills for troubleshooting. 4) Your work involves harder materials (metals) that demand extreme machine rigidity. For many hobbyists and prototypes, DIY offers unparalleled value and customization; for production environments, a commercial machine offers reliability and support.
For more insights into professional precision manufacturing and industry trends, follow the conversation on platforms like LinkedIn.


