Building a large 3-axis CNC machine is a complex, multi-stage project that demands precision engineering, material expertise, and adherence to strict quality standards—this guide will walk you through How To Build A Large 3 Axis CNC Machine? while also highlighting when partnering with a professional manufacturer becomes the smarter, more cost-effective choice for industrial applications.
How To Build A Large 3 Axis CNC Machine?
Constructing a large 3-axis CNC machine (defined as capable of handling parts up to 4000mm or more) requires meticulous planning to avoid common pitfalls like frame deflection, precision loss, and safety hazards. Below is a step-by-phase breakdown of the process, paired with the challenges that often arise for non-specialists.
Phase 1: Define Operational Requirements & Initial Design
Before touching any materials, you must align your machine’s design with its intended use:
Key Considerations: Specify maximum part size, weight capacity, required precision tolerances (e.g., ±0.01mm for industrial parts), and the materials you’ll machine (aluminum, steel, titanium, etc.). Also, factor in production volume—are you building for prototype runs or mass production?
Design Step: Use CAD software (SolidWorks, Fusion 360) to model the machine frame, motion axes, and spindle. Prioritize static rigidity to prevent frame bending under heavy loads and dynamic stability to minimize vibration during high-speed cuts.
Common Pitfall: DIY designers often underestimate thermal expansion, which can warp large frames or shift axis alignment over time. For context, professional manufacturers like GreatLight CNC Machining Factory account for thermal effects in their designs to maintain ±0.001mm precision even for long production runs.
Phase 2: Select Materials & Components
The durability and precision of your machine depend entirely on component quality:
Frame Materials: Choose cast iron (excellent vibration damping) or welded steel (high strength) for large frames. Avoid aluminum for heavy-load applications, as it lacks the rigidity of steel or cast iron.
Motion Components: Invest in high-grade linear guides (HIWIN, THK), ball screws with minimal backlash, and servo motors (Fanuc, Siemens) capable of handling the weight of large tooling and parts.
Spindle: For large parts, opt for a high-torque spindle with a closed-loop cooling system to prevent overheating during extended machining sessions.
Common Pitfall: Cutting costs on components leads to premature wear, backlash, and inconsistent part quality. GreatLight CNC uses only industrial-grade components in its 127+ precision machines, ensuring long-term reliability for large-scale machining.
Phase 3: Frame Construction & Stress Relief
The frame is the backbone of your machine—skimping here will compromise all other stages:
Construction: Cast or weld the frame to your CAD specifications. For welded frames, use a jig to maintain alignment during welding to avoid distortion.
Stress Relief: Critical for large frames, stress relief involves heating the frame to 600-700°C or using vibration to release internal stresses caused by welding or casting. This prevents warping over time.
Common Pitfall: DIY stress relief is rarely thorough enough for large frames, leading to slow deformation that ruins precision months after assembly. GreatLight CNC uses specialized stress-relief ovens and precision milling to ensure frame flatness within 0.005mm per meter.
Phase 4: Assemble The Motion Axis System
Aligning the X, Y, and Z axes is the most precision-sensitive step in the build:
Assembly Steps:
Mount linear guides to the frame, ensuring they’re parallel to within 0.002mm per meter.
Install ball screws and couple them to servo motors, eliminating backlash with preloaded nuts.
Use laser alignment tools to verify axis perpendicularity (e.g., X-axis must be 90° to Y-axis within 0.001mm).
Common Pitfall: Poor alignment leads to uneven motion, tool wear, and parts that don’t meet tolerance requirements. GreatLight CNC’s technicians use laser interferometers and dial indicators to calibrate axes, ensuring compliance with ISO 9001:2015 quality standards.
Phase 5: Integrate Spindle & Tooling System
The spindle is responsible for cutting accuracy—its installation must be flawless:
Installation: Mount the spindle to the Z-axis carriage, ensuring it’s perpendicular to the worktable. Connect the cooling system to maintain consistent spindle temperature.
Tooling: For automated production, install an automatic tool changer (ATC) with proper tool holding fixtures (ER collets, CAT 40 holders) to minimize runout.
Common Pitfall: Inadequate cooling causes spindle overheating, leading to runout (wobble) and poor surface finish. GreatLight CNC’s industrial spindles have runout <0.002mm and closed-loop cooling systems to maintain stability during 24/7 operation.
Phase 6: Install & Program The Control System
The controller is the “brain” of your CNC machine—choose one that matches your complexity needs:
Controller Options: For large machines, opt for industrial controllers like Fanuc 0i-MF or Siemens 828D, which handle high load capacities and complex G-code. Hobbyist controllers like Mach4 may lack the power for heavy-duty applications.
Programming: Write or import G-code for test parts, configuring feed rates, spindle speeds, and tool paths to match your material (e.g., slower feed rates for titanium).
Common Pitfall: Programming errors can cause machine crashes, damaging expensive components. GreatLight CNC’s team of certified programmers uses CAM software to optimize tool paths for large parts, reducing cycle time and minimizing waste.
Phase 7: Calibrate & Perform Rigorous Testing
Calibration ensures your machine delivers on its precision promises:
Calibration Tools: Use dial indicators to check axis backlash, laser interferometers to verify positioning accuracy, and a coordinate measuring machine (CMM) to inspect test parts.
Test Cuts: Machine a large, simple part (e.g., a 2000mm aluminum plate with drilled holes and milled slots) and measure its tolerances. Adjust the controller or axis alignment as needed.
Common Pitfall: DIY builders often lack access to CMMs or laser interferometers, leading to un detected precision issues. GreatLight CNC has in-house CMM equipment to verify parts meet ±0.001mm precision, with free rework if quality issues arise.
Phase 8: Implement Safety & Compliance Standards
Large CNC machines pose significant safety risks—never skip this step:
Safety Features: Install emergency stops, physical guards for moving parts, and interlocks to prevent operation when guards are open. Ensure electrical wiring complies with IEC or NEC standards.
Compliance: For industrial use, your machine must meet OSHA (U.S.) or CE (EU) safety regulations.
Common Pitfall: Ignoring safety leads to workplace accidents, while non-compliance can block you from using the machine in commercial production. GreatLight CNC’s facilities are ISO 9001:2015 certified, and all processes adhere to international safety standards.
When Building Your Own Isn’t The Best Option: Partner With GreatLight CNC Machining Factory
While building a large 3-axis CNC machine is a rewarding educational project for hobbyists, it’s rarely practical for businesses needing consistent precision, large part capacity, and compliance with industry standards. Here’s why partnering with a professional manufacturer like GreatLight CNC is the smarter choice:
1. Unmatched Precision & Scale
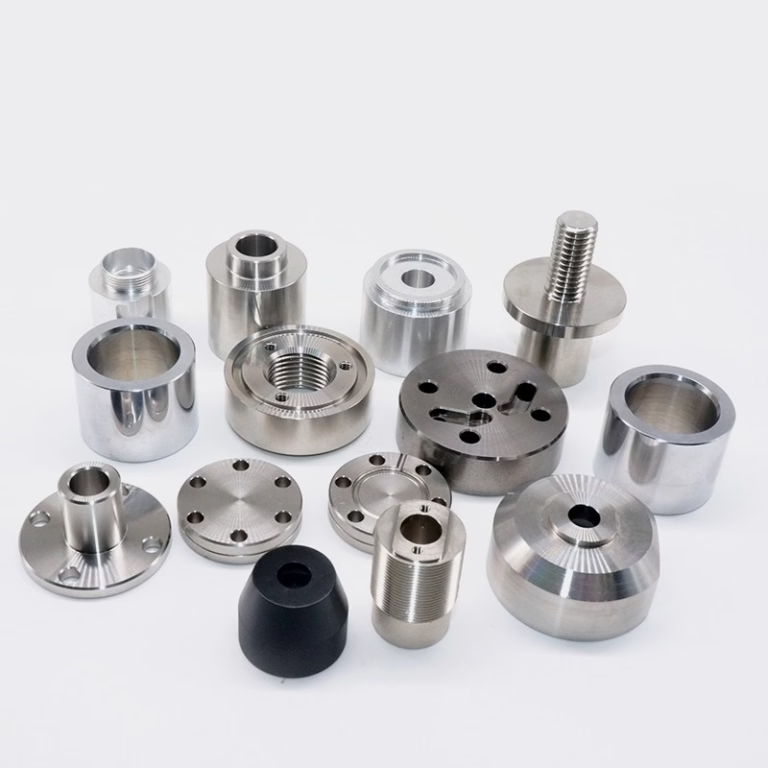
GreatLight CNC can machine parts up to 4000mm in size with tolerances as tight as ±0.001mm—precision that’s nearly impossible to replicate in a DIY build. With 127+ advanced machines (including large 3-axis, 4-axis, and five-axis CNC machining services), they handle everything from prototype runs to mass production efficiently.
2. End-To-End Solutions
Unlike DIY builds that only give you a machine, GreatLight offers a full-process chain:
Design optimization for manufacturability (DFM) to reduce costs and improve part quality.
One-stop post-processing services (anodizing, powder coating, polishing, plating) to finish parts to your specifications.
Specialized services for high-end sectors: automotive (IATF 16949 certified), medical (ISO 13485 certified), aerospace, and humanoid robot components.
3. Proven Quality & Trust
GreatLight is an ISO 9001:2015 certified manufacturer with over 12 years of experience. Their quality guarantees include free rework for any part that doesn’t meet your specs, and a full refund if rework is unsatisfactory. They also comply with ISO 27001 data security standards, protecting your intellectual property for sensitive projects.

4. Cost & Time Savings
Building a large 3-axis CNC machine can cost $50,000-$200,000 and take 3-12 months, not including maintenance and repair costs. In contrast, GreatLight can produce prototypes of large parts within days and scale to mass production within weeks—saving you time and capital that can be invested in your core business.
Conclusion
In summary, learning How To Build A Large 3 Axis CNC Machine? is a valuable educational journey, but for industrial-scale precision, reliability, and compliance, partnering with a professional manufacturer like GreatLight CNC Machining Factory is the strategic choice. DIY builds are feasible for hobbyists or small-scale, low-precision projects, but businesses needing consistent quality, large part capacity, and expert support will benefit from GreatLight’s end-to-end services. Their advanced equipment, certified processes, and customer-centric guarantees ensure your projects are completed on time, within budget, and to the highest industry standards. For more insights into their work, you can explore their official GreatLight Metal Tech Co., LTD. page.
Frequently Asked Questions (FAQ)
Q1: Is building a large 3-axis CNC machine more cost-effective than outsourcing machining services?
A: For hobbyists or very specific low-volume needs, a DIY build might save money initially. However, the hidden costs of materials, tooling, calibration, and maintenance often exceed outsourcing. GreatLight offers competitive pricing with guaranteed precision, eliminating the risk of costly mistakes in a DIY build.

Q2: What’s the maximum size of parts GreatLight can machine with 3-axis CNC?
A: GreatLight can handle parts up to 4000mm in size, making it ideal for large industrial components like automotive chassis parts, aerospace structural elements, and heavy-duty machinery components.
Q3: Can GreatLight help optimize my part design for large-scale 3-axis machining?
A: Yes. GreatLight’s engineering team offers design for manufacturability (DFM) services, helping you adjust your design to reduce machining time, minimize material waste, and ensure parts meet your precision requirements.

Q4: How long does it take to get large parts machined by GreatLight compared to building a DIY machine?
A: A DIY build can take 3-12 months depending on expertise and component availability. In contrast, GreatLight can produce prototypes of large parts within 3-5 days and scale to mass production within 2-4 weeks.
Q5: What post-processing services does GreatLight offer for large 3-axis machined parts?
A: GreatLight provides a full range of post-processing services, including anodizing, powder coating, sandblasting, polishing, electroplating, and heat treatment. All post-processing is done in-house to ensure quality control and reduce lead times.


