If you’ve ever wondered, How To Build A CNC Machine From Scratch?, you’re not alone. For hobbyists, small workshop owners, and DIY enthusiasts, building a custom CNC machine offers the chance to tailor equipment to exact project needs, learn deep manufacturing principles, and save costs on specialized tools. However, this journey requires careful planning, technical know-how, and attention to detail—especially when it comes to ensuring precision and reliability. While a DIY CNC can be perfect for prototyping small parts or hobby projects, for high-precision industrial applications or large-scale production, partnering with a professional manufacturer like GreatLight CNC Machining Factory is often the smarter choice. In this guide, we’ll walk you through the step-by-step process of building a CNC machine from scratch, plus help you decide when to turn to experts for support.
How To Build A CNC Machine From Scratch?
Building a CNC machine from scratch is a multi-phase project that balances mechanical design, electrical wiring, and software calibration. Below is a detailed, actionable breakdown to guide you through each stage.
Step 1: Define Your CNC Machine’s Purpose and Specifications
The first critical step is clarifying exactly what you’ll use the machine for—this will shape every subsequent decision. Ask yourself these key questions:
Machine Type: Will it be a CNC mill for metal parts, a router for wood/plastics, or a lathe for turning cylindrical components?
Work Envelope: What’s the maximum size of parts you’ll need to machine? (For context, GreatLight offers machining up to 4000mm for large-scale industrial parts, which is far beyond most DIY builds.)
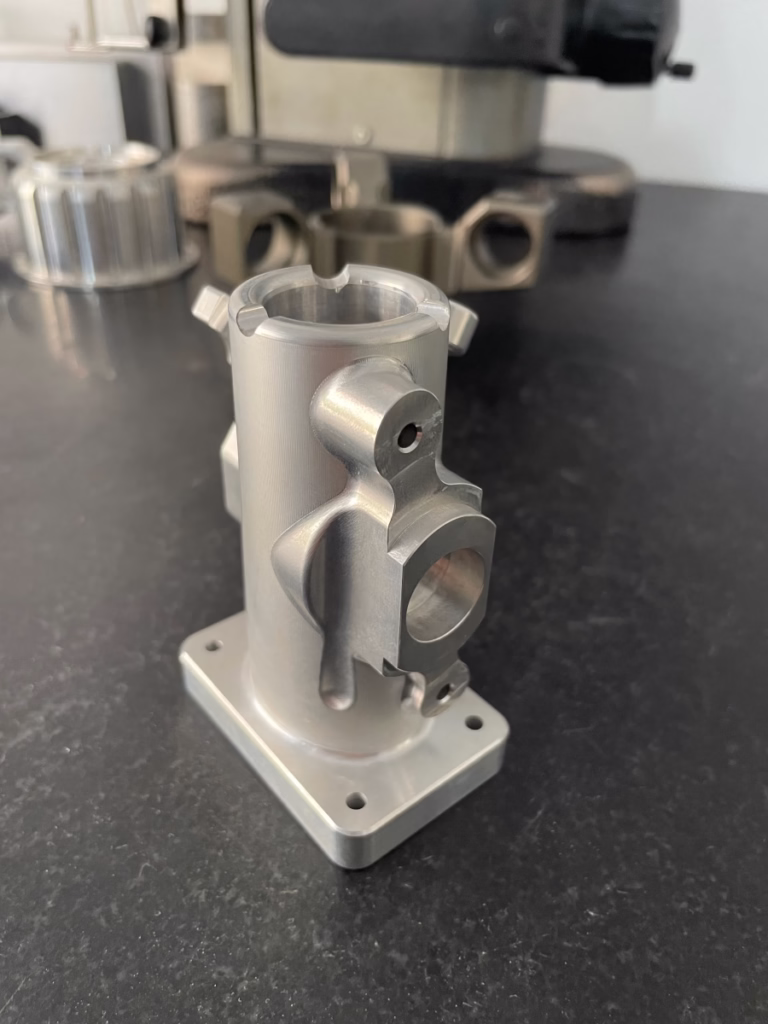
Precision Requirements: DIY CNCs typically achieve tolerances of ±0.1mm to ±0.01mm with careful calibration. If your project demands tighter precision (±0.001mm or better)—common in aerospace, medical, or automotive engine components—professional facilities like GreatLight are equipped to meet that standard with temperature-stabilized environments and high-precision equipment.
Material Compatibility: Will you machine soft materials like foam and wood, or hard metals like steel and titanium? Harder materials require more rigid frames and higher-power spindles.
List out your final specs (e.g., 3-axis router, 600x600x100mm work envelope, 2kW spindle, ±0.05mm tolerance) to use as a blueprint for component selection.
Step 2: Gather Key Components and Tools
Once you have your specs, you’ll need to source core components and tools. Here’s a categorized breakdown:
Structural Frame:
Aluminum extrusion (2020/4040 series) is popular for DIYers due to its ease of assembly and moderate rigidity.
Steel offers superior rigidity but requires welding tools and is heavier to maneuver.
Wood is low-cost but less durable for heavy use or high-precision machining.
Motion System:
Linear Guides: V-slot rails (budget-friendly) or ball linear guides (higher precision, lower friction) for smooth axis movement.
Drive Mechanism: Lead screws (affordable but with more backlash) or ball screws (high precision, minimal backlash) to convert motor rotation to linear motion.
Motors: Stepper motors (affordable, ideal for hobby use) or servo motors (higher speed, torque feedback, better for industrial DIY builds).
Control System:
Entry-level: Arduino + GRBL (open-source, easy to program for 3-axis machines).
Mid-range: Mach3/Mach4 software with a dedicated controller board.
High-end: LinuxCNC for complex multi-axis setups.
Spindle & Cutting Tools: A 1.5–3kW collet chuck spindle, paired with end mills, drills, or router bits specific to your target materials.
Essential Tools: Drill press, angle grinder, wrench set, digital calipers, laser level, and multimeter for wiring checks.
Note: If sourcing precision components like ball screws or custom frame brackets proves challenging, GreatLight’s CNC milling services can produce high-quality parts to your exact specs quickly, saving you time and frustration.
Step 3: Design the CAD Model and Blueprint
Using CAD software (FreeCAD, Fusion 360, or SolidWorks) is essential to visualize your build, identify potential conflicts, and ensure all parts fit together seamlessly. Key design considerations:
Rigidity: Reinforce high-stress areas like the spindle mount and frame corners to minimize vibration during machining.
Clearance: Ensure enough space between moving axes, the spindle, and the worktable to avoid collisions.
Accessibility: Design for easy maintenance (e.g., removable panels to access wiring or motion components).
For those new to CAD, or if you need to validate your design with a physical prototype, GreatLight’s rapid prototyping services can 3D print or CNC machine a scale model of your frame to test its stability before you commit to full assembly.
Step 4: Assemble the Mechanical Frame
A straight, rigid frame is the foundation of an accurate CNC machine. Follow these tips:
Lay out base frame components on a flat surface and use a laser level to ensure perfect flatness—even a 0.1mm tilt can cause machining errors.
Secure joints using brackets, bolts (for aluminum extrusion), or welds (for steel). Tighten bolts evenly to avoid warping the frame.
Check the squareness of the frame with a carpenter’s square or diagonal measurements (opposite corners should be identical in length). Adjust joints until the frame is perfectly square.
Mount the worktable to the base, ensuring it’s level and securely fastened.
Step 5: Install the Motion System Components
Attach linear guides or v-slot rails to the frame. Use calipers to measure the distance between rails at multiple points to ensure they’re parallel.
Mount motors to the frame, then connect them to lead screws/ball screws using flexible couplings—these absorb small misalignments between the motor and screw to prevent damage.
Install carriage assemblies on the linear guides, then attach them to the lead screw nuts. Test each axis by hand to ensure smooth, friction-free movement; if you feel resistance, check for misaligned rails or tight couplings.
Add limit switches and homing sensors to each axis—these tell the controller where the “home” position is, preventing overtravel and ensuring consistent machining.
Step 6: Wire the Control System and Electronics
Wiring is one of the most error-prone stages, so take your time and double-check all connections:

Connect motor drivers to the controller board, following the manufacturer’s wiring diagrams closely to avoid short-circuiting components.
Wire stepper/servo motors to their respective drivers. Pay attention to phase wiring—reversing wires can cause the motor to run backwards.
Connect the spindle to the power supply and controller. Install an emergency stop button that cuts power to all components immediately—this is a non-negotiable safety feature.
Ground all metal components to prevent electrical interference and ensure operator safety.
Do a dry run without power first to check for loose connections, then power on the system to test motor movement and spindle activation.
Step 7: Calibrate and Test the CNC Machine
Calibration is where you turn a collection of parts into a functional, accurate CNC machine:
Homing the Axes: Run the controller’s homing routine to set the machine’s reference position. Adjust limit switch positions if the axes don’t stop at the correct spot.
Backlash Compensation: Measure backlash (play) in the lead screws using a dial indicator. Enter this value into the controller settings to compensate for gaps, which improves machining accuracy. I’ve worked with many DIYers who skip this step and end up with parts that have visible inconsistencies—don’t overlook it.
Test Cutting: Start with a simple part (e.g., a square or circle) using a soft material like foam or pine. Generate toolpaths with CAM software (Fusion 360, Easel) and run a slow test cut. Check the final part’s dimensions with digital calipers to verify accuracy.
Fine-Tune: Adjust motor speeds, spindle RPM, and feed rates based on test results. For example, if the spindle chatters during cutting, reduce the feed rate or increase RPM.
For high-precision projects, keep in mind that DIY machines can’t match the calibration standards of professional facilities. GreatLight uses coordinate measuring machines (CMMs) to calibrate equipment to ±0.001mm accuracy, ensuring consistent results across every part.
When to Opt for Professional CNC Machining Instead of DIY
Building a CNC machine from scratch is a rewarding learning experience, but it’s not always the most practical choice for every project. Here are scenarios where partnering with a professional manufacturer like GreatLight makes more sense:
Industrial-Grade Precision: If your parts require ±0.001mm accuracy or compliance with strict standards (ISO 9001:2015, IATF 16949, ISO 13485), GreatLight’s certified facilities are equipped to meet these requirements.
Complex Multi-Axis Parts: DIY machines are almost exclusively limited to 3-axis machining. For intricate designs that need 4-axis or 5-axis CNC machining (like humanoid robot components or turbine blades), GreatLight’s 5-axis capabilities can handle even the most challenging geometries.
Large Production Runs: DIY machines are not built for high-volume production. GreatLight’s three manufacturing plants and 127+ precision equipment pieces can scale from prototyping to mass production efficiently, with quick turnaround times.
Time and Resource Constraints: Building a CNC from scratch takes weeks or months. If you need parts quickly, GreatLight’s rapid prototyping services can deliver prototypes in days, saving you valuable time.
One-Stop Post-Processing: DIY setups often lack tools for surface finishing (anodizing, powder coating, polishing, etc.). GreatLight offers one-stop post-processing services, so you get fully finished parts ready for use.
Additionally, GreatLight offers after-sales guarantees: free rework for quality problems, and a full refund if rework is still unsatisfactory—something you won’t get with a DIY build.

Conclusion
Building a CNC machine from scratch is a challenging but fulfilling project that gives you full control over your machining setup. By following the step-by-step guide outlined above, you can create a machine tailored to your hobby or small-scale workshop needs. However, for industrial-grade precision, complex parts, or large production runs, partnering with a professional manufacturer like GreatLight CNC Machining Factory ensures you get reliable, high-quality results every time. Remember, How To Build A CNC Machine From Scratch? is a question that leads to either a rewarding DIY journey or a strategic partnership with experts—choose the path that best aligns with your project goals.
Frequently Asked Questions (FAQ)
How much does it cost to build a CNC machine from scratch?
Costs vary widely based on size, precision, and components. A basic hobby CNC router can cost $500–$2,000, while an industrial-grade DIY mill can range from $3,000–$10,000. For high-precision parts, outsourcing to GreatLight is often more cost-effective, as you avoid upfront equipment investments and ongoing maintenance costs.
How long does it take to build a CNC machine from scratch?
For beginners, it can take 4–8 weeks of consistent work to assemble and calibrate a basic CNC. Experienced builders may finish in 2–4 weeks. If time is a constraint, GreatLight can deliver custom parts in as little as 3–5 days.
What’s the maximum precision I can achieve with a DIY CNC machine?
Most DIY CNCs can achieve tolerances between ±0.1mm and ±0.01mm with careful calibration. Tighter tolerances (±0.001mm or better) require professional-grade equipment like that used at GreatLight, which includes temperature-stabilized environments and high-precision ball screws.
Can a DIY CNC machine cut hard metals like steel?
Yes, but only with a high-power spindle (3kW or more) and rigid frame. However, machining hard metals puts significant stress on DIY builds, leading to reduced accuracy over time. GreatLight’s industrial frames and high-torque spindles are designed for long-term machining of hardened steels and titanium.

Do I need CAD/CAM experience to build a DIY CNC machine?
Basic CAD knowledge is helpful for designing the frame, but many DIYers use pre-made open-source plans. For CAM, user-friendly software like Fusion 360 or Easel offers simple toolpath generation. If you need help with complex CAD/CAM for parts, GreatLight’s engineering team can assist with design optimization.
What certifications does GreatLight hold, and why do they matter?
GreatLight holds ISO 9001:2015 (quality management), IATF 16949 (automotive industry), ISO 13485 (medical devices), and ISO 27001 (data security). These certifications ensure compliance with strict global standards, making GreatLight a reliable partner for regulated industries like aerospace and medical.


