How To Adjust Lighting On Dake CNC Machine? is a question we often hear from clients and fellow machining professionals, as proper lighting is an underrated yet critical factor in ensuring precision, safety, and efficiency in CNC operations. For anyone working with high-tolerance parts—whether in aerospace, automotive, medical, or industrial automation—even minor shadows or dimness can lead to costly errors, missed tool wear, or safety hazards. At GreatLight CNC Machining Factory, we understand this intimately: our team of certified technicians optimizes machine lighting as part of a holistic strategy to deliver parts with tolerances as tight as ±0.001mm. In this guide, we’ll walk you through the step-by-step process of adjusting lighting on Dake CNC machines, explain why this task matters, and share how our expertise can support your precision machining goals.
The Critical Role of Lighting in CNC Machining
Before diving into the adjustment process, it’s essential to understand why lighting is more than just a convenience for CNC operators:
Precision and Accuracy: High-precision machining requires clear visibility of the cutting zone, fixture alignment, and part details. Poor lighting can lead to misalignment of tools, missed burrs, or incorrect measurements—all of which can result in parts failing to meet tight tolerance requirements (like the ±0.001mm standards we uphold at GreatLight).
Operator Safety: Fatigue from straining to see in dim conditions increases the risk of accidents. Proper lighting reduces eye strain, helps operators spot loose fixtures or damaged tools early, and creates a safer work environment.
Tool and Machine Longevity: Early detection of tool wear or chip buildup (made possible by good lighting) prevents premature tool failure and reduces unnecessary wear on machine components. This extends the lifespan of both tools and CNC machines, lowering long-term operational costs.
How To Adjust Lighting On Dake CNC Machine?
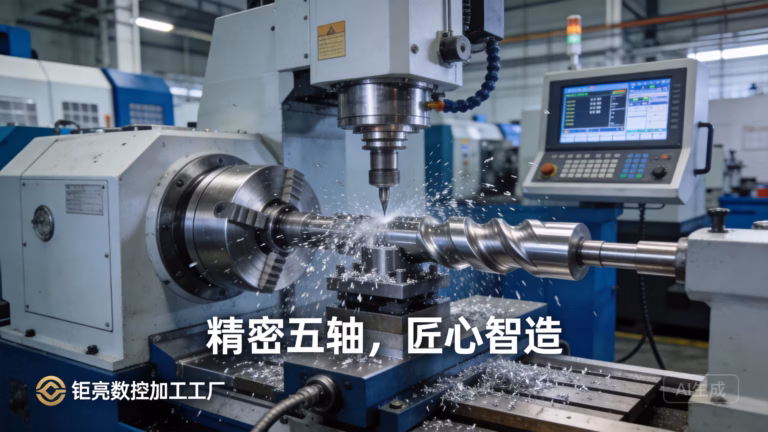
Dake offers a range of CNC machines, from entry-level mills to high-precision 5-axis models, so lighting systems can vary slightly. However, the core adjustment steps remain consistent. Below is a comprehensive guide tailored to common Dake CNC configurations:
Pre-Adjustment Safety Checks
Safety should always be your first priority when working with CNC machinery:

Power off the machine and engage the lockout-tagout (LOTO) procedure to prevent accidental startup.
Clear the work area of any loose tools, chips, or debris that could interfere with lighting adjustments.
For machines with external articulated arm lights, ensure the arm is cool to the touch (especially if the machine was recently in use) to avoid burns.
Identify Your Dake CNC Machine’s Lighting System
Dake CNC machines typically use one of three lighting types:
Integrated LED Panel Lighting: Most modern Dake models (like the Dake CNC Milling Series) feature built-in LED panels controlled via the machine’s touchscreen interface. These offer adjustable brightness and uniform illumination across the work envelope.
Articulated Arm Lights: Common on older Dake machines and models with large work areas, these are manually adjustable lights mounted on flexible arms, allowing operators to target specific zones.
Fluorescent Fixtures: Some legacy Dake machines use fluorescent tubes, which may not have digital brightness controls but can be repositioned or replaced with adjustable LED alternatives.
Adjusting Integrated LED Panel Lighting (Modern Dake Models)
For machines with touchscreen controls, follow these steps:
Power on the machine’s control panel (keep the main spindle power off for safety).
Navigate to the “Machine Settings” or “Ergonomics” menu—this may be located under a “Maintenance” or “Operator Preferences” tab depending on your model.
Locate the “Lighting Brightness” or “Work Area Illumination” option. This is usually displayed as a slider (0-100%) or numerical value (in lux).
Adjust the setting to your desired brightness: For high-precision parts (e.g., medical implants or aerospace components), we recommend 80-100% brightness to eliminate shadows. For general machining tasks, 50-70% is sufficient to reduce eye strain during long shifts.
Save the settings and test the lighting by moving the machine’s axis to ensure the entire work envelope is evenly illuminated. Adjust further if you notice shadow zones around fixtures or complex part geometries.
Adjusting Articulated Arm Lights (All Dake Models)
For manually adjustable lights:
Locate the locking knobs on the arm’s joints (usually 2-3 joints per arm).
Loosen each knob slightly to allow movement of the arm—avoid fully removing the knobs to prevent losing parts.
Reposition the light head to directly illuminate the cutting zone, fixture, or measurement area you need to focus on. For complex parts with deep cavities, angle the light to reduce glare and shadows.
Tighten the locking knobs securely to hold the light in place.
Test the position by running a dry cycle (no cutting) to ensure the light doesn’t interfere with the spindle or tool movement.
Troubleshooting Common Lighting Issues on Dake CNC Machines
If you encounter problems with your Dake CNC machine’s lighting, try these fixes:
Dim Lights: Clean the light fixture’s lens to remove dust or coolant residue. If dimming persists, check for loose wiring connections or aging LED bulbs/fluorescent tubes.
Flickering Lights: Inspect the power supply cable for damage. For LED systems, a flickering light may indicate a faulty driver—contact a certified technician or replace the driver unit.
No Lighting: Verify that the machine’s circuit breaker for lighting is not tripped. If the breaker is intact, check the fixture’s wiring or replace the bulb/LED panel.
How GreatLight CNC Machining Leverages Proper Lighting for Unmatched Precision
At GreatLight CNC Machining Factory, we recognize that every detail of the machining environment contributes to final part quality—including lighting. As a leading provider of precision 5-axis CNC machining services (opening in new window), we optimize our fleet of CNC machines (including Dake models) to ensure consistent, shadow-free illumination for all projects:
Model-Specific Optimization: Our technicians are trained on a wide range of Dake CNC machines, so we can quickly adjust lighting for any model to meet the unique needs of your part. For example, when machining complex humanoid robot joints (a specialty of ours), we angle articulated arm lights to highlight tight tolerances between moving components.
Client Success Story: A recent aerospace client was experiencing 2-3% inspection errors on turbine blade prototypes due to shadow zones in their Dake CNC machine’s work area. Our team repositioned the machine’s articulated arm lights and upgraded to high-CRI (color rendering index) LED bulbs, reducing inspection errors to less than 0.5% and accelerating their project timeline by 10%.
Certified Standards: Our ISO 9001:2015 and IATF 16949 certifications require us to maintain strict ergonomic standards, including proper machine lighting. This ensures that every part we produce meets the highest quality benchmarks, regardless of project complexity.
Beyond Lighting – Holistic Precision Machining Support from GreatLight CNC
Lighting adjustment is just one small part of a comprehensive precision machining strategy. GreatLight CNC Machining Factory offers end-to-end solutions tailored to your unique needs, including:

Full-Process Manufacturing: From rapid prototyping (via SLA, SLS, or SLM 3D printing) to high-volume production (CNC milling, die casting, sheet metal fabrication), we cover every step of the product development cycle.
One-Stop Post-Processing: We provide comprehensive surface finishing services, including anodizing, powder coating, polishing, and electroplating, to ensure your parts meet both functional and aesthetic requirements.
Unmatched After-Sales Support: We stand behind our work with a free rework guarantee for quality issues, and a full refund if rework does not meet your specifications. Our team is available to answer questions and provide technical support throughout your project.
Industry-Specific Expertise: We specialize in serving automotive, medical, aerospace, and humanoid robot industries, with certifications like ISO 13485 (medical hardware) and IATF 16949 (automotive) to meet sector-specific standards.
Conclusion
How To Adjust Lighting On Dake CNC Machine? is a seemingly simple task that yields significant impacts on machining precision, safety, and efficiency. Whether you’re a small shop owner optimizing a single machine or a large enterprise managing a fleet of Dake CNC machines, taking the time to adjust and maintain your lighting system is a low-investment, high-return step. For complex high-precision projects that demand flawless results, partnering with an experienced provider like GreatLight CNC Machining Factory is the ideal choice. Our team of experts combines decades of machining experience, state-of-the-art equipment, and strict quality standards to deliver parts that meet even the tightest tolerances. You can learn more about our industry insights and client success stories on GreatLight Metal on LinkedIn (opening in new window).
Frequently Asked Questions (FAQ)
Q1: Why is lighting adjustment important for CNC machining?
A: Proper lighting reduces operator eye strain, enables early detection of tool wear or part defects, ensures accurate tool and fixture alignment, and minimizes safety hazards. For high-precision parts with tolerances of ±0.001mm or tighter, even minor shadows can lead to non-conforming parts.
Q2: Do all Dake CNC machines have adjustable lighting?
A: Most modern Dake CNC models feature adjustable LED lighting via the control panel. Older models may have manually adjustable articulated arm lights, while some legacy machines have fixed fluorescent fixtures that can be replaced with adjustable LED alternatives.
Q3: How often should I check my Dake CNC machine’s lighting?
A: We recommend a visual check of the lighting system at the start of each shift. A comprehensive inspection (including brightness testing, lens cleaning, and tightness of articulated arm joints) should be conducted monthly, or whenever you notice a drop in machining accuracy or operator discomfort.
Q4: Can poor lighting affect machining precision?
A: Yes. Poor lighting can lead to misalignment of tools and fixtures, missed detection of tool wear, and errors in manual measurement steps. For parts requiring tight tolerances (like those produced by GreatLight CNC), even a 0.002mm deviation due to poor lighting can result in part failure.

Q5: What if I can’t adjust the lighting on my Dake CNC machine?
A: First, consult your machine’s user manual for model-specific instructions. If you’re still unable to adjust the lighting, contact a certified CNC technician or reach out to GreatLight CNC Machining. Our team has extensive experience servicing and optimizing Dake CNC machines to meet precision requirements.
Q6: What type of lighting is best for Dake CNC machines?
A: LED lighting is the optimal choice for Dake CNC machines due to its long lifespan, low heat emission, adjustable brightness, and uniform, shadow-free illumination. It also consumes less energy than fluorescent or incandescent bulbs, reducing operational costs over time.


