Unlocking CNC mastery: Your roadmap for meaningful beginner projects (and beyond)
The call of spindles, the precise dance of cutting tools, converting raw materials into finished products – CNC machining fascinates manufacturers and manufacturers. As a beginner, the absolute possibility of CNC can feel overwhelming and even daunting. Where did you start? Which projects build the right skills without causing frustration? As a professional five-axis CNC machining partner (Greatlight CNC), we see countless projects coming from our doors, from simple prototypes to complex aerospace components. The expert’s journey usually begins with mastering basic skills through intelligent beginner programs. Let’s uncover this starting point.
Why start with the project? Theory is in line with tangible results
While understanding the basics of G code, feeds and speed, and CAD/CAM software is essential, real CNC learning accelerates when your knowledge is applied immediately. Project provides:
- Actual skills integration: Combine CAD design, CAM tool paths, fixing, setup, machining operations and inspections and combine them into a cohesive workflow.
- Solve the problem under pressure: Meet and overcome real-world challenges such as vibration, tool deflection, and material changes.
- Real motivation: Hold object object you Processing is incredibly beneficial and adds a desire to learn more.
- Skill Assessment: Successful projects are milestones that highlight mastery of skills and identify areas that need focus.
- Complex foundation: The techniques learned in simple projects are transferred directly to more advanced work.
Building Basic Skills: Basic Beginner Project (2D Focus)
Golden Rules: Easy to start and master the basics. Don’t jump to complex 3D engravings. Start with 2.5-axis machining (cut curves, pockets, drilling) to consolidate core skills.
Modesty keychain:
- Skills learned: Basic CAD design (simple shapes, text engraving), CAM settings (profile profile, bags), labor (double-sided tape, simple visor), setting XY zero (key!), understanding origin, tool changes, feed/speed/material of material (e.g. acrylic, wood, wood).
- Why it’s perfect: Small size minimizes material costs and processing time. Pure focus on 2D contours and bags. Offset and depth control were introduced in terms of engraving.
- Tip: Soft materials such as MDF or acrylic are initially used. Practice designing different shapes and combining larger text/pockets.
Coasters (4 sets):
- Skills learned: Effective cam nesting (optimized material usage), consistent working coordinate settings (multiple parts), finishing techniques (wool edges), maintaining tolerances for multiple parts.
- Why it’s perfect: Reinforced profile cut slightly larger. Force you to consider material efficiency and repeatability. Create collections to emphasize consistency.
- Tip: Try different designs (simple circles, squares, custom shapes with engraving patterns). Use materials such as hardwood, bamboo or plastic. Focus on achieving clean, burr-free edges.
Simple logo/name plate:
- Skills learned: More complex CAD (font, layout design, vector and grid interpretation), cam for V-buckle or profile text, depth control for readability, surface finish (sanding, painting).
- Why it’s perfect: The bridge is purely aesthetic. The challenge of processing fine details (such as text without tool breaking or tearing). Excellent exercise in surface finishing.
- Tip: Start large font size and shallow depth. Use climbing milling to clean wood/plastic cutting. Experiment with different cutter types (V bits of sharp text, ending mill mill).
- Basic fixtures and fixtures:
- Skills learned: Accurate drilling and knocking holes, true flatness/convenience, design function, positioning feature accuracy (pin, slot), rigid material selection (plywood, HDPE, aluminum).
- Why it’s perfect: Give critical manufacturing principles: fixtures make production efficient and repeatable. Practical projects and immediately apply to future work.
- Tip: Design a simple drill bit to accurately locate the holes. Keep your vice soft chin to maintain irregular shape. Focus on tolerance for control holes and positioning surfaces.
Transition Tips: Early 3D and Prototyping Projects
Once you have confidence in 2D analysis, pocket and drilling:
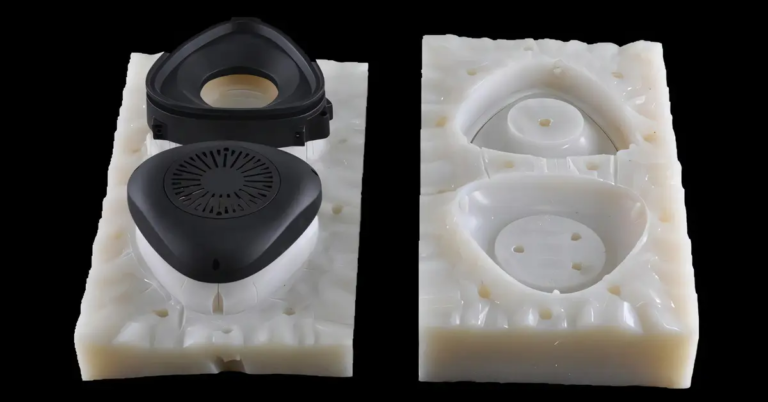
Simple vacuum forming mold:
- Skills learned: Basic 3D modeling toolbox (Boss, Hollows, Draft Corners), cams for rough cams and ball end mills, understand the Stepover and Scallop heights of the surface finish, and process even/consistent surfaces to release mold.
- Why it’s perfect: Actually, 3D machining is used. Create tools for producing multiple parts. The concept of mold geometry was introduced (draft angle is essential!).
- Tip: Start with a shallow shape. Ensure clear draft angle (> 2°). Machines come primarily from stable materials such as lenses, MDF or aluminum. Focus on surface quality – it is crucial to perform surgery after matte MDF/lens.
Nested parts (puzzle or fence tray):
- Skills learned: Advanced cam nesting strategy to create organic interlocking shapes (puzzles), accurately develop thin walls, edge details, precisely for socket pockets.
- Why it’s perfect: Combine 2D analytical techniques with critical thinking about manufacturability design (wall thickness, nested clearance). Perfect for practicing precise and refined machining.
- Tip: Design puzzle with obvious interlocking tolerances (~0.005"-0.01" clear). Machine pallets from stable materials, such as stable materials. Use climb milling and slower feed rates as thin walls.
- Functional component parts (e.g., box joint box, simple hinge):
- Skills learned: Design parts suitable for putting together, machining precision slots and labels to achieve specific tolerances (+/- 0.001" -0.005"), handles tighter geometric tolerances (parallelism, perpendicularity), element post-processing components.
- Why it’s perfect: The object that the steering function is available. Emphasizes accuracy beyond simple analysis (TAB/slot width, depth). Shows how tolerance decisions directly affect assembly.
- Tip: First create a prototype in MDF/Wood to verify the appropriateness before processing expensive materials. The real tolerances can be achieved according to the function of the machine.
Great Advantages: Your Project, Our Accuracy
As you go beyond these basic projects, the complexity inevitably increases. 3D profile, organic shape, undercut, complex features at multiple composite angles Become a design goal. This transition directly points to unparalleled functionality 5-axis CNC machining. The five-axis machine simultaneously operates the cutting tool and/or workpiece along five different axes (X, Y, Z, and two rotation axes, A/B/C). This unlocks:
- Single setup processing: Complete complex parts in one fix, greatly reducing errors and lead times with multiple 3-axis settings.
- Complex geometric processing: Directly use 3-axis computers with impossible machine profiles and shapes.
- Top surface finish: Keep vertical tooling methods to perform complex surfaces, minimize step lines and reduce hand-made finishes.
- Improve tool life and performance: Optimize tool orientation for chip evacuation and cutting forces.
The company likes it GreatEquipped with advanced five-axis CNC machining center and deep production expertise, its unique location can bring your ambitious prototype or production parts into reality. We don’t just cut metal; we effectively solve complex metal parts manufacturing challenges. Take advantage of our One-stop solution From engineering consultation to meticulous processing and comprehensive post-treatment (anodization, painting, electroplating, etc.) almost any material – All custom made at speed and delivered at competitive prices. Your journey begins with a simple keychain, but your innovative design deserves the accuracy and freedom of five-axis functionality.
Conclusion: Your journey begins now
Starting your CNC journey with a structured, skill building project is key to sustainable growth and unlocking potential. Master 2D fundamentals through purposeful, achievable projects such as Keychains and Jigs. Gradually use prototype molds and components to include additional dimensions, constantly pushing your CAD/CAM knowledge and machining intuition. Remember that every complex aerospace component starts with simple cutting. Embrace the challenge, learn from every chip produced (even broken tools!), and gradually accumulate expertise.
With your project reaching complexity levels only through advanced kinematics, remember that partners like Greatlight are ready 5-axis CNC machining function, material versatility and post-processing expertise Bring your most complex vision into life. Start up simple, dreamy Yamato machine!
Frequently Asked Questions for Beginners in CNC (FAQs)
Q: I’m brand new. What is the minimum device I need to start with?
- one: On a basic level, you need: 1) CNC machine (router, mill), 2) CAD software (free/paid – Fusion 360 people, Freecad, Sketchup), 3) CAM software (usually bundled with CAD), 4) Basic measurement tools (calipers, squares), 5), 5) Safety equipment (safety glasses, hearing protection, dust collection). Factory solutions (vide, fixture, tape) are also important.
Q: What is the best material to start a CNC project?
- one: Start with tolerant low-cost materials: Wood (MDF, Pine, Poplar), Plastic (acrylic, HDPE, PVC), Soft Metal (wax, brass, easy mechanical aluminum (6061)). Avoid using tool steel, titanium or composite materials initially.
Q: How to choose my first project?
- one: Prioritize projects of attention One or two new skills once. Before adding pockets or text engraving, make purely 2D analysis (keychain). Choose items with a small material footprint to minimize error costs. Make sure the project uses ready-to-use tools.
Q: Why do my parts sometimes have the wrong size?
- one: This usually goes with fixed (part of movement during processing), Tool Deflection (Tool bend under load – use larger/harder tools or lighter cutting), Incorrect tool diameter settings In a cam or machine controller, Working coordinates set error (xy or z-zero) or Machine rebound/calibration issues.
Q: What are the biggest tips for avoiding damage to tools?
- one: Conservative feed and speed! Consult manufacturer advice As a starting pointThen Reduce them by 30-50% For initial testing, especially on smaller tools (<1/4"). Ensure a safe labor force to prevent vibration. Use climbing milling in wood and plastic for cleaning.
Q: When should I consider outsourcing to a professional CNC store, like Greatlime?
- one: Consider the following:
- your Design complexity exceeds The functions of your machine (for example, 5 axes are required).
- You need processing The material is too hard Or specifically used in your store (e.g. stainless steel, exotic alloy).
- you need to Tensile tolerance (+/- 0.001" or less) consistent.
- Production More than practicality on the machine.
- You need to ensure that the results are met Industry-specific standards (AS9100, ISO).
- You need Comprehensive post-processing Expertise (complex finishing, electroplating, anodizing).
- one: Consider the following:
- Q: How to make the project look more professional?
- one: Focus on Surface finish: Appropriate steps when sorting out the pass, sharp tools, optimal feed/speed. Carefully designed – Sharp edge screaming "self made". Apply Purposeful post-processing: Grinding, painting, polishing or appropriate functional effects. design Clear And consider Draft corner For anything that needs to be released from the mold or suitable for another part.


