How to Set Up a CNC Swiss Screw Machine (With YouTube Resource Tips) is a question that plagues many precision machining technicians and shop managers, especially those tasked with producing small, intricate parts for high-stakes industries like aerospace, medical devices, and automotive engine components. Proper setup of a CNC Swiss screw machine—also known as a Swiss-type lathe—directly impacts part quality, production efficiency, tool life, and workplace safety. While online resources like YouTube offer accessible guidance, navigating the nuances of setup for tight-tolerance parts requires a blend of hands-on experience, technical knowledge, and access to advanced metrology tools. For businesses looking to complement their in-house Swiss screw capabilities or outsource complex production, partnering with a trusted expert like GreatLight CNC Machining Factory (GreatLight Metal) can streamline the process and ensure consistent, high-quality results.

How to Set Up a CNC Swiss Screw Machine (With YouTube Resource Tips)
What is a CNC Swiss Screw Machine & Why Setup Precision Matters?
CNC Swiss screw machines are specialized turning centers designed to produce small, high-precision parts (typically up to 32mm in diameter) with features like deep holes, fine threads, and complex geometries. Unlike conventional lathes, Swiss machines hold the workpiece stationary against a guide bushing while the tooling moves around it, minimizing deflection and enabling tighter tolerances—often as low as ±0.002mm. This makes them ideal for components like medical implants, aerospace fasteners, and electronic connectors.
Poor setup can lead to a cascade of issues: parts that miss tolerance, excessive tool wear, production downtime, and even safety hazards. For example, misaligning the guide bushing can cause workpiece deflection, leading to inconsistent diameters. Skipping dry runs can result in tool collisions, damaging both the machine and expensive tooling. In industries where part failure can have life-threatening consequences (like medical or aerospace), proper setup isn’t just a best practice—it’s a regulatory requirement.
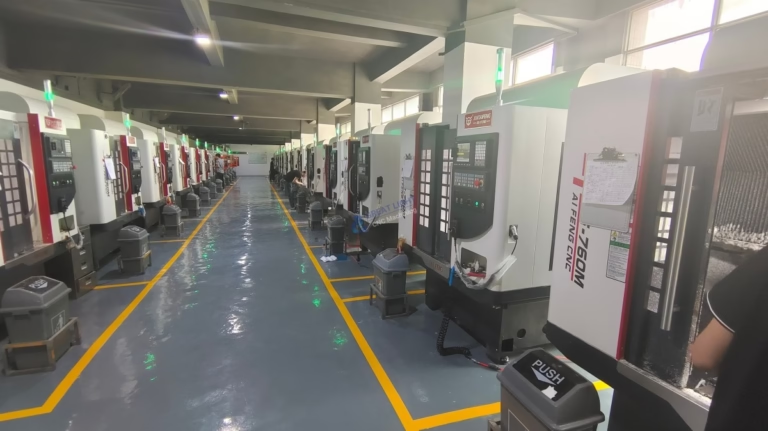
GreatLight Metal understands this criticality deeply. Founded in 2011 in Dongguan’s Chang’an District (China’s “Hardware and Mould Capital”), the company operates three wholly-owned manufacturing plants spanning 7600 square meters with 150 employees and 127 pieces of precision equipment. As an ISO 9001:2015 certified manufacturer, their team regularly works with complementary processes to Swiss screw machining, such as five-axis CNC machining, to deliver complete solutions for complex part assemblies. Their focus on tight tolerances (down to ±0.001mm) ensures that even the most intricate parts meet or exceed client specifications.
Step-by-Step Guide to Setting Up a CNC Swiss Screw Machine
Pre-Setup Preparation & Safety Checks
Before touching any machine components, prioritize safety and preparation:
Lockout/Tagout (LOTO): Disconnect power to the machine and apply LOTO devices to prevent accidental startup—this is non-negotiable for workplace safety.
Inspect Machine Condition: Check for signs of wear on the guide bushing, spindle, and tool turret. Ensure coolant lines are clear and lubrication systems are fully charged.
Review Part Drawings & Specifications: Verify key details like material type, tolerance ranges, surface finish requirements, and production volume. For medical parts, confirm compliance with ISO 13485 standards.
Gather Tooling & Materials: Inventory required tools (drills, taps, turning inserts, parting tools) and ensure they are in good condition. For materials like titanium or stainless steel, ensure you have appropriate cutting fluids and tool coatings to reduce wear.
GreatLight Metal’s pre-production workflow includes a rigorous audit of these steps, aligned with their ISO 9001:2015 quality management system. This proactive approach reduces the risk of setup errors and ensures that every project starts on the right foot.

Load & Align Raw Material
The way you load and align raw material directly affects part concentricity and tolerance:
Select the Correct Stock: Choose bar stock with a diameter that matches the guide bushing size (allow for a small clearance of 0.005-0.01mm to avoid binding).
Load the Bar Feeder: Insert the bar into the machine’s bar feeder, ensuring it’s straight and properly secured. For long bars, use a support mechanism to prevent deflection.
Align with the Guide Bushing: Adjust the bar position so it sits centered within the guide bushing. Use a dial indicator to measure runout—aim for less than 0.002mm for high-precision parts.
Secure the Spindle Chuck: Tighten the chuck to hold the workpiece firmly, but avoid over-tightening which can deform soft materials like aluminum.
GreatLight Metal frequently works with materials like aluminum alloy, titanium alloy, and stainless steel across their 3D printing and CNC machining services. Their team has extensive experience handling these materials in Swiss screw machines, ensuring optimal alignment and minimal waste.
Install & Calibrate Tooling
Tooling calibration is one of the most critical steps in Swiss screw machine setup:
Select Appropriate Tools: Choose tools designed for Swiss-type machining—these are often shorter and more rigid than conventional lathe tools to reduce deflection. For example, use carbide drills for deep hole drilling in stainless steel.
Install Tools in the Turret: Insert each tool into its designated turret position, following the machine manual’s torque specifications. Ensure tools are seated correctly to avoid movement during production.
Calibrate Tool Offsets: Use a touch probe or dial indicator to measure the exact position of each tool relative to the workpiece. Input these offsets into the CNC control to ensure accurate cuts.
Check Guide Bushing Clearance: For tools that pass through the guide bushing (like drills), verify that there’s enough clearance to avoid rubbing against the bushing.
For ultra-precise tool calibration that complements Swiss screw machine work, consider integrating precision CNC machining services (opens in new window) like those offered by GreatLight. Their five-axis CNC machining centers can handle complex geometries that may be challenging or time-consuming to produce on a Swiss machine alone, providing a one-stop solution for mixed-part assemblies.
Input & Validate CNC Program
Once tooling is calibrated, it’s time to load and validate the CNC program:
Load the Program: Transfer the G-code/M-code program to the machine control via USB, Ethernet, or direct input. Ensure the program is tailored to your specific machine model.
Run a Dry Cycle: Execute the program without material in the machine to check for tool collisions, incorrect tool paths, or programming errors. Most modern Swiss machines have a simulation mode to visualize tool movements.
Adjust Program Parameters: If collisions are detected or tool paths are inefficient, modify the program to correct these issues. For example, adjust the feed rate for deep drilling to prevent tool breakage.
While YouTube tutorials can walk you through basic program validation, for parts with tolerances as tight as ±0.001mm, it’s wise to consult experts. GreatLight Metal’s in-house engineering team has years of experience optimizing CNC programs for Swiss screw machines and complementary processes, reducing cycle time while maintaining the highest precision standards.
Run a Test Part & Inspect Tolerances
Even with thorough preparation, it’s essential to run a test part to confirm setup accuracy:
Produce a Single Test Part: Run one part using the configured setup. Ensure coolant is flowing correctly to cool tools and flush away chips.
Measure Key Dimensions: Use precision metrology tools like a coordinate measuring machine (CMM), optical comparator, or micrometer to measure critical dimensions against the part drawing. Check for concentricity, thread pitch, and surface finish.
Adjust Offsets if Necessary: If measurements are out of tolerance, tweak the tool offsets or program parameters and run another test part. Repeat until all dimensions meet specifications.
GreatLight Metal’s quality control lab is equipped with state-of-the-art metrology equipment to perform these inspections. Their ISO 9001:2015 certification, combined with industry-specific credentials like IATF 16949 (automotive) and ISO 13485 (medical), ensures that all parts undergo rigorous testing to meet global regulatory standards.
Finalize Setup & Optimize Cycle Time
Once the test part passes inspection, you can finalize the setup and optimize production efficiency:
Adjust Process Parameters: Fine-tune feed rates, spindle speeds, and coolant flow to balance speed and tool life. For example, increase spindle speed for aluminum parts to improve surface finish.
Run a Small Production Batch: Produce 10-20 parts and inspect a sample to ensure consistency. Look for signs of tool wear, like burrs or inconsistent dimensions.
Monitor Production: Set up real-time monitoring to track cycle time, tool wear, and part quality. Use the machine’s data logging features to identify bottlenecks and make further adjustments.
GreatLight Metal specializes in optimizing production cycles for both prototyping and mass production. Their one-stop services include post-processing (like anodizing, powder coating, and polishing) to deliver fully finished parts, eliminating the need for clients to coordinate with multiple vendors.
How to Find Reliable CNC Swiss Screw Machine Setup Tutorials on YouTube
YouTube is a valuable resource for learning basic setup techniques, but not all tutorials are created equal. Here are tips to find reliable content:
Prioritize Reputable Channels: Look for channels run by certified machinists, industry experts, or well-known machine manufacturers (e.g., DMG Mori, Citizen Machinery). These channels often provide accurate, up-to-date information aligned with industry best practices.
Seek Step-by-Step Demonstrations: Choose tutorials that walk you through each setup step with clear visual instructions. Avoid videos that skip critical safety checks or calibration steps.
Check for Industry-Specific Tips: If you’re working on medical or automotive parts, look for tutorials that highlight compliance requirements and tight-tolerance machining techniques.
Review Comments and Feedback: Read the comment section to see if other users have encountered issues with the tutorial’s methods or if they’ve added helpful tips.
Cross-Reference with Machine Manuals: Always verify tutorial instructions against your machine’s official manual, as setup procedures can vary by model.
While YouTube can be a great starting point, it’s important to recognize its limitations. For complex parts or high-volume production, partnering with a seasoned manufacturer like GreatLight Metal can save you time, money, and headaches. Their team has the expertise to handle even the most challenging setup scenarios, ensuring consistent quality and on-time delivery.
Common Setup Mistakes to Avoid
Even experienced machinists can make setup mistakes. Here are the most common ones to watch out for:
Incorrect Guide Bushing Alignment: A misaligned bushing causes workpiece deflection, leading to inconsistent diameters and poor surface finish. Always use a dial indicator to verify alignment.
Ignoring Tool Wear: Using worn tools during setup can result in parts that don’t meet tolerance. Inspect tools for chipping or dull edges before installation.
Skipping Dry Cycles: Dry cycles are essential to catch tool collisions and programming errors. Skipping this step can lead to expensive machine damage.
Poor Material Handling: Using bent or oversized bar stock can cause binding in the guide bushing, leading to tool breakage or workpiece damage.
Not Validating Tolerances with Precision Tools: Relying on visual inspections or non-precision tools can lead to missed tolerance issues. Always use CMMs or micrometers for high-precision parts.
GreatLight Metal’s after-sales guarantee includes free rework for quality issues and a full refund if rework is still unsatisfactory. This commitment to quality means that if any setup errors occur during production, they’ll take full responsibility to rectify the issue.

Conclusion
How to Set Up a CNC Swiss Screw Machine (With YouTube Resource Tips) is a question that requires a mix of practical know-how, attention to detail, and access to advanced tools. Proper setup is the foundation of high-quality, efficient Swiss screw machining, and while YouTube tutorials can provide useful guidance, they can’t replace the expertise of a professional team like GreatLight CNC Machining Factory. With over a decade of experience, ISO certifications covering key industries, a full suite of machining and post-processing services, and a commitment to precision and customer satisfaction, GreatLight Metal is the ideal partner for businesses looking to outsource complex Swiss screw machining projects or complement their in-house capabilities. Whether you’re producing medical implants, aerospace fasteners, or automotive components, their team has the technical knowledge and resources to deliver parts that meet the tightest tolerances and highest quality standards.
Frequently Asked Questions (FAQ)
Q: How long does it take to set up a CNC Swiss screw machine?
A: Setup time varies depending on the complexity of the part, the machine model, and the machinist’s experience. For simple parts, setup can take 1-2 hours. For complex parts with multiple tooling operations and tight tolerances, setup can take 4-8 hours or longer. GreatLight Metal’s experienced team can reduce setup time by leveraging standardized processes and advanced tooling.
Q: What materials are best suited for CNC Swiss screw machining?
A: CNC Swiss screw machines excel at machining small, rigid materials like aluminum, stainless steel, titanium, brass, and copper. They can also handle some plastics (e.g., PEEK, nylon) for electronic or medical components. GreatLight Metal works with all these materials and more across their CNC machining, 3D printing, and die casting services.
Q: Can YouTube tutorials replace formal training for CNC Swiss screw machine setup?
A: While YouTube tutorials are a great supplementary resource, they can’t replace formal hands-on training or certification. Formal training covers safety protocols, advanced calibration techniques, and troubleshooting that may not be covered in basic videos. For complex setup scenarios, consulting an expert like GreatLight Metal is highly recommended.
Q: How does GreatLight Metal support clients who need CNC Swiss screw machining parts?
A: GreatLight Metal offers end-to-end support for Swiss screw machining projects, including design optimization, setup, production, quality inspection, and post-processing. Their team can also integrate Swiss screw machining with other services like five-axis CNC machining or 3D printing to deliver complete assemblies. Additionally, their after-sales guarantee ensures that clients receive high-quality parts or a full refund if issues arise.
Q: What tolerances can be achieved with a properly set up CNC Swiss screw machine?
A: A well-setup CNC Swiss screw machine can achieve tolerances as tight as ±0.002mm for most parts. For ultra-high-precision applications, GreatLight Metal’s combination of Swiss screw machining and complementary processes can achieve tolerances down to ±0.001mm, meeting the needs of aerospace and medical industries.
Q: Does GreatLight Metal offer custom CNC Swiss screw machining services for high-volume production?
A: Yes! GreatLight Metal has the capacity to handle both small-batch prototyping and high-volume mass production. Their three wholly-owned manufacturing plants and 127 pieces of precision equipment allow them to scale production to meet client demands while maintaining consistent quality. For more information on their capabilities, you can explore GreatLight Metal’s professional machining solutions (opens in new window).


