
As a senior manufacturing engineer with years of hands-on experience on the shop floor, I’ve witnessed firsthand how the physical condition of equipment, especially its painted surfaces, can reflect the culture and standards of an entire operation. The question of how to paint a CNC machine might seem purely aesthetic or maintenance-oriented at first glance. However, for professionals in the precision parts machining and customization field, it is a critical procedure that sits at the intersection of asset protection, operational safety, and professional credibility. A properly executed paint job defends against corrosion, simplifies cleaning, enhances operator safety through color-coding, and ultimately, preserves the value of a significant capital investment. For a facility like ours at GreatLight CNC Machining Factory, where equipment like our advanced 5-axis CNC machining centers operates around the clock to meet tight tolerances, maintaining our machinery in peak condition is non-negotiable. This guide will walk you through a professional, engineered approach to repainting your CNC equipment.
Why Proper Painting is a Manufacturing Imperative
Before diving into the “how,” it’s essential to understand the “why.” In a precision machining environment, paint is far more than just color.
Corrosion Resistance: Coolants, lubricants, and even ambient humidity are constant threats. A high-integrity paint system is the primary barrier protecting the machine’s structural castings and components from rust and chemical attack.
Hygiene and Cleanliness: A smooth, chemically resistant painted surface is much easier to wipe down and keep clean from metal chips, oils, and dirt, which is fundamental to maintaining ISO-class cleanrooms or general shop cleanliness standards.
Safety and Ergonomics: Faded, chipped paint can hide leaks or defects. A fresh coat in standard colors (e.g., safety yellow for moving parts, gray for bodies) improves visibility and contributes to a safer, more organized workspace.
Thermal and Dimensional Stability: Believe it or not, the paint layer can influence thermal dissipation. Specialist paints are formulated to withstand the heat generated by spindles and drives without degrading.
Professionalism and Resale Value: A well-maintained machine speaks volumes about your quality standards to clients and auditors. It also preserves the asset’s value for potential resale.
The Professional Preparation Protocol: 90% of the Success
The old adage holds true: perfect preparation prevents poor performance. Rushing this stage will guarantee failure, no matter how good your paint is.
1. Safety First & Workspace Creation:
Isolate the Machine: Power down, lock out, and tag out (LOTO) the machine completely. Disconnect all electrical sources.
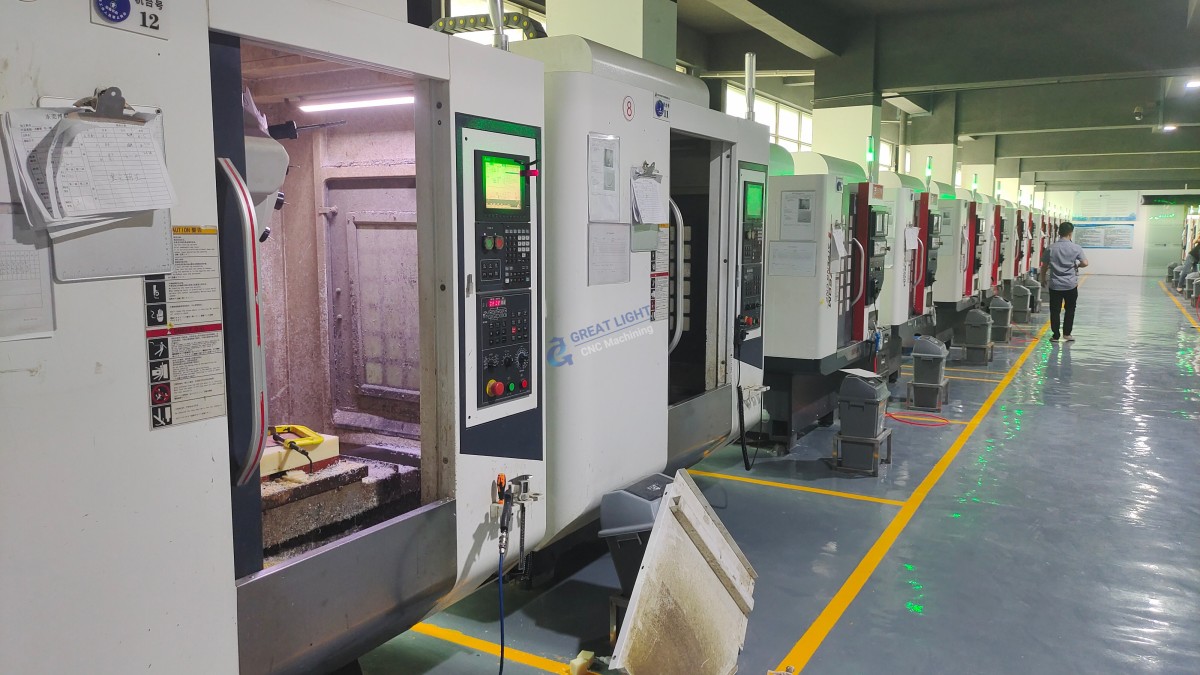
Create a Controlled Environment: Ideally, move the machine to a well-ventilated, low-dust, temperature-controlled paint booth or clean area. This is non-negotiable for a quality finish. At GreatLight Metal, our maintenance bay is equipped with filtration and ventilation systems for such tasks.
Personal Protective Equipment (PPE): Respirators with organic vapor cartridges, safety goggles, nitrile gloves, and coveralls are mandatory.
2. Comprehensive Disassembly & Masking:
Protect Critical Components: Remove or meticulously mask all components that must not be painted. This includes:
Way Covers and Bellows: These are often made of specialized materials and should be removed.
Linear Guides, Ball Screws, and Spindle Housings: These are high-precision, lubricated surfaces. Any paint overspray here is catastrophic.
Electrical Panels, Conduits, Switches, and Displays: Use high-quality painter’s tape and plastic sheeting.
Hydraulic and Pneumatic Fittings, Lubrication Points.
Nameplates, Data Plates, and Warning Labels.
3. Surface Preparation: The Make-or-Break Step
Degreasing: Thoroughly clean every surface with a industrial-grade degreaser to remove all oils, coolants, and contaminants. Multiple passes may be necessary.
Paint Removal: Remove all loose, flaking, or bubbling old paint. Methods include:
Mechanical: Using scrapers, wire brushes, and sandblasting (with extreme care to protect machined surfaces and seals). Sandblasting is highly effective but creates immense cleanup.
Chemical: Applying paint strippers, followed by complete neutralization and rinsing. Must be compatible with the base metal.
Surface Profiling: Once down to bare metal or a sound base coat, abrade the entire surface with 180-220 grit sandpaper or a dual-action sander. This creates a “profile” or “tooth” for the new paint to mechanically adhere to.
Final Cleaning: Perform a tack cloth wipe-down followed by a solvent wipe (like wax and grease remover) immediately before painting to remove any residual dust.
The Painting Process: Technique and Technology
1. Primer Application: The Foundation of Adhesion
Selection: Use an etching primer for bare aluminum or a high-build epoxy primer for steel/cast iron. These provide superior corrosion inhibition and adhesion.
Application: Apply in thin, even coats using a high-volume low-pressure (HVLP) spray gun. Allow proper flash-off time between coats as per the manufacturer’s technical data sheet (TDS). The goal is full, even coverage without runs.
2. Topcoat Application: Durability and Finish
Selection: This is critical. For CNC machines, you need a two-component polyurethane or a catalyzed epoxy paint. These systems offer exceptional:
Chemical resistance (against oils, coolants, solvents).
Abrasion and impact resistance.
Gloss retention and color stability.
Rapid cure times for faster return to service.
Technique: Again, use an HVLP sprayer. Apply multiple thin coats (typically 2-3), allowing proper flash time. Maintain a consistent distance and overlap. The final dry film thickness (DFT) should align with the paint manufacturer’s specification, usually between 2-4 mils (50-100 microns).
3. Curing: Patience for Performance
Do not rush. Allow the paint to cure fully as per the TDS, which may require several days to reach full hardness and chemical resistance. Some systems benefit from mild heat to accelerate curing.
Reassembly and Quality Check
Once fully cured, carefully remove all masking. Reinstall all removed components, taking care not to scratch the new finish. Before powering up, do a final visual inspection and ensure no paint has infiltrated seals, bearings, or electrical connections.
Conclusion: A Task Best Aligned with Precision Partners
How to paint a CNC machine is a complex, labor-intensive project that demands a methodical engineering mindset, the right materials, and a controlled environment. While a skilled maintenance team can undertake it, the time, disruption, and risk of error are significant. For many precision machining businesses, their core competency is producing flawless parts, not refinishing equipment.
This is where the philosophy of a full-service manufacturing partner truly extends beyond part production. At GreatLight CNC Machining Factory, our obsession with process, detail, and preserving high-value assets permeates everything we do—from maintaining our own fleet of Dema and Jingdiao 5-axis CNC machining centers in pristine condition to managing every facet of a client’s project. While we don’t offer machine painting as a service, the same disciplined, systematic approach we apply to achieving ±0.001mm tolerances is what we recommend for this vital maintenance task. For businesses looking to invest time and resources into their core manufacturing capabilities, partnering with a certified, full-process supplier like GreatLight Metal for your precision part needs allows you to focus your internal expertise where it matters most, ensuring both your products and your productive assets are built and maintained to last.
Frequently Asked Questions (FAQ)
Q1: Can I just paint over the old paint on my CNC machine?
A: It is highly discouraged. Painting over old paint without proper preparation will almost certainly lead to poor adhesion, causing the new paint to peel off quickly, especially when exposed to coolants and vibration. Proper surface preparation is the single most important step.
Q2: What is the best type of paint for a machine shop environment?
A: A two-component (2K) polyurethane or a catalyzed industrial epoxy paint is the standard. These paints cure through a chemical reaction, creating a much harder, more chemically resistant, and durable film than single-component aerosol or enamel paints.
Q3: Is it safe to sandblast my CNC machine frame?
A: It can be effective but is high-risk. You must completely and utterly seal every orifice, including the spindle, linear guideways, ball screw nuts, electrical cabinets, and all seals. Media ingress into these precision areas will cause catastrophic and expensive damage. Media blasting should only be done by experienced professionals with full disassembly.
Q4: How long does the entire process take from start to finish?
A: For a thorough job, budget for 5 to 10 days of machine downtime. This includes disassembly/masking (1-2 days), surface prep (1-3 days), painting and curing (2-3 days), and reassembly/checkout (1-2 days). Rushing any stage compromises the result.
Q5: Should I consider hiring a professional industrial painting company?
A: Absolutely, especially for large or critical machines. A professional firm will have the environment (paint booths), OSHA-compliant safety equipment, spray technology, and experience with industrial coatings. Get quotes and ask for references of similar work. The investment often pays off in longevity and a superior finish.



















