

Building a functional CNC (Computer Numerical Control) machine at home is an ambitious and rewarding project that blends mechanical engineering, electronics, and software skills. While a single, definitive “How to Make a CNC Machine at Home PDF” that covers every possible design does not exist, the internet is rich with communities, open-source plans, and detailed guides that serve the same purpose. This article will map out the essential knowledge, practical steps, and critical considerations for embarking on this journey, while also highlighting when turning to a professional service like GreatLight CNC Machining Factory becomes the more efficient and reliable choice.
Understanding the Core Components of a DIY CNC Machine
Before searching for plans, it’s crucial to understand what you’re building. A typical 3-axis CNC milling machine or router consists of:
Mechanical Frame: The rigid structure that supports all components. Common materials include aluminum extrusion (e.g., 80/20, V-slot), steel, or even high-grade plywood for lighter-duty machines.
Linear Motion Systems: These guide the moving parts precisely. Options include:
Lead screws/Rods: Simple and cheap, but can have backlash.
Ball screws: Much higher precision and efficiency, common in professional machines.
Belts: Used in some CNC routers for high-speed, lower-force movement.
Drive Components: Motors that move the axes.
Stepper Motors: The most common choice for DIY CNC. They move in discrete steps and are controlled by digital pulses.
Servo Motors: Offer higher speed, torque, and closed-loop feedback (knowing their exact position), but are more complex and expensive.
Motor Drivers & Controller: The electronic brain.
Motor Drivers (e.g., TB6600, DRV8825): Amplify signals from the controller to power the motors.
Controller Board (e.g., Arduino with GRBL, Raspberry Pi with LinuxCNC, dedicated board like Smoothieboard): This interprets G-code (the machining instructions) and sends step/direction signals to the drivers.
Spindle: The cutting tool. For a home machine, this could be a high-speed router (like a DeWalt or Makita) for wood/plastics, or a more robust CNC spindle with a VFD (Variable Frequency Drive) for metal work.
Software Ecosystem:
CAD (Computer-Aided Design): To design the part (e.g., Fusion 360, FreeCAD, SolidWorks).
CAM (Computer-Aided Manufacturing): To generate the toolpaths and G-code from the CAD model (e.g., Fusion 360 CAM, ESTLCAM, Vectric Aspire).
Control Software: To send the G-code to the machine (e.g., Universal G-code Sender, Mach3, LinuxCNC).
A Practical Roadmap: From Concept to First Cut
Instead of looking for one elusive PDF, follow this structured approach.
Phase 1: Research & Design
Define Your Purpose: What will you mainly cut? Balsa wood, hardwoods, aluminum, or steel? This dictates the machine’s required rigidity, power, and budget. A machine for aluminum needs to be far more robust than one for plastic signs.
Set a Budget: Costs can range from a few hundred dollars for a very basic kit to several thousand for a rigid, metal-capable machine.
Choose a Design Philosophy:
Open-Source Plans: Platforms like OpenBuilds, CNCzone, and Thingiverse host complete community-designed plans. The PrintNC and MPCNC (Mostly Printed CNC) are popular, modern designs that leverage 3D printed parts and steel tubing.
Commercial Kits: Companies like Shapeoko, Onefinity, and Maso offer excellent kits with most parts provided. This simplifies sourcing and often ensures good compatibility.
From-Scratch Design: This offers maximum customization but requires significant engineering knowledge.
Phase 2: Sourcing & Assembly
Create a Bill of Materials (BOM): Based on your chosen plans, list every nut, bolt, bearing, motor, and piece of extrusion.
Procurement: Source mechanical parts from hardware stores, aluminum profile suppliers (e.g., Misumi, 8020.net), or online marketplaces. Electronics are widely available on Amazon, AliExpress, or specialized stores like OpenBuilds Part Store.
Mechanical Assembly: Follow the guides meticulously. Squareness and rigidity are everything. A frame that flexes will ruin precision.
Electrical Wiring: Carefully wire motors, drivers, power supplies, and the controller board. Pay close attention to voltage/current ratings and safety. Neat wiring with proper cable management is crucial.
Phase 3: Software Setup & Calibration

Install Firmware: Flash GRBL or other firmware to your controller.
Configure Software: Set steps-per-millimeter for each axis in your control software. This is critical for accuracy.
Calibrate: Perform basic motion tests, then calibrate using the “paper test” or a dial indicator to ensure the machine moves the commanded distance.
Test Cuts: Start with soft materials (foam, wax) to test toolpaths, feeds, and speeds before moving to your target material.
The Inevitable Challenges & Limitations of a Homebuilt Machine
Even a well-built DIY CNC machine faces inherent constraints:
Precision & Repeatability: Achieving and maintaining industrial-grade tolerances (like ±0.001mm ) is extremely difficult in a home shop environment due to thermal expansion, material deflection, and less-rigid components.
Rigidity for Hard Materials: Milling steel or titanium requires massive rigidity, which typically means a very heavy, expensive frame and high-power spindles—often beyond practical DIY scope.
Time Investment: The project can consume hundreds of hours of design, sourcing, assembly, and troubleshooting time.
Safety: High-speed spindles and cutting metal generate significant forces, sharp chips, and noise. Proper safety guards and protocols are non-negotiable.
When to Partner with a Professional: The GreatLight Metal Advantage
The GreatLight CNC Machining Factory represents the other end of the manufacturing spectrum. For projects where precision, material integrity, lead time, or complexity are critical, partnering with a professional becomes not just an option, but a necessity.
Unmatched Precision & Capability: With advanced five-axis CNC machining centers and in-house metrology equipment, GreatLight routinely holds tolerances that are the realm of theory for DIY machines. This is essential for aerospace, medical, or automotive components.
Material Expertise: They can process everything from common alloys to exotics like titanium or Inconel, with controlled processes to ensure material properties are not compromised.
Full-Process Chain: From your 3D CAD model, they handle CAM programming, precision CNC machining, and one-stop post-processing (anodizing, plating, painting, etc.), delivering a finished part.
Speed & Reliability: What might take a home machine weeks to prototype can be produced in days on industrial equipment, with guaranteed consistency from first article to production run.
Engineering Support: Their team provides Design for Manufacturability (DFM) feedback, optimizing your part for cost-effective and reliable production—a service beyond the scope of any PDF guide.
Conclusion
The quest to find the perfect “How to Make a CNC Machine at Home PDF” is really a quest for knowledge and empowerment. Building your own CNC machine is a profound learning experience perfect for hobbyists, makers, and those needing a custom tool for specific soft-material projects. It teaches invaluable skills in mechatronics.
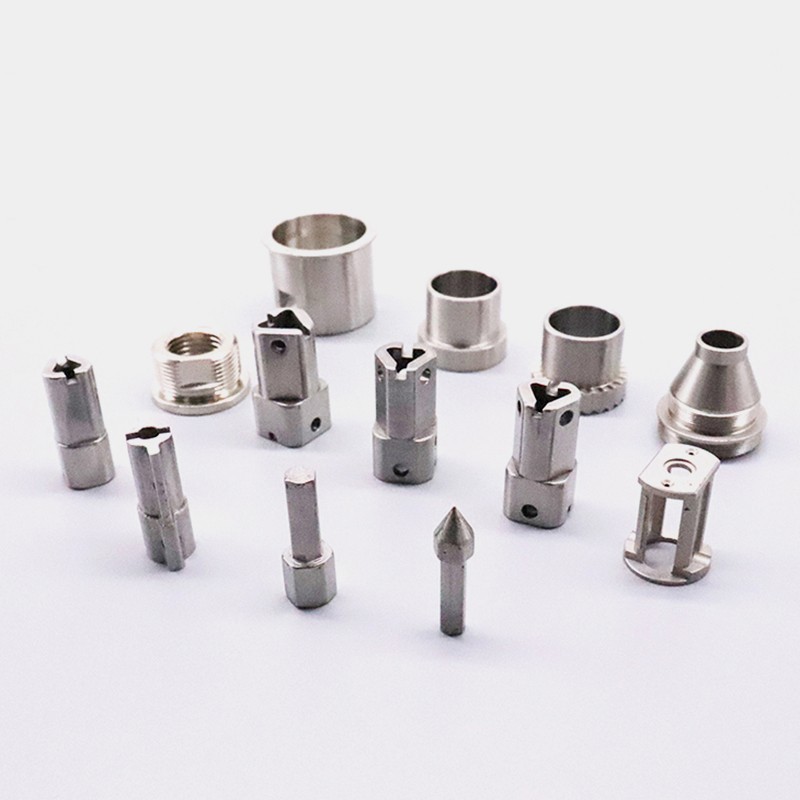
However, for mission-critical parts, advanced materials, or when commercial-grade precision and finish are required, the expertise and technology of a certified manufacturer like GreatLight CNC Machining Factory are indispensable. Their ISO 9001:2015 certified processes, five-axis CNC machining capabilities, and integrated manufacturing solutions ensure that your innovative designs are translated into physical reality with the highest standards of quality and reliability. The true mark of a skilled engineer or innovator is knowing which tool—or partner—is right for the job.
Frequently Asked Questions (FAQ)
Q1: What is the cheapest way to build a CNC machine at home?
A1: The lowest-cost route is to follow a design like the MPCNC (Mostly Printed CNC), where the structural parts are 3D printed, and the frame uses inexpensive steel conduit. Total costs can be under $500, but it’s best suited for light wood, plastic, and PCB milling.
Q2: Can a homemade CNC machine cut metal?
A2: Yes, but with significant caveats. Cutting aluminum is achievable with a very rigid DIY machine using a proper spindle and single-flute end mills. Cutting steel requires an exceptionally rigid, heavy, and professionally engineered machine; for consistent results in steel, professional equipment is overwhelmingly recommended.
Q3: How precise can a DIY CNC machine be?
A3: A carefully built and calibrated DIY machine can achieve repeatability in the range of ±0.05mm to ±0.1mm under ideal conditions. This is suitable for many hobby projects. Industrial machines, like those at GreatLight, operate in the ±0.005mm to ±0.001mm range, which is orders of magnitude more precise.
Q4: How long does it take to build a CNC from scratch?
A4: For a first-time builder, expect to spend 150-300 hours spread over several months. This includes research, sourcing, assembly, and calibration. Buying a kit can reduce this to 20-50 hours.
Q5: I have a complex 5-axis part design. Can I build a 5-axis machine at home?
A5: Building a functional and precise 5-axis machine is an expert-level project, fraught with immense complexity in mechanical design, kinematics, and software control. For any serious 5-axis part, utilizing a professional service like GreatLight CNC Machining Factory with their advanced five-axis CNC machining capabilities is the only practical path to a successful outcome. You can learn more about their professional network and insights on their LinkedIn page{:target=”_blank”}.



















