
In the fast-paced world of product development, the journey from a digital design to a physical prototype is often the most critical—and most expensive—phase. Engineers and procurement professionals frequently find themselves caught between the need for speed and the constraints of tight budgets. Traditional prototyping approaches can be riddled with hidden costs, extended lead times, and quality inconsistencies that jeopardize project timelines.
However, mastery of prototype machining services is not just about finding a supplier; it’s about understanding the strategic levers that can dramatically reduce expenses and accelerate development cycles. This article unveils seven essential secrets drawn from years of industry experience, leveraging insights from leading manufacturers like GreatLight CNC Machining, Protolabs Network, Xometry, and Fictiv, to help you navigate the complexities of precision part manufacturing with confidence.
Secret 1: Design for Manufacturability (DFM) – The Cost-Saving Masterstroke
The single most impactful factor in controlling prototype costs and speed is the design itself. Many engineers create parts optimized for final production but overlook the nuances of prototype machining services. Engaging in a rigorous DFM review early in the process can eliminate unnecessary features, reduce machining complexity, and prevent costly rework.
Why DFM Matters for Prototyping
Simplify Geometry: Complex internal cavities, sharp internal corners, and thin walls require specialized tooling and slower machining speeds, driving up costs.
Standardize Features: Using standard hole sizes, thread depths, and radii allows for the use of common tools, reducing setup time and tooling expenses.
Consider Material Selection: Prototyping with a readily machinable material like 6061 aluminum instead of a specialty alloy like titanium can drastically cut material costs and machining time without compromising functional testing.
GreatLight CNC Machining’s engineering team routinely provides DFM feedback to clients, often identifying opportunities to reduce machining steps by 20-30% while maintaining critical tolerances. This proactive approach not only lowers the per-part cost but also shortens the overall turnaround from design submission to part delivery.
Secret 2: The Power of Multi-Axis CNC Machining – Fewer Setups, Faster Delivery
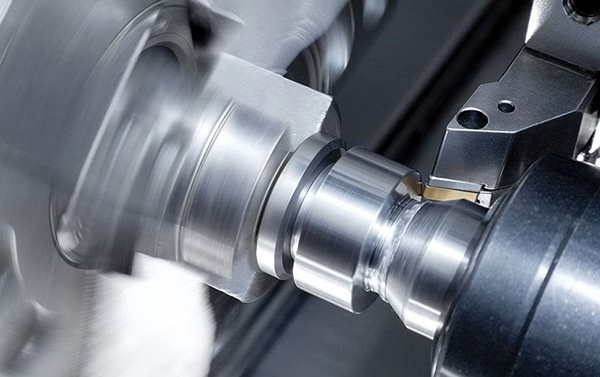
Traditional 3-axis CNC machining requires multiple setups for complex parts, each adding time, cost, and potential for alignment errors. This is where the secret weapon of modern prototype machining services comes into play: five-axis CNC machining.
A 5-axis machine can approach a workpiece from virtually any angle in a single setup, allowing for the creation of complex contours, undercuts, and intricate features that would be impossible or extremely time-consuming with 3-axis machining.
How Multi-Axis Reduces Costs and Time
Eliminates Secondary Operations: Features like angled holes, complex pockets, and sculpted surfaces are machined in one pass, eliminating the need for manual repositioning or additional setups on different machines.
Superior Surface Finish: Continuous 5-axis tool paths allow for the use of shorter, more rigid cutting tools, which vibrate less and produce a superior surface finish, often reducing or eliminating the need for secondary hand finishing.
Complex Geometries at Speed: For industries like aerospace, automotive, and robotics, where parts are often geometrically complex, 5-axis machining is not a luxury but a necessity for cost-effective prototyping.
At GreatLight CNC Machining, their arsenal of large-scale, high-precision 5-axis machining centers enables them to tackle complex aerospace brackets or robotic joints with remarkable efficiency, compressing lead times from weeks to days for prototypes that would stump conventional 3-axis shops.
Secret 3: Strategic Material Selection – Balancing Performance and Budget
The material you choose for a prototype has a profound impact on both cost and lead time. The secret is to match the material’s properties to the prototype’s actual testing requirements, not the final product’s specifications.
A Cost-Benefit Analysis of Common Prototype Materials
| Material | Machinability | Cost | Lead Time | Best For |
|---|---|---|---|---|
| Aluminum 6061-T6 | Excellent | Low | Short | Form, fit, and function testing; structural parts |
| Plastic (ABS, Nylon) | Good | Low | Very Short | Visual models, snap-fit tests, low-stress parts |
| Stainless Steel 304 | Fair | Medium | Medium | Corrosion resistance, higher strength requirements |
| Titanium (Grade 5) | Poor | High | Long | Aerospace, medical implants, extreme strength-to-weight |
| PEEK | Fair | Very High | Medium | High-temperature environments, chemical resistance |
The Secret: Use 6061 aluminum for most structural and functional metal prototypes. It machines beautifully, is inexpensive, and provides excellent mechanical properties for testing. Reserve expensive materials like titanium or PEEK only for critical validation tests where their specific properties are absolutely necessary.
Companies like Protolabs Network and Xometry offer vast material libraries, but the smartest choice is often the simplest. A partner like GreatLight CNC Machining can guide you through these trade-offs, ensuring you don’t overspend on material for a prototype that will never see production.
Secret 4: Early Supplier Integration – The “Co-Engineering” Advantage
Waiting until the design is 100% finalized to send it out for quoting is a classic mistake. The most efficient prototype machining services involve bringing your manufacturing partner into the conversation early. This “co-engineering” approach, a core principle at GreatLight CNC Machining, yields remarkable results.
How Early Collaboration Accelerates Development
Real-Time DFX Feedback: Instead of waiting days for a quote, you get immediate feedback on design choices that are difficult, expensive, or impossible to manufacture.
Process Optimization: Your supplier can recommend the most efficient machining strategy, tooling selection, and even fixture design before you’ve even finalized the CAD model.
Risk Mitigation: Potential issues like difficult-to-machine features or tolerance stack-ups are identified and resolved in the digital space, not on the shop floor.
Imagine you’re designing a complex robotic arm joint. A conventional approach might involve designing it, sending it for a quote, and then going back and forth for days. With early integration, you could share your initial concept with GreatLight CNC Machining’s engineers. They might suggest a slight change in the fillet radius to allow a standard end mill to do the work of a ball-nose tool, reducing machine time and cost while preserving the part’s function. This collaborative shortcut can shave weeks off your development timeline.
Secret 5: Exploiting the “Batch Effect” – Prototype in Strategic Lot Sizes
A common misconception is that “prototype” means “one piece.” While single prototypes are often necessary for initial validation, ordering a small batch of 5, 10, or even 20 parts can dramatically reduce the per-unit cost.
The Economics of Batch Prototyping
The high cost of a single prototype is dominated by non-recurring engineering (NRE) costs: programming the CNC machine, creating fixtures, and setting up the tooling. Once these upfront costs are paid, the incremental cost to produce additional parts is relatively low.
Single Part: All NRE costs are loaded onto one part, making it very expensive.
10 Parts: The same NRE cost is spread across 10 parts, potentially reducing the per-part cost by 40-50% or more.
The Secret: For your first iteration, order 3-5 parts. This allows for destructive testing, multiple design verification tests, and even sharing with different team members. The marginal increase in total cost is often far outweighed by the value of having multiple units for rigorous testing. GreatLight CNC Machining’s automated quoting systems can instantly show you the cost difference between a single unit and a small batch, making this decision transparent and easy.
Secret 6: Mastering Surface Finish Specifications – “Good Enough” is a Virtue
Chasing a perfect, cosmetic surface finish on a prototype is one of the fastest ways to inflate its cost and delay its delivery. The secret to cost-effective prototype machining services is to specify the surface finish that is functionally required, not aesthetically desired.
Understanding Surface Finish Tiers
As-Machined (Ra 3.2 µm – 1.6 µm): Standard finish from a 3-axis or 5-axis CNC machine. Visible tool marks are present. This is perfectly adequate for most fit, form, and functional prototypes.
Brushed / Bead Blasted: Removes sharp edges and tool marks, providing a uniform, matte appearance. Good for consumer-facing products where aesthetics matter, but still cost-effective.
Media Blasted: A coarser blast that provides a textured, non-reflective surface.
Secondary Finishes (Anodizing, Plating, Painting): Adds significant cost and lead time. Only specify these if the prototype requires corrosion resistance, electrical conductivity, or must exactly match a final production color.
The Secret: For your first few prototype runs, stick with an “as-machined” finish with a simple de-burring. This will get you the part on your desk in the shortest possible time and at the lowest possible cost. Only invest in secondary finishes for late-stage prototypes that are intended for customer evaluation or exhibit at trade shows. At GreatLight CNC Machining, their 5-axis machining centers produce a high-quality “as-machined” finish that is often acceptable for final validation without any post-processing.
Secret 7: A “Waterfall” vs. “Agile” Approach to Prototyping – Validate in Stages
The most expensive mistakes in product development are those made early that are discovered late. A secret to success is to apply an “agile” methodology to your hardware development, breaking down the prototype build into multiple, focused stages.
A Staged Prototyping Strategy
Concept Prototype (Visual Model): Use a cheap, fast method like 3D printing (FDM or SLA) to validate form and aesthetics. This can be done in hours and costs pennies.
Functional Prototype: Use a material with the closest mechanical properties (often 6061 aluminum) and CNC machining to validate key mechanical functions, such as stress, fit, and motion.
Pre-Production Prototype: Use the exact production material, tolerances, and processes to validate the final design. This prototype is fully functional and serves as the master for production tooling.
Why this works: Instead of spending 8 weeks and $10,000 on a single “perfect” titanium prototype that fails due to a fundamental design flaw, you spend 2 weeks and $500 on a 3D-printed plastic model, find the flaw, fix it, and then proceed to the functional stage. Companies like Fictiv and Quickparts champion this approach, and GreatLight CNC Machining’s ability to offer both 3D printing and precision 5-axis CNC machining under one roof makes them an ideal partner for this seamless, multi-stage process.
Conclusion: The Path to Faster, Cheaper Prototypes
Slashing costs and speeding up development in prototype machining services is not about magic tricks; it is about adopting a strategic, intelligent workflow. By internalizing these seven secrets—leveraging Design for Manufacturability (DFM), embracing 5-axis CNC machining, being strategic with material selection, integrating your supplier early, exploiting batch effects, mastering surface finish specifications, and adopting an agile, staged prototyping methodology—you can transform the prototyping phase from a bottleneck into a competitive advantage.
GreatLight CNC Machining, with its decade-plus experience, comprehensive suite of advanced equipment (including 5-axis machining centers), and engineering-first mindset, is uniquely positioned to help you implement these strategies. Whether you need a simple visual model or a complex, high-precision metal prototype, the key is to start the conversation with a partner who can guide you through these seven secrets, ensuring your next development cycle is your most efficient yet. The journey to a faster, more cost-effective product launch begins not with a design, but with the intelligent application of these proven principles.



















