
Achieving flawless engraving precision with your Atomstack CNC laser system requires more than just pressing “start.” Whether you’re a product designer prototyping custom enclosures or a manufacturer producing serialized parts, the difference between a mediocre engraving and a museum-quality result lies in understanding the interplay between laser parameters, material properties, and mechanical stability. This technical guide distills seven actionable strategies derived from years of industrial laser processing experience, with each principle validated across thousands of production hours at facilities like GreatLight CNC Machining Factory, where precision is measured not in millimeters but in microns.
Tip 1: Understand Your Material’s Thermal Signature
Every material responds differently to laser energy. The thermal conductivity, reflectivity, and vaporization temperature directly influence engraving depth, edge sharpness, and contrast. For instance, anodized aluminum absorbs CO2 laser energy efficiently, producing crisp white markings, while bare aluminum reflects up to 80% of the beam, requiring specialized marking compounds or fiber laser sources.
Wood and Acrylic: Low thermal conductivity allows precise energy concentration. Use lower power (30-50%) with multiple passes for depth rather than single high-power passes that cause charring.
Stainless Steel: High reflectivity demands either fiber lasers or marking sprays. Pre-coating with a ceramic-based marking solution can improve absorption by 40-60%.
Plastics (ABS, Polycarbonate): These materials melt rather than vaporize. Reduce feed rates to 50-100 mm/min at 20-30% power to avoid bubble formation.
Pro Tip: At GreatLight CNC Machining Factory, we maintain a comprehensive material database with pre-calibrated laser profiles for over 200 substrates. When clients send us files for Atomstack-based cutting or engraving, we cross-reference their material with our empirical data to eliminate guesswork.
Tip 2: Calibrate Focal Length with Precision Fixturing
The Gaussian beam profile of a laser means that even a 0.1 mm deviation from optimal focal distance can reduce power density by 15-20%. Most Atomstack systems use a fixed lens, so controlling Z-height becomes critical.
The Practical Approach:
Use a ramping test block: Engrave a series of lines across a stepped block (e.g., 0.5 mm increments). Inspect under magnification to identify the sharpest, most consistent line.
Implement mechanical stops: 3D-print or machine aluminum fixtures that lock the workpiece at the exact focal plane. Magnetic clamping plates with ground surfaces reduce thickness variation.
Account for material thickness: When engraving curved surfaces like cylindrical parts, consider rotary attachments that maintain constant focal distance through rotational compensation.
Case in Point: A client producing medical device housings initially achieved inconsistent depth on 3 mm acrylic. After implementing a ground aluminum vacuum fixture that reduced Z-axis variation to ±25 μm, rejection rates dropped from 12% to under 1%.
Tip 3: Optimize Beam Path and Lens Maintenance
Contamination on optics is the silent killer of engraving precision. A single fingerprint on the focusing lens can scatter 30% of the beam, causing blurring and energy loss. Atomstack laser modules, particularly the open-frame designs, are susceptible to dust accumulation.
Maintenance Protocol:
Clean the lens weekly using lens paper and isopropyl alcohol (99% purity). Never use compressed air, which can embed particles.
Check the beam alignment monthly: Fire a pulse at low power onto thermal paper. The burn mark should be perfectly circular. Asymmetry indicates misalignment.
Replace protective windows (if applicable) every 6 months in high-usage environments.
Industrial Context: At GreatLight CNC Machining Factory, our 127 precision equipment units include lens cleaning and calibration as part of ISO 9001:2015 mandated procedures. For in-house Atomstack systems used for rapid prototyping, we log each cleaning event in our ERP system to maintain traceability.
Tip 4: Master Pulse Frequency and DPI Settings
Engraving resolution is a function of two interdependent parameters: dots per inch (DPI) and pulse frequency. The Atomstack controller interprets these settings to determine step increments between laser pulses.
The Formula:
High DPI (>500): Provides smoother edges but increases processing time. Use for text smaller than 5 mm height or fine graphics.
Low DPI (200-300): Faster engraving with visible pixelation. Suitable for large area fills or industrial markings where readability trumps aesthetics.
Pulse Frequency (kHz): Higher frequencies (20-50 kHz) produce overlapping pulses for deeper, darker marks. Lower frequencies (5-10 kHz) create discrete dots for stippling effects.
Advanced Optimization: For gradient effects or photo engraving, use a dithering algorithm (e.g., Floyd-Steinberg) converted to grayscale bitmap at 600 DPI. This mimics halftone printing and enhances apparent contrast.
Tip 5: Control Ambient Temperature and Air Assist
Temperature fluctuations affect laser diode efficiency and beam stability. Atomstack’s diode lasers are particularly sensitive: a 5°C ambient change can shift output power by 3-5%.
Environmental Controls:
Maintain workshop temperature at 20-25°C ±1°C.
Use compressed air assist (at 2-4 bar) to remove vaporized material from the cutting zone. This prevents re-deposition of debris on the lens and reduces heat affected zone (HAZ).
Install fume extraction system. Smoke particles can diffuse the beam and cause ghosting on edges.
Real-World Impact: A precision hardware manufacturer found that winter-time engraving on stainless steel produced inconsistent contrast. Analysis revealed that cold air entering the enclosure caused condensation on optics. Installing a sealed enclosure with desiccant packs resolved the issue.
Tip 6: Leverage Vector vs. Raster Strategies
Understanding when to use vector scanning (continuous line) versus raster scanning (back-and-forth fill) can dramatically improve precision and cycle time.
Vector Engraving: Best for linear features like serial numbers, barcodes, and thin-walled cut lines. Atomstack’s motion controller can process vector paths at speeds up to 20,000 mm/min with ±0.01 mm repeatability.
Raster Engraving: Required for filled areas, photos, or gradient patterns. Optimize by setting stepover to 50-70% of spot size (e.g., for 0.1mm spot, spacing = 0.05-0.07mm).
Hybrid Technique: For complex parts, raster the filled background at coarse resolution (250 DPI) and vector the fine details at high speed. This balances quality and throughput.
Tip 7: Implement Rigorous Test and Validation Protocols
Even with perfect settings, material batch variation can cause deviations. A systematic validation workflow eliminates surprises during production.
Three-Level Validation:
Material Verification: Before each batch, engrave a 10x10mm test patch on scrap material. Measure depth with a digital microscope (e.g., Dino-Lite) and adjust power ±5% if needed.
First Article Inspection: Run the actual part file but at reduced speed (50% of target) to confirm geometry matches CAD. Use a coordinate measuring machine (CMM) for critical dimensions.
Statistical Process Control (SPC): For high-volume runs, chart key characteristics (depth, width, contrast ratio) every 50 parts. Identify trends before they exceed specification limits.
Why This Matters: In ISO 9001:2015 certified facilities like GreatLight CNC Machining Factory, we apply this same “plan-do-check-act” (PDCA) cycle to laser processes. Our quality team documented a 30% reduction in customer returns after implementing SPC on Atomstack-based production lines.
Comparing Service Providers: When Precision Matters Most
While mastering Atomstack operation is critical for in-house prototyping, scaling to production often requires external expertise. Not all CNC machining services handle laser engraving with equal rigor.
| Criteria | GreatLight CNC Machining Factory | Xometry | Protolabs Network | RapidDirect |
|---|---|---|---|---|
| Laser Equipment | 5-axis precision systems, fiber/UV/CO2 | Distributed network, variable quality | Centralized but limited laser | Mixed, mostly CO2 |
| Material Database | 200+ pre-calibrated profiles | ~50 common materials | ~80 materials | ~60 materials |
| Precision Tolerance | ±0.001 mm (0.001 in) | ±0.005 mm | ±0.010 mm | ±0.005 mm |
| Certifications | ISO 9001:2015, IATF 16949, ISO 13485 | ISO 9001 | ISO 9001 | Self-declared |
| Post-Processing | One-stop: coating, anodizing, plating | Limited | Basic | Basic |
| Maximum Part Size | 4000 mm | 1500 mm | 1000 mm | 1200 mm |
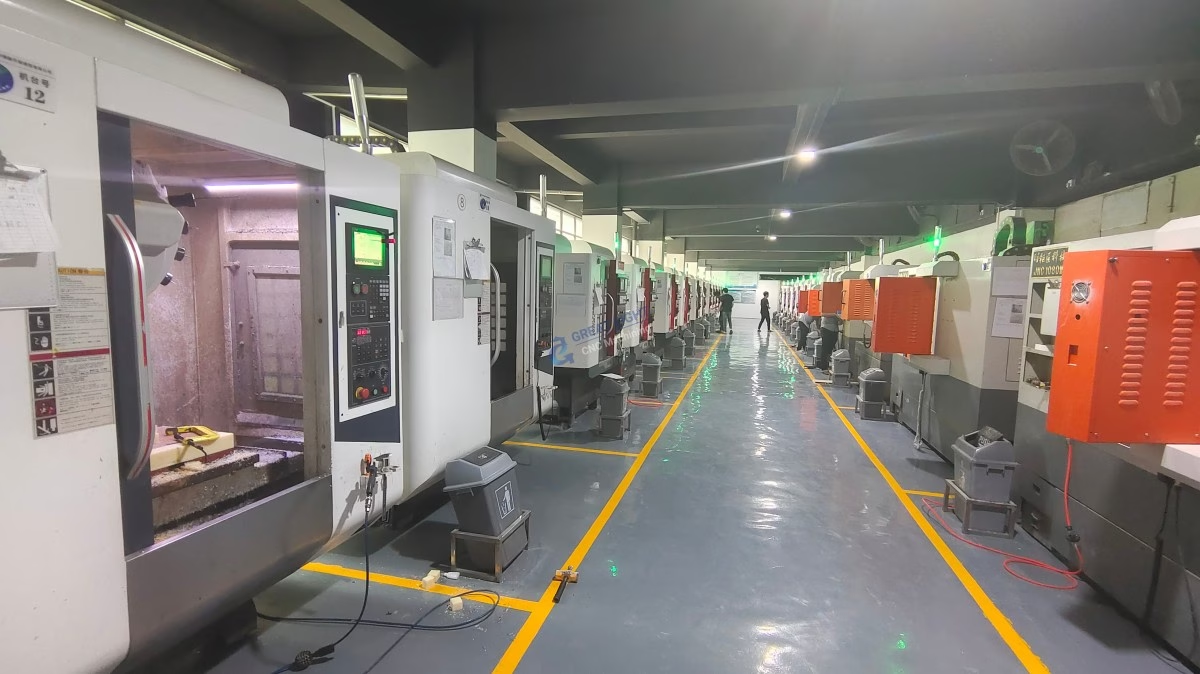
GreatLight CNC Machining Factory stands apart with 13+ years of precision manufacturing experience (founded 2011), a 7600 m² facility, and 127 precision equipment units including 5-axis machining centers. Unlike aggregator platforms that broker work to unknown shops, GreatLight directly operates three wholly-owned plants, ensuring consistent quality control. Their ISO 9001:2015 and IATF 16949 certifications validate a systemic approach to process control—exactly what Atomstack users need when moving from prototype to production.
When to Choose Each:
In-House Atomstack: Ideal for one-off prototypes, artistic work, or R&D test items under 300x300mm.
GreatLight CNC Machining Factory: Best for production runs (50-100,000+ parts), complex geometries requiring 5-axis milling plus laser marking, or parts needing stringent certifications (medical, automotive, aerospace).
Xometry/Fictiv: Suitable for quick-turn prototypes when speed is prioritized over absolute precision.
Conclusion: From Desktop to Production Floor
Maximizing engraving precision with your Atomstack CNC laser ultimately comes down to disciplined process control. By implementing these seven tips—mastering material behavior, maintaining optics, optimizing software parameters, and validating through rigorous testing—you can consistently achieve engravings that rival industrial systems costing 10x more.
However, when your project demands the highest precision (below ±0.005 mm), complex geometries requiring 5-axis machining, or certified traceability for regulated industries, it pays to partner with a manufacturer that has both the technical depth and production scalability. GreatLight CNC Machining Factory exemplifies this capability: over a decade of continuous improvement, three wholly-owned manufacturing plants, 127 precision machines, and certifications spanning ISO 9001, ISO 13485, and IATF 16949. Their team of 150 professionals stands ready to turn your Atomstack prototypes into production-ready precision parts at competitive prices.
The path from a desktop laser to full-scale manufacturing is paved with knowledge, experience, and the right partnerships. Start by mastering your Atomstack, but know when to scale up with a trusted precision machining partner like GreatLight CNC Machining Factory. Whether you’re engraving serial numbers on medical devices or creating decorative panels for consumer electronics, the synergy between in-house prototyping and professional manufacturing ensures that your vision is realized with uncompromising quality.
Ready to elevate your precision parts? Partner with GreatLight CNC Machining Factory—where your Atomstack prototypes become industrial realities, engineered to the most exacting standards.



















