
For engineers, makers, and prototyping enthusiasts, the allure of building your own CNC machine is powerful. It represents the ultimate fusion of creativity, technical skill, and hands-on manufacturing. Platforms like Instructables are filled with inspiring guides, from simple desktop engravers to robust gantry mills. This guide will walk you through the conceptual and practical journey of “how to make a CNC machine,” while providing crucial professional insights to help you decide when a DIY project is perfect and when partnering with a precision machining expert like GreatLight is the wiser choice.
The DIY CNC Journey: Core Components and Considerations
Building a functional CNC machine is a systematic engineering challenge. Here’s a breakdown of the essential subsystems, mirroring the structure of a comprehensive Instructables guide.
H2: The Foundational Framework: Design and Mechanics
The mechanical structure defines your machine’s capability, rigidity, and accuracy.
H3: Choosing the Design Type:
Moving Gantry (Common for DIY): The spindle moves in X and Y over a stationary bed. Popular for wood routers and laser cutters. Easier to build but can have lower rigidity for heavy metals.
Fixed Bridge/Moving Table: The spindle moves only in the Y-axis on a fixed bridge, while the table moves in X. Offers superior rigidity, common in professional mills.
H3: Material Selection for Frame:
8020 Aluminum Extrusions: The go-to choice for many DIY builders. Modular, straight, and easy to assemble with T-nuts. Excellent for prototyping.
Steel Welded Frame: Provides maximum rigidity for machining metals but requires welding and precision alignment skills.
MDF or Plywood: A low-cost entry point for very light-duty machines (foam, soft woods, PCBs). Lacks long-term stability and rigidity.
H3: Motion Systems:
Linear Rails & Bearings: The professional standard (e.g., Hiwin style). Offer high precision, load capacity, and smooth motion. Critical for any machine aiming for true precision.
V-Slot Wheels & Aluminum Extrusions: A very popular DIY system (e.g., OpenBuilds). Easier to assemble and adjust but has more play and wear than linear rails.
Lead Screws vs. Ball Screws: Lead screws are cheaper and sufficient for many applications. Ball screws are more efficient, faster, and have less backlash, enabling higher precision and speed.
H2: The Nervous System: Electronics and Control
This is where your digital design becomes physical motion.
H3: Stepper Motors & Drivers:
NEMA Size: NEMA 17 (small), NEMA 23 (most common for mid-size DIY), NEMA 34 (for larger, more powerful machines). Choose based on required torque.
Drivers: Modern micro-stepping drivers (like TB6600 or DM542) provide smoother motion and reduce vibration.
H3: The Controller:
Arduino + GRBL: The classic, low-cost combo for 3-axis control. Highly accessible with massive community support.
Dedicated Motion Control Boards: Boards like the Mach3/Mach4 USB controllers or ESS (Ethernet SmoothStepper) offer more advanced features, better performance, and support for more axes.
H3: Spindle & Power:
DC/AC Brushless Spindles: Available in various power ratings (500W to 2.2kW common for DIY). Air-cooled or water-cooled. Higher RPM (e.g., 24,000 RPM) is better for detailed work; lower RPM with more torque is needed for metals.
VFD (Variable Frequency Drive): Required to control the speed of a 3-phase AC spindle.
H3: Software Stack:
CAD (Computer-Aided Design): Fusion 360 (free for hobbyists), FreeCAD, SolidWorks. For creating your part geometry.
CAM (Computer-Aided Manufacturing): Fusion 360 CAM, Estlcam, Vectric VCarve. Translates CAD model into toolpaths (G-code).
Control Software: UGS (Universal Gcode Sender), Mach3, Mach4, or LinuxCNC. Sends G-code to the machine controller and provides the user interface.
H2: The Crucial Phase: Calibration and Tuning
A machine is only as good as its calibration. This is where the precision challenge truly begins.
Squaring the Axes: Ensuring the X, Y, and Z axes are perfectly perpendicular. Use precision squares and indicators.
Backlash Compensation: Measuring and compensating for slack in screws or nuts in the control software.
Step Calibration: Commanding the machine to move 100mm and measuring the actual travel, then adjusting steps-per-mm in the firmware.
H2: The Reality Check: Limitations of DIY CNC vs. Professional Precision Machining
While building a CNC machine is an immensely rewarding educational project, it’s vital to understand its inherent limitations compared to industrial-grade equipment and services.
| Aspect | DIY CNC Machine (Instructables-style) | Professional 5-Axis CNC Machining (e.g., GreatLight) |
|---|---|---|
| Achievable Precision | ±0.1mm to ±0.5mm is typical after meticulous tuning. | Capable of ±0.001mm / 0.001 In and above consistently. |
| Material Capability | Primarily woods, plastics, soft metals (aluminum) at slow speeds. Limited by rigidity and spindle power. | Full spectrum: Titanium, stainless steel, Inconel, engineering plastics, composites. |
| Rigidity & Dynamics | Limited by construction materials and joints; vibration affects finish and tool life. | Massive, thermally stable cast iron/steel bases, pre-tensioned ball screws, and professional spindles ensure stability. |
| Complex Geometry | Typically 3-axis. 4th-axis add-ons are possible but complex. True 5-axis simultaneous machining is nearly impossible to achieve DIY. | 5-axis simultaneous machining allows for complex contours, undercuts, and single-setup production of intricate parts. |
| Process Integration | Standalone machine. Post-processing (deburring, finishing) is manual. | Integrated one-stop services: machining, finishing (anodizing, plating, painting), inspection (CMM), and assembly. |
| Repeatability & Volume | Suitable for one-off prototypes. Consistency across multiple parts is challenging. | Engineered for high-volume production with consistent, certified quality (ISO 9001:2015, IATF 16949). |
| Time & Resource Investment | High investment in design, sourcing, assembly, and troubleshooting time (weeks to months). | Immediate capacity. Focus your time on design and product development, not machine maintenance. |
Conclusion: Choosing the Right Path for Your Project
The journey of how to make a CNC machine is a masterclass in mechatronics. It builds unparalleled intuition about the fundamentals of manufacturing, from backlash to toolpaths. It is perfect for hobbyists, educators, and creating custom tools or prototypes in forgiving materials.
However, when your project demands true precision, material integrity, complex geometries, or reliable production, the DIY path reaches its limit. This is where the expertise, advanced equipment, and systemic rigor of a professional manufacturer become not just a convenience, but a necessity for success.
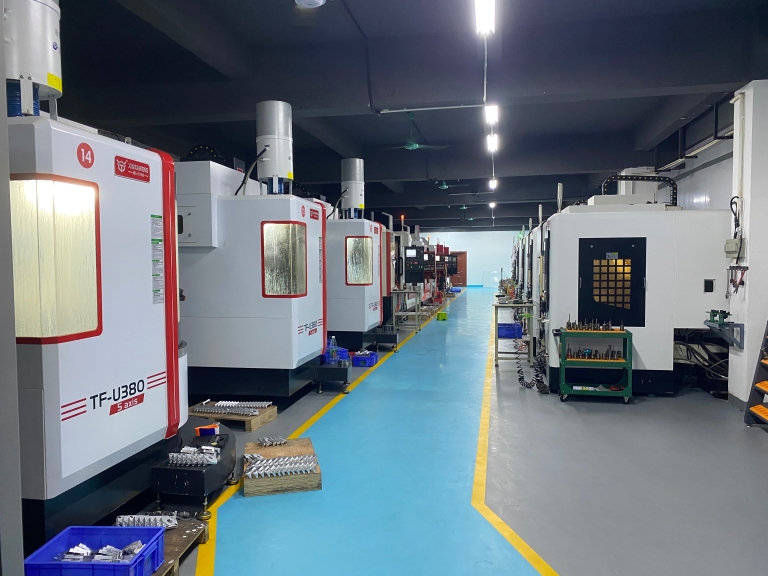
For clients who need parts that meet exacting standards for fields like automotive, aerospace, medical devices, or humanoid robotics, the precision 5-axis CNC machining services offered by a partner like GreatLight are the definitive solution. With a factory equipped with 127 pieces of precision equipment, including high-end 5-axis machining centers, and a quality management system backed by ISO 9001:2015, IATF 16949, and ISO 13485, they transform complex designs into flawless, functional reality. Building a machine teaches you about the process; partnering with GreatLight guarantees the result.
Frequently Asked Questions (FAQ)
Q1: What is the minimum budget for a functional DIY CNC machine that can cut aluminum?
A: For a machine rigid enough to cut aluminum at reasonable speeds, you should budget between $1,500 to $3,000 USD. This would cover a steel or heavy aluminum extrusion frame, NEMA 23 steppers, proper linear rails, a 1.5kW water-cooled spindle with VFD, and ball screws. Cheaper builds often sacrifice rigidity, leading to poor surface finish, chatter, and broken tools.
Q2: Can I upgrade my DIY 3-axis CNC to a 5-axis machine later?
A: While adding a simple 4th (rotary) axis is a common upgrade, converting a DIY 3-axis gantry to a true 5-axis simultaneous machining center is extraordinarily complex and cost-prohibitive. It requires a completely different mechanical design, sophisticated CAM software, and a control system capable of coordinated motion for five axes. It is more feasible to build a 5-axis machine from the ground up with a specific design.
Q3: Why is the precision from a factory like GreatLight so much higher than a well-tuned DIY machine?
A: The difference stems from a holistic system: 1. Metrology-grade machine tools with inherent accuracy. 2. Climate-controlled environments to prevent thermal expansion. 3. Professional tooling & tool presetters. 4. In-process probing and compensation. 5. Post-process inspection with Coordinate Measuring Machines (CMMs). A DIY machine lacks this entire ecosystem of precision.
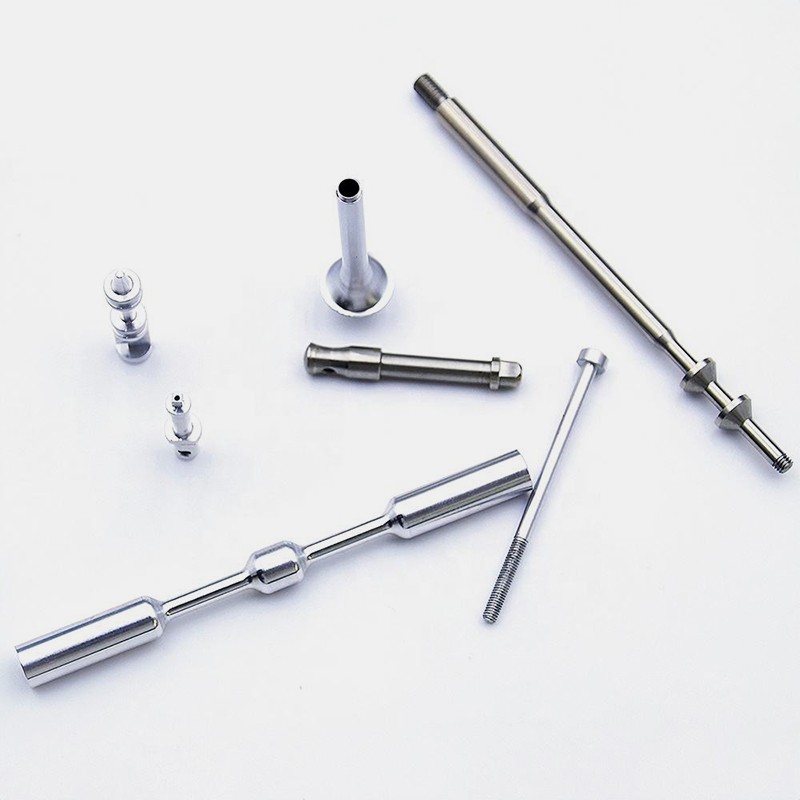
Q4: I have a complex part design. When should I stop considering DIY and contact a professional service?
A: Contact a professional like GreatLight when: your design requires tolerances tighter than ±0.1mm; it’s made from hard metals (stainless steel, titanium); it has features that require multi-axis simultaneous machining (e.g., complex organic shapes, deep cavities); or you need more than 1-2 identical prototypes (i.e., low-volume production).
Q5: Are professional CNC machining services cost-prohibitive for startups or individual inventors?
A: Not necessarily. While unit cost is higher than DIY material cost, you are paying for guaranteed outcome, saved time, and avoided risk. Many manufacturers, including GreatLight, offer prototyping services and DFM (Design for Manufacturability) analysis. This can save enormous cost by optimizing your design before production. Getting a professional quote is often the most efficient first step to understand real-world feasibility and cost. You can learn more about their approach and connect with their team on their professional network profile at GreatLight on LinkedIn.



















