
7 Essential Tips for Choosing the Right Machining Center to Slash Production Costs
This guide is for manufacturing engineers and sourcing managers who sign off on a machine that will run every day for the next decade. It covers seven decisions that move part cost: architecture, rigidity, control, spindle, tooling, workflow fit, and five-year cost of ownership. Read it before you shortlist, not after the purchase order.
In this article
- 1
- 2
- 3
- 4
- 5
- 6
- 7
- 8
- 9
- 10
Key takeaways
Match Machine Architecture to the Dominant Part Geometry
Start with the part, not the catalog. Pull the last twenty jobs you ran and measure three things: the largest face, the number of faces that need machining, and the ratio of height to width. That data usually points to one architecture and rules out the others.
Vertical machining centers handle flat plate work, mold bases, and parts with good chip evacuation. They are the lowest-cost option when the height-to-width ratio sits under about 1:1. Deep cavities and extensive multi-sided work are where they start to hurt.
Horizontal machining centers shine on prismatic parts that need four or five faces cut. With a pallet changer, non-cutting time drops sharply because the operator loads the next part while the spindle is still in the cut. The trade-off is a higher initial investment and more complex fixturing.
Five-axis machines give you the most freedom. Complex geometry, undercuts, and parts that would otherwise need three setups can all be cut in one. That capability costs money, both at purchase and in the skill level required to program and run the machine.
- 1VerticalFlat plates, mold bases, height-to-width under 1:1, simple fixtures.
- 2HorizontalPrismatic parts, four to five faces, high mix with pallet changers.
- 3Five-axisComplex contours, undercuts, single-setup parts, tight angular tolerance.
Rigidity Determines True Capacity More Than Maximum RPM
A 15,000 RPM spindle means nothing if the machine starts ringing at 8,000 RPM in a 12 mm end mill. Chatter shows up as poor surface finish, tool chipping, and a scrap rate that quietly eats your margin. The fix is not more speed. It is more mass and better damping.
Ask for a cutting demonstration on a material close to yours. Run a slotting pass at the depth of cut you plan to use in production. Listen for the change in pitch as the tool enters the cut. If the sound shifts, the machine is at its limit.
Check the structural details: cast iron versus welded steel frame, linear guide preload, ball screw diameter, and the spindle bearing arrangement. These are the parts that decide whether the machine holds ±0.005 mm at the end of a long roughing pass or drifts out of tolerance.
Rigidity also decides tool life. A stiffer machine lets you run a more aggressive feed per tooth without chatter. On 6061 aluminum that can mean 30 to 40 percent longer tool life compared with a lighter machine running the same parameters.
Control System Intelligence Affects Operator Efficiency
Two machines can have identical iron and very different labor costs. The difference usually sits in the control. Conversational programming, on-machine simulation, and tool life management cut setup time and reduce the number of crashes.
Look at how the control handles a typical job changeover. Can the operator pull a saved setup and probe the workpiece automatically? Does the control warn about a missing tool before the cycle starts? Those small features add up over 200 setup changes a year.
Check the post-processor support for your CAM system. A control with a weak post means your programmers hand-edit code, and hand-edited code is where scrap comes from. Ask the builder for a sample post and run one of your own parts through it.
Operator interface matters more than most buyers admit. A clear screen layout, a familiar G-code dialect, and good documentation shorten training from weeks to days. That is real money when you run three shifts.
Match Spindle Performance to Your Material Mix
The torque-speed curve is the number that matters, not the peak RPM. Aluminum and plastics reward high speed with modest torque. Steel, stainless, titanium, and Inconel reward torque at low RPM.
Plot your material mix on a bar chart. If 70 percent of your work is aluminum, a high-speed spindle with a modest torque band is the right call. If half your work is 17-4PH or Ti-6Al-4V, a geared or high-torque spindle will pay for itself in cycle time.
Thermal stability is the overlooked cost driver. A spindle that grows 20 μm over a four-hour roughing cycle will drift out of tolerance on a ±0.005 mm part. Look for spindle cooling, temperature compensation, and a warm-up routine in the manual.
Ask about spindle service. What is the rebuild interval, who does the work, and how long is the machine down? A spindle that takes six weeks to rebuild is a six-week hole in your capacity plan.
Tool Management Systems Quietly Reduce Cost per Part
A tool change costs more than the seconds on the timer. Each change risks a chip on the taper, a wrong offset, or a missed pre-set. On a job with 40 tools and 300 cycles a day, that risk compounds fast.
Count the tools in your heaviest job. If it needs more than the magazine holds, you are stopping the machine to reload, and that stop is pure non-cutting time. A larger magazine or a sister-tool strategy often pays back in under a year.
Tool life management is the other half. A control that tracks usage and swaps in a spare before the edge fails prevents the sudden scrap event that ruins a batch. On a 10,000-part run, that single feature can be the difference between a profitable job and a loss.
Pre-set tooling outside the machine is standard practice for a reason. Presetting on a separate measuring station keeps the spindle cutting and pushes setup accuracy into a controlled environment.
Integration with Your Existing Workflow Sets Implementation Cost
The purchase price is visible. The implementation cost is not. Power, foundation, chip management, coolant supply, compressed air, and floor space all have to be ready before the machine lands. Miss one and the machine sits idle.
Check the footprint against your actual aisle width, not the brochure drawing. A machine that blocks the forklift path will be moved, and moving a machining center costs more than most people budget.
Look at how parts flow in and out. Can a pallet or a robot reach the table? Is there room for a chip conveyor and a coolant tank? These are the details that decide whether the machine runs unattended at night or needs an operator standing next to it.
At GreatLight we run 127 high-precision CNC machines across three plants, so we have seen both sides of this. The projects that go smoothly are the ones where the workflow was mapped before the machine was ordered.
Total Cost of Ownership Over Five Years Tells the Real Story
Purchase price is roughly half the five-year cost. The rest is tooling, spindle service, preventive maintenance, scrap, and downtime. A machine that costs 15 percent more up front can be the cheaper choice over five years.
Build a simple spreadsheet. List the annual tooling spend, the expected spindle rebuild, the maintenance contract, and an estimate for unplanned downtime. Then compare two candidate machines side by side.
Include the cost of scrap. A machine that holds ±0.005 mm consistently will scrap fewer parts than one that drifts. On a part with 20 operations, a one percent scrap rate difference is significant money over five years.
Do not forget the learning curve. A machine that takes three months to bring up to full rate has three months of reduced output. That cost belongs in the comparison, not in a footnote.
Seven Steps to Shortlist and Validate a Machining Center
Work through these in order. Each step produces an artifact you can hand to the next reviewer.
- 1Map your part familyPull the last 20 jobs. Record largest face, number of machined faces, and height-to-width ratio. This rules out architectures before you waste time on quotes.
- 2Set the material mixRank materials by annual volume. Note which ones need torque at low RPM. This drives the spindle spec more than any other input.
- 3Define tolerance and finishState the tightest tolerance and the finest surface finish you must hold in production, not in a lab. ±0.005 mm and Ra 0.8–1.6 μm are common targets; write yours down.
- 4Request a cutting demonstrationAsk the builder to cut a part close to your geometry in your material. Watch the slotting pass and listen for chatter. A recorded video is not enough.
- 5Check the control and postRun one of your own parts through the builder's post-processor. If the code needs hand edits, factor that labor into the cost model.
- 6Audit the tooling planCount tools per job against magazine capacity. Decide whether you need a larger magazine, sister tools, or an off-machine presetter.
- 7Build the five-year modelAdd purchase price, tooling, spindle service, maintenance, scrap, and downtime. Compare at least two candidates on the same sheet.
Architecture Selection by Part Type
Pick the row that matches your dominant part, then read across.
| Part type | Best architecture | Typical tolerance | Watch out for |
|---|---|---|---|
| Flat plates, mold bases | 3-axis vertical | ±0.005 mm | Deep cavities need long reach tools |
| Prismatic, 4–5 faces | 4-axis horizontal | ±0.005 mm | Fixturing cost and pallet setup |
| Complex contours, undercuts | 5-axis simultaneous | ±0.005 mm | Programming skill and simulation time |
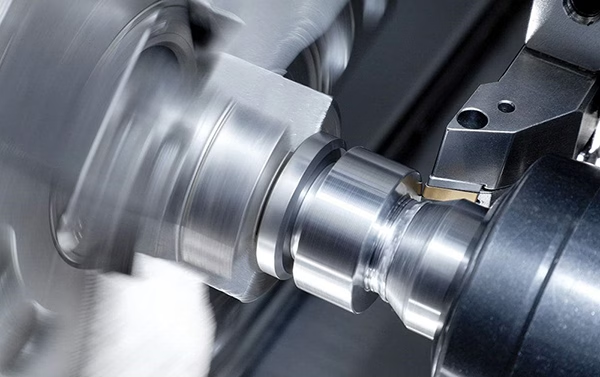
| Shafts, turned features | Mill-turn center | ±0.005 mm | Tool clearance and bar feed limits |
| Mixed high-mix, low-volume | 3-axis vertical + pallets | ±0.01 mm | Setup time dominates cycle time |
| Hard materials, deep cuts | High-torque vertical | ±0.005 mm | Spindle thermal growth over long cuts |
| Large frames, long parts | Gantry or extended travel | ±0.01 mm | Floor space and foundation cost |
Buy the Machine That Fits Your Parts, Not the Brochure
If your part mix is flat and simple, a rigid 3-axis vertical will out-earn a 5-axis machine every month. If your parts need four or more faces and tight angular tolerance, pay for the extra axes and the programming skill. The right answer is the one your part geometry and material mix point to.
Questions Engineers Ask Before Buying
How many axes do I actually need?
Count the number of setups your part needs on a 3-axis machine. If it is three or more, and the part is not a simple plate, a 4-axis or 5-axis machine usually pays back within a year through reduced handling and better tolerance stack-up.
If your parts are flat and drilled from one face, a 3-axis machine is the right answer. Do not buy degrees of freedom you will not use.
What spindle speed should I specify for aluminum?
For 6061 and similar alloys with small tools, 12,000 to 15,000 RPM is a practical range. Above that, tool holder balance and coolant delivery become the limiting factors, not the spindle.
If you also cut steel or titanium, check the torque at low RPM. A spindle that is fast but weak will stall on a 20 mm indexable cutter in 4140.
How do I test rigidity without buying the machine?
Ask for a cutting demo on your material at your planned depth of cut. Listen for a change in pitch as the tool enters the cut. Measure the surface finish and the dimensional result afterward.
A machine that holds size and finish through a full roughing pass is stiff enough for production. One that needs a finishing pass to recover is not.
What is a realistic five-year cost model?
Start with purchase price, then add annual tooling, one spindle rebuild, a maintenance contract, and an allowance for downtime and scrap. On most production machines, the non-purchase items add up to roughly the same as the purchase price over five years.
Use your own numbers for tooling and scrap. Generic industry averages will not reflect your part mix.
Should I buy new or used?
A used machine can be a good value if you can verify the spindle condition, the geometric accuracy, and the control's service life. Ask for a ballbar test and a spindle runout measurement before you commit.
If the control is out of support or the spindle needs a rebuild, the savings often disappear. Run the same five-year model you would use for a new machine.
How does GreatLight handle machine selection for customer projects?
We match the machine to the part, not the other way around. With 127 CNC machines, including 16 simultaneous 5-axis centers and 16 mill-turn centers, we can route a job to the architecture that holds tolerance at the lowest cost per part.
For new projects, we quote and provide a free DFM analysis within 12 hours, and production can start within 24 hours. Parts ship in 3–5 days.
Send Us Your Part and We Will Match the Machine
Upload a drawing or a 3D file. We will review the geometry, material, and tolerance, then tell you which architecture holds it at the lowest cost per part. Quotation and free DFM analysis within 12 hours.
12-hour quote100% inspectionNo minimum orderISO 9001:2015
More Machining Center Guides
We publish setup notes, tooling trials and inspection data from the factory floor.











