as the most commonFDM 3D printing materials and PLA post-processing methods are worth knowing. Unfortunately, the properties of this material mean that smoothing with acetone is not an option, but there are other ways to achieve a smooth, shiny finish.
In this article,magic monkey networkwillEveryonePresents various methods for smoothing polylactic acid prints. We’ll start with the basics like trimming and sanding, then move on to different methods of coating or even melting the surface of a part to achieve a smooth finish.
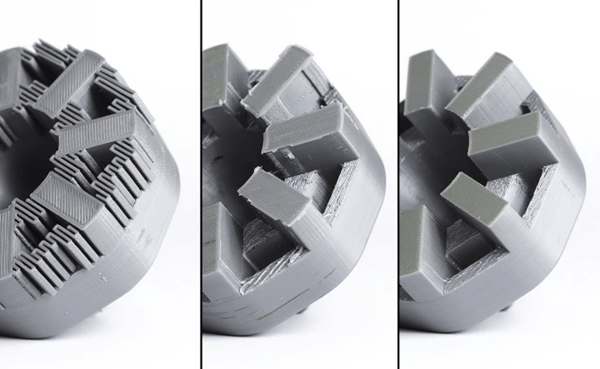
1、Remove excess material

in three steps starting fromRemoving supports when printing PLA (Source: Hubs)
Sometimes,3D printingThere will be excess material, such as the edge of a hat brim or backing. In order to complete the print correctly, you must remove these materials. There are several different tools you can use to get the job done.
utility knife
Let’s start with the basics and see how to cut excess material with a utility knife. A common example of such a tool isX-Acto knife. If you are familiar with other DIYs, chances are you are also familiar with this type of knife.
Looking for a cleaningWhen 3D printing a pocket knife, the first thing to consider is blade choice. Generally speaking, standard size 11 gauge blades are a good choice due to their versatility, but other types of blades may be better suited to your specific needs.
Before you start cutting, learn some basic knife safety rules. Be sure to stay away from yourself when cutting, be careful not to put your fingers in front of the blade, and don’t use too much force when cutting.
To remove supports or other excess material, place the blade on one edge of the print and move the blade across the surface. Avoid applying too much pressure, otherwise you risk removing more material than intended and damaging your print. Repeat these steps until all edges are smooth.
Last but not least, if you don’t have a utility knife, a single-edged razor blade will do the trick, but be careful. A smooth surface is not worth losing a finger!
rotary multi-function tool

pictureRotating multi-tools like Dremels are another great option for performing 3D printing. Using these tools is similar to using a knife, but because there are many different bits to choose from, it’s easy to work on the inside edges of parts and other hard-to-reach places .
There are two things to note when using a rotary multi-tool. First, these are speed tools and not torque tools. Therefore, instead of increasing the pressure, it is better to increase the rotation speed when the desired effect is not achieved. Not only does this save you a lot of work, but it also extends the life of your tool.
Second, since you’re using a power tool on plastic, don’t stay in one place for too long or apply too much pressure. The movement of the tool generates heat, which will permanently melt the plastic you are working on and cause cracks and holes in the print.
Some rotary tools also come with sanding accessories, but they may be too powerful for sanding PLA. Next we’ll look at effective sanding techniques.
2、Polish

Sand the print with damp sandpaper (source:MakerBot)
Sanding is one of the easiest methods to master for smooth printing. You may have discovered through your own experiences that polishing3DThere are many different ways to make prints.
If your print has a large surface area, consider using a sanding block. They take the strain off your hands and ensure even wear of the sandpaper and print.
If the print has a lot of detail, it is best to use a nail file. Nail files come in many different sizes and types, and the right choice depends on what you’re trying to polish, but an inexpensive cardboard file usually works just fine.
Of course, you can also use free sandpaper, which may be preferable in certain situations. For best sanding results, move the sandpaper in a circular motion over the print, following the grain of the layer lines.
You will also want to increase the grit of your sandpaper. Depending on the desired effect, you can go as low asStart with 400-grit sandpaper and work your way up to 4000-grit.
Finally, you may have heard of wet sanding. Wet, high-grit sandpaper can be used as the final step of sanding, as it will not remove as much material and will leave a polished surface. The technique of using wet sandpaper is basically the same as regular sandpaper, just moisten it from time to time.
3、Superficial fusion

Using a heat gun3D printing becomes fluid (Source: Tinkerine via YouTube)
As you may know, polylactic acid is not particularly heat resistant, making it unsuitable for outdoor applications. However, you can still print using the effects of heat on plastic.
The most common tool is a heat gun, set to the lowest heat setting. Place the print on the turntable and rotate it slowly to distribute the heat evenly for the best and most stable results. This also helps prevent excessive blending in specific areas, leading to a better overall result.
Although a hair dryer may seem like an alternative to a heat gun, a hair dryer is not hot enough to melt plastic. Most hair dryers don’t even reach the glass transition temperature of polylactic acid (60°C), it will therefore be necessary to wait a long time before seeing any changes!
4、surface coating

Primed print (Source: via3D printed accessories for YouTube)
Another way to smooth the surface of your print is to add a layer of material, whether sprayed, painted, or dipped. This fills in any imperfections in the surface texture, including layers, leaving a shiny, smooth surface. Two common examples of polylactic acid are the use of paint primers or epoxy coatings.
Primer
existimpressionApplying a primer more or less goes hand in hand with sanding. The principle of using a primer to make a print is that the primer will fill in the textures of the layers and create a smooth surface. Then let the primer dry before sanding the surface. Sanding primer is generally much easier than sanding polylactic because the primer is much softer.
Using a primer will often give a nicer impression than just sanding. However, you should keep in mind that this method takes longer because you have to wait for each coat of primer to dry. Additionally, it is best to apply paint after priming and printing, because without priming, the primer will not stand the test of time.
Epoxy resin

The epoxy coating leaves an incredible shine (Source:Reddit)
Epoxy is a resin coating that works essentially the same way as a primer. However, epoxy is more difficult to work with because it must be mixed before being applied to the print. However, one thing that epoxy does better than primer is fill in larger holes or print marks left during the printing process.
Making a print with epoxy involves mixing a batch of epoxy. Then use a brush to apply it generously to all surfaces of the print. Just be sure to apply it evenly so you don’t end up with varying coating thicknesses on your final print.
5、chemical straightening

Polymaker’s Polysher has a similar effect to acetone mist on ABS (Source: 3DJake)
Finally, let’s talk about chemicals. As we mentioned before, PLA cannot act asPolish it with acetone like ABS, but there is still a way to achieve a similar effect.
Polymaker Polysmooth is made from PVB, a material very similar to polylactic acid that can be chemically smoothed. However, this requires the use of Polymaker Polysher. This is a can that disperses isopropyl alcohol, which interacts with the filaments to smooth the top layer.
Purchasing all the equipment you need is an investment, but if you need smooth, smooth printing, it’s worth the risk with this system.
Daguang focuses on providing solutions such as precision CNC machining services (3-axis, 4-axis, 5-axis machining), CNC milling, 3D printing and rapid prototyping services.


