In the world of precision manufacturing, where tolerances are measured in microns and the success of a part hinges on absolute accuracy, the tools used for verification are as critical as the machining tools themselves. Among these, the test indicator stands as an indispensable instrument for any serious CNC machining operation. For clients seeking high-quality precision parts machining and customization, understanding the role and application of a test indicator is key to appreciating the depth of quality control that goes into every component. This article delves into the purpose, types, and critical applications of test indicators in CNC machining, highlighting why their meticulous use is a hallmark of a top-tier manufacturer like GreatLight CNC Machining Factory.
H2: What Is A Test Indicator Used For CNC Machine?
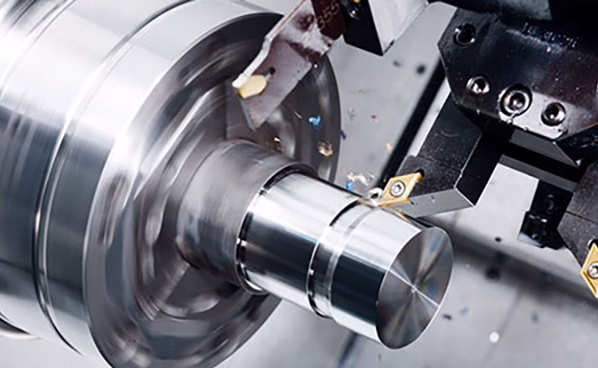
At its core, a test indicator (often distinguished from a dial indicator by its lever-style contact point) is a precision measuring instrument used to measure small linear distances, detect runout, and align workpieces or machine components with extreme accuracy. It translates minute physical displacements into a magnified reading on a dial or digital display, typically with resolutions down to 0.001 mm (0.00005 inches) or finer. In the context of a CNC machine, it is not a tool for the machining process itself but a fundamental instrument for setup, verification, and quality assurance.
H3: The Fundamental Purposes of a Test Indicator in CNC Operations
The use of a test indicator transcends simple measurement; it is about establishing and confirming a foundation of precision. Its primary purposes include:
Workpiece Alignment and Zeroing: Before any cutting begins, the raw material (workpiece) must be perfectly aligned with the machine’s axes. A test indicator is used to “sweep” a datum surface (like a vice jaw or a machined edge), allowing the machinist to adjust the workpiece until the indicator reading shows minimal variation, ensuring the part is square and true.
Runout Detection: This is crucial for rotating operations (on lathes or with rotary tables on mills). The indicator checks for eccentricity in a chuck, collet, or a cylindrical workpiece. Excessive runout leads to out-of-round parts, poor finishes, and tool wear.
Machine Geometry Verification: Periodic checks of the CNC machine itself—such as the squareness of the spindle to the table, or the alignment of guideways—are performed with test indicators. This preventative maintenance ensures the machine is capable of holding tight tolerances.
In-Process and Post-Process Inspection: While dedicated Coordinate Measuring Machines (CMMs) handle final inspection, test indicators are vital for quick, on-the-spot checks of feature heights, groove depths, or the parallelism of surfaces directly on the machine bed, reducing downtime.
H3: Key Applications in the Machining Workflow
Let’s break down exactly where and how a test indicator is applied during the manufacturing of a precision part:
H4: Setting Up a Vice or Fixture: The first step in any job. An indicator is used to ensure the machine vice is perfectly aligned with the X or Y-axis of the machine. A misaligned vice means every part produced will be skewed.
H4: Indicating a Bore or Datum Hole: When a part must be located from an existing bore, the indicator’s stylus is placed inside the hole. The machine table is moved to find the centerline (where the indicator reading is consistent), accurately establishing the part’s origin.
H4: Tramming the Spindle: “Tramming” refers to ensuring the spindle is perpendicular to the worktable. An indicator attached to the spindle sweeps a precision surface on the table. Any tilt in the spindle would result in tapered walls on milled pockets or shoulders—unacceptable for critical components.
H4: Verifying Rotary Axis Accuracy: On 4-axis or 5-axis CNC machines, the accuracy of rotary tables is paramount. A test indicator is used to check for axial and radial runout of the rotary axis, ensuring complex multi-sided machining is synchronized correctly.
H2: The Critical Role in Ensuring Precision at GreatLight CNC Machining Factory
At GreatLight CNC Machining Factory, the philosophy is that precision is not an accident but a systematic outcome of correct processes and verification. The use of high-precision test indicators is embedded in our Standard Operating Procedures (SOPs) for every job. This practice is a direct contributor to our ability to consistently achieve tolerances as tight as ±0.001mm.
Our technicians are trained to use test indicators not as a mere formality, but as a diagnostic tool. For instance, when setting up for a complex 5-axis CNC machining project involving an aerospace bracket, the alignment of the workpiece and the verification of our 5-axis trunnion’s movement are checked with Swiss-made or Japanese-made test indicators with 0.0001″ (0.0025mm) resolution. This upfront diligence prevents costly errors and material waste, ensuring that the digital design is faithfully replicated in metal.

This meticulous attention to foundational setup aligns perfectly with our ISO 9001:2015 certified quality management system. Every setup that is verified with an indicator has a record, creating traceability and ensuring repeatability for batch production. For projects requiring IATF 16949 (automotive) or ISO 13485 (medical) standards, this level of documented process control is not just beneficial—it is mandatory.
Conclusion: More Than a Tool—A Symbol of Commitment
So, what is a test indicator used for on a CNC machine? It is the bridge between the digital precision of a CAD model and the physical reality of a machined part. It is the quality gatekeeper at the very beginning and throughout the manufacturing process. For clients, a manufacturer’s disciplined use of these instruments is a strong indicator of their commitment to quality, their technical expertise, and their understanding that true precision is built from the ground up.
Choosing a partner like GreatLight CNC Machining Factory means choosing a team that respects the fundamentals of metrology. We invest in the finest measuring tools and, more importantly, in the skills to use them effectively, ensuring that every custom precision part we deliver is not just to print, but to a standard of excellence that builds lasting trust.
FAQ: Frequently Asked Questions
H3: Q1: What’s the difference between a dial indicator and a test indicator?
A: While both are precision comparators, a dial indicator typically has a plunger-style contact point that moves linearly along its axis, ideal for measuring depth or thickness. A test indicator has a lever-style (swinging) contact point, which is more versatile for checking alignment, runout, and flatness on surfaces that are not easily accessible from above. Test indicators are generally the preferred tool for CNC machine setup.

H3: Q2: Can’t a CNC machine align everything automatically? Why is manual indicating still necessary?
A: Modern CNC machines have sophisticated probes (Tool Setting Probes and Workpiece Probes) that automate many setup tasks. However, manual test indicators are still essential for several reasons: 1) Verification: They independently verify the accuracy of automated probes. 2) Ultimate Precision: For the highest-precision jobs, manual indicating can sometimes achieve a finer level of adjustment. 3) Diagnostics: They are used to diagnose machine geometry issues that a probe might not identify. 4) Flexibility: They are indispensable for unconventional setups or when probing is not available.
H3: Q3: What level of accuracy should I expect my CNC machining supplier to achieve with test indicators?
A: A professional shop should be capable of aligning workpieces and machine components to within 0.005 mm (0.0002″) or better using test indicators. For high-precision industries like aerospace or medical, alignment within 0.0025 mm (0.0001″) is often the standard. This capability is a direct prerequisite for holding tight part tolerances.
H3: Q4: How does this relate to the final quality of my custom parts?
A: Directly. Any error in the initial setup—misalignment, runout, or spindle squareness—is multiplied into the finished part. A part machined on a misaligned setup will have dimensional errors, poor geometric tolerances (like parallelism or perpendicularity), and may not assemble correctly. Rigorous use of test indicators eliminates these foundational errors, ensuring the part conforms to your design intent from the first cut.

H3: Q5: Does GreatLight CNC Machining Factory use test indicators for all jobs?
A: Absolutely. It is a non-negotiable step in our pre-production checklist for every job, regardless of complexity or batch size. This discipline is integral to our quality assurance system and is a key reason we can offer a guarantee on precision and provide reliable, repeatable results for both prototyping and high-volume production. For more insights into our technical capabilities and industry applications, you can follow our professional updates on LinkedIn{:target=”_blank”}.


