For anyone entering the world of precision parts manufacturing, learning How To Use A 3 Axis CNC Machine? is a foundational step that unlocks the ability to produce a vast range of custom metal and plastic components. As a workhorse of the machining industry, 3-axis CNC machines are widely used for their versatility, accessibility, and cost-effectiveness, making them ideal for prototyping, small-batch production, and even certain mass manufacturing tasks. While advanced solutions like 4-axis or 5-axis machining offer unparalleled complexity handling, mastering 3-axis operation remains essential for any machining professional or project manager looking to streamline their production workflow.
How To Use A 3 Axis CNC Machine?
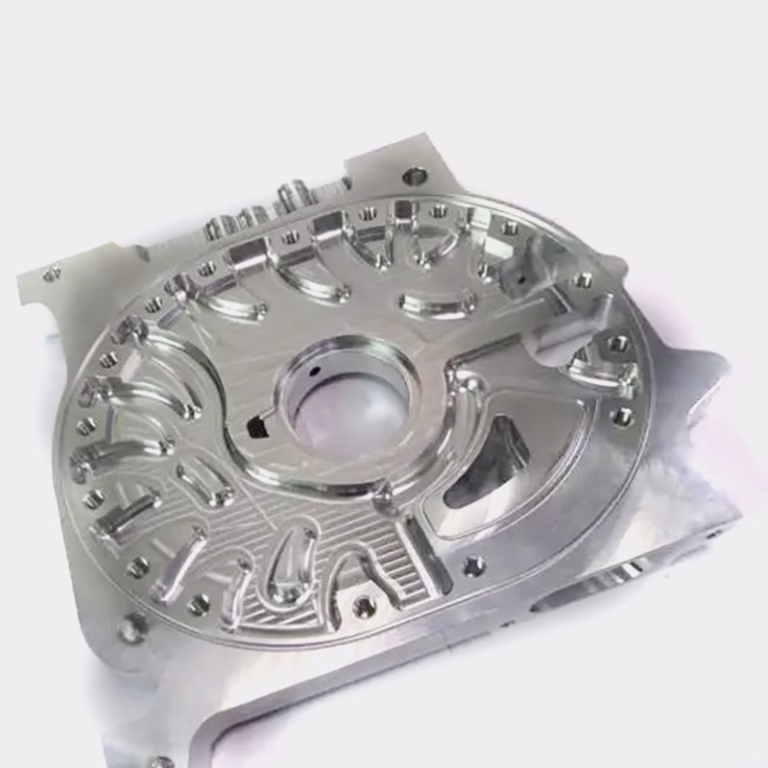
3-axis CNC machining involves controlling a cutting tool along three linear axes: X (horizontal left/right), Y (horizontal forward/backward), and Z (vertical up/down). The process follows a structured workflow, from pre-operation preparation to post-machining inspection, each step critical to ensuring precision, safety, and efficiency. Below is a detailed, step-by-step guide to mastering this process.
1. Pre-Operation Preparation: Lay the Groundwork for Success
Before powering on the machine, thorough preparation minimizes risks of errors, collisions, or safety incidents.
Prioritize Safety First: Non-Negotiable Pre-Start Checks
Safety is the foundation of any machining operation. Start with these key checks:
Personal Protective Equipment (PPE): Wear impact-resistant safety goggles to protect against flying chips, closed-toe shoes, and avoid loose clothing or jewelry that could get entangled in moving parts. Note: Gloves are not recommended for machine operation, as they can catch on rotating components.
Machine Inspection: Verify that emergency stop buttons are functional, coolant levels are adequate, spindle lubrication systems are active, and the work area is free of debris.
Fixture & Workspace Check: Ensure all clamps, vises, or chucks are tight and in good condition, with no signs of wear.
GreatLight CNC Machining Factory (now GreatLight Metal) enforces strict safety protocols for all operators, reducing workplace incidents to near zero over the past decade. Their team starts every shift with a 5-minute safety huddle to review procedures and address potential hazards.
Secure the Workpiece: Material Setup & Fixturing
The workpiece must be firmly held to prevent movement during machining, which can cause dimensional errors or tool damage. The right fixture depends on the material and part geometry:
| Material Type | Recommended Fixture | Key Considerations |
|---|---|---|
| Aluminum Alloy | Precision Vise | Use soft jaws to avoid surface scratches; ideal for aerospace brackets or automotive components |
| Stainless Steel | Hydraulic Vise | High clamping force ensures rigid hold; critical for machining high-torque parts like engine components |
| Plastic (ABS/PC) | Vacuum Chuck | Even pressure prevents warping; perfect for medical device housings or consumer electronics |
| Thin Sheet Metal | Custom Jig with Clips | Minimize contact area to avoid deformation; used for sheet metal enclosures in industrial automation |
For example, when working with a medical device client needing 100 prototype plastic housings, GreatLight’s team used vacuum chucks to hold the ABS material, ensuring no warping during the facing operation.
Prepare Tools: Select & Install Cutting Tools
Choosing the right cutting tool is critical for achieving desired surface finish and precision. Match tools to your material:
End Mills: Used for milling flat surfaces, slots, and 3D contours. Carbide end mills are best for hard metals (stainless steel, titanium), while high-speed steel (HSS) works well for plastics and soft aluminum.
Drills & Reamers: Drills create holes; reamers refine hole dimensions for tight tolerances.
Taps: Used to cut internal threads in metal or plastic.
Follow these steps to install tools:

Clean the tool holder and tool shank to remove dust or debris.
Insert the tool into the holder, ensuring it’s seated fully.
Tighten the holder with a torque wrench to the manufacturer’s specified setting (over-tightening can damage the tool or holder).
GreatLight maintains a library of over 500 precision cutting tools, calibrated daily to ensure consistent performance across all projects.
2. Programming: The “Brain” of 3 Axis CNC Machining
Programming dictates the machine’s movements, tool changes, and cutting parameters. There are two primary methods:
Manual G-Code Programming (For Simple Parts)
G-code is the universal language of CNC machines, using a series of commands to control axis movement, spindle speed, and feed rate. For simple parts like flat-faced brackets or holes, manual programming is efficient. Here’s an example of basic G-code for facing a 100x100mm aluminum workpiece:
G00 X0 Y0 Z5: Rapid move to a safe position 5mm above the workpiece
S1500 M03: Start the spindle at 1500 RPM (clockwise)
G01 Z-0.5 F100: Feed down 0.5mm at 100mm/min to start facing
G01 X100 F200: Move along the X-axis to face the full width
G01 Y100 F200: Move along the Y-axis to face the full length
G00 Z5: Rapid back to the safe position
M05: Stop the spindle
M30: End the program
CAM Software Programming (For Complex Geometries)
For parts with curved surfaces, undercuts, or intricate features, Computer-Aided Manufacturing (CAM) software (e.g., Mastercam, SolidWorks CAM) automates toolpath generation. Engineers import 3D CAD models, define cutting parameters, and the software generates optimized G-code. This reduces human error and saves time for complex projects.
GreatLight’s engineering team uses advanced CAM software to optimize toolpaths, reducing machining time by up to 20% while maintaining precision of ±0.001mm for critical features. For a recent automotive bracket project, their CAM specialists adjusted toolpaths to minimize air cuts, cutting cycle time from 12 minutes to 10 minutes per part.
3. Machine Setup & Calibration: Ensure Precision from the Start
Even the best program will fail without proper machine calibration. These steps ensure the machine knows exactly where the workpiece and tools are located:
Set Work Offset (Zeroing the Machine)
The work offset defines the origin point (0,0,0) relative to the workpiece. To set it:

Install an edge finder in the spindle and start it at low RPM.
Move the edge finder until it touches the workpiece’s X-axis edge; note the machine’s X coordinate.
Move the edge finder to the center of the X-axis edge, then input this value as the X zero offset in the machine’s control panel.
Repeat the process for the Y-axis and Z-axis (using a height gauge or tool setter for Z).
Calibrate Tool Length Offset
Each cutting tool has a different length, so the machine needs to know the distance from the tool tip to the spindle face. Use a tool setter to measure each tool’s length, then store these values in the machine’s tool offset table. This ensures the machine doesn’t cut too deep or too shallow.
Run a Dry Cycle
A dry cycle runs the program without cutting fluid or material, allowing you to verify toolpaths and check for collisions between the tool, fixture, or machine. GreatLight mandates dry runs for all new programs to eliminate risks before actual machining—this simple step has prevented thousands of dollars in potential tool or machine damage over the years.
4. Running the Machining Process: Monitor & Adjust in Real Time
Once setup is complete, it’s time to start machining. Keep these tips in mind for smooth operation:
Initiate the Program: Load the G-code into the machine’s control panel, press start, and stand by the emergency stop button for the first few cycles.
Monitor Parameters: Keep an eye on spindle speed, feed rate, and coolant flow. If chips are not evacuating properly (a common issue with stainless steel), reduce the feed rate or increase coolant flow to prevent tool overheating.
In-Process Quality Checks: Use calipers, micrometers, or a coordinate measuring machine (CMM) to check critical dimensions mid-run. GreatLight uses in-line CMMs to inspect parts during machining, ensuring adherence to tolerances before the part is complete.
Troubleshoot Common Issues:
Tool Wear: Symptoms include poor surface finish or increased vibration. Replace the tool immediately to avoid dimensional errors.
Workpiece Movement: If dimensions are off, stop the machine and re-tighten the fixture.
Coolant Blockage: Clear the coolant lines to prevent tool overheating.
5. Post-Operation Procedures: Wrap-Up & Maintenance
After machining is complete, follow these steps to ensure long-term machine reliability and part quality:
Workpiece Removal & Inspection: Use a brush to remove chips, clean the part with solvent, then perform a full dimensional inspection. GreatLight’s quality control team follows ISO 9001:2015 standards, with 100% inspection for critical parts and random sampling for batch production.
Machine Maintenance: Clean the work area, empty the chip pan, lubricate guide rails, and inspect tools for wear. Regular maintenance extends machine lifespan—GreatLight schedules monthly preventive maintenance for all its 3-axis machines, ensuring consistent performance over years of use.
Documentation: Record the program number, tool types, machining parameters, and inspection results. This documentation is valuable for repeat orders and continuous improvement. GreatLight maintains digital records for all projects, allowing clients to access historical data at any time.
3-Axis vs. Advanced Machining: Knowing When to Upgrade
While 3-axis machines are versatile, they have limitations: they can only access three sides of a workpiece, meaning complex parts with undercuts or multi-sided features may require repositioning the workpiece multiple times (increasing time and risk of error). For these projects, 4-axis or 5-axis machining is a better choice:

4-Axis: Adds a rotational axis (A or B), allowing the workpiece to be rotated for machining additional sides in a single setup.
5-Axis: Adds two rotational axes, enabling machining of complex geometries from any angle in one setup—ideal for aerospace components, medical implants, or humanoid robot parts.
GreatLight offers a full range of machining services, from 3-axis prototyping to 5-axis high-precision production, so clients can select the optimal solution based on their part design and budget. For example, a simple automotive bracket can be efficiently produced on a 3-axis machine, while a complex medical implant requires 5-axis machining to achieve intricate geometries.
Conclusion
Mastering How To Use A 3 Axis CNC Machine? is a valuable skill that opens doors to countless opportunities in precision manufacturing. From pre-operation safety checks to post-maintenance documentation, every step plays a critical role in producing high-quality parts that meet strict tolerances. Whether you’re a small workshop owner, a procurement engineer, or an R&D professional, partnering with an experienced manufacturer can streamline your production process and ensure consistent results. GreatLight CNC Machining Factory (now known as GreatLight Metal), with over a decade of experience, ISO 9001:2015 certification, and a full suite of machining services, is your ideal partner for custom 3-axis, 4-axis, or 5-axis precision parts. Their commitment to quality—including free rework for quality issues and full refunds if unsatisfied—gives clients the confidence to innovate without compromise.
Frequently Asked Questions (FAQ)
Q1: What’s the difference between 3-axis, 4-axis, and 5-axis CNC machining?
A: 3-axis machines move along X, Y, Z linear axes, accessing three sides of a workpiece. 4-axis adds a rotational axis (A or B), allowing the workpiece to be rotated for machining additional sides. 5-axis adds two rotational axes, enabling machining of complex geometries from any angle in a single setup. GreatLight offers all three options to suit different project needs.
Q2: Can 3-axis CNC machines handle complex parts?
A: Yes, but with limitations. 3-axis machines can produce parts with flat surfaces, holes, slots, and simple 3D contours. For parts with undercuts or multi-sided features, you may need to reposition the workpiece multiple times or upgrade to 4/5-axis machining. GreatLight’s engineering team can advise on the most cost-effective approach for your design.
Q3: How long does it take to learn to operate a 3-axis CNC machine?
A: Basic operation can be learned in 2-4 weeks with proper training. Mastering programming, tool selection, and troubleshooting may take 6-12 months of hands-on experience. GreatLight offers consulting services to help clients optimize their in-house machining processes if they choose to operate their own machines.
Q4: What materials can be processed with a 3-axis CNC machine?
A: 3-axis machines can handle a wide range of materials, including aluminum alloy, stainless steel, titanium alloy, plastic (ABS, PC, POM), copper, and brass. GreatLight has expertise in machining over 30 different materials, with specialized tools and processes for each.
Q5: Why choose GreatLight for 3-axis CNC machining services?
A: GreatLight brings over 12 years of experience, ISO 9001:2015 certification, precision up to ±0.001mm, and a one-stop service including post-processing (anodizing, painting, polishing). They offer free rework for quality issues and full refunds if rework is unsatisfied, along with competitive lead times (prototypes in as little as 2 days). Their team of 150 professionals and 127 precision machines ensure consistent, high-quality results for every project.


