127 Sets Processing 4000mm 127 Sets High-Precision CNC Lathes
15 Years of Experience

Hands-on 3D Scanner Tutorial 2: Scanner Calibration

Click to learn:First hands-on 3D scanner tutorial: Installing the scanner Click to learn:Third Hands-on 3D Scanner Tutorial: Collecting 3D Scan Data 1. Explanation of the concept of calibration The built-in system of each scanner has a spatial coordinate. However, because the spatial coordinates in the machine will have errors after leaving the factory, and sometimes […]

hands on 3d scanner tutorial 2: scanner calibration

Click to learn:First hands-on 3D scanner tutorial: Installing the scanner

Click to learn:Third Hands-on 3D Scanner Tutorial: Collecting 3D Scan Data

1. Explanation of the concept of calibration

The built-in system of each scanner has a spatial coordinate. However, because the spatial coordinates in the machine will have errors after leaving the factory, and sometimes the spatial coordinates will differ according to the different sizes and positions of the scanned objects, so the calibration function is to succeed The calibration plate (positioning coordinates) is used to match spatial coordinates in the machine, unify spatial coordinates, or calibrate the user’s desired coordinate system.
2. Explanation of calibration steps
Connect the data cable – install the software – open the software – coarse adjustment – left camera focal length – right camera focal length – left aperture adjustment – right aperture adjustment – calibration
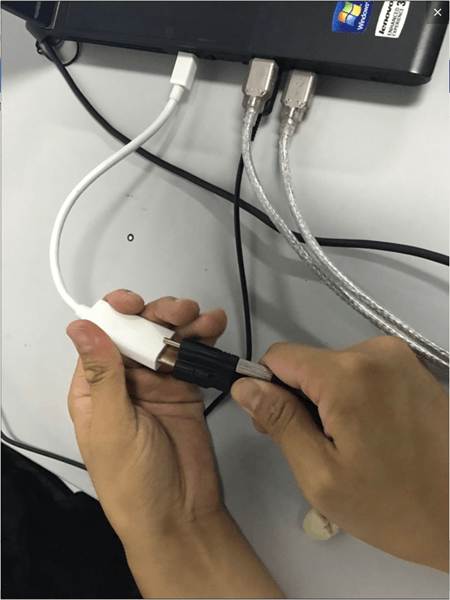
1. Connect the data cable
Hands on 3D Scanner Tutorial 2 Scanner Calibration
1732745284 297 Hands on 3D Scanner Tutorial 2 Scanner Calibration
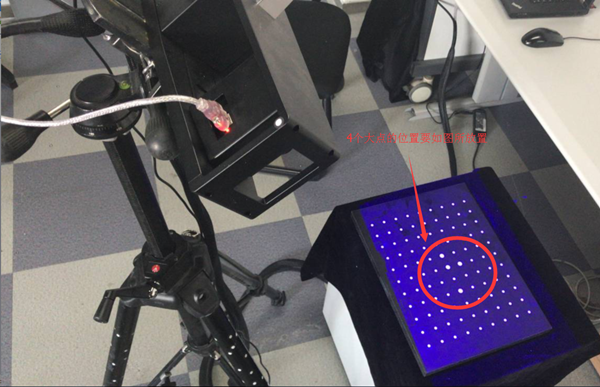
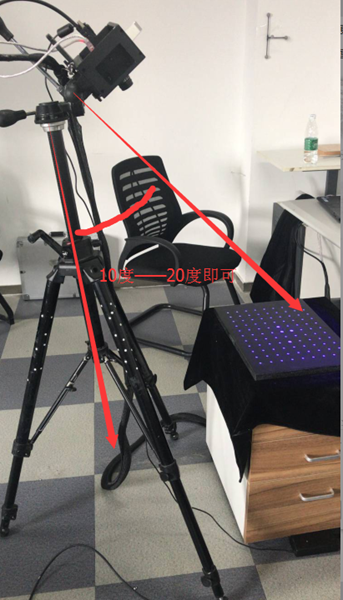
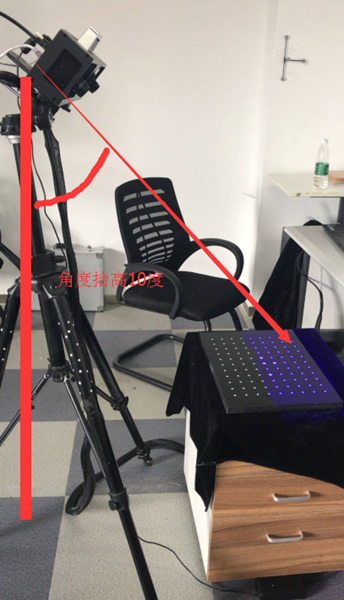
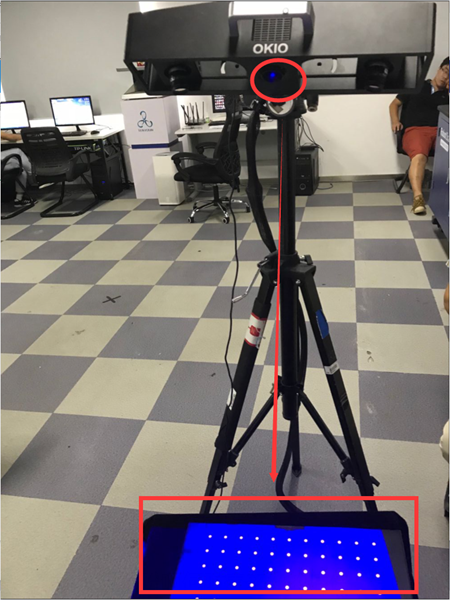
Note: After connecting to the computer, adjust the angle between the scanning head and the center support rod to approximately 10 to 15 degrees. Once the connection is successful, a blue light will be emitted.
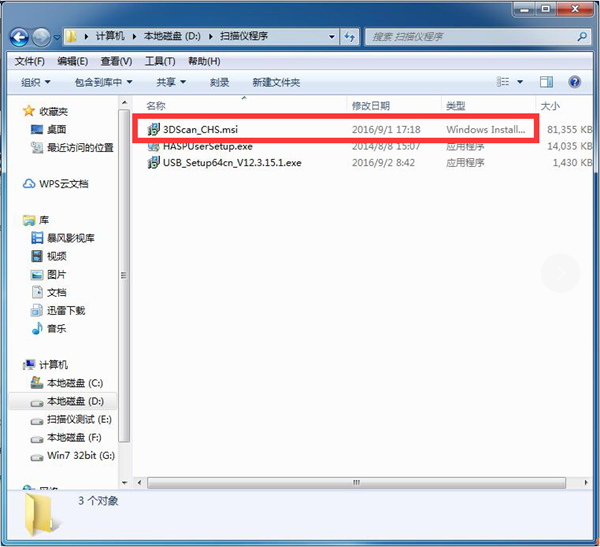
2.Install the software
1732745285 673 Hands on 3D Scanner Tutorial 2 Scanner Calibration
Install in one click
3. Open the software
1) Click on the installed software icon
1732745285 821 Hands on 3D Scanner Tutorial 2 Scanner Calibration
2) Enter the interface
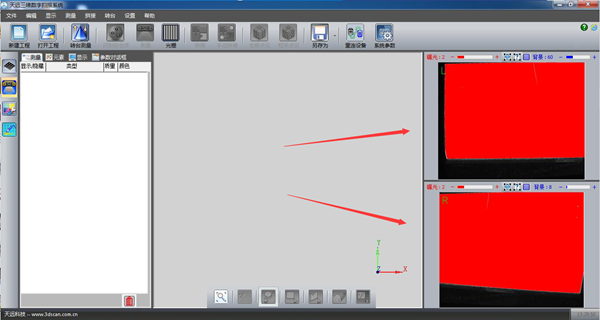
1732745285 125 Hands on 3D Scanner Tutorial 2 Scanner Calibration
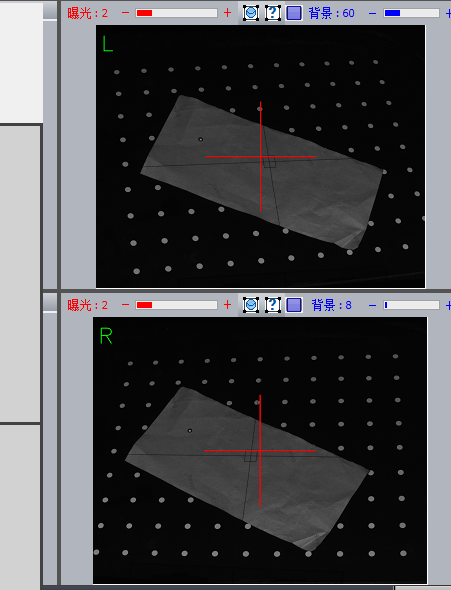
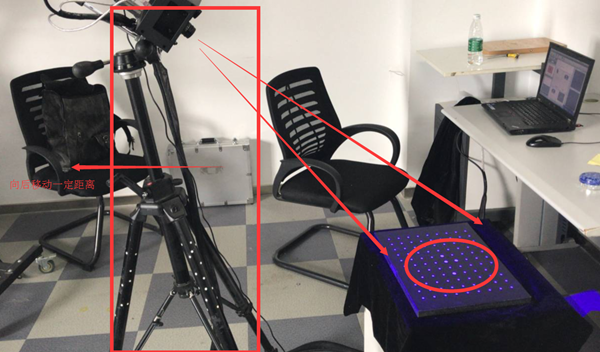
Note: After entering the page, if the left and right cameras are displayed in red as shown in the figure, it means that the distance between the scan head and the calibration plate is too close and the distance needs to be increased. As shown below
1732745286 690 Hands on 3D Scanner Tutorial 2 Scanner Calibration
1732745286 891 Hands on 3D Scanner Tutorial 2 Scanner Calibration

Let the red fade slowly

1732745286 492 Hands on 3D Scanner Tutorial 2 Scanner Calibration

Color returns to normal
4. Coarse adjustment
Rough adjustment means a rough positioning test before preliminary calibration and debugging, and it is also a preliminary preparation for calibration.
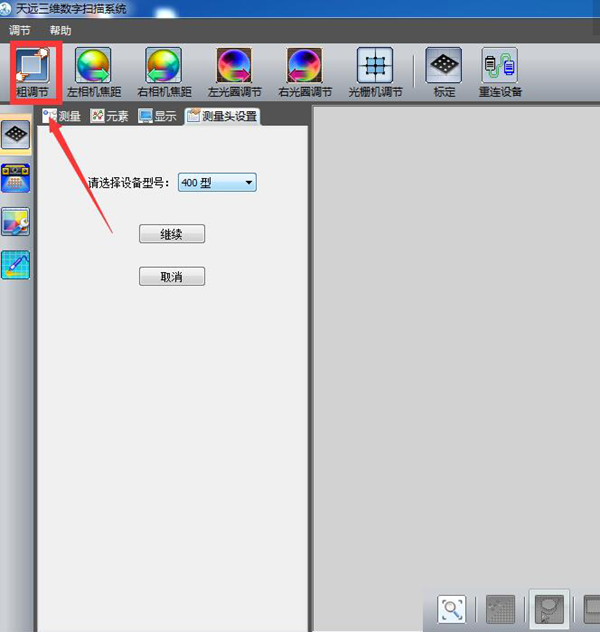
1).Click coarse setting
1732745287 654 Hands on 3D Scanner Tutorial 2 Scanner Calibration
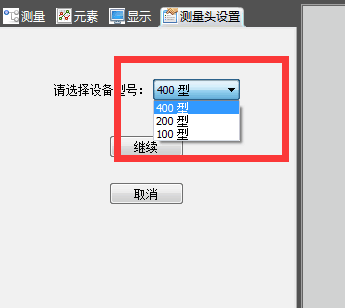
2) Select the device model

1732745287 441 Hands on 3D Scanner Tutorial 2 Scanner Calibration

1732745287 445 Hands on 3D Scanner Tutorial 2 Scanner Calibration

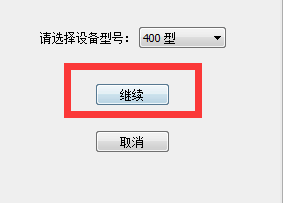
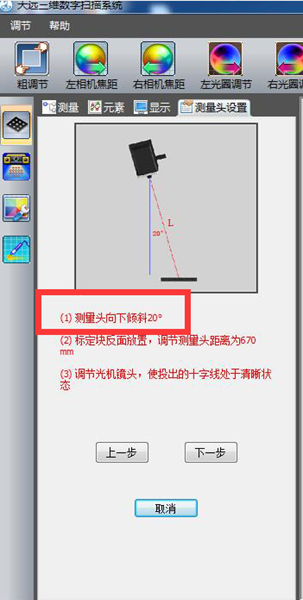
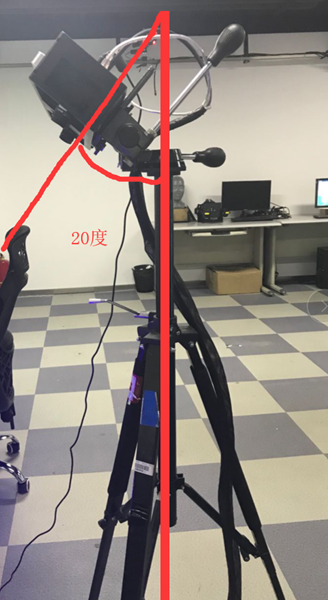
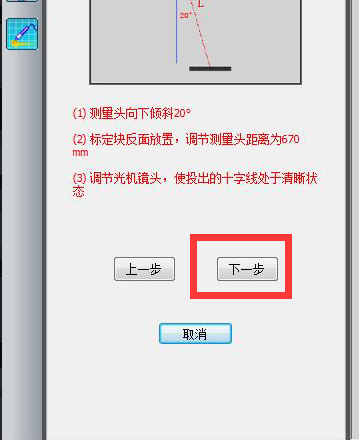
3) Adjust the position of the scanning head to a vertical angle of approximately 20 degrees.

1732745288 617 Hands on 3D Scanner Tutorial 2 Scanner Calibration

1732745288 349 Hands on 3D Scanner Tutorial 2 Scanner Calibration

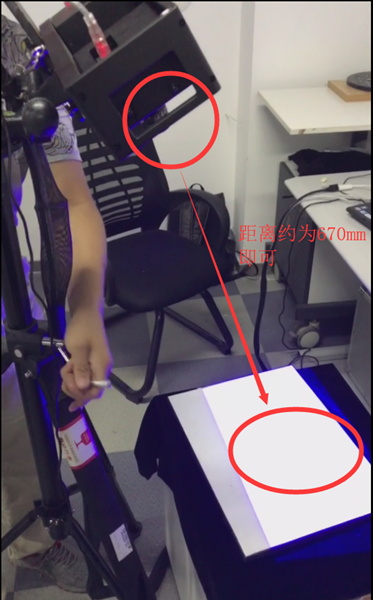
4) Place the calibration block on its side and set the distance between the measuring heads to approximately 670
1732745288 472 Hands on 3D Scanner Tutorial 2 Scanner Calibration
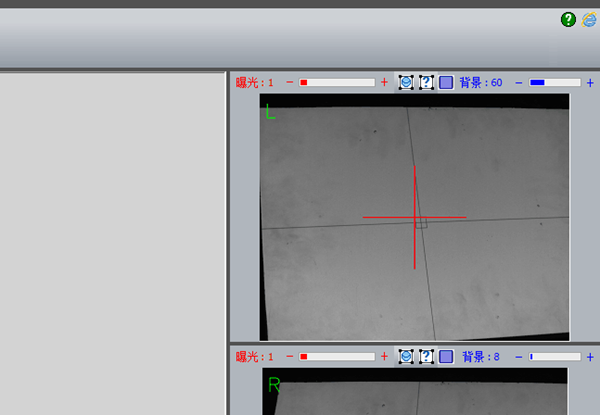
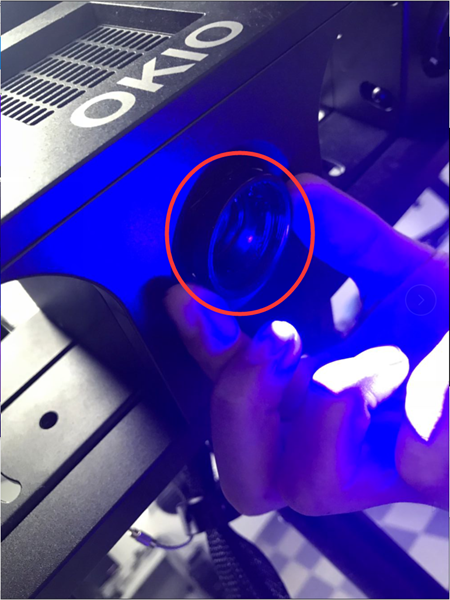
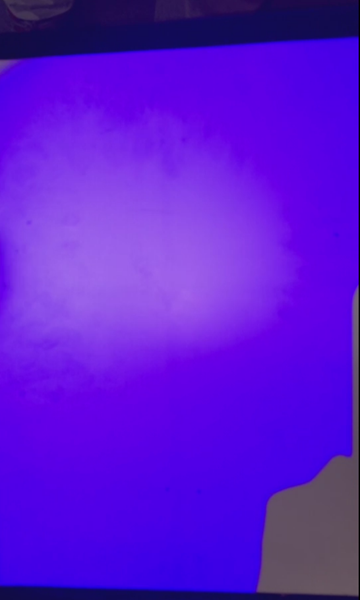
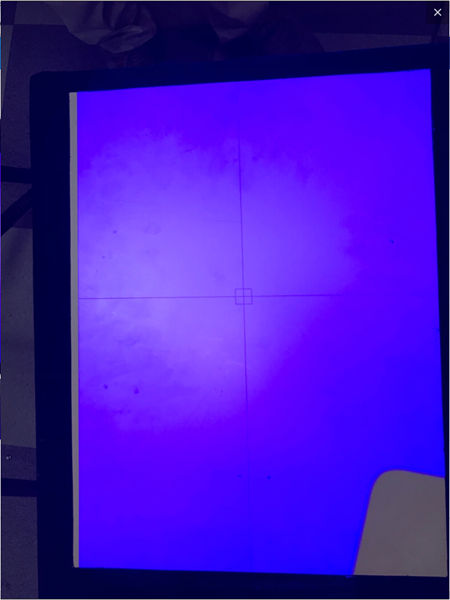
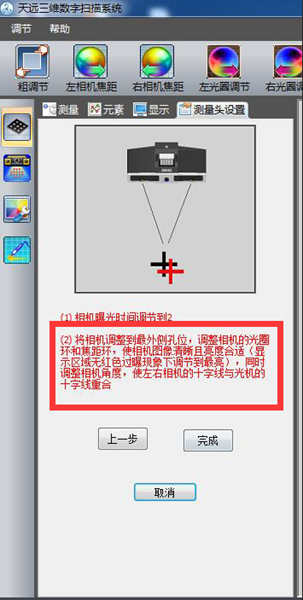
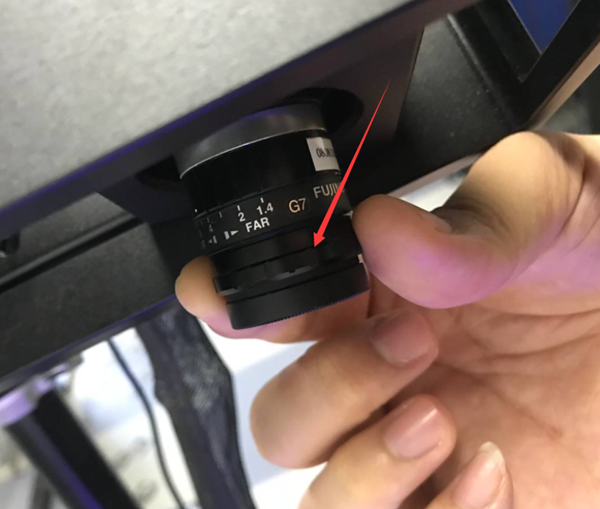
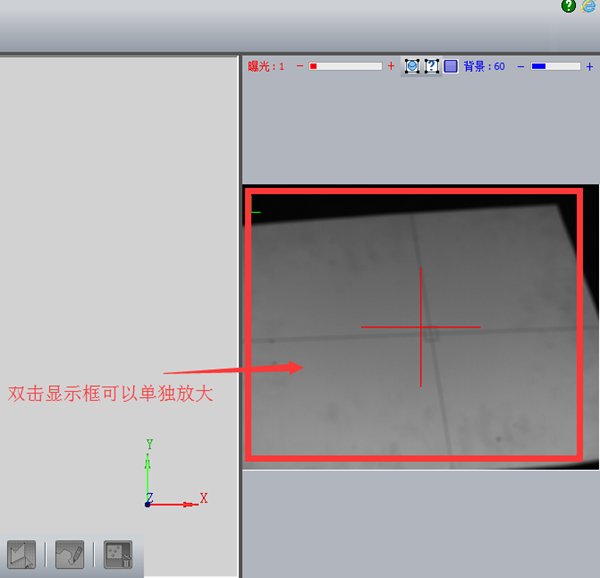
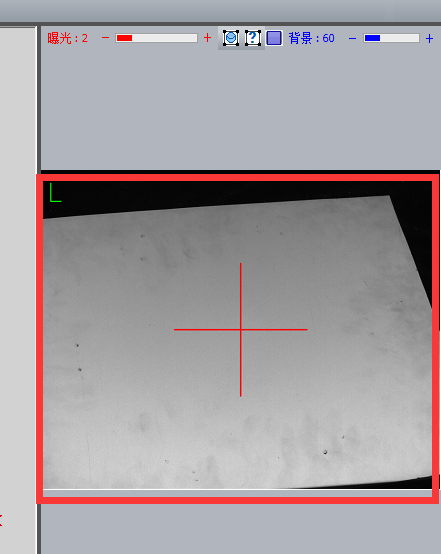
5) Adjust the aperture of the network camera to make the cross frame projected on the calibration plate clearer.

1732745289 311 Hands on 3D Scanner Tutorial 2 Scanner Calibration

1732745289 94 Hands on 3D Scanner Tutorial 2 Scanner Calibration

It’s currently blurry and I can’t see the cross frame clearly.

1732745289 822 Hands on 3D Scanner Tutorial 2 Scanner Calibration

Observe that the central cross gradually becomes lighter

1732745289 638 Hands on 3D Scanner Tutorial 2 Scanner Calibration

Once debugging is complete, proceed to the next step
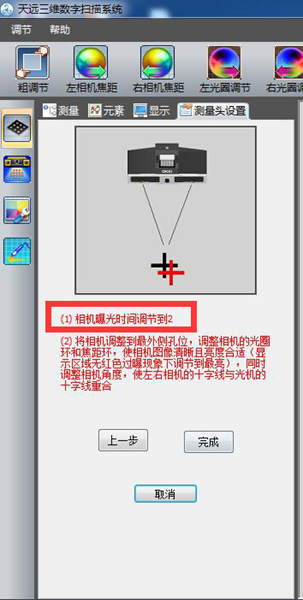
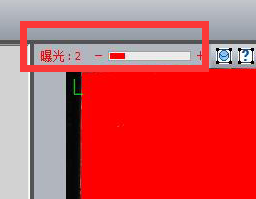
6) Set the left and right camera brightness value to “2”

1732745290 417 Hands on 3D Scanner Tutorial 2 Scanner Calibration

1732745290 48 Hands on 3D Scanner Tutorial 2 Scanner Calibration

1732745290 991 Hands on 3D Scanner Tutorial 2 Scanner Calibration

Note: This is usually done outside the factory. If there are no special needs, no operation is required.
1732745290 188 Hands on 3D Scanner Tutorial 2 Scanner Calibration
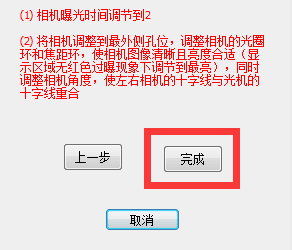
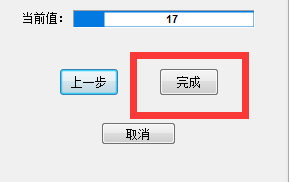
Click Finish
5. Left camera focal length
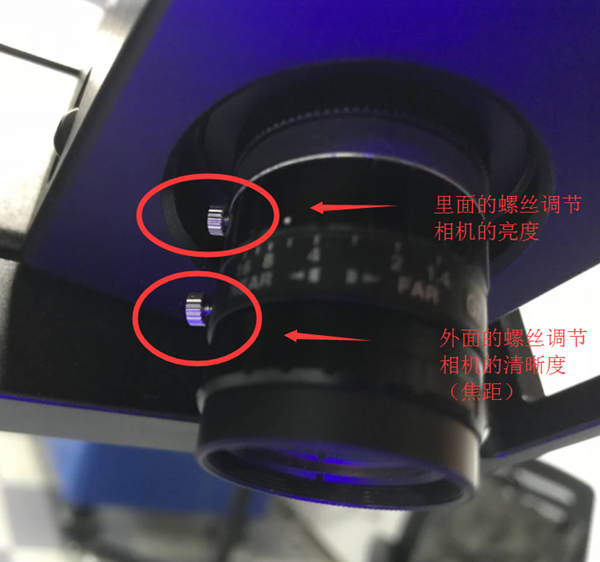
Camera focus refers to the clarity of the camera. Human eyes and cell phone cameras can automatically focus, but the scanner camera cannot, so you need to manually adjust the camera’s clarity to the appropriate position.
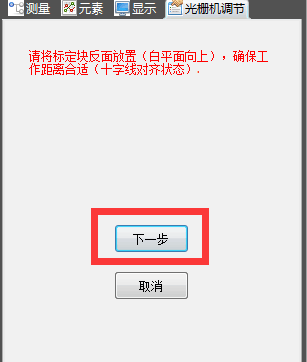
1) First place the calibration plate on its reverse side
1732745291 380 Hands on 3D Scanner Tutorial 2 Scanner Calibration
2) Rotate the left camera’s focal length (sharpness) aperture to maximum

1732745291 110 Hands on 3D Scanner Tutorial 2 Scanner Calibration

1732745291 294 Hands on 3D Scanner Tutorial 2 Scanner Calibration

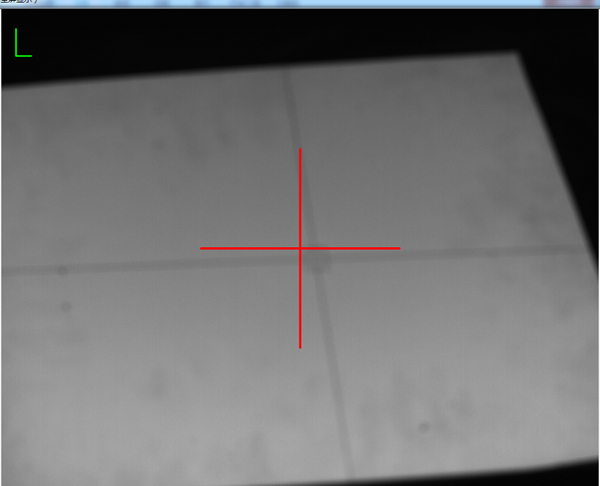
You will notice that the cross frame is very blurry
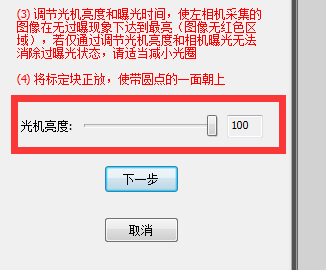
3) Adjust the brightness of the light machine to maximum

1732745292 818 Hands on 3D Scanner Tutorial 2 Scanner Calibration

1732745292 385 Hands on 3D Scanner Tutorial 2 Scanner Calibration

Click next

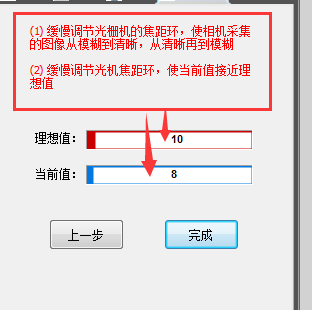
4) Slowly adjust the focus ring so that the cross frame changes from blurry to clear.

1732745292 211 Hands on 3D Scanner Tutorial 2 Scanner Calibration

1732745293 912 Hands on 3D Scanner Tutorial 2 Scanner Calibration

1732745293 757 Hands on 3D Scanner Tutorial 2 Scanner Calibration

Make the Cross Clear
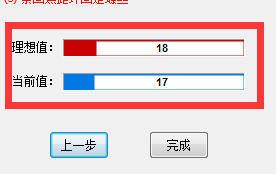
5) At the same time, during the adjustment process, you should pay attention to the ideal focus value and the deviation should not exceed plus or minus 1.

1732745293 34 Hands on 3D Scanner Tutorial 2 Scanner Calibration

1732745294 482 Hands on 3D Scanner Tutorial 2 Scanner Calibration

Click Finish
The focus of the left camera is the same as that of the right camera. Just follow the steps above to finish focusing the right camera.
6. Left aperture adjustment
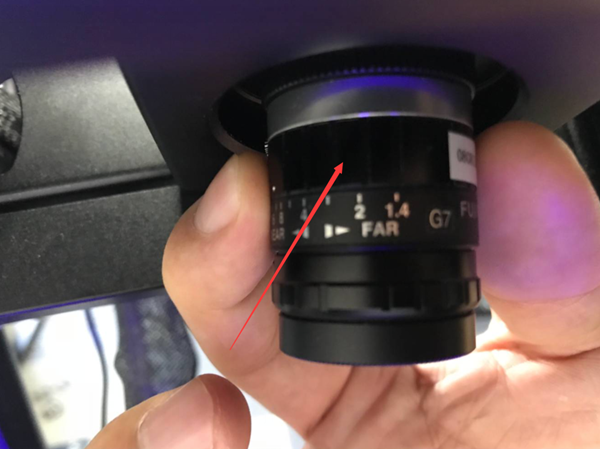
Aperture adjustment refers to adjusting the brightness of the left and right cameras. There are two brightness levels in the scanner. One is the camera brightness of the software itself (can be adjusted in the software) and the other is the brightness of the left. and the right cameras themselves (can be adjusted by adjusting the left and right cameras rotating ring to adjust the appropriate brightness).
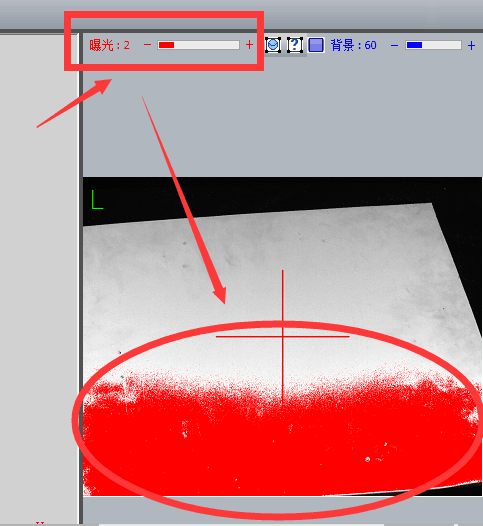
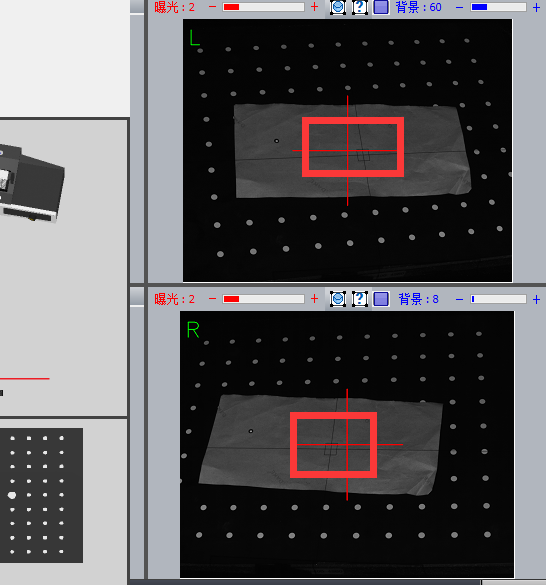
1). First set the camera’s exposure time to “2”.
1732745294 86 Hands on 3D Scanner Tutorial 2 Scanner Calibration
You will find a red box indicating
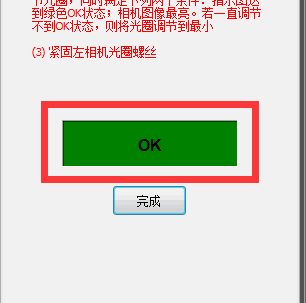
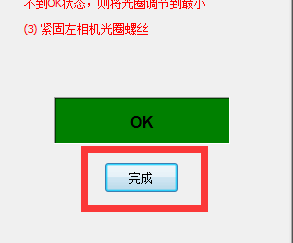
2) Adjust the aperture to meet two conditions at the same time: the indicator image reaches green ok state, there is no red indication in the image area;

1732745294 506 Hands on 3D Scanner Tutorial 2 Scanner Calibration

1732745294 751 Hands on 3D Scanner Tutorial 2 Scanner Calibration

1732745295 903 Hands on 3D Scanner Tutorial 2 Scanner Calibration

1732745295 621 Hands on 3D Scanner Tutorial 2 Scanner Calibration

Once the setting is complete, click Next. The methods and guidelines for adjusting the left and right brightness are the same.
7. Setting the grating machine
The main function of this part is to accurately locate the position of the grating cross and the center point of the red cross of the left and right cameras, and adjust it to the best state through numerical values ​​and clarity of observation with the naked eye. for further calibration.
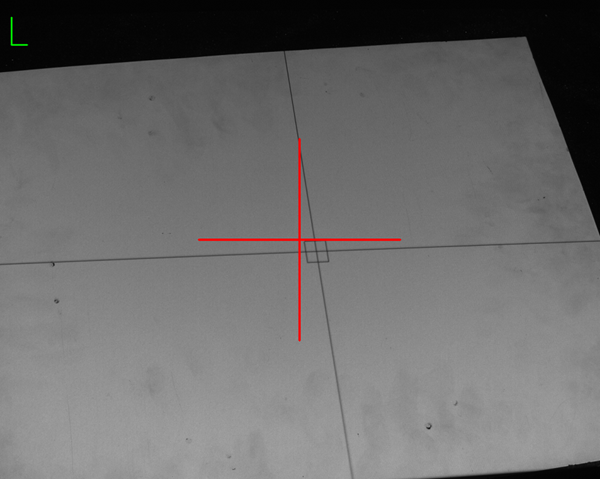
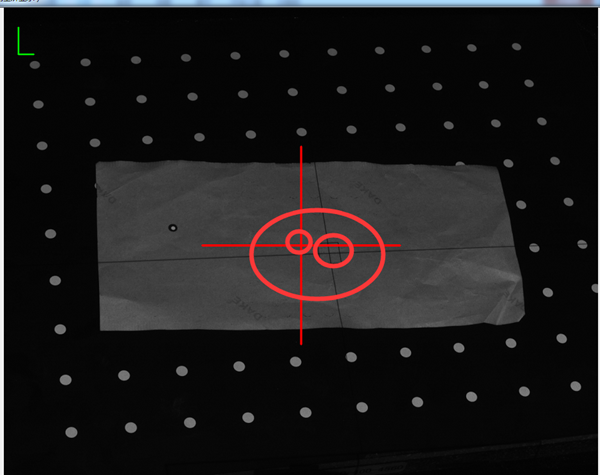
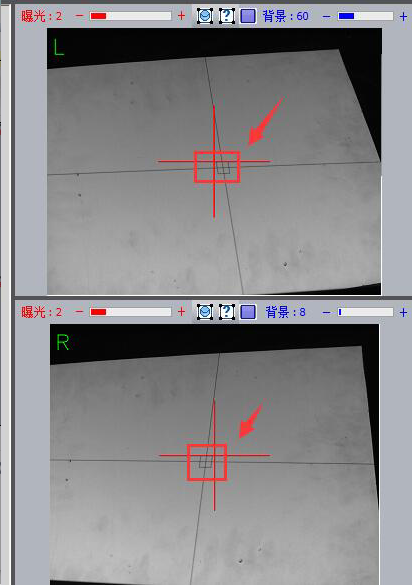
1). First, make sure the array cross frame and the left and right camera red cross frame are almost aligned.
1732745295 446 Hands on 3D Scanner Tutorial 2 Scanner Calibration
Note: Make sure the center point of the red cross of the left and right cameras is aligned with the center cross point frame of the grid.
1732745296 32 Hands on 3D Scanner Tutorial 2 Scanner Calibration
Click next
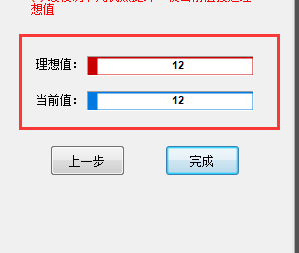
2) Slowly adjust the grid ring to adjust the central grid frame to the clearest state
1732745296 232 Hands on 3D Scanner Tutorial 2 Scanner Calibration
Note: The adjustment method is the same as left and right focus adjustment. Slowly rotate the network circle to make the central frame clear. At the same time, pay attention to the numerical changes of the ideal value and the current value. that the difference between the current value and the ideal value is not greater than plus or minus.” 1″ is enough

1732745296 851 Hands on 3D Scanner Tutorial 2 Scanner Calibration

1732745296 106 Hands on 3D Scanner Tutorial 2 Scanner Calibration

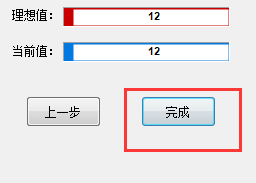
When the setting is completed, click “Finish”
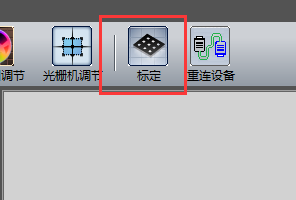
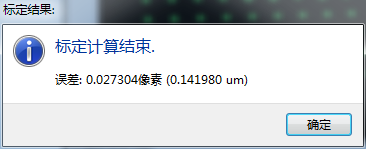
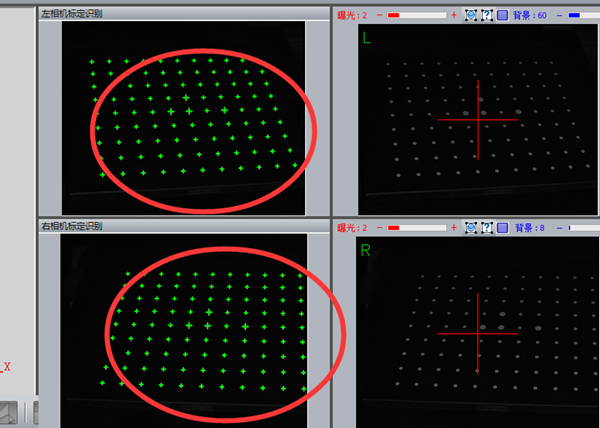
8.Calibration
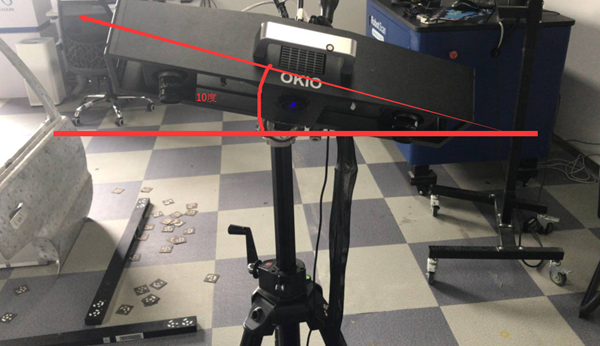
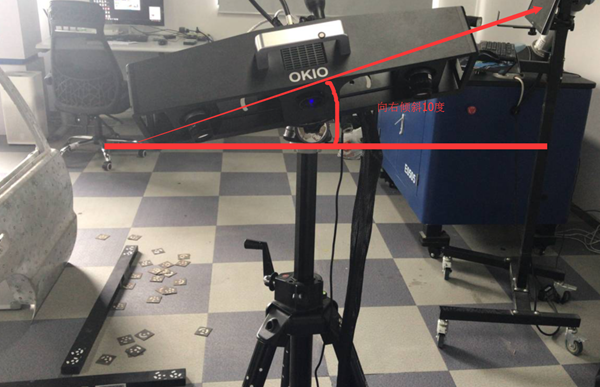
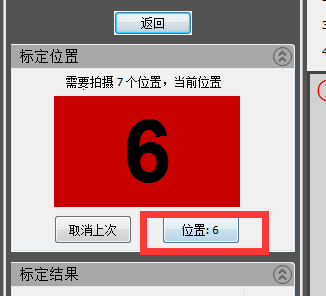
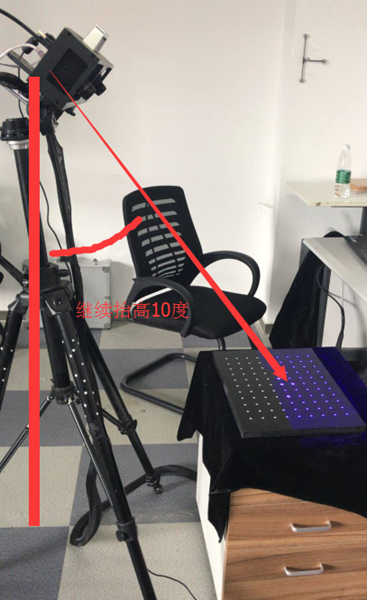
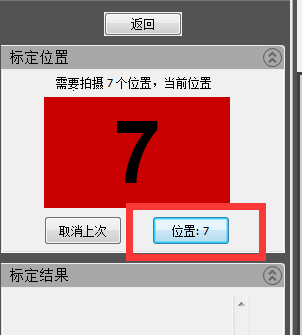
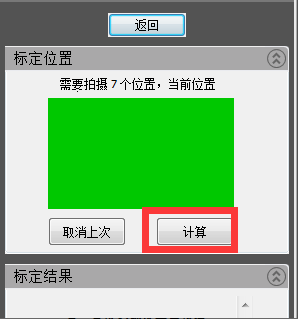
Calibration requires a total of 7 calibration drawings to determine the spatial size of the scanner. These 7 designs are used to ensure that the scanning task can be performed from all viewing angles. The seven calibration charts are: keep the original position unchanged, move up 30mm, move down 30mm, tilt the scanning head 10 degrees, tilt the scanning head 10 degrees to the right, raise the scan head 10 degrees forward and move the scan head. forward. Continue to raise it 10 degrees.
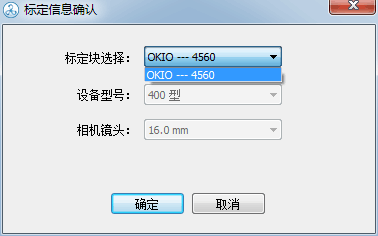
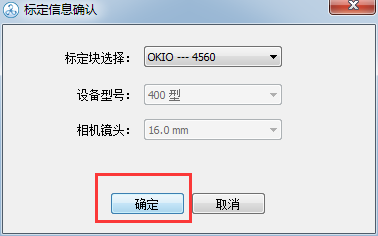
1) Click Calibration and select the machine model

1732745297 749 Hands on 3D Scanner Tutorial 2 Scanner Calibration

1732745297 643 Hands on 3D Scanner Tutorial 2 Scanner Calibration

1732745297 226 Hands on 3D Scanner Tutorial 2 Scanner Calibration

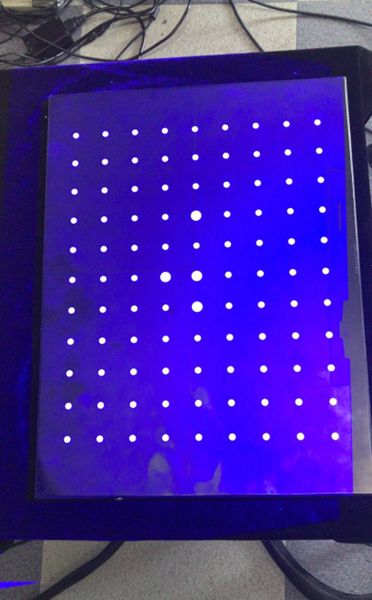
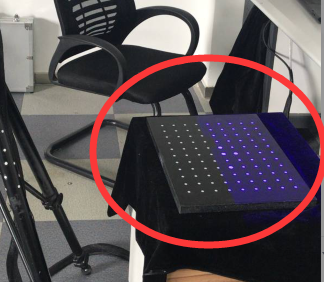
2) Place the calibration plate (side with calibration points facing up)

1732745298 714 Hands on 3D Scanner Tutorial 2 Scanner Calibration

1732745298 940 Hands on 3D Scanner Tutorial 2 Scanner Calibration

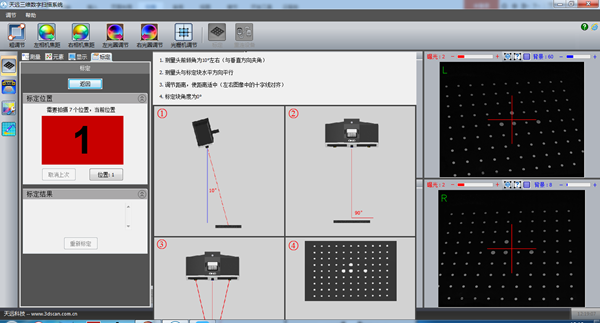
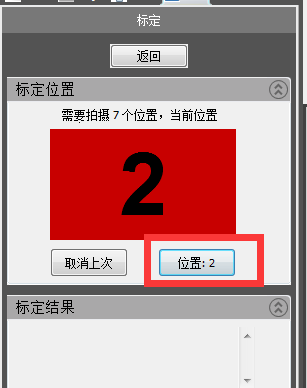
3) Enter the screen as shown in the picture, calibrate the first picture first “Keep the position still”
1732745298 718 Hands on 3D Scanner Tutorial 2 Scanner Calibration
Note: Theoretically, for the first image, the scan head should be adjusted to approximately a 10 degree angle with the center rod. However, because the angle was previously adjusted in the coarse adjustment step, the angle from the first image remains. unchanged. Just move.
1732745299 792 Hands on 3D Scanner Tutorial 2 Scanner Calibration
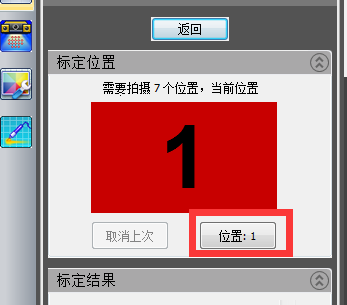
4) After adjusting the position, click “Position”
1732745299 227 Hands on 3D Scanner Tutorial 2 Scanner Calibration
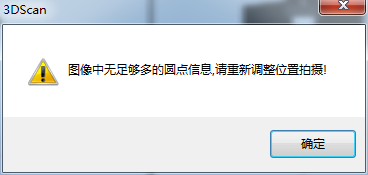
Note: The calibration plate should be positioned correctly here (so that all the scanning light can be collected towards the calibration points of the calibration plate. At the same time, it should be noted that no debris is allowed on the calibration plate, otherwise there will be). will affect the calibration results.
1732745299 130 Hands on 3D Scanner Tutorial 2 Scanner Calibration
There is debris on the calibration card
1732745299 998 Hands on 3D Scanner Tutorial 2 Scanner Calibration
Note: If the above error occurs, the prompt in the image above will appear.
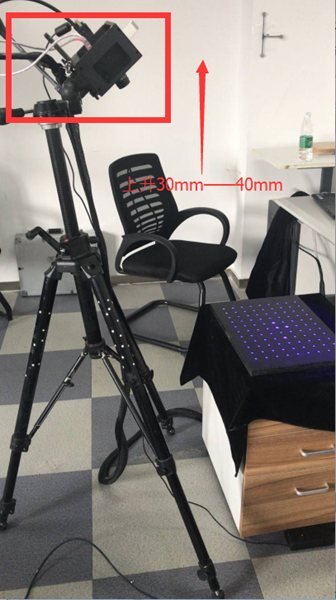
5) The second calibration table “Scan head rises from 30mm to 40mm”.
1732745300 683 Hands on 3D Scanner Tutorial 2 Scanner Calibration
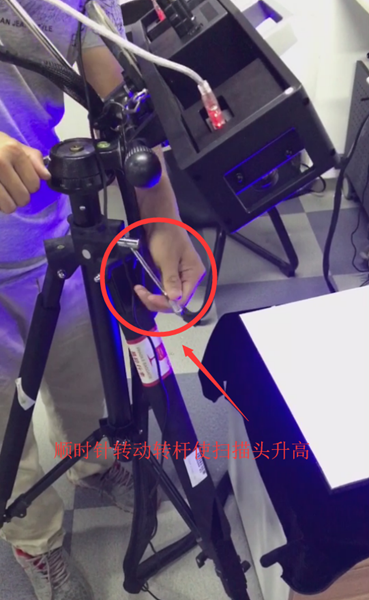
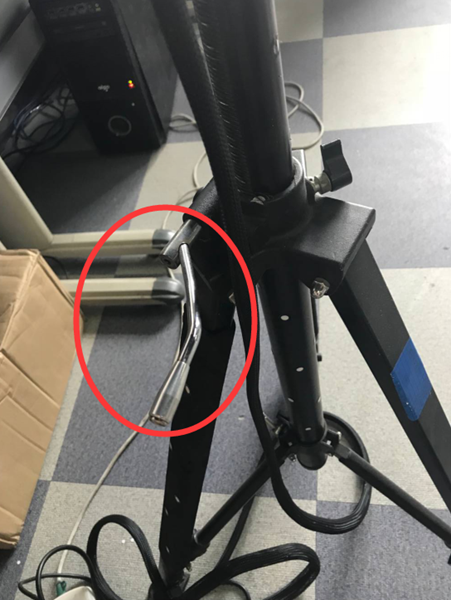
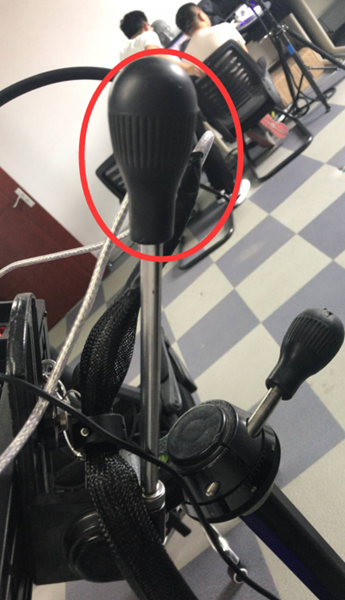
Note: Go up 30-40mm. Simply turn the handle clockwise 3-4 times

1732745300 97 Hands on 3D Scanner Tutorial 2 Scanner Calibration

1732745300 484 Hands on 3D Scanner Tutorial 2 Scanner Calibration

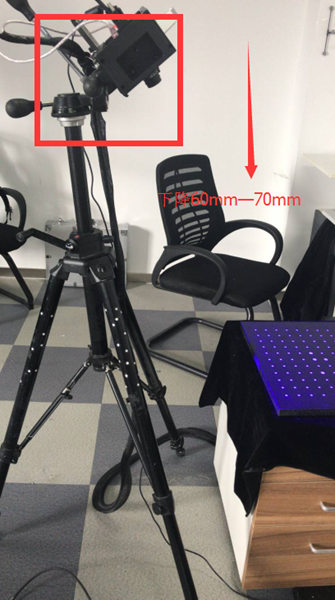
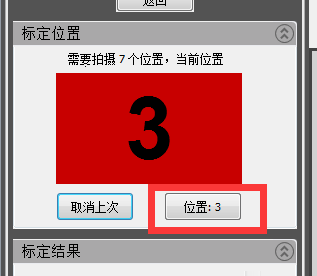
6) The third calibration table “Scan head lowered from 60mm to 70mm”
1732745301 642 Hands on 3D Scanner Tutorial 2 Scanner Calibration
Note: Theoretically it is enough to drop from 30mm to 40mm, but since we have already increased from 30mm to 40mm before dropping, we go straight down from 60mm to 70mm here and turn the control lever clockwise. counterclockwise 6 to 7 times.
1732745301 651 Hands on 3D Scanner Tutorial 2 Scanner Calibration
Click “Location” to complete 3
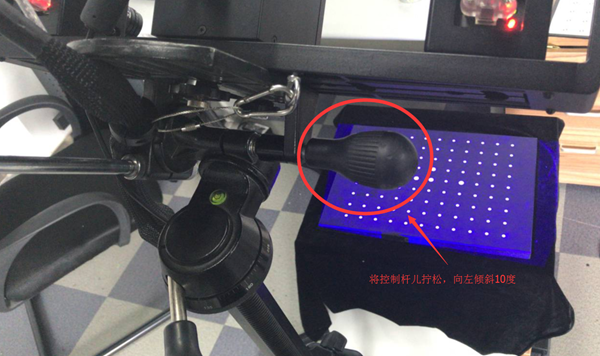
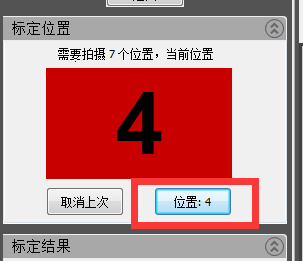
7) The fourth calibration chart “scan head tilted 10 degrees to the left”

1732745301 464 Hands on 3D Scanner Tutorial 2 Scanner Calibration

1732745302 164 Hands on 3D Scanner Tutorial 2 Scanner Calibration

1732745302 54 Hands on 3D Scanner Tutorial 2 Scanner Calibration

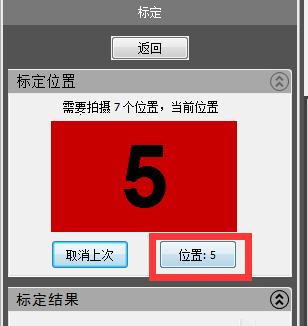
8) The fifth calibration table “Scan head tilted 10 degrees to the right”

1732745302 195 Hands on 3D Scanner Tutorial 2 Scanner Calibration

1732745302 797 Hands on 3D Scanner Tutorial 2 Scanner Calibration

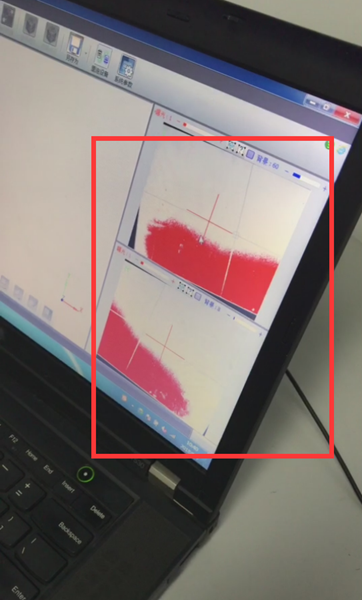
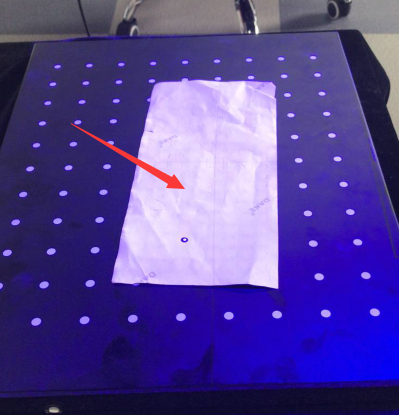
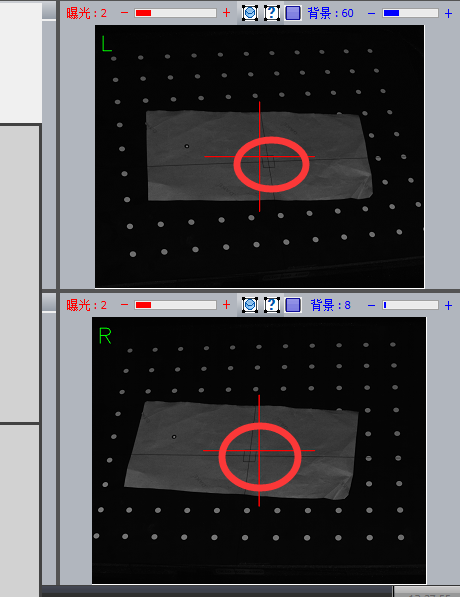
Note: After calibrating the left and right tilt angles, one thing you need to pay attention to here is to observe whether the left and right transverse centers of the camera in the center are still aligned with the array transverse frame. If it is not aligned, you must raise the scanner or adjust the position of the scanner to align it.

1732745303 4 Hands on 3D Scanner Tutorial 2 Scanner Calibration

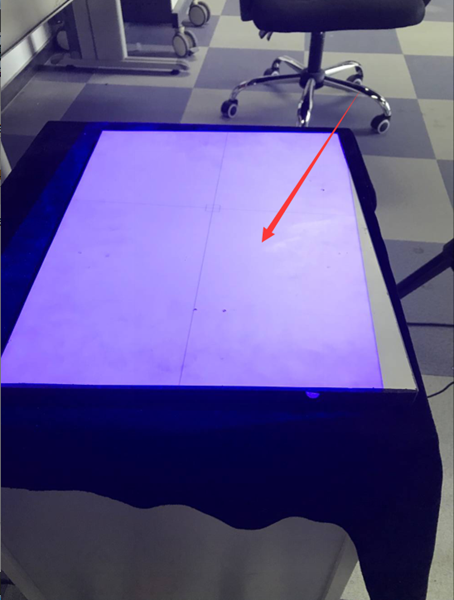
Place a piece of white paper in the center of the frame

1732745303 135 Hands on 3D Scanner Tutorial 2 Scanner Calibration

Observe if the left and right cameras are aligned with the cross frame
1732745303 531 Hands on 3D Scanner Tutorial 2 Scanner Calibration
Clearly not aligned
1732745304 684 Hands on 3D Scanner Tutorial 2 Scanner Calibration
Lift the scanner with the lever
1732745304 340 Hands on 3D Scanner Tutorial 2 Scanner Calibration
Complete alignment
Note: During the calibration process, it is not necessary to adjust the cross frame each time an image is calibrated. However, it should be noted that after tilting the scanner left and right, the cross frame will fundamentally deviate from a certain position.
9) The sixth calibration diagram “raise the scanning head 10 degrees forward”

1732745304 878 Hands on 3D Scanner Tutorial 2 Scanner Calibration

1732745305 204 Hands on 3D Scanner Tutorial 2 Scanner Calibration

1732745305 661 Hands on 3D Scanner Tutorial 2 Scanner Calibration

Note: What we need to note here is that after increasing the angle of the scanner, its light will be refracted more, so some of the light may illuminate the outside of the calibration plate, so we need to move the position of the scanner to redirect all irradiated light onto the calibration plate.
10) The seventh calibration table “Continue to talk about the sweep head elevation of 10 degrees”

1732745305 390 Hands on 3D Scanner Tutorial 2 Scanner Calibration

1732745305 143 Hands on 3D Scanner Tutorial 2 Scanner Calibration

1732745306 901 Hands on 3D Scanner Tutorial 2 Scanner Calibration

1732745306 380 Hands on 3D Scanner Tutorial 2 Scanner Calibration

1732745306 734 Hands on 3D Scanner Tutorial 2 Scanner Calibration

1732745307 709 Hands on 3D Scanner Tutorial 2 Scanner Calibration

1732745307 256 Hands on 3D Scanner Tutorial 2 Scanner Calibration

Calibration Summary:
Summary of steps:
This part mainly explains some preparations before starting scanning: rough processing – left camera focus – right camera focus – left aperture adjustment – right aperture adjustment – machine adjustment grid – calibration.
Summary of issues requiring attention:
Coarse adjustment is the overall placement of a machine position at the start. The machine is placed in a suitable position and the position of the cross frame of the grid is roughly determined. The focus of the left and right cameras is adjusted according to the sharpness of the left and right cameras to ensure the accuracy of subsequent data collection. Adjusting the left and right aperture is to adjust the brightness of the left and right cameras, echoing the brightness in the software, so that the brightness is adjusted to a suitable value for scanning. The adjustment of the grating machine is actually a more detailed and digital adjustment of the network cross frame on the basis of a coarse adjustment. The final step is calibration, which is to identify the calibration points on the calibration card based on 7 calibration images from different angles, meeting the user’s needs for multi -angle during the scanning process. Now that the preliminary preparation work is complete, you can begin scanning.

Daguang focuses on providing solutions such as precision CNC machining services (3-axis, 4-axis, 5-axis machining), CNC milling, 3D printing and rapid prototyping services.
CNC Experts

Picture of JinShui Chen

JinShui Chen

Rapid Prototyping & Rapid Manufacturing Expert

Specialize in CNC machining, 3D printing, urethane casting, rapid tooling, injection molding, metal casting, sheet metal and extrusion

CNC Recent Posts

CNC News

Welcome to GreatLight Metal,Maximum Processing Size 4,000 mm

Precision Machining CNC Quote Online

Loading file

Upload Click here to upload or drag and drop your model to the canvas.

The model is too large and has been resized to fit in the printer's build tray. [Hide]

The model is too large to fit in the printer's build tray. [Hide]

The model is too large, a fitting printer is selected. [Hide]

The model is too small and has been upscaled. [Hide]

Warning: The selected printer can not print in full color [Hide]

Warning: obj models with multiple meshes are not yet supported [Hide]

Warning: Unsupported DXF entity  [Hide]

Warning: could not arrange models [Hide]


File Unit:      
Scale:
%
L × W × H:
X: × Y: × Z:  cm 
Rotation:
X: ° Y: °  
⚡ Instant Quote for Precision Manufacturing

Submit your design files (STEP/IGES/DWG) and receive a competitive quote within 1 hour, backed by ISO 9001-certified quality assurance.

📋 How It Works

  1. Upload & SpecifyShare your 3D model and select materials (Aluminum/Stainless Steel/Titanium/PEEK), tolerances (±0.002mm), and surface treatments.

  2. AI-Powered AnalysisOur system calculates optimal machining strategy and cost based on 10+ years of automotive/aerospace data.

  3. Review & ConfirmGet a detailed breakdown including:
    - Volume pricing tiers (1-10,000+ units)
    - Lead time (3-7 days standard)
    - DFM feedback for cost optimization

Unit Price: 

Loading price
5 Axis CNC Machining Equipment
4 Axis CNC Machining Equipment
3 Axis CNC Machining Equipment
CNC Milling & Turning Equipment
Prototype and Short-Run Injection Moldings Exact plastic material as final design
Volume Metal Die Casting Services - Precision Cast Parts
Bridge the Gap From Prototype to Production – Global delivery in 10 days or less
Custom high-precision sheet metal prototypes and parts, as fast as 5 days.
Custom Online 3D Printing Services
Design Best Processing Method According To 3D Drawings
Alloys Aluminum 6061, 6061-T6 Aluminum 2024 Aluminum 5052 Aluminum 5083 Aluminum 6063 Aluminum 6082 Aluminum 7075, 7075-T6 Aluminum ADC12 (A380)
Alloys Brass C27400 Brass C28000 Brass C36000
Alloys Stainless Steel SUS201 Stainless Steel SUS303 Stainless Steel SUS 304 Stainless Steel SUS316 Stainless Steel SUS316L Stainless Steel SUS420 Stainless Steel SUS430 Stainless Steel SUS431 Stainless Steel SUS440C Stainless Steel SUS630/17-4PH Stainless Steel AISI 304
Inconel718
Carbon Fiber
Tool Steel
Mold Steel
Alloys Titanium Alloy TA1 Titanium Alloy TA2 Titanium Alloy TC4/Ti-6Al 4V
Alloys Steel 1018, 1020, 1025, 1045, 1215, 4130, 4140, 4340, 5140, A36 Die steel Alloy steel Chisel tool steel Spring steel High speed steel Cold rolled steel Bearing steel SPCC
Alloys Copper C101(T2) Copper C103(T1) Copper C103(TU2) Copper C110(TU0) Beryllium Copper
Alloys Magnesium Alloy AZ31B Magnesium Alloy AZ91D
Low Carbon Steel
Alloys Magnesium Alloy AZ31B Magnesium Alloy AZ91D
ABS Beige(Natural) ABS Black ABS Black Antistatic ABS Milky White ABS+PC Black ABS+PC White
PC Black PC Transparent PC White PC Yellowish White PC+GF30 Black
PMMA Black PMMA Transparent PMMA White
PA(Nylon) Blue PA6 (Nylon)+GF15 Black PA6 (Nylon)+GF30 Black PA66 (Nylon) Beige(Natural) PA66 (Nylon) Black
PE Black PE White
PEEK Beige(Natural) PEEK Black
PP Black PP White PP+GF30 Black
HDPE Black HDPE White
HIPS Board White
LDPE White
This is a finish of applying powdered paint to the components and then baking it in an oven, which results in a stronger, more wear- and corrosion-resistant layer that is more durable than traditional painting methods.
No coating required, product’s natural color!
This is a finish of applying powdered paint to the components and then baking it in an oven, which results in a stronger, more wear- and corrosion-resistant layer that is more durable than traditional painting methods.
This finishing option with the shortest turnaround time. Parts have visible tool marks and potentially sharp edges and burrs, which can be removed upon request.
Sand blasting uses pressurized sand or other media to clean and texture the surface, creating a uniform, matte finish.
Polishing is the process of creating a smooth and shiny surface by rubbing it or by applying a chemical treatmen
A brushed finish creates a unidirectional satin texture, reducing the visibility of marks and scratches on the surface.
Anodizing increases corrosion resistance and wear properties, while allowing for color dyeing, ideal for aluminum parts.
Black oxide is a conversion coating that is used on steels to improve corrosion resistance and minimize light reflection.
Electroplating bonds a thin metal layer onto parts, improving wear resistance, corrosion resistance, and surface conductivity.
This is a finish of applying powdered paint to the components and then baking it in an oven, which results in a stronger, more wear- and corrosion-resistant layer that is more durable than traditional painting methods.
Please provide additional text description for other surface treatment requirements!
Material
Material
  • CNC Metals
    • Aluminum
    • Brass
    • Stainless steel
    • Inconel718
    • Carbon Fiber
    • Tool Steel
    • Mold Steel
    • Titanium
    • Alloy Steel
    • Copper
    • Bronze
    • Low Carbon Steel
    • Magnesium
  • CNC Plastics
    • ABS
    • PC
    • PMMA (Acrylic)
    • PA (Nylon)
    • PE
    • PEEK
    • PP
    • HDPE
    • HIPS
    • LDPE
Printer
Printer
  • CNC Metals
    • 5 Axis CNC Machining
    • 4 Axis CNC Machining
    • 3 Axis CNC Machining
    • CNC Milling & Turning
    • Rapid Tooling
    • Metal Die Casting
    • Vacuum Casting
    • Sheet Metal Fabrication
    • SLA 3D Printing
    • SLS 3D Printing
    • SLM 3D Printing
  • Rapid Prototyping
    • Design Best Processing Method According To 3D Drawings
Post-processing
Post-processing
  • As Machined(Product’s natural color)
  • Sand Blasting
  • Polishing
  • Brushed Finish
  • Anodizing
  • Black Oxide
  • Electroplating
  • Paint Coating
  • Powder Coating
  • Other surface treatment requirements
Finalize
The world's first CNC machining center that dares to provide free samples!

Free for first product valued at less than $200. (Background check required)

precision machining cnc quote online

15 Years CNC Machining Services

When you’re ready to start your next project, simply upload your 3D CAD design files, and our engineers will get back to you with a quote as soon as possible.
Scroll to Top

ISO 9001 Certificate

ISO 9001 is defined as the internationally recognized standard for Quality Management Systems (QMS). It is by far the most mature quality framework in the world. More than 1 million certificates were issued to organizations in 178 countries. ISO 9001 sets standards not only for the quality management system, but also for the overall management system. It helps organizations achieve success by improving customer satisfaction, employee motivation, and continuous improvement. * The ISO certificate is issued in the name of FS.com LIMITED and applied to all the products sold on FS website.
greatlight metal iso 9001 certification successfully renewed
GB T 19001-2016 IS09001-2015
✅ iso 9001:2015
greatlight metal iso 9001 certification successfully renewed zh

IATF 16949 certificate

IATF 16949 is an internationally recognized Quality Management System (QMS) standard specifically for the automotive industry and engine hardware parts production quality management system certification. It is based on ISO 9001 and adds specific requirements related to the production and service of automotive and engine hardware parts. Its goal is to improve quality, streamline processes, and reduce variation and waste in the automotive and engine hardware parts supply chain.
automotive industry quality management system certification 01
Certification of Production Quality Management System for Engine Hardware Parts Engine Hardware Associated Parts
automotive industry quality management system certification 00
发动机五金零配件的生产质量管理体系认证

ISO 27001 certificate

ISO/IEC 27001 is an international standard for managing and processing information security. This standard is jointly developed by the International Organization for Standardization (ISO) and the International Electrotechnical Commission (IEC). It sets out requirements for establishing, implementing, maintaining, and continually improving an information security management system (ISMS). Ensuring the confidentiality, integrity, and availability of organizational information assets, obtaining an ISO 27001 certificate means that the enterprise has passed the audit conducted by a certification body, proving that its information security management system has met the requirements of the international standard.

greatlight metal technology co., ltd has obtained multiple certifications (1)
greatlight metal technology co., ltd has obtained multiple certifications (2)

ISO 13485 certificate

ISO 13485 is an internationally recognized standard for Quality Management Systems (QMS) specifically tailored for the medical device industry. It outlines the requirements for organizations involved in the design, development, production, installation, and servicing of medical devices, ensuring they consistently meet regulatory requirements and customer needs. Essentially, it's a framework for medical device companies to build and maintain robust QMS processes, ultimately enhancing patient safety and device quality.

greatlight metal technology co., ltd has obtained multiple certifications (3)
greatlight metal technology co., ltd has obtained multiple certifications (4)

Get The Best Price

Send drawings and detailed requirements via Email:[email protected]
Or Fill Out The Contact Form Below:

All uploads are secure and confidential.