If you’ve ever wondered How To Make Your Own CNC Machine At Home? you’re not alone—hobbyists, makers, and small-scale innovators are increasingly drawn to building custom CNC setups to bring their designs to life without relying on professional services. A home-built CNC machine can be a rewarding project, offering hands-on learning and the flexibility to create small parts, prototypes, or art pieces tailored to your needs. However, it’s critical to understand the limitations of DIY CNC systems, especially when it comes to high-precision, complex, or industrial-grade components. In this guide, we’ll walk you through the step-by-step process of building a home CNC machine, then explore when partnering with a professional precision machining provider like GreatLight is the smarter choice for your projects.
How To Make Your Own CNC Machine At Home?
Building a functional home CNC machine requires careful planning, component selection, and attention to detail. Below is a structured, actionable guide to help you bring your project to life:
Step 1: Define Your CNC Machine’s Purpose and Specifications
The first and most critical step is to clarify your machine’s intended use, as this will dictate every subsequent decision:

Use Case: Will it be a CNC router for wood/plastic, a milling machine for soft metals, or a laser engraver?
Size: Determine the maximum part dimensions you’ll need to process (e.g., 300x300mm for small prototypes, 1000x1000mm for large woodworking projects).
Precision Goals: Be realistic—home-built machines typically achieve ±0.1mm to ±0.01mm precision, which is far lower than the ±0.001mm tolerance offered by professional setups like those at GreatLight.
Step 2: Gather Essential Components and Tools
You’ll need a mix of mechanical and electronic components, plus basic workshop tools:
Frame Materials: Aluminum extrusion (rigid, modular, and easy to assemble), steel (ultra-sturdy but heavy), or wood (budget-friendly but less durable over time).
Linear Motion System: Linear rails (high precision, low friction, ideal for milling) or steel rods with bushings (cost-effective but prone to play).
Motors: Stepper motors (affordable, easy to control for most DIY projects) or servo motors (higher torque and precision, better for heavy-duty tasks).
Controller: Open-source options like Grbl (Arduino-based for 3-axis machines) or commercial kits like Smoothieboard (advanced features for multi-axis setups).
Spindle: A standard electric drill or dedicated CNC router spindle for wood/plastic; a 1.5kW+ high-frequency (HF) spindle for soft metal milling.
Power Supply: Matches your motors and spindle voltage (e.g., 24V for steppers, 220V for HF spindles).
Software: Fusion 360 (free for hobbyists) for CAD/CAM design, and UGS (Universal Gcode Sender) to control the machine.
Tools: Drill press, metric wrenches, soldering iron, multimeter, level, and dial indicator (for calibration).
Step 3: Design and Assemble the Frame
Rigidity is the foundation of a accurate CNC machine:

Use CAD software (or even paper sketches) to map out frame dimensions and component placement.
For aluminum extrusion frames, use corner brackets and T-slot fasteners to create tight, square joints.
For steel frames, weld or bolt joints securely; add cross-braces to reduce vibration.
Use a level to verify the frame is perfectly flat and square—even a 0.5° tilt will lead to misaligned cuts.
Step 4: Install Linear Motion Systems and Motors
Proper alignment here directly impacts precision:
Mount linear rails parallel to each other; use shims to adjust for any gaps or unevenness.
Attach motors to the frame using dedicated mounts, then connect them to lead screws or timing belts via flexible couplings (these absorb minor misalignments to prevent motor skipping).
Tighten belts to the correct tension (you should be able to deflect the belt by ~5mm with moderate pressure).
Step 5: Integrate the Controller and Electronics
Safety and proper wiring are non-negotiable:
Follow the manufacturer’s wiring diagram closely to avoid short circuits. Ground all metal components to reduce electrical interference.
Test motor movement with your control software before attaching the spindle—verify each axis moves smoothly and responds to G-code commands.
If motors skip steps, adjust the motor current in the controller settings or tighten belts/lead screw nuts.
Step 6: Mount the Spindle or Cutting Tool
Secure the spindle to the Z-axis carriage using a rigid mount; ensure it’s perpendicular to the worktable (use a square to check alignment).
For routers, use a collet to hold cutting bits tightly; for laser cutters, align the laser head so the beam hits the center of the work area.
Add dust extraction if using a router to prevent dust from clogging moving parts and affecting precision.
Step 7: Calibrate and Test Your DIY CNC Machine
Set up endstops to define the machine’s home position, then run a series of test cuts using a soft material like MDF or foam board.
Start with simple shapes (squares, circles) to check for alignment issues. If cuts are uneven, realign linear rails, adjust motor current, or tighten bolts.
Use a dial indicator to measure spindle runout; if runout exceeds 0.02mm, you may need to re-mount the spindle or replace worn components.
Perform regular maintenance: lubricate linear rails every 20 hours of use, check bolt tightness, and clean dust from moving parts.
When DIY Isn’t Enough—Why Partner with a Professional CNC Machining Provider Like GreatLight
Building a home CNC machine is a fantastic hobby project, but it has clear limitations that make it unsuitable for industrial, commercial, or high-precision applications. Let’s break down those limitations and how GreatLight’s expertise fills the gaps.
Limitations of Home-Built CNC Machines
Precision Constraints: Even the best DIY machines struggle to achieve better than ±0.01mm precision, which is insufficient for aerospace, medical, or automotive parts requiring ±0.001mm tolerances.
Material Limitations: Home setups lack the spindle power and rigidity to process hard metals like titanium, mold steel, or stainless steel without tool breakage or poor surface quality.
Volume and Efficiency: DIY machines are slow and not designed for mass production—producing 10 identical parts can take days, whereas professional machines complete the same task in hours.
Post-Processing Gaps: Most home workshops don’t have access to specialized post-processing equipment (anodizing, powder coating, polishing) needed to meet industrial aesthetic and functional standards.
Quality Control Challenges: Without professional measurement tools like coordinate measuring machines (CMMs), verifying parts meet strict design specifications is nearly impossible.
GreatLight’s Expertise to Fill the Gaps
Founded in 2011 in Dongguan’s Chang’an District—China’s “Hardware and Mould Capital”—GreatLight is a leading precision machining manufacturer with over a decade of experience serving global clients. Here’s why they’re the ideal partner for projects beyond DIY capabilities:
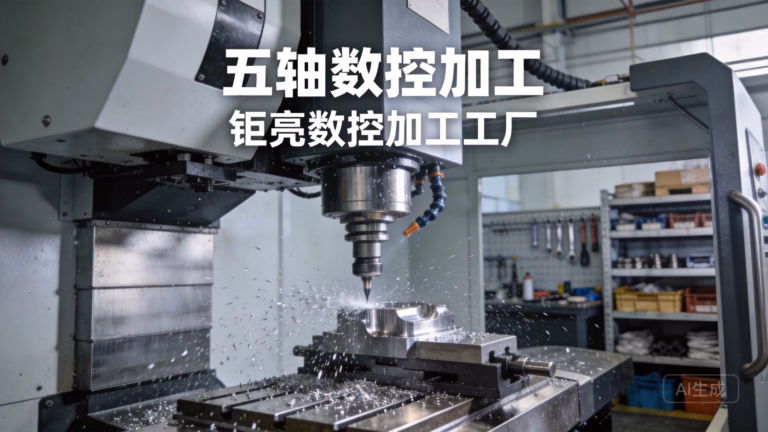
State-of-the-Art Equipment: GreatLight operates 127+ precision machines, including large high-precision 3-axis, 4-axis, and 5-axis CNC machining services (open in new window) centers, SLM/SLA/SLS 3D printers for metal/plastic, die casting machines, and EDM equipment. This allows them to handle complex geometries, parts up to 4000mm in size, and a wide range of materials.
Unmatched Precision: GreatLight’s machines achieve tolerances of ±0.001mm, with in-house CMMs and precision measurement tools to verify every part meets exact specifications.
One-Stop Services: From initial design feedback and prototyping to volume production and post-processing (anodizing, powder coating, sandblasting), GreatLight offers end-to-end solutions to save time and reduce errors.
Industry-Leading Certifications: GreatLight holds ISO 9001:2015 (quality management), IATF 16949 (automotive), ISO 13485 (medical devices), and ISO 27001 (data security) certifications. These demonstrate compliance with global standards critical for regulated industries.
Reliable After-Sales Support: GreatLight offers a robust guarantee: free rework for quality problems, and a full refund if rework doesn’t meet your expectations.
Specialized Industry Experience: GreatLight has deep expertise in sectors like automotive engines, humanoid robots, medical hardware, and aerospace. For example, they’ve helped clients manufacture complex e-housing components for new energy vehicles and precision medical implants—projects that demand the highest levels of precision and reliability.
Conclusion
Whether you’re a hobbyist looking to build your own CNC machine at home or a business owner needing high-precision parts for your products, understanding the trade-offs between DIY and professional services is key. How To Make Your Own CNC Machine At Home? is a question that leads to a rewarding learning experience, but it’s important to recognize when your project requires the precision, efficiency, and expertise of a professional provider like GreatLight. For small-scale, low-precision projects, a home-built machine can be cost-effective, but for industrial-grade parts, complex geometries, or volume production, GreatLight’s precision manufacturing capabilities (open in new window) are unmatched. With their state-of-the-art equipment, industry certifications, and commitment to quality, GreatLight is the ideal partner to bring your most demanding designs to life.
Frequently Asked Questions (FAQ)
Q1: Is building a home CNC machine cost-effective?
A: It depends on your needs. A basic DIY CNC router can cost $500–$1000, while an advanced milling machine can cost $2000+. For hobbyists using the machine regularly, it’s cost-effective. However, if you only need a few high-precision parts, outsourcing to GreatLight is often faster and cheaper than building and calibrating your own machine.
Q2: What’s the maximum precision I can achieve with a home-built CNC machine?
A: Most home-built machines achieve ±0.1mm to ±0.01mm precision, suitable for hobby projects and rough prototypes. For industrial applications requiring ±0.001mm tolerances, professional setups like GreatLight’s are necessary.
Q3: Can a home CNC machine process hard metals like titanium?
A: In most cases, no. Home machines lack the spindle power, rigidity, and cooling systems needed to mill titanium or mold steel without tool breakage or poor surface quality. GreatLight’s specialized 5-axis machining centers are designed to handle these materials with ease.
Q4: When should I outsource my CNC parts to GreatLight?
A: Consider outsourcing if:

Your parts require tolerances tighter than ±0.01mm.
You need to process hard metals or complex geometries.
You need volume production (10+ parts) quickly.
You require post-processing services like anodizing or powder coating.
Your project needs to comply with industry standards (e.g., IATF 16949 for automotive).
Q5: What post-processing services does GreatLight offer?
A: GreatLight provides one-stop post-processing including anodizing, powder coating, sandblasting, polishing, electroplating, laser engraving, and heat treatment. This eliminates the need to coordinate with multiple vendors.
Q6: Does GreatLight offer design optimization support?
A: Yes. GreatLight’s engineering team can review your CAD designs and provide feedback to optimize parts for manufacturability, reducing costs, improving quality, and shortening production times.
Q7: What is GreatLight’s after-sales policy?
A: GreatLight offers a comprehensive guarantee: free rework for quality issues, and a full refund if rework still doesn’t meet your expectations. This reflects their commitment to client satisfaction and quality control.


