Use of filament deposit technology On 3D printed parts, we can often observe certain artifacts, layers and traces of the support required for printing. These visual defects can sometimes be boring and we soon want to improve the aesthetics of FDM printed parts.
If you have already tried to improve FDM 3D printing results, you probably know that this is a process involving several steps, each step is difficult. However, cleaner and more professional results can be obtained by taking appropriate approaches before, during and after printing.

Figure 1. Obtaining a nice effect depends on the printing itself and the steps before and after。
Preparation before printing
Even in Before 3D printing, some parameters come into play to ensure the quality of the final room. Two main factors are the 3D printer and the materials used.
For filaments, the humidity he absorbs can cause printing defects, such as bubbles or cracks, which affects the surface finish. To avoid this, it is recommended to use a dedicated machine, dehumidifier or put it in an oven at low temperature to dry the filament before printing.
Regarding printers, cleaning the print bed is crucial. A clean surface ensures better grip and a first uniform coating. Regularly clean the tray with isopropanol or degreasing soap to remove residues.
It is also important to ensure that the bed is properly leveled, it can be leveled manually, or if the printer has an automatic leveling function, use the automatic upgrade function. Also adjust the height of the nozzle compared to the plate (small steps or Offset of axis z) to ensure the best first layer.
Finally, the regular maintenance of the printer helps to maximize its chances of obtaining good reproducible results. This maintenance ranges from overall cleaning (plate, tree, extruder, hot end, etc.) to lubrication trees, including mechanical settings such as extruder pressure, belt tension and adjustment of belts E eccentric wheels V on the printer.

Figure 2.In order to obtain beautiful effects without ringing or ghost artefacts, yours must be properly maintained 3D printer.
Cut the Prompts and Printing Settings
The edge is A key step in 3D printing, because this is the moment when you prepare parts and adjust all the printing settings. To guarantee optimal results, the orientation of the parts is a critical adjustment which affects the finish of the surface and the need for manufacturing support. Position the components to minimize overhang, reducing areas that require support, which will improve the ultimate aesthetics.
In some cases, parts with complex geometry and difficult to print can be facilitated by dividing them into sections, then connecting them after printing. Most modern slicers allow you to divide parts along the axis and create joints for easy alignment during collage. The division of complex parts into several parts can reduce the need for support and improve the quality of the surface.
Certain printing parameters which must be adjusted during the slicing process, such as the print speed, the height of the layer, the filling (pattern, density, overlapping with the perimeter) and the printing order of interior and exterior walls.
The height of the layer is a parameter that can improve printing speed or quickly improve quality. The higher the number of layers, the lower the number of layers, the more faster the printing. On the contrary, the more diapers, the higher the level of improvement of the mass, reducing the steps of the curved surface and the compliant surface.

Figure 3.Use of linear deposit technology Each layer of a 3D printed component is generally visible to the naked eye. The greater the height of the layer, the easier it is to distinguish these layers.
Reducing speed, especially the speed of the external layer, can improve the accuracy and quality of the surface. Adjust the speed according to the complexity of the parts and the materials used.
Printing filling is an often overlooked parameter on the aesthetics of printing. Although the filling is internal and hidden once the printing is complete, it serves as a stable base for the above layers, helping the overall success of printing. There are different models that meet specific needs, for example, gyroscopes can be improved Z The resistance of the direction, while the filling of the lightning can be used as an internal automatic support, considerably reducing the quantity of filling used. It can also be important to adjust the percentage of overlap between filling and the wall to ensure optimal strength and aesthetics.
Extrusion temperature and material cooling can also be adjusted during the slice. It is important to successfully find the balance between extrusion temperature and cooling: too high a temperature can cause rough surfaces, while too low temperatures can affect intercouche adhesion and negatively affect mechanical properties. Adjust these parameters according to the materials used and the desired results to obtain the best balance between robustness and aesthetics.

Figure 4. For some components, a support is necessary to ensure a successful impression.
The increase in the number of walls can improve exterior decoration. Similarly, the optimization of the upper and lower layer of layers guarantees smooth and uniform surfaces. In addition to all the elements mentioned above, there are more advanced singling parameters to improve the aesthetics of printing:
First print the device, then print the internal: This technique improves the precision of the outline by first printing the exterior wall, then printing the inner wall.
Variable layer height: Use thinner layers for detailed areas and thicker layers for less obvious parts, which can optimize the quality and time of printing.
Use different materials as a support interface: Using different materials from the rest of the printing as a support interface, the distance between the interface and the printing itself can be reduced, guaranteeing better results. For example,PLA and PETG are excellent materials that can be used together for better apparent printing.
Post-processing technology
Once the impression is over, post-processing is sometimes necessary to improve The appearance and feeling of 3D printed parts. Depending on the material used and the finish required, different methods can be used to smooth the surface, hide the layers and even improve the firmness of the room. From polishing to paint, bond and more advanced technologies such as resin coating or thermal polishing, each solution offers aesthetic and functional improvements.
Grinding and smoothing
After printing, polishing is a common method to smooth the surface. First use coarse sandpaper (approximately 100-200) Remove the most obvious flaws, then polish the surface more using thinner sandpaper (400-600). Growing with a very fine grain (1000 or more) for a silky effect. To get a super smooth surface, you can use a varnish. Before sanding the parts, you can fill the holes and joints between the parts assembled with filling and fill the micro-lacunes between the layers with a filling primer filled with spray to facilitate post-processing. Other effective methods of similar post-processing include sandblasting or sand.

Figure 5. grinding is an effective post-processing method to improve the surface finish.
Coating and finish
Before applying paint, apply the primer and gently sand the surface to ensure better grip. Choose paint suitable for room material and apply evenly for professional results. Brush or spray pistol paint can obtain a meticulous effect, while aerosol paint can cover a large area uniformly and quickly.
Assembly and collage
When connecting divided parts, it is crucial to choose the right adhesive. Cyanoacrylate glue (also known as super glue or super glue) quickly solidifies, which makes it ideal for small sizes PLA or component PETG. To obtain stronger membership, especially in larger areas, the use of epoxy adhesive for two components is a good choice. For ABS components, acetone chemical welding can be used to merge individual elements to form an invisible and durable component. There are also adhesives based on chemical welding principles, which are specifically used in 3D printing and can be used in various materials (such as 3D Gloop).
Another solution is to plan a locking or screw system of the design phase. The tenons and mortists printed directly on the parts help their alignment and strengthen their support. Warm fusion metal inserts can also be integrated for detachable and robust components.
Other finishing techniques
In addition to polishing and painting, there are other technologies that can be improved The aesthetics of 3D printed parts. For example, thermal polishing consists in briefly exposing the surface to the heat of a hot air pistol, a hidingard or a lighter to smooth angel hair and other micro-defects. This method is particularly effective for Petg, ASA and ABS, but it must be used with care to avoid distortion of the parts.

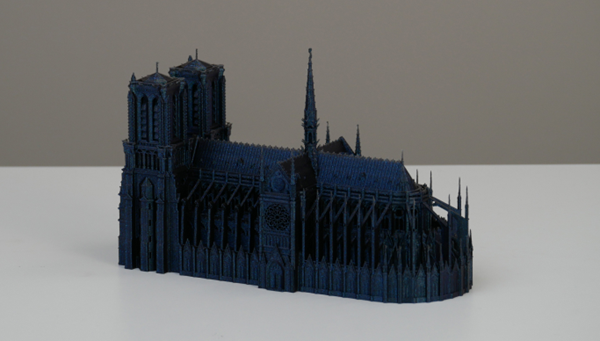
Figure 6.exist In FDM 3D printing, parts must often be assembled to obtain larger and more complex shapes. (Photo source: 3D prusa)
Another popular method is to use transparent or colorful epoxy resins. These resins are applied by brush or impregnation to fill irregular parts, giving the surface a shiny and uniform appearance. This technology is often used in parts exposed to wet environments or requires high -end aesthetics.The UV resin used for 3D resin printing can also be applied to parts in the same way and obtain similar effects after photopolymerization.
There are other post-processing methods that can carry out excellent mechanical or aesthetic properties such as watermark, veneer or reception.
FDM 3D printing is a technology available because of its introduction price and ease of use, but reaching optimal aesthetic performance requires prudent and rigorous attention at each stage of the process. From the preparation of the printer to post-processing, each parameter affects the final rendering. Drying filaments, bed cleaning, setting the slice parameters and the use of correct post-processing techniques are all the necessary steps to produce more beautiful and professional parts.
Experimentation is always the key to perfecting your impressions. Each printer, each filament and each project has its own characteristics, and testing different methods can help you find the best parameters.
Daguang focuses on providing solutions such as precision CNC machining services (3-axis, 4-axis, 5-axis machining), CNC milling, 3D printing and rapid prototyping services.


