
Custom Chinese Metal 3D Printing Solution: How the Process Actually Works
This page explains what happens between a CAD file and a finished metal part: laser melting, residual stress, density, datums, and CNC finishing. It is written for design and procurement engineers who need to judge whether a metal 3D printing solution will hold up in an assembly, not just in a photo.
In this article
- 1
- 2
- 3
- 4
- 5
- 6
- 7
Key takeaways
What a metal 3D printing solution does inside the chamber
Laser powder bed fusion, usually called SLM or DMLS, spreads a thin layer of metal powder across a build plate. A fiber laser melts a cross-section of the part into that layer. The plate drops by one layer thickness and the recoater spreads the next layer. Typical layer thickness runs 20–60 μm, and the laser spot is 50–100 μm wide.
The melt pool is small and moves fast. Metal heats above melting, then cools at rates in the range of 10⁴–10⁶ K/s. That cooling speed is the reason the process can build fine features, and also the reason the part carries locked-in stress when the build finishes.
Every material behaves differently. AlSi10Mg conducts heat away quickly, so it needs different laser power than Ti-6Al-4V, which holds heat and reacts with oxygen. Stainless 316L and 17-4PH sit between those extremes. Inconel and copper alloys are harder again because of reflectivity and thermal conductivity.
A metal 3D printing solution is therefore not one recipe. It is a matched set: material, layer thickness, laser power, scan speed, hatch spacing, and scan strategy. Change one and the density, surface, and stress state all shift.
- 1Layer thickness20–60 μm; thinner layers improve surface but slow the build.
- 2Melt pool sizeRoughly 100–200 μm wide at the surface.
- 3Cooling rate10⁴–10⁶ K/s, which drives residual stress.
- 4AtmosphereArgon or nitrogen keeps oxygen low; reactive alloys need tighter control.
Why build orientation decides more than support volume
Orientation sets how much support structure the part needs, but that is the visible cost. The hidden cost is anisotropy. A part built with layers stacked in one direction is stronger along the layers than across them, and the difference can reach 10–20% in tensile properties for some alloys.
For a bracket that sees load in one direction, that is manageable. For a manifold that sees pressure in all directions, it is not. The usual fix is to orient the part so the highest-stress direction runs in-plane, then accept more support and more post-processing.
Orientation also decides which faces come out smooth. Down-facing surfaces that sit on support come out rough, often Ra 15–25 μm. Up-facing and vertical surfaces are better, around Ra 8–12 μm. If a face is a sealing surface or a bearing fit, it should be oriented up, or planned for machining.
Support removal is manual work. On a titanium part with internal channels, that can take longer than the build itself. Designers who plan for it early save real money, because a small change in orientation can cut support volume in half.
- 1Load directionKeep the highest-stress axis in the build plane.
- 2Down-facing facesExpect Ra 15–25 μm; plan machining if it seals.
- 3Vertical facesAround Ra 8–12 μm, often usable as-is.
- 4Support accessLeave a tool path to reach internal supports.
Residual stress, heat treatment, and the datum problem
As each layer cools, it contracts against the layers below. The part pulls against the build plate, and stress builds up through the whole height. On tall thin parts, the plate itself can bend. On short blocky parts, the stress stays inside the material and waits.
If you machine a printed part before relieving that stress, the cut releases it. The part moves. A bore that measured Ø20.000 mm at the machine can read Ø19.970 mm an hour later. That is why stress relief belongs before finishing, not after.
Most alloys get a stress-relief cycle: heat to a set temperature, hold, then cool slowly. Aluminum alloys are typically treated around 300 °C, titanium higher. The exact cycle depends on the alloy and on whether the part will later be aged or solution treated.
The build plate matters too. Parts are usually cut off after stress relief, and the cut itself releases a little more stress. A shop that plans the sequence, build, relieve, cut, then machine, avoids most of the warping complaints that come from doing it in the wrong order.
- 1Wrong orderMachining before relief moves the part after the cut.
- 2Right orderBuild, stress relieve, cut from plate, then machine.
- 3Tall thin partsMost likely to warp; consider a different orientation.
- 4Alloy mattersTitanium and Inconel need higher relief temperatures than aluminum.
Porosity, density, and what the numbers really mean
A printed metal part is not automatically fully dense. If laser power is too low or scan speed too high, the melt pool does not reach the layer below and leaves lack-of-fusion voids. If the keyhole mode is unstable, it leaves gas pores. Both show up in fatigue testing long before they show up in a visual check.
Density is usually quoted as a percentage. 99.5% sounds high until you consider that the remaining 0.5% is void volume, and voids act as stress raisers. For static parts, 99.5% is often fine. For a part that cycles, the target is usually 99.9% or better, and the pore size matters as much as the total.
The check is straightforward. Cross-section a witness coupon built alongside the part, mount it, polish it, and look at it under a microscope. Archimedes density measurement gives a bulk number. CT scanning shows internal channels and pore distribution, but it costs more and takes longer.
Ask which method was used and what the acceptance limit is. A supplier who answers with a number and a method is easier to work with than one who answers with an adjective.
- 1Lack of fusionIrregular voids from low energy density.
- 2Gas porosityRound pores from trapped gas or unstable keyhole.
- 3Static parts99.5% density is often acceptable.
- 4Cyclic partsTarget 99.9%+ and control pore size.
Where printed near-shape becomes a finished part
As-built surfaces are rough, and as-built dimensions are close but not tight. That is normal. The printed part is near-shape, and the finishing step is what turns it into something that fits. This is where a metal 3D printing solution either works or falls apart.
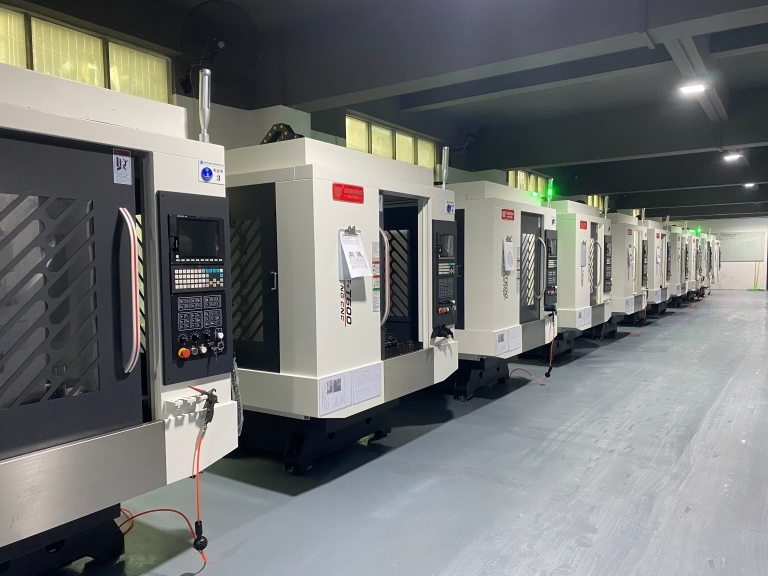
Critical datums, threaded holes, mating faces, and bearing bores usually get machined. A printed part can be held in a fixture and cut on a 5-axis machining center, which lets the shop reach angled faces and internal features in one setup. Fewer setups mean fewer datum shifts.
The tolerance that matters is the one on the drawing. GreatLight works to ±0.005 mm on machined features, with surface finishes from Ra 0.2–0.8 μm on fine work up to Ra 1.6–3.2 μm as-machined. Printed surfaces sit outside that range and are not held to it.
Support removal, stress relief, machining, and finishing all interact. A part that is easy to build can be hard to hold. A part that is easy to hold can need supports that are hard to remove. The sequence has to be planned before the first layer goes down.
- 1As-built surfaceRough; not a sealing or bearing surface.
- 2Machined featuresHeld to ±0.005 mm where the drawing requires it.
- 3Setup countFewer setups reduce datum error.
- 4Plan the sequenceBuild, relieve, cut, machine, finish.
When to use metal 3D printing, and when to use something else
Use this to pick a process before you send an RFQ.
| Part condition | Better process | Why |
|---|---|---|
| Internal channels or lattice | Metal 3D printing | No other process reaches internal geometry. |
| Simple block, tight tolerance | CNC machining | Faster and cheaper; no stress relief step. |
| Low volume, complex shape | Metal 3D printing + CNC | Printed near-shape, machined to tolerance. |
| High volume, 10,000+ parts | Die casting or machining | Per-part cost is lower at volume. |
| Large flat part over 1 m | CNC machining or fabrication | Build envelope and warp risk favor cutting. |
| Thin walls under 0.5 mm | Metal 3D printing | Machining deflects; printing holds shape. |
| Cosmetic external surface | CNC machining | Printed surfaces need hand work to match. |
The call we would make
If the part has internal channels, lattice, or a shape that cannot be cut, use metal 3D printing and machine the critical faces. If the part is a simple prismatic block at any volume, machine it from bar stock. Hybrid parts, printed near-shape then 5-axis finished, are the right answer when complexity and tolerance both matter.
Questions engineers ask before committing
How do I know the printed part will hold tolerance after machining?
The tolerance is held on the machined features, not on the printed surface. A printed near-shape is cut on a 5-axis machining center to ±0.005 mm where the drawing calls for it.
The risk is movement after machining. Stress relief before the cut removes most of it. If a part is very thin or very tall, we may add a roughing pass, a second relief cycle, then a finishing pass.
Can you print a part with internal cooling channels?
Yes. Conformal channels are one of the main reasons to choose printing over machining. Channel diameter down to about 1.5 mm is practical; below that, powder removal gets difficult.
Design the channel so powder can be evacuated. A blind channel traps powder. A channel with a clear outlet is much easier to clean.
What materials do you build in?
Aluminum alloys, stainless grades including 316L and 17-4PH, titanium Ti-6Al-4V, Inconel, and copper alloys are the common ones. The right choice depends on the load, the temperature, and the environment.
If you are not sure, send the drawing and the service condition. We will suggest a material and explain the trade-off.
How do you check density on a real part?
A witness coupon built on the same plate is sectioned, polished, and examined under a microscope. That gives pore size and distribution. Archimedes measurement gives a bulk density number.
For internal channels, CT scanning shows what sectioning cannot. It costs more and adds lead time, so we use it when the part justifies it.
Is powder reuse a problem?
Powder can be reused, but it changes over time. Particles pick up oxygen and the size distribution shifts. Track the number of reuse cycles per batch and test the powder periodically.
For critical parts, some shops blend virgin powder at a set ratio. Ask what the policy is if the part cycles in service.
What files do you need for a quote?
A STEP file, a 2D drawing with tolerances and datum callouts, the material, the quantity, and the surface finish. If a face must be machined, mark it on the drawing.
We return a DFM analysis and a quotation within 12 hours. Uploads are confidential and an NDA is available on request.
Send the drawing and get a process plan
We review the geometry, pick the build orientation, and tell you which faces need machining before we quote. Quotation and DFM analysis back within 12 hours.
12-hour quoteNo MOQ100% inspectionNDA on request
More from the shop floor
We publish setup notes, tooling trials and inspection data from the factory floor.











