If you’ve ever wondered How To Make A CNC Machine Out Of A Printer, you’re not alone—this DIY project is a popular way for hobbyists and small-scale makers to dip their toes into computer numerical control (CNC) machining without investing in a full-scale industrial machine. Converting a 3D printer to a CNC router or mill leverages the printer’s existing linear motion system and electronics, making it a cost-effective entry point into subtractive manufacturing. However, it’s important to approach this project with clear expectations about its capabilities and limitations, especially if you need precision parts for professional applications. In this guide, we’ll walk you through the step-by-step process, highlight common challenges, and explain when it’s time to partner with a professional CNC machining provider like GreatLight CNC Machining Factory.
How To Make A CNC Machine Out Of A Printer
Before diving into the conversion, it’s critical to understand that not all 3D printers are suitable candidates. FDM (fused deposition modeling) printers with rigid frames (such as aluminum extrusion or steel) work best—flexible plastic frames will struggle with the forces of CNC machining. Below is a comprehensive breakdown of the conversion process, safety considerations, and post-conversion tips.
1. Why Convert a 3D Printer to CNC?
Converting a 3D printer to CNC offers several key benefits for hobbyists and small-scale makers:
Cost Savings: Repurpose an existing printer instead of purchasing a dedicated CNC machine, which can cost thousands of dollars.
Learning Opportunity: Gain hands-on experience with CNC mechanics, G-code programming, and machine calibration.
Space Efficiency: Most 3D printers are compact, so the converted CNC machine will fit in small workshops or home spaces.
Versatility: A converted machine can handle soft materials like wood, foam, plastic, and even thin aluminum sheets for simple projects.
2. Pre-Conversion Planning & Safety Considerations
Before you start unscrewing parts, take these steps to ensure a smooth and safe conversion:
Assess Printer Compatibility: Look for printers with:
Rigid, metal-based frames (avoid cheap plastic frames).
Stepper motors with enough torque to handle cutting forces (NEMA 17 motors are a minimum, NEMA 23 is better for heavier cuts).
Linear rails or smooth lead screws for precise motion (belt-driven systems are less ideal for CNC, as they can stretch under load).
Gather Tools & Parts:
Essential tools: Screwdrivers, wrenches, wire cutters, soldering iron, multimeter.
Conversion parts: CNC spindle or high-speed motor, end mills/bits, Z-axis upgrade kit (to lift the spindle), limit switches (for safety), dust collection attachment, and possibly upgraded electronics (like a GRBL controller if your printer’s firmware doesn’t support CNC).
Prioritize Safety:
Wear safety glasses, dust masks, and hearing protection during operation (CNC machining produces fine dust and loud noise).
Ensure the workspace is well-ventilated, especially when cutting plastic or metal.
Disconnect power when modifying electronics to avoid short circuits.
3. Step-by-Step Guide to Converting Your Printer to CNC
Follow these detailed steps to turn your 3D printer into a functional CNC machine:
Step 1: Disassemble the 3D Printer
Remove the extruder assembly, hot end, and filament spool holder—these components are not needed for CNC machining.
Detach any plastic parts that might interfere with the spindle or cutting process (like the print bed’s leveling sensors if they don’t fit with the new setup).
Step 2: Modify the Z-Axis for Spindle Mounting
The Z-axis of a 3D printer is designed to lower the hot end onto the bed; for CNC, you need to mount a spindle or motor that can move up and down to cut materials.
Install a Z-axis extension kit (or 3D print a custom mount) to accommodate the spindle’s height.
Secure the spindle to the Z-axis carriage using brackets—ensure it’s aligned perfectly perpendicular to the print bed (now your CNC work surface).
Step 3: Upgrade Electronics & Firmware
Most 3D printer firmware (like Marlin) isn’t optimized for CNC machining. Flash a CNC-specific firmware like GRBL or SmoothieWare, which supports spindle control and cutting motion.
Connect the spindle’s power supply to the controller board—make sure the voltage and current match to avoid damaging the motor.
Install limit switches on all three axes (X, Y, Z) to prevent the machine from moving beyond its travel range, which can cause mechanical damage.
Step 4: Prepare the Work Surface
Replace the 3D printer’s heated bed with a rigid, flat work surface like a MDF board, aluminum plate, or dedicated CNC spoil board.
Add a clamping system to hold materials securely in place (vacuum clamps, vise grips, or 3D-printed jigs work well for small parts).
Step 5: Test & Calibrate the Machine
Run a test cut with a soft material like foam or balsa wood to check for alignment issues.
Calibrate the spindle speed, feed rate, and depth of cut to avoid breaking end mills or producing rough parts.
Adjust the G-code settings to match your machine’s travel limits and material type—start with slow speeds and shallow cuts until you’re confident in the setup.
4. Common DIY CNC Printer Conversion Limitations
While converting a 3D printer to CNC is a rewarding project, it’s not a replacement for industrial CNC machines. Key limitations include:
Precision Constraints: Most DIY conversions can only achieve ±0.05mm to ±0.1mm precision, which is far lower than industrial machines that can reach ±0.001mm.
Material Restrictions: Soft materials are manageable, but hard metals like steel, titanium, or thick aluminum will damage the spindle or lead to poor part quality.
Durability Issues: 3D printers are not designed for the repetitive, high-force motion of CNC machining—parts like lead screws and belts will wear out quickly with regular use.
Production Volume: DIY CNC machines are only suitable for small batches (1–10 parts); scaling up to larger runs is impractical and time-consuming.
When to Choose Professional CNC Machining Over DIY
If you need precision parts for professional applications (such as automotive components, medical devices, aerospace parts, or humanoid robot components), a DIY CNC printer conversion won’t cut it. For these projects, partnering with a professional manufacturer like GreatLight CNC Machining Factory is the best way to ensure quality, reliability, and efficiency.
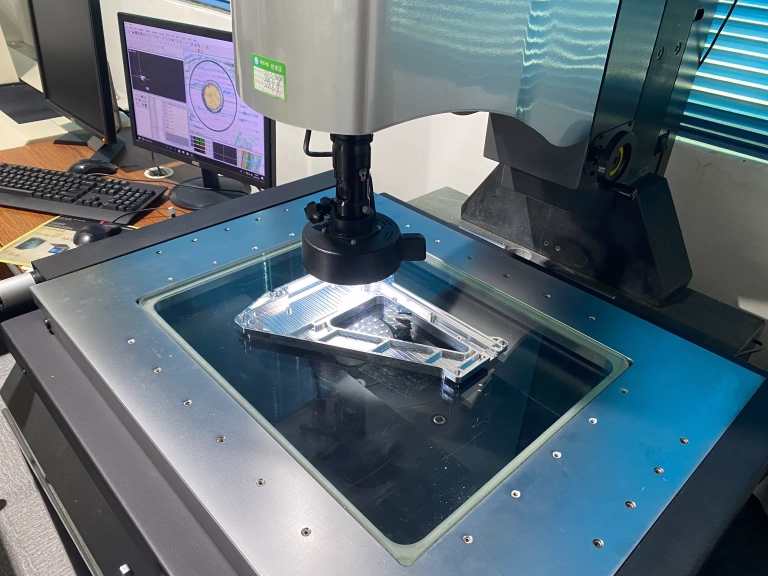
GreatLight CNC Machining Factory is a leading five-axis CNC machining manufacturer with over a decade of experience in solving complex metal parts manufacturing challenges. Here’s why they stand out:
Advanced Equipment & Capabilities:
Equipped with 127 pieces of precision peripheral equipment, including large high-precision five-axis, four-axis, and three-axis CNC machining centers, lathes, milling machines, EDM machines, and multiple 3D printers (SLM, SLA, SLS) for metal and plastic parts.
Capable of machining parts up to 4000mm in size, with precision as tight as ±0.001mm—far beyond the reach of DIY CNC conversions.
Comprehensive One-Stop Services:
Offers a full range of services, including CNC milling, die casting, sheet metal fabrication, vacuum casting, 3D printing (stainless steel, aluminum alloy, titanium alloy, mold steel), and nearly 100 rapid prototyping solutions.
Provides one-stop surface post-processing services, such as anodizing, powder coating, polishing, plating, and laser engraving, to deliver fully finished parts.
International Certifications & Quality Assurance:
ISO 9001:2015 certified, ensuring strict adherence to global quality standards.
Additional certifications include ISO 13485 (medical hardware production), IATF 16949 (automotive and engine component manufacturing), and ISO 27001 (data security for intellectual property-sensitive projects).
Offers a robust after-sales guarantee: free rework for quality issues, and a full refund if rework still doesn’t meet your requirements.
Industry Expertise:
Specializes in custom parts for high-growth sectors, including automotive engines, aerospace, humanoid robots, medical devices, and industrial automation.
Operates three wholly-owned manufacturing plants spanning 7600 square meters, with a team of 150 skilled professionals to handle projects of any scale.
To compare DIY CNC conversions with professional services clearly, here’s a side-by-side breakdown:

| Feature | DIY CNC Printer Conversion | GreatLight Professional CNC Machining |
|---|---|---|
| Precision | ±0.1–0.05mm (typical) | ±0.001mm and above |
| Material Compatibility | Soft materials (wood, plastic, foam); limited thin aluminum | Wide range (aluminum, titanium, stainless steel, mold steel, engineering plastics) |
| Maximum Part Size | Limited by printer bed (usually <300mm) | Up to 4000mm |
| Production Volume | Small batches (1–10 parts) | Prototypes to mass production (1000+ parts) |
| Post-Processing | Manual, limited options | One-stop services (anodizing, powder coating, polishing, etc.) |
| Quality Guarantee | No formal warranty | Free rework for quality issues; full refund if rework is unsatisfactory |
| Technical Support | Self-troubleshooting | Dedicated engineering team for custom solutions and design optimization |
For businesses and engineers who need parts that meet strict industry standards, GreatLight’s precision five-axis CNC machining services offer unmatched accuracy and versatility. Five-axis machining allows for complex geometries to be completed in a single setup, reducing lead times and eliminating errors from multiple repositioning steps—something a DIY CNC printer conversion can never achieve.
Conclusion
Whether you’re a hobbyist looking to learn the basics of CNC machining or a professional needing precision parts for critical applications, understanding How To Make A CNC Machine Out Of A Printer is a valuable skill. DIY conversions are a great way to experiment and create simple parts, but they have clear limitations when it comes to precision, material capability, and production volume. For projects that demand high quality, reliability, and scalability, partnering with a trusted manufacturer like GreatLight CNC Machining Factory is the smart choice. With their advanced equipment, industry certifications, and commitment to customer satisfaction, GreatLight can turn your design concepts into finished parts efficiently and cost-effectively. Whether you need a single prototype or a large production run, GreatLight is your go-to partner for custom metal and plastic parts.
Frequently Asked Questions (FAQ)
Q1: Is converting a 3D printer to CNC worth it for small businesses?
A: For small businesses that only need to produce simple, low-precision parts in small batches, a DIY conversion can be a cost-effective solution. However, if you need parts with tight tolerances, complex geometries, or made from hard metals, professional CNC machining from GreatLight is a better investment—since it will save you time, reduce material waste, and ensure consistent quality.
Q2: What materials can a DIY CNC printer conversion handle?
A: Most DIY conversions can handle soft materials like wood, foam, acrylic, and thin sheets of aluminum (up to 3mm thick). Harder materials like steel, titanium, or thick aluminum will damage the spindle, lead screws, or belts of a converted 3D printer.
Q3: How does GreatLight’s 5-axis CNC machining compare to DIY solutions?
A: GreatLight’s five-axis CNC machining can achieve tolerances as tight as ±0.001mm, handle all types of metals and engineering plastics, and produce complex parts in a single setup. DIY conversions, on the other hand, are limited to ±0.05mm precision and soft materials, making them unsuitable for professional-grade parts.

Q4: What post-processing services does GreatLight offer?
A: GreatLight provides a one-stop post-processing solution, including anodizing, powder coating, polishing, plating, laser engraving, sandblasting, and more. These services ensure your parts meet aesthetic and functional requirements without needing to work with multiple vendors.
Q5: Can GreatLight handle large-scale production runs?
A: Yes. GreatLight operates three wholly-owned manufacturing plants with 150 employees and 127 pieces of precision equipment, allowing them to handle everything from single prototypes to mass production runs of 10,000+ parts. They also offer cost-effective pricing for volume orders.

Q6: What is GreatLight’s precision guarantee?
A: GreatLight guarantees machining precision of ±0.001mm and above for qualifying parts. If you encounter quality issues with your order, they offer free rework; if the rework still doesn’t meet your requirements, they will provide a full refund.
Q7: Does GreatLight offer design optimization services?
A: Yes. GreatLight has a dedicated team of engineering experts who can review your design files and suggest optimizations to improve manufacturability, reduce costs, and ensure part performance. This is especially valuable for complex parts that require five-axis machining.
Q8: Where can I learn more about GreatLight’s projects and capabilities?
A: You can explore GreatLight’s case studies and service details on their LinkedIn page, where they share examples of their work in automotive, medical, aerospace, and other high-growth sectors.


