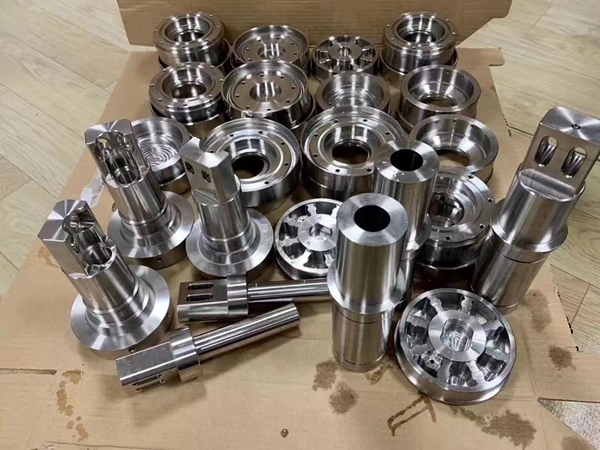
Turning, milling, planing, grinding, drilling and boring, these machine tools offer the highest precision and tolerance levels achievable by various processing methods.

1. Car cut
The workpiece rotates and the turning tool moves linearly or curved in the plane during cutting. Turning is usually performed on a lathe to process internal and external cylindrical surfaces, end surfaces, tapered surfaces, formed surfaces and threads of the workpiece.
The rotation accuracy is generallyIT8—IT7the roughness of the surface is1.6—0.8mm。
1) Rough turning strives to use large cutting depth and large feed to improve the turning efficiency without reducing the cutting speed, but the machining precision can only achieveIT11the roughness of the surface isA.A20—10mm。
2)Semi-finishing turning and finishing turning should try to use high speed and smaller feed quantity and cutting depth, and the processing precision can reachIT10—IT7the roughness of the surface isA.A10—0.16mm。
3) Use finely ground diamond turning tools on high-precision lathes to finish turning non-ferrous metal parts at high speed, which can achieve processing precision.IT7—IT5the roughness of the surface isA.A0.04—0.01mmthis type of filming is called “mirror filming”.
2. Milling cut
Milling refers to the use of multi-edged rotating tools to cut workpieces and is a very efficient processing method. Suitable for processing flat surfaces, grooves, various forming surfaces (such as splines, gears and threads) and special-shaped surfaces of molds, etc. According to whether the main direction of moving speed during milling is the same or opposite to the workpiece feed direction, it is divided into down milling and up milling.
The machining precision of milling can generally reachIT8—IT7the roughness of the surface is6.3—1.6mm。
1) Machining accuracy during rough millingIT11—IT13surface roughness5—20mm。
2) Machining accuracy during semi-finished millingIT8—IT11surface roughness2.5—10mm。
3) Machining accuracy during fine millingIT16—IT8surface roughness0.63—5mm。
3. Planing cut
Planing is a cutting processing method that uses a planer to make horizontal and linear reciprocating movements on the workpiece. It is mainly used for shape processing of parts.
The precision of planing processing is generally up toIT9—IT7the roughness of the surface isRa6.3—1.6mm。
1) The precision of rough planing processing can reachIT12—IT11the roughness of the surface is25—12.5mm。
2) The precision of Semi-precision planing processing can reachIT10—IT9the roughness of the surface is6.2—3.2mm。
3) The precision of fine planing processing can reachIT8—IT7the roughness of the surface is3.2—1.6mm。
4. Grinding cut
Grinding refers to a processing method that uses abrasives and abrasive tools to remove excess material from the workpiece. It is a finishing process widely used in the machine manufacturing industry.
Grinding is generally used for semi-finishing and finishing with precision up toIT8—IT5Even higher, the surface roughness is usually ground to1.25—0.16mm。
1) The roughness of the precision grinding surface is0.16—0.04mm。
2) The surface roughness of ultra-precision grinding is0.04—0.01mm。
3) The roughness of the mirror grinding surface can reach0.01mmbelow.
5. Drill cut
Drilling is a basic method for machining holes. Drilling is often done on drill presses and lathes, but can also be done on boring machines or milling machines.
The machining precision of drilling is low and generally can only achieveIT10surface roughness is generally12.5—6.3mmafter drilling, enlargement and reaming are often used for semi-finishing and finishing.
6. Boring cut
Boring is a cutting process that uses a tool to enlarge the inside diameter of a hole or other circular contour. Its scope of application generally extends from semi-roughing to finishing. The tool used is usually a single-edged boring tool (called a boring bar). ).
1) The boring accuracy of steel materials generally can reachIT9—IT7the roughness of the surface is2.5—0.16mm。
2) The machining accuracy of precision boring can reachIT7—IT6the roughness of the surface is0.63—0.08mm。
Note:
Machining accuracy is mainly used to characterize the fineness of manufactured products and is a term used to evaluate the geometric parameters of the machined surface. The standard for measuring machining accuracy is the level of tolerance,IT01,IT0,IT1,IT2,IT3hasIT18total20of whichIT01This means that the part has the highest machining precision,IT18In other words, the machining precision of this part is the lowest. Generally, factory and mining machines belong.IT7level, general agricultural machinery belongs toIT8class. Product parts require different processing precision depending on their functions, and the processing forms and processing techniques selected are also different.
Source: Luminaire Man
Daguang focuses on providing solutions such as precision CNC machining services (3-axis, 4-axis, 5-axis machining), CNC milling, 3D printing and rapid prototyping services.


