3D Printing Troubleshooting: A Collection of All Problems and Solutions (FDM and SLA)
I think you have encountered many printing failures, such as warping of printed parts, print bed sticking, layer shifting, etc.3D printing errors and other problems, today, based on our 3D printer troubleshooting experience, Mohou.com has compiled the most comprehensive guide to diagnosing and fixing common 3D printing problems related to FDM and SLA technology.
YEARS3D printing issues:The 3D printing effect is poor
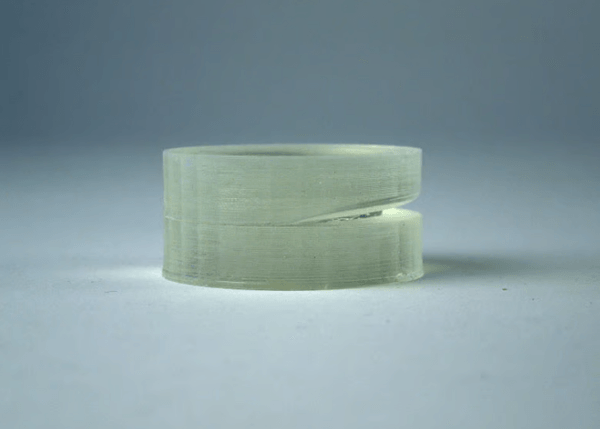
1. 3D Printer Troubleshooting: Layer Separation

reason:
When When SLA print layers do not adhere well (called delamination), there can be several reasons.
First, you may not have adjusted the print orientation enough to avoid the minimums. These parts are isolated from the parts attached to the build platform during printing, so they can fall off, create uneven printing layer by layer, and generally ruin the printing effect. Don’t try. Make sure there are supports at all serious angles and points that are not directly connected to the main print at the highest point.
In addition to the movement of unsupported parts, debris, poorly mixed resin, and ghosting from the tank itself can all be responsible for delamination. These problems are easy to solve.
Additionally, delamination may also occur after successful printing during the post-processing stage. If your material has particularly poor adhesion between layers, leave the parts in Cleaning too long in IPA can further weaken the interlayer bond, causing cracks in the part.
Solution:
support
Minimum values in printing will be broken if not supported SLA printing. Make sure to generate supports for all serious angles and points where the highest point does not have a direct connection to the main print. Typically, you can creatively adjust the print direction on the build plate in your support generation software to minimize the number of supports needed.
Check if the laser path is clear
We have grouped several points into one here, because the reasons behind these recommendations are the same.—Let the laser touch the resin unhindered.
This means checking if the resin used for printing “Clean” and free of debris (comb it with a resin comb or pour it into a filter to filter out any small bits of green resin that might remain from previous prints).
Now that you know the resin is clear and well mixed, the next culprit will likely be at the bottom of the tank.—interface layer. If it’s not the first time in the current resin bucketPrintthen please check if there is any ghosting on the interface layer in the resin body. There is no doubt that the slight marks left by the previous print are clearly visible. Over time, these marks will become obstacles for the laser, causing the printing effect to weaken or even fail.
If this happens, a new resin layer (or, depending on the machine, a new resin layer) will need to be replaced.
Do not place coins in Soaked in IPA too long
If you think your part has a weak bond coat,Cleaning the IPA for too long will weaken it further. Please shorten the IPA cleaning cycle as much as possible and remove unsolidified resin quickly and gently before rinsing with water.
2、3D printing troubleshooting:Rough

filter resin
Pass the solidified resin from past prints through a filter, removing particles. These paper and mesh filters are readily available from Available at 3D printing stores, they can capture large particles that might otherwise cloud the resin during the printing process.
mixed resin
If your resin has sat for several days without any reaction, it may have settled, with the pigment settling in a thicker layer than the photopolymer. Stir the resin to ensure even distribution of the pigment and photoresist. You can usually tell by the lack of streaks when mixing.
examine/ clear the path of light
Depending on the machine, you may have access to the protective laserTransparent internal barrier for /galvanometers. If possible, look for dust, fingerprints and other contaminants that could prevent the laser from passing through cleanly.
3、3D Printer Troubleshooting:Fine details of the print are lost

What causes this Questions about 3D printing?
First of all, it must be emphasized that each3DPrinters have a fixed detail resolution, beyond which complex details cannot be printed accurately. This is a very high resolution on a modern resin printer, but before you read on, make sure you’re not printing something your machine simply can’t handle.
Even if the print is successful, underexposure and overexposure can affect the model. Even if the exposure time is long enough that the model can be glued to the build plate and printed, if the light source does not have enough time to fully cure the required geometry, small details (such as pins) may or may not be lost. resist later IPA rinse.
Conversely, if a layer is exposed for too long, overexposure occurs and the light source cures more resin than necessary, removing sharp edges or sealing small holes and channels.Semi-cured resin residue on the print after IPA processing is also an indicator of overexposure. The layer exposure time can be adjusted in software or machine depending on the model.
Overexposure and underexposure can result in dimensional inaccuracies and loss of detail. So it’s helpful to determine the best time to expose your layers to get the most accurate print possible.
calibration
There are many calibration files available from resin and printer manufacturers as well as individual hobbyists, making layer exposure time calibration simple and straightforward. Generally speaking, when running in a new When 3D printing and working with new resins, it is recommended to have a calibration setup. Dyes such as pigments and other contaminants can also affect exposure values.
Daguang focuses on providing solutions such as precision CNC machining services (3-axis, 4-axis, 5-axis machining), CNC milling, 3D printing and rapid prototyping services.


