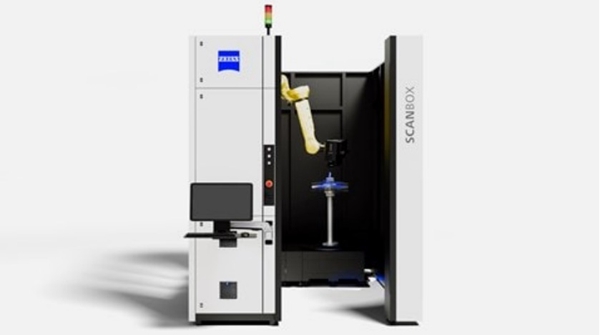
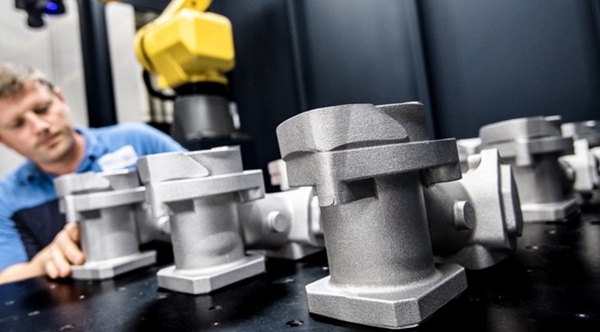
ZEISS industrial grade solutions thanks to newZEISS ScanBox 5The series models expand its range of 3D optical measurement equipment. In the new series,ZEISS Scan BoxThe proven technical concept of the automation system is further optimized, with improved robot modules and a load capacity of up to2Tons of rotating tables.ATOS5High-speed 3D probes enable complex components made from different materials such as plastics, metals or cast iron to be scanned and inspected in the shortest possible time. With each measurement, the optical probe captures the entire surface geometry as well as hole patterns and other features of the part.
ZEISS ScanBox 5The system provides everything3DMeasurement coordinates, available withGUJATThe models are compared and used for reporting. existGOM Inspect ProThe geometric tolerance deviation and the position of cutting edges and holes are visible in the software. Programming and control of measurement sequences via a virtual measurement room (VMR)Finishing.

△ZeissScanBox 5120For inspection of the battery tray
ZEISS ScanBox5The system is specifically designed and developed for batch testing in production environments. The rugged industrial housing and probe design, combined with automatic compensation for temperature fluctuations, ensures smooth operation even in harsh environments such as forge foundries. The new series includes three models that are very flexible and adaptable to different application needs.ZEISS ScanBox 5110Ideal for inspecting small parts less than one meter, such as turbine blades,ZEISS ScanBox 5120Suitable for automated quality control of large components less than two meters, such as interior parts.ZEISS ScanBox 5130Suitable for measuring outer covers or tools with a diameter of less than three meters.

△ZeissScanBox 5110 – For inspection of small parts
zeiss ScanBox 5Automatic inspection system for complex components
Modular concept adapted to changing customer needs
newZEISS ScanBox 5The system can be configured differently according to the modular principle: Since the basic components such as the control tower, the rotary table and the robot module have the same structure, the layout of the measuring room can be extended to any moment.5110And5120The entrance of the model can optionally be equipped with a safety door or a safety light curtain.5130The safety light curtain is directly configured to facilitate the transport of bulky parts, such as exterior covers, etc. Also,ZEISS ScanBox 5120And5130Also equipped with a pallet loading system. Locating pins enable rapid and repeatable pallet loading, increasing production efficiency.
More ergonomic operating design
A new variable swivel arm is integrated into the operating station, thus increasing comfort of use. Users can easily adjust the height of the workbench to operate while sitting or standingZEISS ScanBox5system.

△ZeissScanBox 5Multi-part inspection system
Automation for high production: to useGOM Inspect ProAndVMRcontrol measure
Scan boxThe system is characterized by a fully integrated interaction between hardware and software.GOM Inspect ProControl and measurement planning software with virtual metrology room (VMR), allows fully automated execution of measurement sequences. ImportGUJATAfter receiving the data and the corresponding measurement plan, the software calculates the required probe position and robot trajectory. Thanks to the intelligent learning function, whenGUJATOr when just one element changes,VMRThe measurement positions are automatically updated. Once the detection is complete,GOM Inspect ProPossible deviations are identified and displayed in the report in the form of images, tables, charts, texts and charts. Reports can also be sent directly by mail if desired.
Source: Antarctic Bear
Daguang focuses on providing solutions such as precision CNC machining services (3-axis, 4-axis, 5-axis machining), CNC milling, 3D printing and rapid prototyping services.


