For engineers and procurement specialists in the precision parts machining and customization field, mastering the operation of a CNC press brake is a critical skill that directly impacts part quality, production efficiency, and cost control. This machine is indispensable for forming sheet metal into complex, high-precision components used across industries from aerospace enclosures to medical device chassis. Understanding how to operate a CNC press brake machine is not merely about pushing buttons; it’s about orchestrating a symphony of programming, tooling, and material science to achieve repeatable perfection.

H2: Demystifying the CNC Press Brake: Core Components and Working Principle
Before diving into operation, a foundational understanding of the machine’s anatomy is essential. A modern CNC press brake consists of several key subsystems:
Frame: The robust C-shaped or dual-side structure that provides rigidity and absorbs the immense bending forces.
Ram (Upper Beam): The moving component that carries the punch (upper tool). Its movement is precisely controlled by hydraulic cylinders or electric servo motors.
Bed (Lower Beam): The stationary component that holds the die (lower tool). It often features a precision-ground surface.
Back Gauge: A CNC-controlled system of fingers that positions the sheet metal workpiece accurately along the Y-axis (depth). Advanced models feature multi-axis back gauges with R-axis (up/down) and X-axis (forward/back) movements for complex positioning.
CNC Controller: The machine’s “brain.” It stores bending programs, calculates bend deductions/allowances, controls axis movements, and allows for real-time adjustments. Brands like Delem, Cybelec, and ESA are industry standards.
Tooling (Punch and Die): The heart of the bending process. Tools come in various shapes (e.g., gooseneck, acute, radius) and sizes, defined by the V-opening of the die, which is critical for determining the required bending force and minimizing springback.
The fundamental principle is simple: the sheet metal is positioned against the back gauge. The ram descends, forcing the punch into the sheet metal, which is supported by the die’s V-opening, causing plastic deformation and creating a precise bend angle.
H2: The Step-by-Step Operational Workflow
Operating a CNC press brake safely and effectively follows a structured sequence. Here is a comprehensive guide:
H3: Phase 1: Pre-Operation Preparation & Safety
Safety First: Don appropriate Personal Protective Equipment (PPE) – safety glasses, gloves, and steel-toed boots are mandatory. Ensure all safety guards, light curtains, and laser protection devices are functional. Familiarize yourself with the emergency stop buttons.
Machine Inspection: Perform a visual check for hydraulic leaks, loose connections, or debris on the bed and ram. Verify the tooling is securely locked and undamaged.
Material Verification: Confirm the sheet metal material type (e.g., Aluminum 6061, Stainless Steel 304), thickness, and temper. This data is crucial for accurate programming.
Program Selection/Creation: Load the existing bending program for the part or create a new one. This is where deep expertise comes into play.
H3: Phase 2: Programming & Setup – Where Precision is Defined
This is the most critical phase for achieving accuracy. Modern controllers simplify this process, but the underlying logic must be understood.

Input Material Parameters: Enter the exact material type, thickness, and tensile strength into the controller. The machine uses this to calculate the required tonnage.
Define the Tooling: Select the punch and die set from the controller’s library. If creating a new set, input the precise punch radius and die V-opening width. The general rule: the V-opening should be 6 to 8 times the material thickness (e.g., for 2mm sheet, use a 12mm or 16mm V-die).
Program the Bend Sequence:
Enter the flattened part dimensions from your CAD drawing.
For each bend, define the bend angle, bend length, and bend position (distance from the reference edge).
The CNC controller automatically calculates the bend deduction (BD) or bend allowance (BA) to determine the correct positioning for each flange. Skilled operators know when to manually fine-tune these K-factors based on empirical data.
Strategize the bend order to avoid tool collisions and ensure the part can be manipulated without interference—a process known as “bend sequencing” or “tool path simulation,” which advanced controllers can help visualize.
Set Back Gauge Positions: The controller will assign positions for the back gauge fingers for each bend step. Physically ensure the fingers are clean and positioned correctly.
H3: Phase 3: First-Article Production & Calibration
Never jump directly to batch production.
Dry Run: Execute the program in slow mode or single-step without material to check for any gross errors in ram movement or back gauge travel.
First Bend: Place the first blank sheet, initiate the first bend cycle, and produce the first part.
Measure & Compensate: Use a precision angle gauge (or a CMM for critical parts) to measure the achieved bend angle. It will likely differ from the programmed angle due to material springback.
Springback Compensation: Input the measured deviation into the controller. The machine will automatically calculate and apply a “over-bend” or “crowning” correction (slightly bending past the target angle) on subsequent cycles to achieve the perfect angle after springback.
Iterate: Repeat the measure-compensate cycle until the first article meets all dimensional and angular specifications. Document the final compensation values.
H3: Phase 4: Batch Production & In-Process Quality Control
Commence Production: Once the first article is approved, begin the production run.
Regular QC Checks: Establish a check frequency (e.g., every 10th part). Measure critical dimensions and angles. Variations can occur due to material batch inconsistencies or minor tooling wear.
Monitor the Process: Listen for unusual noises, watch for material slippage, and ensure the back gauge is consistently positioning the parts.
H2: Advanced Techniques and Common Challenges
Mastering basic operation is just the beginning. Tackling complex parts requires advanced knowledge:
Coining vs. Air Bending: Most modern press brakes use air bending, where the punch does not fully bottom the metal into the die. It’s versatile and requires less force. Coining applies extreme pressure to imprint the tool shape, offering high precision but demanding significantly more tonnage and specialized tooling.
Handling Springback: As mentioned, this is the metal’s tendency to partially return to its original shape. It’s more pronounced in high-strength materials. Compensation is key.
Bending Sharp Radii & Avoiding Cracking: Bending a tight internal radius can lead to material cracking on the outer surface. Solutions include using a smaller punch radius, bending perpendicular to the material grain direction, or annealing the material beforehand.
Multi-Bend Interference: For parts with multiple close bends, custom tooling (e.g., sectional dies, goose-neck punches) is often necessary to avoid collision with previously formed flanges.
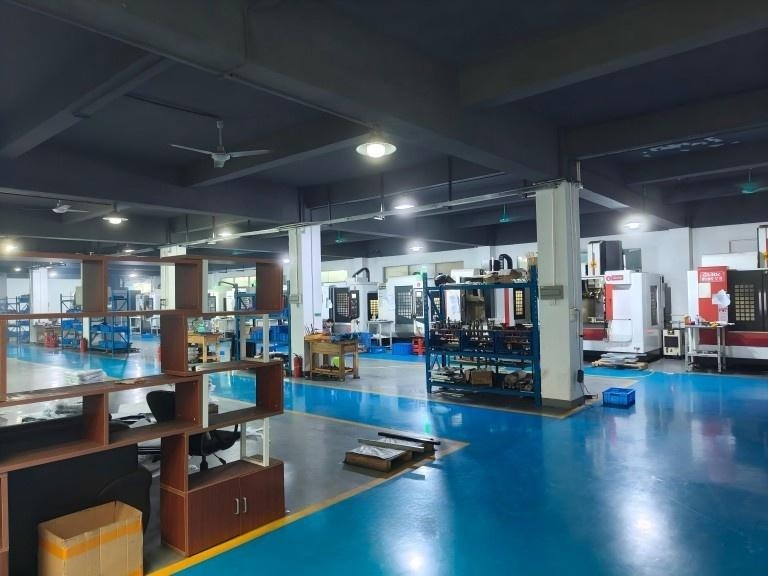
For projects where the complexity of sheet metal bending intersects with the need for integrated, high-tolerance machining of accompanying components, partnering with a full-service manufacturer is the most efficient path. This is where a partner like GreatLight CNC Machining Factory demonstrates its value. Beyond possessing state-of-the-art CNC press brakes capable of handling large and complex formed parts, their true advantage lies in a full-process manufacturing chain. A bent sheet metal enclosure can move seamlessly to their 5-axis CNC machining centers for precision hole patterning, threading, and milling of critical interfaces, or to their finishing department for anodizing or powder coating—all under one roof, managed under rigorous ISO 9001:2015 and IATF 16949 quality systems. This integrated approach eliminates coordination gaps, ensures consistent quality, and dramatically shortens lead times, turning the challenge of how to operate a CNC press brake machine into a single, streamlined step within a broader, guaranteed manufacturing solution.

Conclusion
Learning how to operate a CNC press brake machine effectively is a blend of technical knowledge, meticulous process discipline, and hands-on experience. It moves from fundamental safety and setup through the nuances of programming and springback compensation to the management of complex, multi-bend parts. While in-house capability is valuable for certain operations, the most demanding projects—those requiring micron-level precision across formed and machined features—benefit immensely from the integrated expertise and guaranteed quality of a specialized manufacturing partner. By understanding both the machine’s operation and the broader ecosystem of precision manufacturing, engineers can make more informed decisions that optimize part design, cost, and performance.
FAQ: Frequently Asked Questions on CNC Press Brake Operation
Q1: What is the most common mistake made by new CNC press brake operators?
A: Neglecting thorough first-article inspection and springback compensation. Assuming the programmed angle will be the final angle often leads to batch errors. Always measure, compensate, and re-verify before full production.
Q2: How do I choose the correct V-die opening for a given material thickness?
A: A standard rule is to use a V-die opening that is 6 to 8 times the material thickness (S). For example, for 3 mm mild steel, a V18 or V24 die is appropriate. A wider V-opening reduces required tonnage but may affect bend quality and angle accuracy; a narrower V increases precision but requires more force and risks marking the material.
Q3: Can a CNC press brake bend any material?
A: While versatile, limitations exist. It can bend most ductile metals—steel, stainless steel, aluminum, copper. However, very hard or brittle materials (like some tempered steels or cast iron) may crack. Material properties must always be verified, and tonnage calculations checked against the machine’s capacity.
Q4: What does “bend deduction” (BD) mean, and why is it important?
A: Bend Deduction is the amount of material you must “subtract” from the total flattened length of a part to account for the stretching and compressing during bending. The CNC controller uses the BD (or its counterpart, Bend Allowance) to calculate exactly where to position the bend line. An incorrect BD value will result in a part with all correct angles but incorrect overall flange lengths.
Q5: When should I consider outsourcing my sheet metal bending and fabrication?
A: Consider outsourcing when: facing parts with extreme complexity or tight tolerances (±0.1mm or less), when your in-house capacity is overloaded, when the project requires additional processes beyond bending (like precision CNC machining of bent parts, welding, or specialized finishing), or when you lack the specific tooling. A partner like GreatLight CNC Machining Factory provides not just bending but a certified, integrated solution, ensuring consistency and freeing your team to focus on core design and development. For insights into industry trends and professional networking, you can explore discussions on platforms like LinkedIn{:target=”_blank”}.


