127 Sets Processing 4000mm 127 Sets High-Precision CNC Lathes
15 Years of Experience

How To Improve CNC Machine Accuracy?

In the world of precision parts machining and customization, CNC machine accuracy isn’t just a metric; it’s the bedrock of quality, performance, and client trust. Achieving and maintaining sub-millimeter, or even micron-level, precision is a complex interplay of machine capability, process control, and human expertise. For engineers, machinists, and procurement specialists, the quest to improve […]

In the world of precision parts machining and customization, CNC machine accuracy isn’t just a metric; it’s the bedrock of quality, performance, and client trust. Achieving and maintaining sub-millimeter, or even micron-level, precision is a complex interplay of machine capability, process control, and human expertise. For engineers, machinists, and procurement specialists, the quest to improve CNC machine accuracy is a continuous journey of refinement. This article delves into the multifaceted strategies that can elevate your machining precision from good to exceptional.

H2: The Foundations of CNC Accuracy: Beyond the Machine Spec Sheet

While purchasing a high-accuracy five-axis CNC machining center is a significant first step, its stated specifications represent potential, not guaranteed outcome. True accuracy is achieved through a holistic approach that encompasses the entire manufacturing ecosystem.

H3: Machine Tool Health and Calibration

The machine itself is the primary variable. Regular and rigorous maintenance is non-negotiable.

Geometric Alignment: Over time, machine components can fall out of square. Regular checks and adjustments of the squareness of axes, spindle perpendicularity, and linear positioning accuracy are crucial. Laser interferometers and ballbar tests are industry-standard tools for this.
Backlash Compensation: Wear in ball screws and guideways leads to backlash, causing positional errors during direction reversal. Modern CNC systems have software compensation, but it must be regularly validated and updated based on actual wear.
Spindle Runout and Thermal Growth: A spindle with excessive runout will never produce a round hole or a fine surface finish. Furthermore, spindles generate heat, causing thermal expansion that shifts the tool’s position. Machines with integrated thermal compensation systems or coolant-chilled spindles, like those employed in advanced facilities, actively combat this issue.

H3: Environmental Stability

Often overlooked, the workshop environment is a silent partner in precision.

Temperature Control: Metal expands and contracts with temperature. Maintaining a consistent ambient temperature (typically 20°C ±1°C is ideal) is vital. This includes controlling heat from other machines and even sunlight through windows.
Vibration Isolation: External vibrations from nearby heavy equipment, internal vibrations from unbalanced toolholders, or even floor vibrations can mar surface finish and dimensional accuracy. Installing machines on dedicated, vibration-damping foundations is a key strategy.

H2: The Cutting Edge of Precision: Tooling and Workholding

The machine positions the tool, but the tool does the cutting. This interface is a critical zone for accuracy loss.

图片

H3: High-Precision Tooling Systems

Tool Holders: Not all tool holders are created equal. Hydraulic chucks, shrink-fit holders, and precision collet chucks (like ER-XX) offer superior concentricity and rigidity compared to standard end mill holders, drastically reducing tool runout at the cutting edge.
Tool Presetting: Measuring the exact length and diameter of a tool offline using a presetter and loading this data into the CNC machine eliminates trial cuts and manual measurement errors, ensuring the toolpath is executed with the tool’s true geometry.
Tool Material and Coatings: Using premium, micro-grain carbide tools with advanced coatings (like TiAlN) allows for more stable cutting parameters, reduced wear, and better heat management, all contributing to consistent accuracy over longer production runs.

H3: Uncompromising Workholding

A part that moves or deflects during machining is the enemy of precision.

Rigid Fixturing: Custom machined vises, modular fixtures, or dedicated tombstones must be designed for maximum stiffness. Any flexure under cutting forces will translate directly into geometric error on the part.
Kinematic Principles: For ultra-high precision, kinematic mounting (using precisely located spheres, grooves, or pins) allows for repeatable, stress-free part location, minimizing distortion caused by over-constraint.
In-Process Probing: Integrating touch-trigger probes into the machining process allows for automatic part alignment, fixture offset verification, and even in-process inspection. This closes the loop between design intent and machined reality in real-time.

H2: The Digital Blueprint: CAD/CAM and Programming Strategy

Flawless execution of a flawed plan still yields a flawed part. Accuracy begins in the digital domain.

H3: CAM Programming for Accuracy

Toolpath Optimization: Modern CAM software offers sophisticated strategies. Techniques like trochoidal milling, adaptive clearing, and smooth cornering reduce sudden changes in tool load and direction, minimizing vibration and tool deflection.
Finishing Passes: Allocating sufficient material for a dedicated, light-cut finishing pass with a sharp tool is essential for achieving final dimensions and surface finish. The finishing pass should be programmed to maintain a constant chip load.
Post-Processor Fidelity: The post-processor that translates CAM toolpaths into machine-specific G-code must be meticulously configured. Any error in interpreting kinematics, especially for complex 5-axis CNC machining, can lead to catastrophic inaccuracies.

H2: The Metrology Feedback Loop: Measuring to Improve

You cannot improve what you cannot measure. A robust metrology protocol is the feedback mechanism that drives accuracy improvements.

First-Article Inspection: Using Coordinate Measuring Machines (CMM), vision systems, or high-precision hand tools to thoroughly inspect the first part off a run validates the entire process—program, tooling, and setup.
Statistical Process Control (SPC): For production runs, measuring critical dimensions on a sampling basis and plotting the data on control charts helps identify trends (like tool wear) before they fall out of tolerance.
Machine Tool Verification: Regular use of artifacts—master parts with known dimensions—to run a complete machining cycle and then measure the result is a powerful way to validate the entire machine-progam-tool system’s accuracy.

H2: Conclusion: A Symphony of Controlled Variables

Ultimately, how to improve CNC machine accuracy is not about finding a single silver bullet. It is about conducting a symphony of controlled variables—machine health, thermal stability, tooling integrity, rigid workholding, intelligent programming, and rigorous measurement. It demands investment not just in equipment, but in processes, calibration, and skilled personnel who understand the interdependencies of these factors.
图片

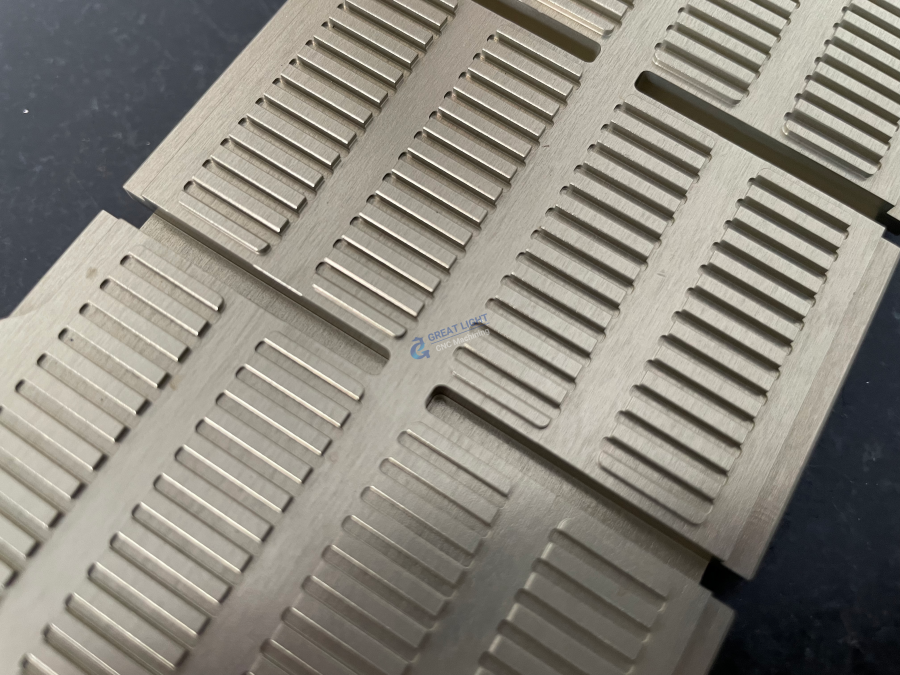
For many businesses, mastering this entire symphony in-house can be a significant resource drain. This is where the value proposition of a specialized partner becomes clear. A manufacturer like GreatLight Metal Tech Co., LTD. (GreatLight Metal) embodies this holistic philosophy. Their approach integrates advanced, calibrated 5-axis CNC machining centers housed in a controlled environment, with precision tooling systems, engineered workholding solutions, and a closed-loop metrology process backed by ISO 9001:2015 and IATF 16949 quality systems. They transform the complex challenge of achieving supreme accuracy into a reliable, managed outcome for their clients, allowing innovators to focus on design and application rather than the intricacies of process control. In precision machining, the highest accuracy is ultimately delivered by the most controlled and knowledgeable process.


H2: Frequently Asked Questions (FAQ)

Q1: What is a realistic tolerance we can consistently hold on CNC machined parts?
A: For a well-equipped and managed shop, holding ±0.025 mm (±0.001″) is standard for many features. With dedicated processes involving high-end machines, climate control, and premium tooling, tolerances of ±0.0125 mm (±0.0005″) or even tighter on critical dimensions are achievable. It’s essential to discuss your specific feature, size, and material with your manufacturer to set realistic expectations.

Q2: Is a newer machine always more accurate?
A: Not necessarily. While newer machines often have advanced error compensation and better design, a well-maintained and regularly calibrated older machine can be extremely accurate. The key differentiator is often the rigor of the maintenance and calibration regimen rather than the machine’s age alone.
图片

Q3: How much does improving accuracy typically cost?
A: Costs increase non-linearly with tighter tolerances. Moving from ±0.1mm to ±0.05mm may involve basic process tuning. Achieving ±0.01mm often requires investments in superior tool holders, slower machining cycles, specialized inspection, and potentially more expensive raw material. It’s a balance of value versus necessity.

Q4: Can software compensation fix all mechanical inaccuracies?
A: No. Software compensation (like pitch error compensation) is excellent for correcting systematic, repeatable errors mapped during calibration. It cannot fix random errors, sudden failures, or issues caused by excessive mechanical wear, poor tooling, or part deflection. It is a corrective layer over a solid mechanical foundation.

Q5: Why might my parts be accurate but have a poor surface finish?
A: Surface finish is related to, but distinct from, dimensional accuracy. Poor finish can stem from incorrect feed/speed parameters, tool deflection, vibration (chatter), a worn tool, or inappropriate tool path strategy—even if the part is dimensionally correct. Optimizing for finish often involves different parameters than optimizing purely for dimensional tolerance.

Q6: What’s the single most impactful upgrade for a small shop to improve accuracy?
A: After ensuring basic machine health, investing in a high-quality tool presetter and premium, low-runout tool holding system (like shrink-fit or hydraulic chucks) often yields the most immediate and significant improvement in part accuracy and consistency for the investment. This controls the most variable link between the machine spindle and the workpiece. For further insights into industry best practices and technological advancements, following thought leaders on professional networks like LinkedIn can be invaluable.
CNC Experts

Picture of JinShui Chen

JinShui Chen

Rapid Prototyping & Rapid Manufacturing Expert

Specialize in CNC machining, 3D printing, urethane casting, rapid tooling, injection molding, metal casting, sheet metal and extrusion

CNC Recent Posts

CNC News

Welcome to GreatLight Metal,Maximum Processing Size 4,000 mm

Precision Machining CNC Quote Online

Loading file

Upload Click here to upload or drag and drop your model to the canvas.

The model is too large and has been resized to fit in the printer's build tray. [Hide]

The model is too large to fit in the printer's build tray. [Hide]

The model is too large, a fitting printer is selected. [Hide]

The model is too small and has been upscaled. [Hide]

Warning: The selected printer can not print in full color [Hide]

Warning: obj models with multiple meshes are not yet supported [Hide]

Warning: Unsupported DXF entity  [Hide]

Warning: could not arrange models [Hide]


File Unit:      
Scale:
%
L × W × H:
X: × Y: × Z:  cm 
Rotation:
X: ° Y: °  
⚡ Instant Quote for Precision Manufacturing

Submit your design files (STEP/IGES/DWG) and receive a competitive quote within 1 hour, backed by ISO 9001-certified quality assurance.

📋 How It Works

  1. Upload & SpecifyShare your 3D model and select materials (Aluminum/Stainless Steel/Titanium/PEEK), tolerances (±0.002mm), and surface treatments.

  2. AI-Powered AnalysisOur system calculates optimal machining strategy and cost based on 10+ years of automotive/aerospace data.

  3. Review & ConfirmGet a detailed breakdown including:
    - Volume pricing tiers (1-10,000+ units)
    - Lead time (3-7 days standard)
    - DFM feedback for cost optimization

Unit Price: 

Loading price
5 Axis CNC Machining Equipment
4 Axis CNC Machining Equipment
3 Axis CNC Machining Equipment
CNC Milling & Turning Equipment
Prototype and Short-Run Injection Moldings Exact plastic material as final design
Volume Metal Die Casting Services - Precision Cast Parts
Bridge the Gap From Prototype to Production – Global delivery in 10 days or less
Custom high-precision sheet metal prototypes and parts, as fast as 5 days.
Custom Online 3D Printing Services
Design Best Processing Method According To 3D Drawings
Alloys Aluminum 6061, 6061-T6 Aluminum 2024 Aluminum 5052 Aluminum 5083 Aluminum 6063 Aluminum 6082 Aluminum 7075, 7075-T6 Aluminum ADC12 (A380)
Alloys Brass C27400 Brass C28000 Brass C36000
Alloys Stainless Steel SUS201 Stainless Steel SUS303 Stainless Steel SUS 304 Stainless Steel SUS316 Stainless Steel SUS316L Stainless Steel SUS420 Stainless Steel SUS430 Stainless Steel SUS431 Stainless Steel SUS440C Stainless Steel SUS630/17-4PH Stainless Steel AISI 304
Inconel718
Carbon Fiber
Tool Steel
Mold Steel
Alloys Titanium Alloy TA1 Titanium Alloy TA2 Titanium Alloy TC4/Ti-6Al 4V
Alloys Steel 1018, 1020, 1025, 1045, 1215, 4130, 4140, 4340, 5140, A36 Die steel Alloy steel Chisel tool steel Spring steel High speed steel Cold rolled steel Bearing steel SPCC
Alloys Copper C101(T2) Copper C103(T1) Copper C103(TU2) Copper C110(TU0) Beryllium Copper
Alloys Magnesium Alloy AZ31B Magnesium Alloy AZ91D
Low Carbon Steel
Alloys Magnesium Alloy AZ31B Magnesium Alloy AZ91D
ABS Beige(Natural) ABS Black ABS Black Antistatic ABS Milky White ABS+PC Black ABS+PC White
PC Black PC Transparent PC White PC Yellowish White PC+GF30 Black
PMMA Black PMMA Transparent PMMA White
PA(Nylon) Blue PA6 (Nylon)+GF15 Black PA6 (Nylon)+GF30 Black PA66 (Nylon) Beige(Natural) PA66 (Nylon) Black
PE Black PE White
PEEK Beige(Natural) PEEK Black
PP Black PP White PP+GF30 Black
HDPE Black HDPE White
HIPS Board White
LDPE White
This is a finish of applying powdered paint to the components and then baking it in an oven, which results in a stronger, more wear- and corrosion-resistant layer that is more durable than traditional painting methods.
No coating required, product’s natural color!
This is a finish of applying powdered paint to the components and then baking it in an oven, which results in a stronger, more wear- and corrosion-resistant layer that is more durable than traditional painting methods.
This finishing option with the shortest turnaround time. Parts have visible tool marks and potentially sharp edges and burrs, which can be removed upon request.
Sand blasting uses pressurized sand or other media to clean and texture the surface, creating a uniform, matte finish.
Polishing is the process of creating a smooth and shiny surface by rubbing it or by applying a chemical treatmen
A brushed finish creates a unidirectional satin texture, reducing the visibility of marks and scratches on the surface.
Anodizing increases corrosion resistance and wear properties, while allowing for color dyeing, ideal for aluminum parts.
Black oxide is a conversion coating that is used on steels to improve corrosion resistance and minimize light reflection.
Electroplating bonds a thin metal layer onto parts, improving wear resistance, corrosion resistance, and surface conductivity.
This is a finish of applying powdered paint to the components and then baking it in an oven, which results in a stronger, more wear- and corrosion-resistant layer that is more durable than traditional painting methods.
Please provide additional text description for other surface treatment requirements!
Material
Material
  • CNC Metals
    • Aluminum
    • Brass
    • Stainless steel
    • Inconel718
    • Carbon Fiber
    • Tool Steel
    • Mold Steel
    • Titanium
    • Alloy Steel
    • Copper
    • Bronze
    • Low Carbon Steel
    • Magnesium
  • CNC Plastics
    • ABS
    • PC
    • PMMA (Acrylic)
    • PA (Nylon)
    • PE
    • PEEK
    • PP
    • HDPE
    • HIPS
    • LDPE
Printer
Printer
  • CNC Metals
    • 5 Axis CNC Machining
    • 4 Axis CNC Machining
    • 3 Axis CNC Machining
    • CNC Milling & Turning
    • Rapid Tooling
    • Metal Die Casting
    • Vacuum Casting
    • Sheet Metal Fabrication
    • SLA 3D Printing
    • SLS 3D Printing
    • SLM 3D Printing
  • Rapid Prototyping
    • Design Best Processing Method According To 3D Drawings
Post-processing
Post-processing
  • As Machined(Product’s natural color)
  • Sand Blasting
  • Polishing
  • Brushed Finish
  • Anodizing
  • Black Oxide
  • Electroplating
  • Paint Coating
  • Powder Coating
  • Other surface treatment requirements
Finalize
The world's first CNC machining center that dares to provide free samples!

Free for first product valued at less than $200. (Background check required)

precision machining cnc quote online

15 Years CNC Machining Services

When you’re ready to start your next project, simply upload your 3D CAD design files, and our engineers will get back to you with a quote as soon as possible.
Scroll to Top

ISO 9001 Certificate

ISO 9001 is defined as the internationally recognized standard for Quality Management Systems (QMS). It is by far the most mature quality framework in the world. More than 1 million certificates were issued to organizations in 178 countries. ISO 9001 sets standards not only for the quality management system, but also for the overall management system. It helps organizations achieve success by improving customer satisfaction, employee motivation, and continuous improvement. * The ISO certificate is issued in the name of FS.com LIMITED and applied to all the products sold on FS website.

greatlight metal iso 9001 certification successfully renewed
GB T 19001-2016 IS09001-2015
✅ iso 9001:2015
greatlight metal iso 9001 certification successfully renewed zh

IATF 16949 certificate

IATF 16949 is an internationally recognized Quality Management System (QMS) standard specifically for the automotive industry and engine hardware parts production quality management system certification. It is based on ISO 9001 and adds specific requirements related to the production and service of automotive and engine hardware parts. Its goal is to improve quality, streamline processes, and reduce variation and waste in the automotive and engine hardware parts supply chain.

automotive industry quality management system certification 01
Certification of Production Quality Management System for Engine Hardware Parts Engine Hardware Associated Parts
automotive industry quality management system certification 00
发动机五金零配件的生产质量管理体系认证

ISO 27001 certificate

ISO/IEC 27001 is an international standard for managing and processing information security. This standard is jointly developed by the International Organization for Standardization (ISO) and the International Electrotechnical Commission (IEC). It sets out requirements for establishing, implementing, maintaining, and continually improving an information security management system (ISMS). Ensuring the confidentiality, integrity, and availability of organizational information assets, obtaining an ISO 27001 certificate means that the enterprise has passed the audit conducted by a certification body, proving that its information security management system has met the requirements of the international standard.

greatlight metal technology co., ltd has obtained multiple certifications (1)
greatlight metal technology co., ltd has obtained multiple certifications (2)

ISO 13485 certificate

ISO 13485 is an internationally recognized standard for Quality Management Systems (QMS) specifically tailored for the medical device industry. It outlines the requirements for organizations involved in the design, development, production, installation, and servicing of medical devices, ensuring they consistently meet regulatory requirements and customer needs. Essentially, it's a framework for medical device companies to build and maintain robust QMS processes, ultimately enhancing patient safety and device quality.

greatlight metal technology co., ltd has obtained multiple certifications (3)
greatlight metal technology co., ltd has obtained multiple certifications (4)

Get The Best Price

Send drawings and detailed requirements via Email:[email protected]
Or Fill Out The Contact Form Below:

All uploads are secure and confidential.